The Damage ARC using Jump Mine trial rewards one thing and one thing only, which is raw explosive damage dealt to ARC machines while you have Jump Mines equipped. It runs through August 10, 2026, and a free loadout will not carry you here because you need crafted Jump Mines to make any progress at all.
Quick answer: Load into Spaceport with six Jump Mines, break a Bastion’s yellow leg joint to stagger it, plant a single Jump Mine underneath for 500-900 damage, retreat, and repeat until you reach roughly 4,000 Trials points, then extract to lock in three stars.
What you need before the run
The Jump Mine appears in your crafting menu as the Explosive Mine, a proximity-triggered device that pops up and detonates against anything in a 7.5m radius. You need its blueprint learned and materials such as Explosive Compound and Sensors on hand before you can bring any into a raid. Carry as many as you can afford, since every point on this trial flows from these detonations.
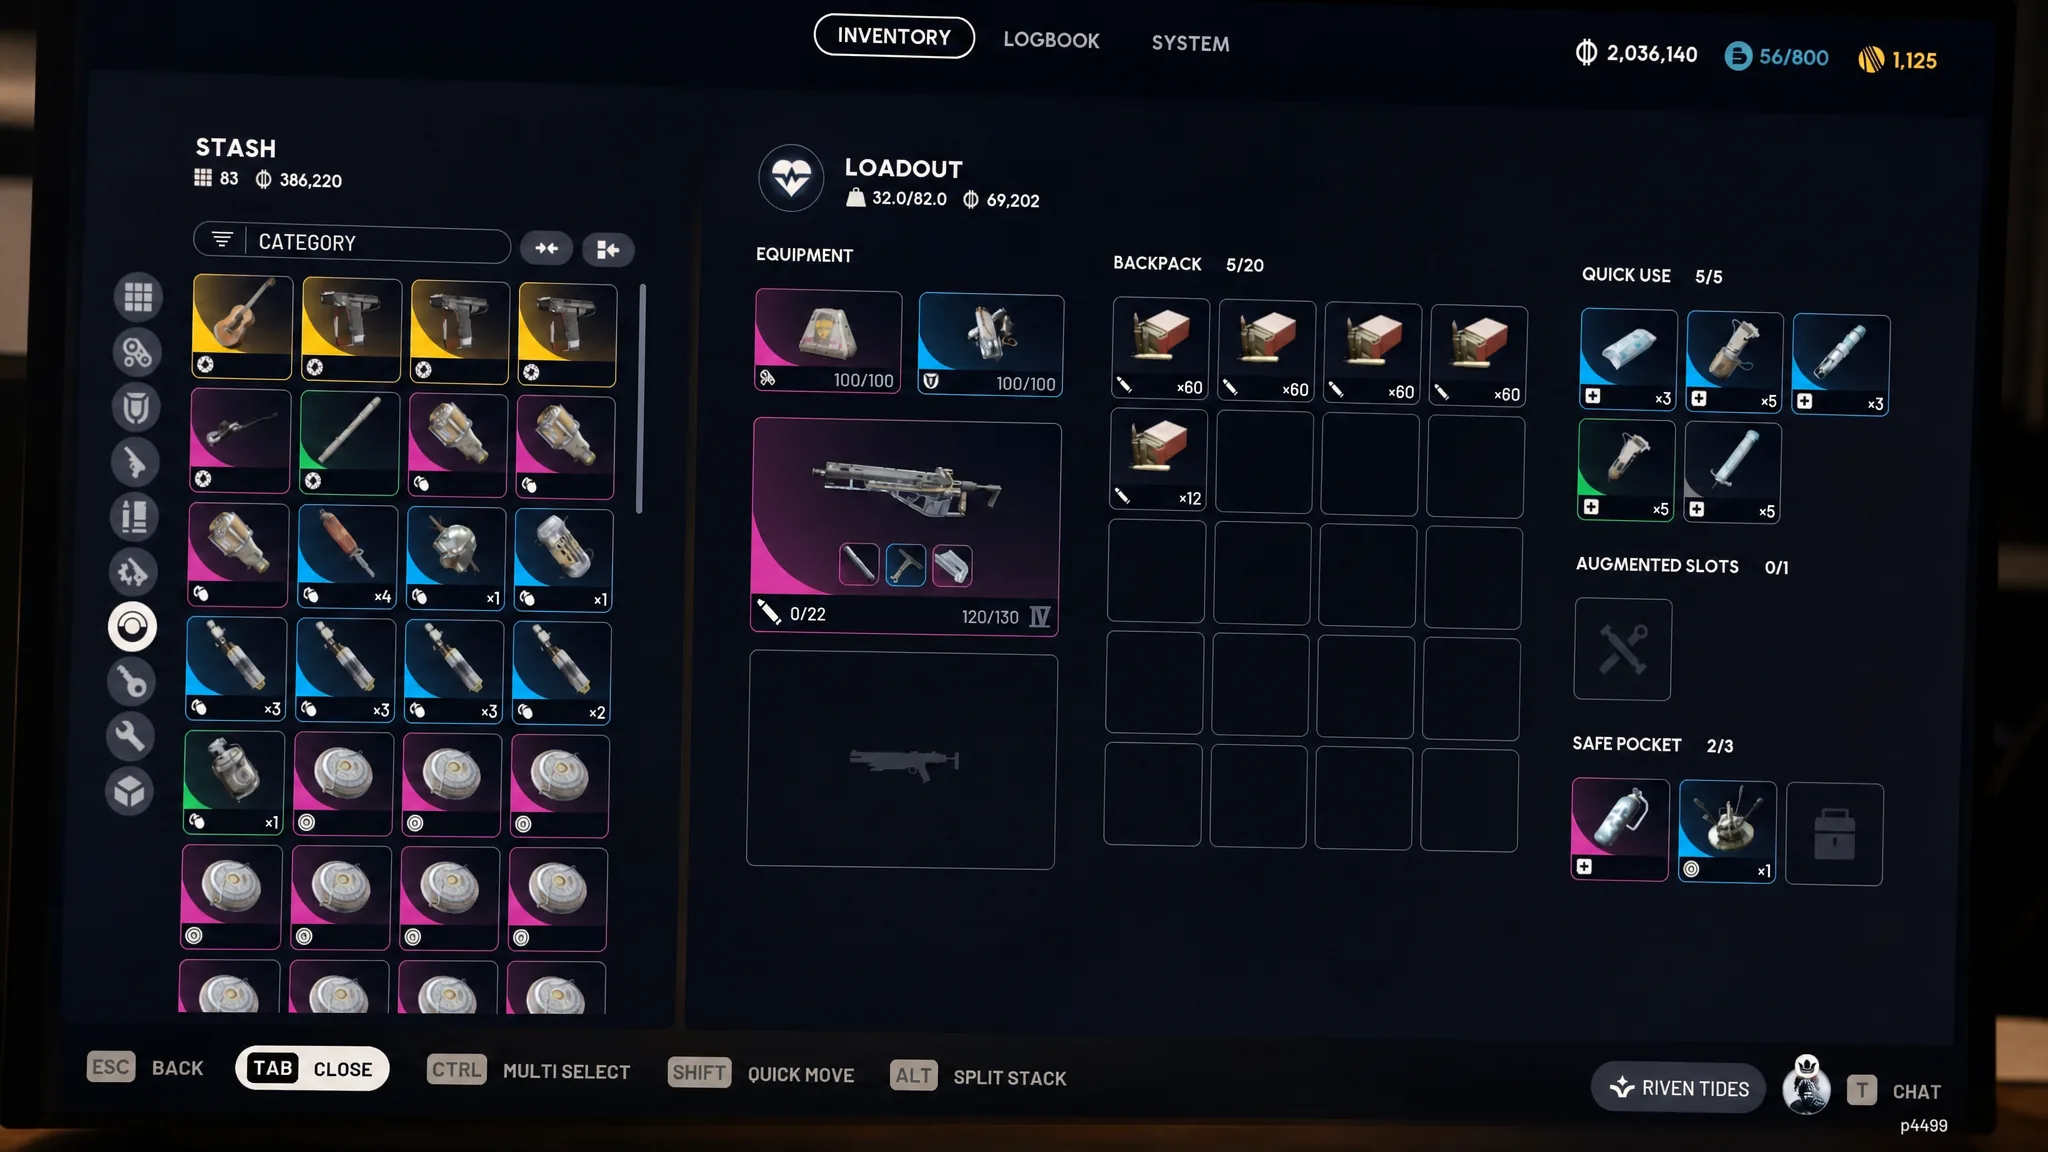
A lean, survivable loadout keeps you alive long enough to plant repeatedly without dying to a Bastion’s minigun. The setup below covers defense and recovery while leaving room for the mines that actually matter.
| Slot | Recommended |
|---|---|
| Weapon | Renegade or Bettina, plus a stagger option like the Anvil pistol |
| Ammo | Four stacks each |
| Shield | Medium Shield |
| Recovery | Shield Rechargers, Bandages or Vita Spray |
| Key item | 6x Jump Mines (Explosive Mine), or more if you can spare them |
Where to farm on Spaceport
Spaceport is the strongest choice because it has reliable Bastion spawns and plenty of buildings to duck into when a fight turns against you. Head toward Control Tower A6, Container Storage, or Vehicle Maintenance, since these points of interest put you close to the large ground ARCs you need.
If you want a guaranteed miniboss, run Spaceport during the Hidden Bunker event. That condition spawns a boss near the Hidden Bunker entrance and gives you a 40-minute match timer, which is more than enough time to hit the point threshold in a single trip.
Stagger a Bastion, then plant one mine
Note: The Bastion looks slow, but the minigun mounted near its head can drop you in seconds. Breaking a leg first is what buys you the safe approach, so never try to plant while it is still mobile and firing.
Bombardier as the low-effort alternative
If Bastions are giving you trouble, hunt Bombardiers instead. They demand far less setup and go down with less drama, which makes them the easier meal ticket for this trial. Both machines are slow enough that a mine detonates on target instead of hitting empty ground.
The best placement on a Bombardier is the yellow cylinder on its underside. Shoot the glowing weak point on a leg with the Anvil or Renegade to stagger and drop it, then slip underneath and set your mine deep in the chassis rather than on the surface, where it can slide off.
| Target | Why it works |
|---|---|
| Bastion | Leg joints stagger it for several seconds; high health means many mine placements |
| Bombardier | Less setup, low mobility, and a clear weak point on the underside cylinder |
Stick to large, slow ground ARCs. Fast or airborne units like Fireflies and Wasps wander out of the blast before it lands, which wastes mines and drags your score down.
Banking points and confirming three stars
Open the menu and check the Logbook under Trials to watch the Damage ARC using Jump Mine entry climb. Each detonation adds to the bar and triggers a Milestone Reached notification as you pass thresholds. Three stars lands at roughly 4,000 points, so keep planting until the bar fills.
Points only count once you extract. A personal best that dies inside the raid does not exist, so leave through an extraction point the moment the bar is full. If you run low on mines or medical supplies before you hit the target, extract early and retry in a fresh match rather than risking the whole run.
Why the trial does not progress
- The mine landed on uneven, sloped ground and slid off or detonated too far to connect, dealing no damage.
- You placed the mine while the ARC was still moving, so it walked out of the 7.5m radius before the blast.
- You chased a fast or flying target, which soaks only partial damage at best.
- You died before reaching extraction, which forfeits every unbanked point from that run.
Keep the loop tight and it stays simple. Break a leg, plant one mine under a Bastion or Bombardier, fall back to cover, and repeat until the Logbook bar is full before you head for the exit.