


C4SH has two damage engines worth building at level 70, and they barely resemble each other. One turns your overshield into flat bonus damage on every pellet you fire. The other stacks Fortune until your card throws hit like ordnance. Both clear Ultimate Vault Hunter 7 content and both flatten raid targets like the Subjugator and Thol the Invincible.
Quick answer: For the gun build, max From Gloam Till Glow with a Windrider class mod and slide to trigger it. For the card build, max Ante Up with a Ludopath and keep Windfall permanently up.
Two level 70 C4SH builds: Gloam gun vs. card damage
Pick one before you spend a single point. The trees pull in opposite directions, and trying to split the difference gets you a version of C4SH that does neither job well.
| Build | Core skill | Class mod | Action skill |
|---|---|---|---|
| Gloam gun | From Gloam Till Glow | Windrider | Cleromancy |
| Card | Ante Up | Ludopath or Whale | Sleight of Hand |
Of the two options, Gloam is easier to equip. Its damage is tied to a skill multiplier instead of a weapon card, letting level 60 guns, shields, and grenades remain effective against endgame bosses. The card setup is less flexible, requiring particular class mod rolls and a one-round shotgun.
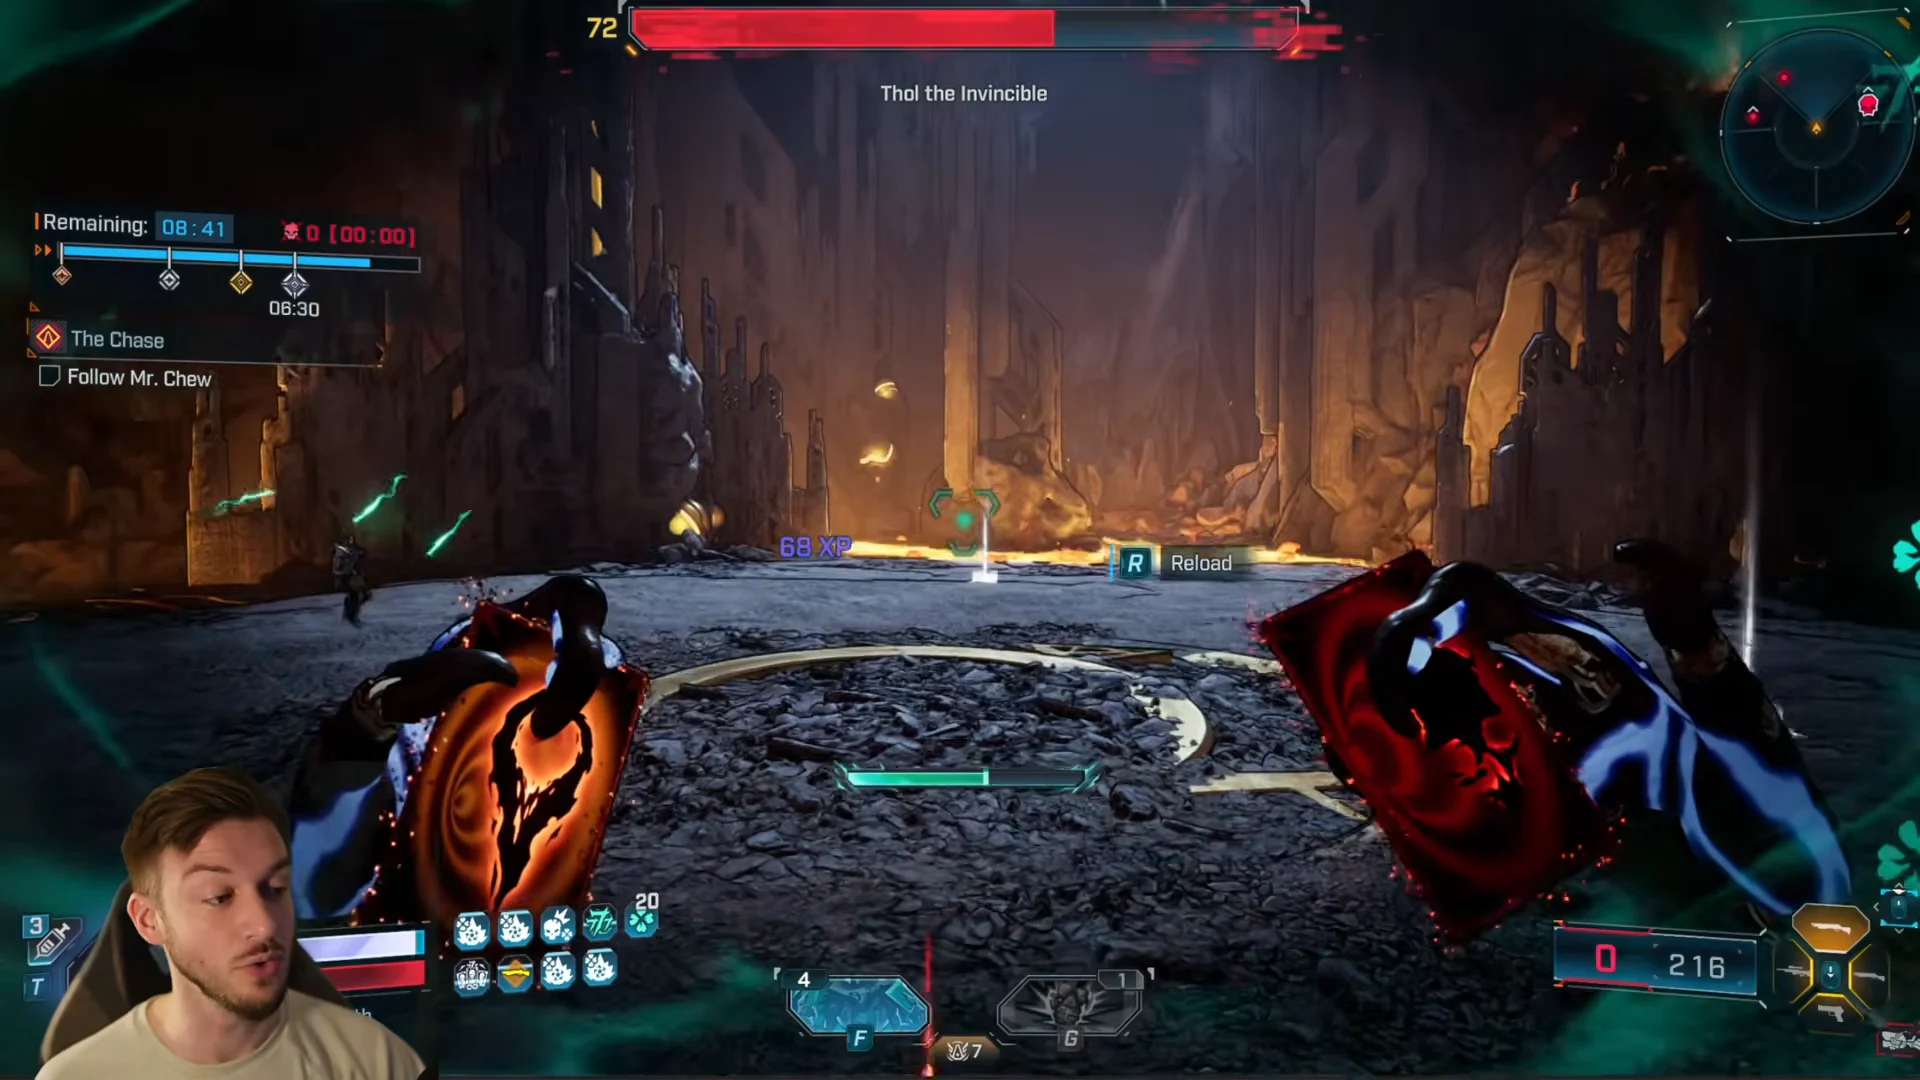
Fortune stacks and Windfall: the engine both builds run on
Fortune is C4SH’s universal currency. Kills grant stacks, and the default cap is 10. No Limit pushes that ceiling to 20. Alchemy adds a stack every time you apply an elemental effect, which is by far the fastest generator once you have a status-heavy grenade.
Those stacks feed the scaling skills, and Payout inflates all of them by a further 40%. Windfall is the payoff state: while it is active you count as holding 20 Fortune, so every stack-scaled bonus sits at maximum.
Entering Windfall is a roll, not a guarantee. Fast Hands and O Fortuna raise the chance to 4.5% per stack, which is a 90% chance at 20 stacks. The trigger conditions are an automatic reload, an action skill activation, a gun critical hit, or an action skill critical hit, with the last two unlocked by a single point in Can’t Stop Winning.
Crits are the reliable route into Windfall on the Gloam build. War Wagon refunds so much magazine ammo that you almost never hit the auto-reload trigger.
From Gloam Till Glow and the overshield loop
From Gloam Till Glow turns your existing overshield into flat amp damage. Every pellet receives the full amount rather than a divided share. With 5/5 points and another +5 from a Windrider class mod, the skill reaches 10/10 and provides up to 200% bonus damage. The added damage uses the element that activated it, stacking with your weapon’s damage.
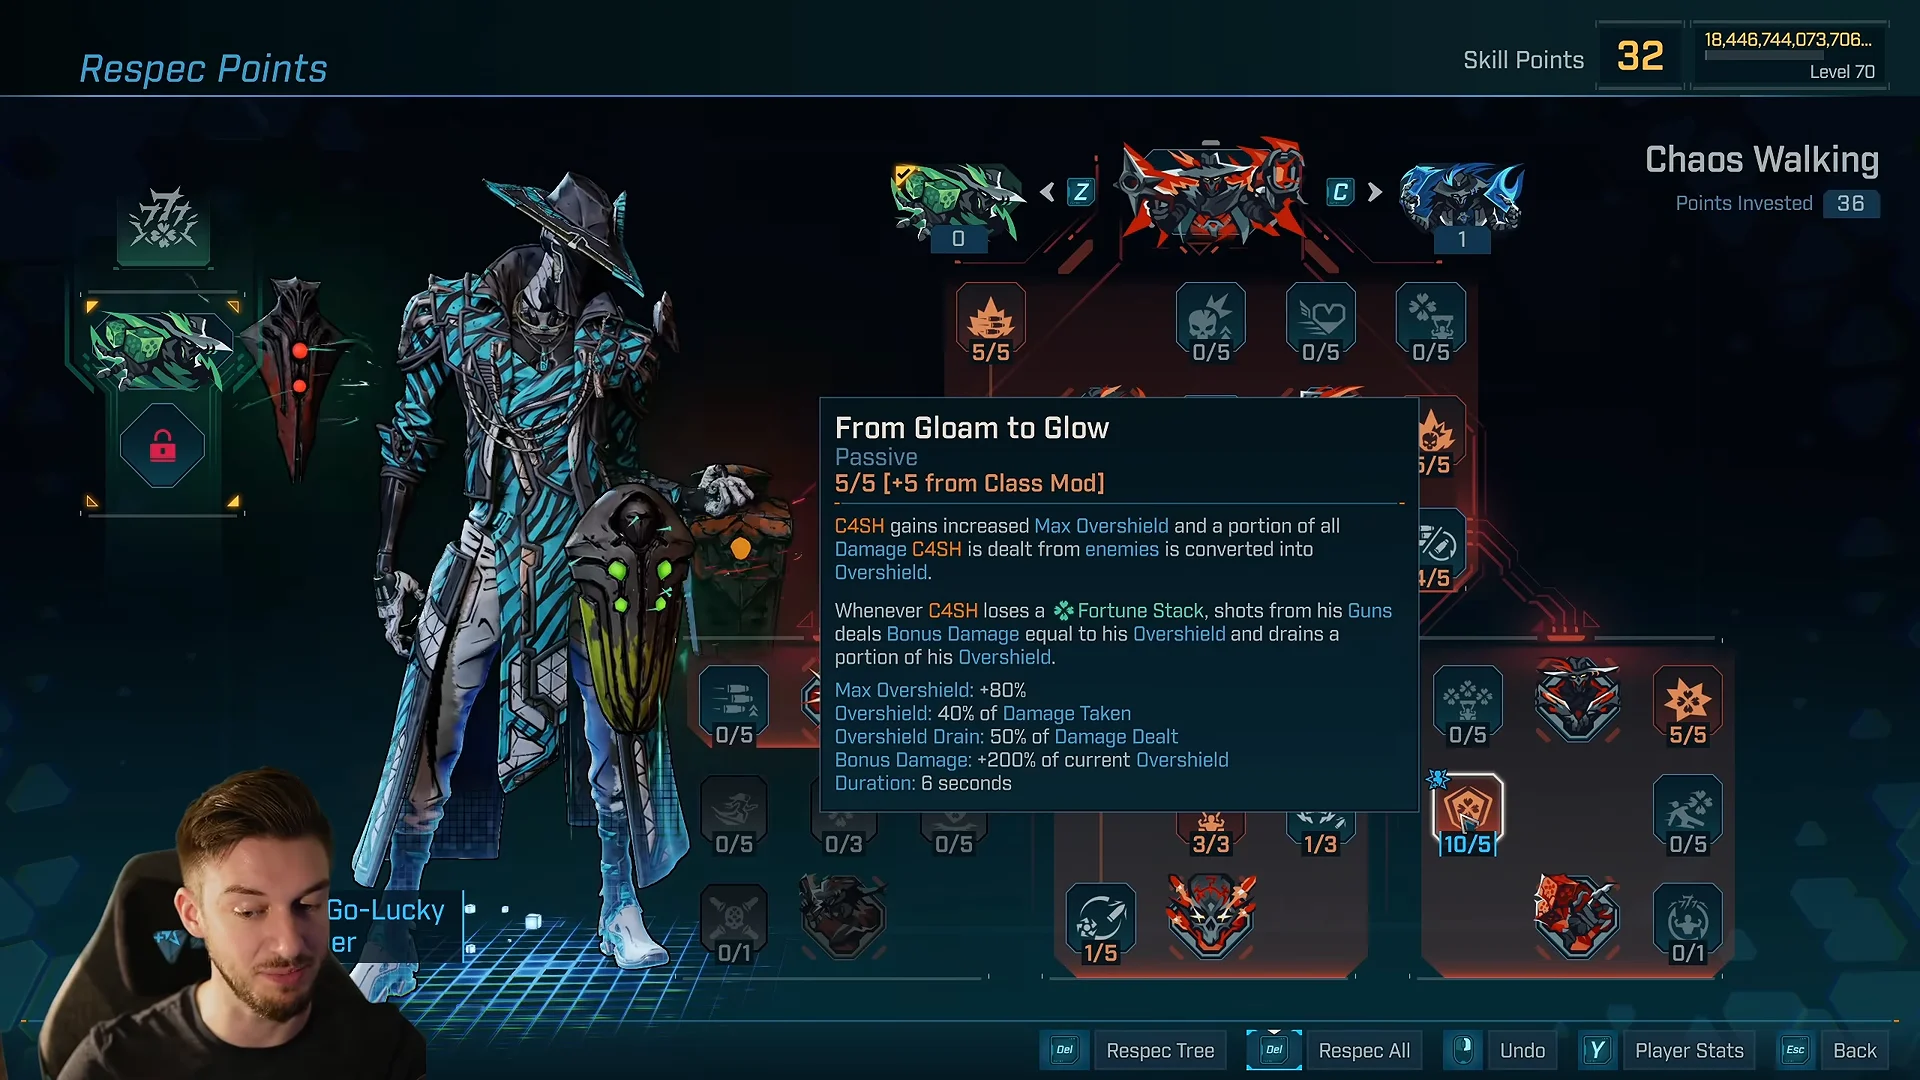
Because firing consumes overshield, the build depends on restoring it. Turn of Fate converts lifesteal to overshield while your health bar is full. That produces the needed cycle: fire, recover health, turn the excess into overshield, then amplify the next volley.
Three supporting skills keep that loop moving at speed:
- Dusty Trail fires Gloam off when you slide, spending Fortune stacks and handing back fire rate and reload speed.
- War Wagon returns kinetic-damage ammo to the magazine, making reloads largely unnecessary.
- Nothing Beats Lead creates an additional kinetic damage instance for every pellet, producing one more Gloam activation from each pellet.
Kinetic weapons do not activate Nothing Beats Lead. Kinetic-locked guns remain usable, but the build loses a substantial number of triggers with them.
Gloam build skill points at level 70
The allocation intentionally favors one side: Chaos Walking receives about 37 points to reach and support Gloam, Roll the Bones gets 31 for overshield and Windfall access, and Luck of the Draw receives precisely one point.
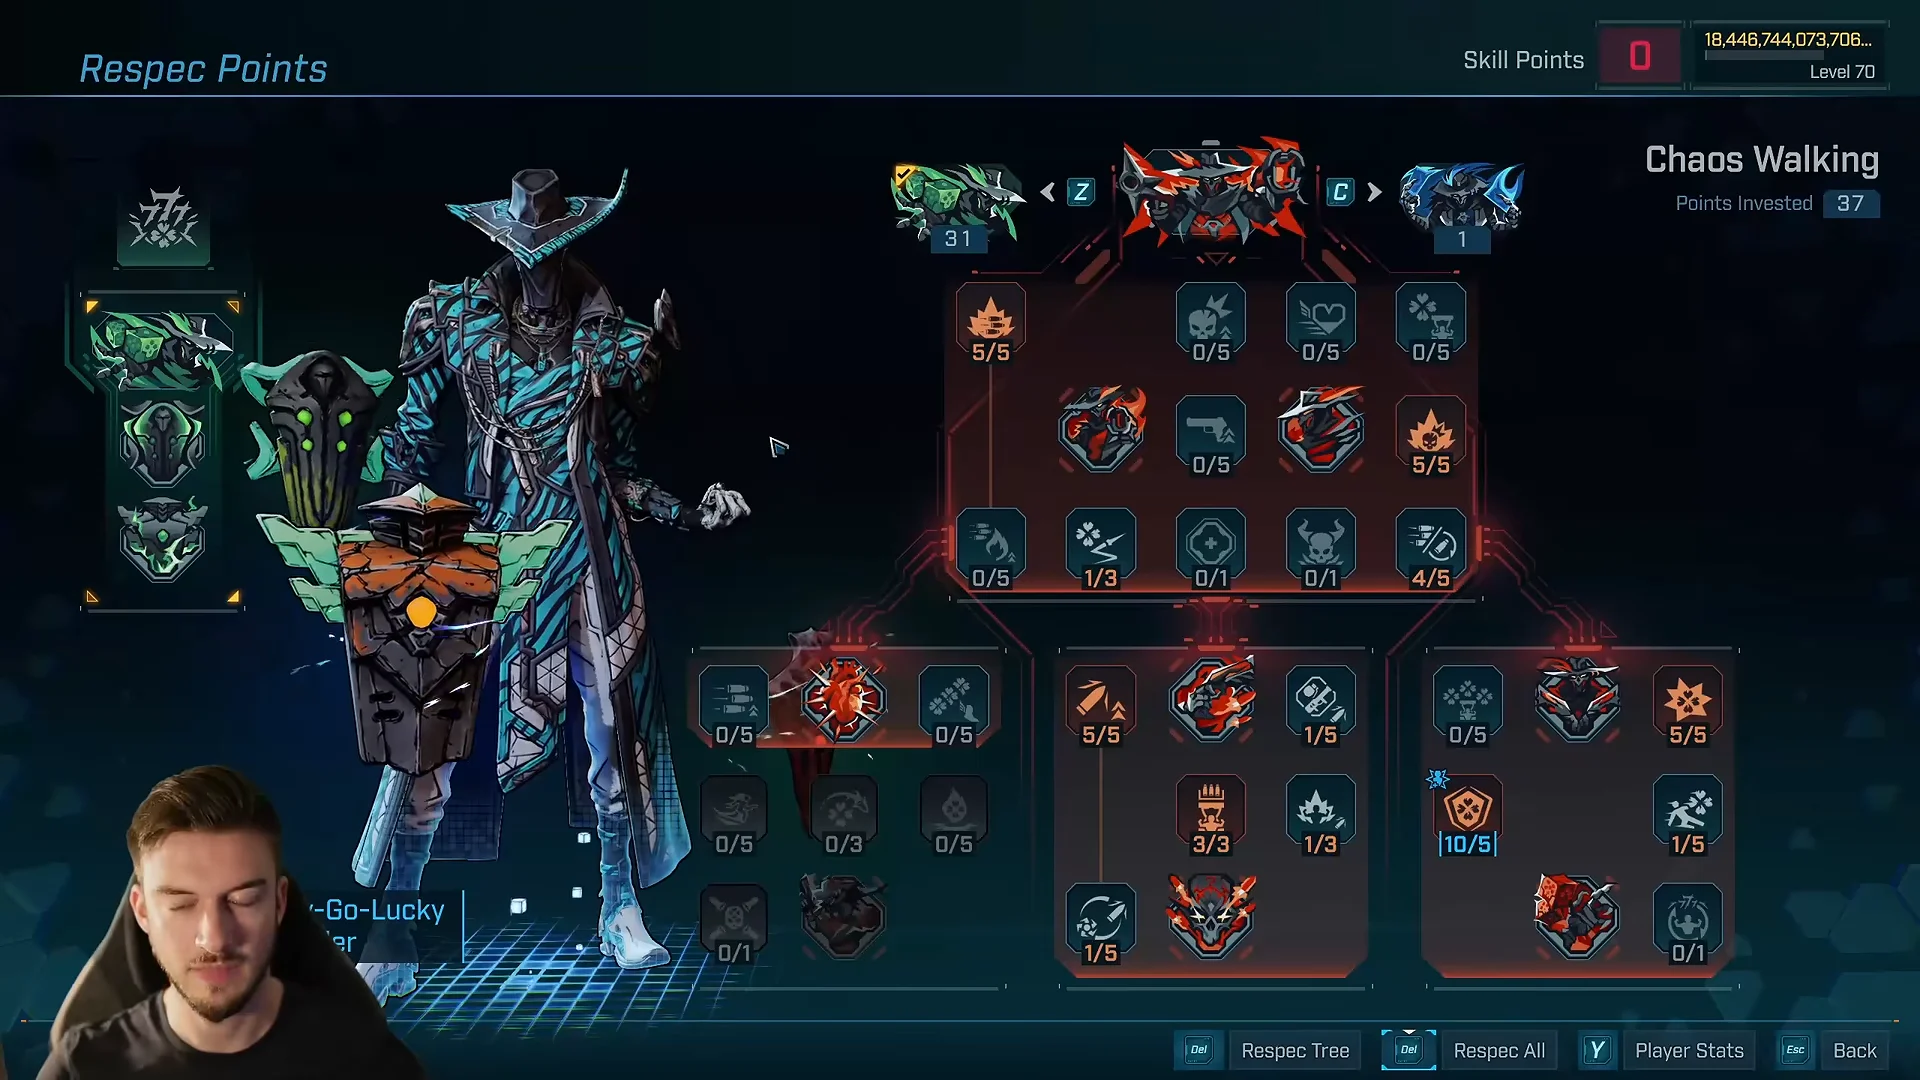
Chaos Walking (red)
| Skill | Points | Role |
|---|---|---|
| From Gloam Till Glow | 5/5 | Core amp damage |
| Dusty Trail | 1/5 | Slide trigger |
| War Wagon | 3/3 | Ammo refunds |
| Nothing Beats Lead | 1/5 | Extra trigger per pellet |
| Unleashed | 5/5 | Fire rate |
| Stand and Bleed | 5/5 | Crit chance |
| Unshaken | 5/5 | General damage |
| Lawless | 5/5 | Kinetic portion |
| A Blur of Fingers and Brass | 4/5 | Fire rate |
| Trick Shot | 1/3 | Filler |
| Truck Full of Nitro | 1/5 | Kinetic on ordnance |
| Pale Rider | 1/3 | Kinetic on action skill |
Those single points in Truck Full of Nitro and Pale Rider exist only so grenades, ordnance and action skills each carry their own kinetic instance, which War Wagon then turns back into ammo.
Roll the Bones (green)
| Skill | Points | Role |
|---|---|---|
| Turn of Fate | 5/5 | Lifesteal to overshield |
| Can’t Stop Winning | 2/5 | Windfall on crits |
| Sweet Roll | 5/5 | Health and overshield on totem spawn |
| Red Moon Rising | 5/5 | Damage |
| The Wilds | 5/5 | Damage |
| Fortune’s Favor | 3/3 | Gun and skill damage |
| Bonemeal Ticket | 3/5 | Totem duration |
| Devil’s Tines | 1/1 | Extra augment slot |
| Luckless | 1/1 | Jinx debuff |
| Let It Ride | 1/1 | Utility |
Luck of the Draw (blue)
The investment stops at one point in Alchemy. Applied status effects become Fortune stacks through it, supplying Windfall and giving Dusty Trail resources to consume during a slide. That lone point handles the build’s entire stacking function.
Card build skill points: Ante Up, Vigorish and Fortune scaling
The card version parks almost everything in Luck of the Draw. Ante Up at 5/5 is the headline, scaling gun and skill damage off missing magazine ammunition and Fortune stacks. That is why a one-round magazine is so valuable here. No Limit raises the cap to 20 stacks, Payout inflates every Fortune bonus by 40%, and Ace in the Hole adds gun damage per stack, doubled during Windfall.
Vigorish at 5/5 grants bonus elemental damage matching your action skill’s damage type, scaled by Fortune. Take the Pot restores health and generates shields or overshields when you activate an action skill with stacks banked, which is most of the survivability in the build.

The rest of the blue tree fills in around that core. Fast Hands takes four points for reload speed and Windfall chance, Sounds of Rain takes five for crit chance, Devil’s Tines takes one for the extra augment slot, and Late Scratch takes one so failed Windfall attempts still return Fortune. Dealer’s Bluff at two points and Around the Corner at five keep the action skill cooldown short enough to spam. Hot Streak’s single point guarantees an automatic critical hit after you gain a stack, and Card Sharp stops Sleight of Hand from burning charges for five seconds after Windfall begins.
Skip House Edge on this version. Holding Fortune stacks is what blocks you from recharging cooldown through Dealer’s Bluff.
Green tree support is small: Luck Be a Robot at 5/5 for cooldown rate per stack, Red Moon Rising at 5/5 for bonus incendiary damage during Windfall, and one point in Luckless to inflict Jinxed on nearby enemies for 20% increased damage taken. With everything allocated, the character sheet lands near +692.6% gun damage and +1232.5% skill damage.
Class mods: Windrider, Ludopath and Whale
The Windrider is mandatory for the Gloam build, and a Happy-Go-Lucky roll at level 60 is enough. The ideal roll is +5 From Gloam Till Glow, +1 Dusty Trail, +1 Dealer’s Bluff. The +5 is what pushes Gloam to its 10/10 ceiling. The Dusty Trail point matters just as much, because without it you have to strip a point from somewhere else to cover the slide trigger. For raw stat lines, prioritise gun crit chance, gun damage and fire rate.
The card build wants a Compulsive Ludopath for its +5 to Ante Up and extra action skill cooldown rate. The Calculating Whale is the alternative, and it changes how the build scales: it converts action skill cooldown rate straight into action skill damage, which makes Ready to Roll, Luck Be a Robot and Around the Corner into damage stats. On a Whale, look for 5 Payout and 2 Unshaken for pure damage, or Turn of Fate if you want a buffer. Reload speed is guaranteed on its modifiers, so chase action skill damage, cooldown rate or crit damage on the rest.
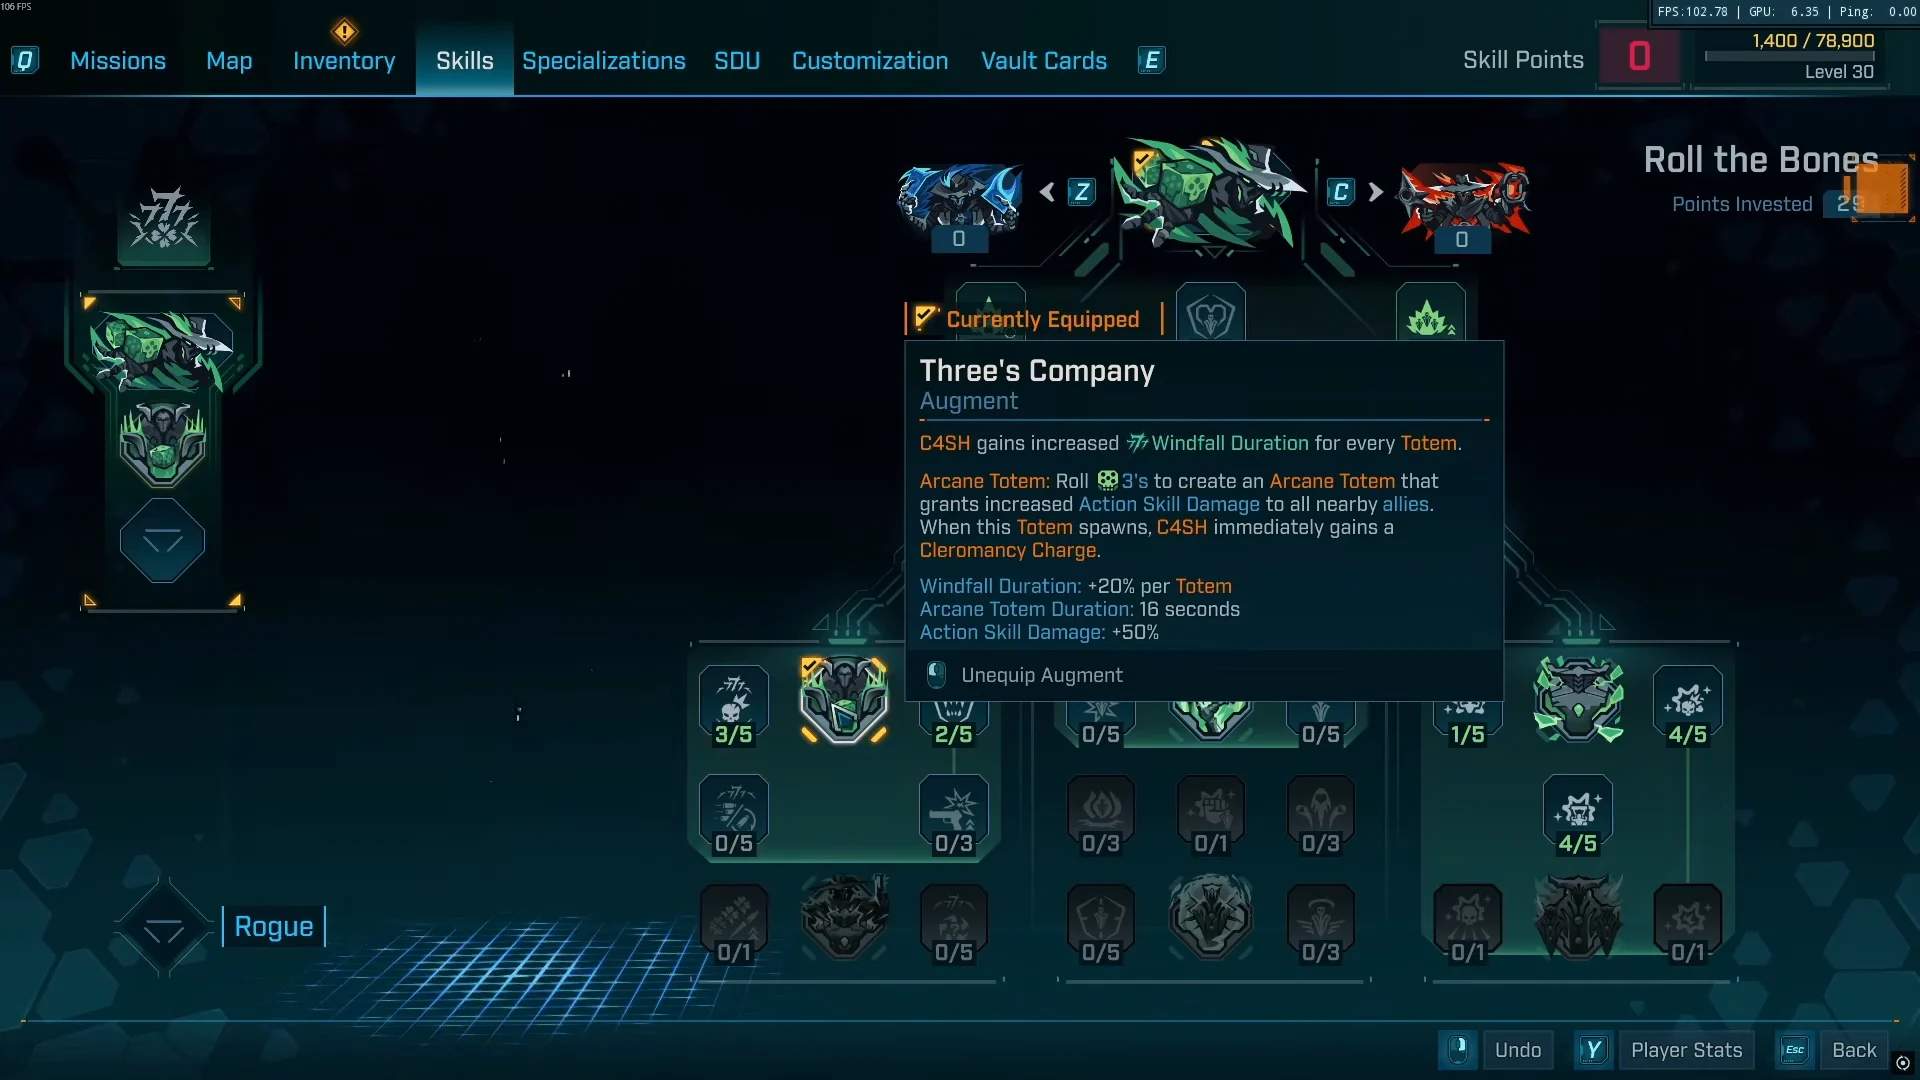
Cleromancy augments, totems and Sleight of Hand cards
Cleromancy rolls C4SH’s Bone Dice, then summons a totem according to the result. Augments expand the pool by adding further possible results.
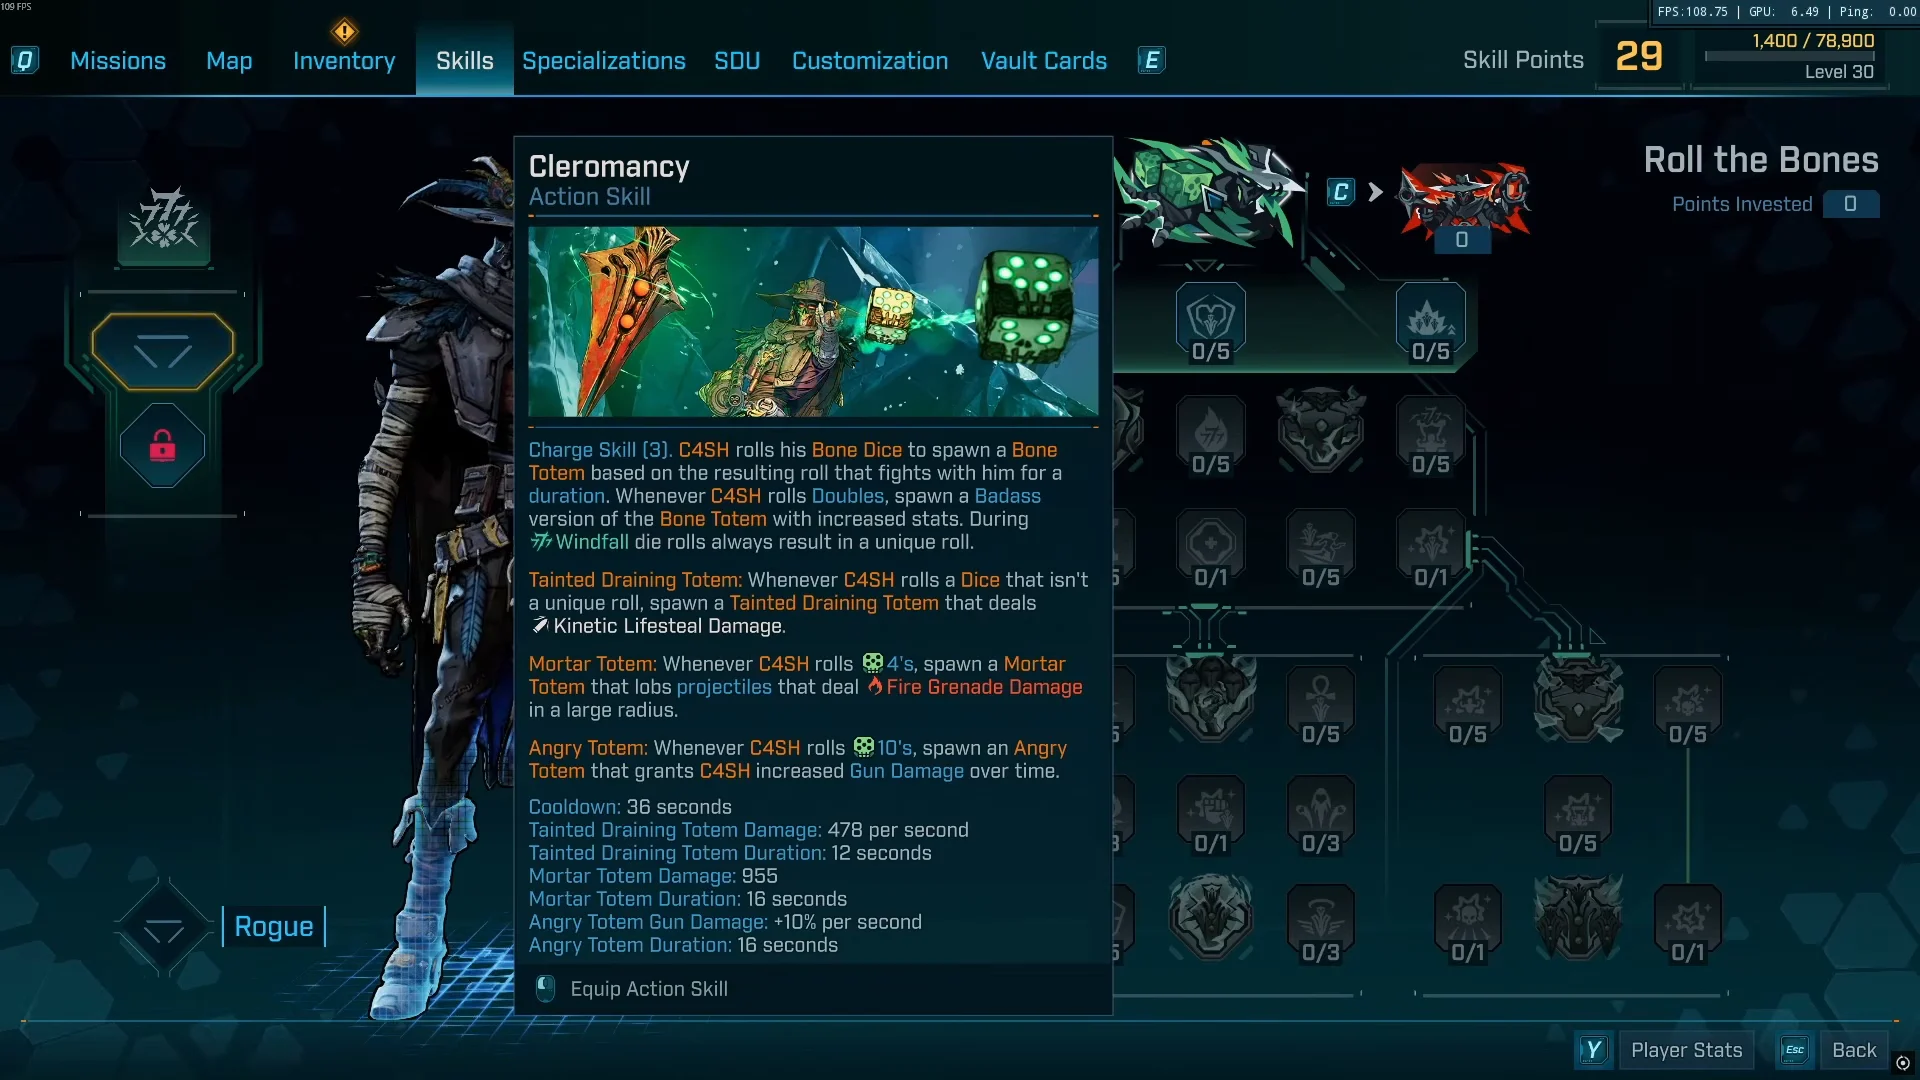
Heavenly Sevens, Five is Alive and Commotion’s Eleven is a solid trio for the Gloam build. The Protector Totem from Heavenly Sevens is the standout, since it grants overshield on spawn and adds fire rate and reload speed scaled to your shields. Running zero augments is also legitimate: fewer entries in the table means a better chance of landing the Angry Totem and its gun damage over time. Dirty Dozen earns a slot in fights where status effects cannot be applied, because it gives you a Fortune source when Alchemy has nothing to proc on.
Do not pair Mighty Nine with Groundbreaker. The extra melee element releases Groundbreaker too soon, preventing you from storing a large hit.
On the card build, Devil’s Tines in both trees opens up three augment slots. Bet on Red adds the Vampiric Touch card, which automatically kills non-badass enemies during Windfall and deals heavy ordnance damage. The Cooler adds Freezing Shards cryo melee cards that double Windfall bonuses and trigger Groundbreaker.
Shields, repkits, enhancements and ordnance
| Slot | Gloam build | Card build |
|---|---|---|
| Shield | Super Soldier, or Hopscotch with x2 Turtle | Watts 4 Dinner |
| Enhancement | Vindictive Pumper | Vindictive Pumper or Rolling Hat Trick |
| Repkit | Triple Bypass, War Paint or Kill Spring | Mega Triple Bypass |
| Ordnance | Waterfall with Lingering and Alchemic | Collateral Potent Waterfall |
A Resonant Generous Super Soldier is the offensive default on the Gloam build, while a double-Turtle Hopscotch buys you a thicker buffer between incoming damage and your health bar. On enhancements, gun fire rate and weapon-type fire rate rolls have the tightest synergy with Gloam, because every extra shot is another trigger. A Jakobs Crit Knife grenade is a strong bossing swap for the Waterfall.
Avoid Watts 4 Dinner on the Gloam build. It is a fine damage shield for the card version, but it can wreck your From Gloam Till Glow uptime.
Weapons for each build
The Gloam weapon profile is simple: high fire rate, as many simultaneous damage instances as possible, and elemental so Nothing Beats Lead applies. Match the element to the health bar you are shooting. The Domino People’s Triplicate assault rifle is the clean example, firing three projectiles per shot for three Gloam applications per trigger pull. A Ceramic Bellicose Bod shotgun and a Hungry Scraping Enumeration SMG round out a practical three-gun loadout, with the SMG covering the deeper ammo pool. Beyond those, Stray and Stealth & Seek handle mobbing, Convergence and Broken Wings handle bossing, and Acey May brings pellet count. Ripper charge mags, Jakobs ricochet accessories and Torgue impact mags are all good parts, and a Daedalus underbarrel in SMG mode buys ammo reserves at some cost to damage.
The card setup reverses those priorities. Its main weapon is the Hot Slugger Jakobs shotgun, whose one-round magazine gets the most from Ante Up. Keep firing while repeatedly pressing reload to improve its effective fire rate. DLC alternatives include Quincunx Decompiler, Accelerated Nadir Clarity, and Debauched Performative Critical Decay.
Firmware and specializations
- High Caliber 3, Skillcraft and Active Fire cover projectile speed and skill output.
- At 3/3, Deadeye affects From Gloam Till Glow directly.
- Taking Bullets to Spare 3/3 grants fire rate and increases the value of magazine-size rolls.
- Specializations: Honed Mind, I Am A Gun, Riddle You This, Bullet Train and Groundbreaker.
Groundbreaker is optional on the Gloam build but doubles up nicely, since Gloam damage builds it. On the card build it is the payoff for melee cards, storing 20% of damage dealt and discharging it on a melee card hit.
The Gloam combat loop
The card loop
How to tell the build is working
Check the magazine before anything else. At War Wagon 3/3, sufficient kinetic instances can refill the counter during combat, allowing entire boss phases to pass without a reload animation. If you do reload mid-fight, War Wagon is not receiving enough kinetic instances, most often because the weapon has too few pellets or too little fire rate.
Next, inspect the shield bar. Your health should remain untouched while overshield stays full or nearly full, since Turn of Fate requires that condition to continue converting lifesteal. When enemies begin damaging your health, the overshield conversion weakens and From Gloam Till Glow stops delivering its payoff. War Wagon consumes reserve ammunition instead of generating it, so a sufficiently long fight will eventually exhaust your supply.
The damage numbers are the last confirmation. With Gloam live at 10/10 and an elemental, multi-pellet weapon in hand, the jump is obvious, and under-levelled gear stops mattering. On the card build, the equivalent tell is Windfall: if you are ending a Windfall window with card charges still in hand, the Fortune engine is running the way it should.





