

FL4K and the Last Resort added a full shelf of new legendaries to Borderlands 4, and most of them are locked behind a specific boss or side mission. Farming all of them takes hours, so the only question that matters is which ones earn a permanent slot in your loadout at max level.
Quick answer: The Quincunx Decompiler and Fourier’s Malady are the two standouts worth farming first. The Virtue pistol is the only gun here that is safe to skip outright.
Story Pack 2 weapon tier list
| Tier | Weapons |
|---|---|
| S | Quincunx Decompiler, Fourier’s Malady |
| A | Devourer, Hand Frag, Ripple, Critical Decay |
| B | Petanque, Honeymooner, Hippo Gun, Avarice, Paperclip, Schadenfreude |
| C | Infection, Lovelorn, Secured Relief |
| D | Virtue |
Placements reflect the Story Pack 2 launch patch in September 2026. Weapons are judged on applied damage at endgame difficulty rather than card numbers alone, so ammo cost, charge time, perk uptime, and how many enemies a shot can realistically hit all pull a gun up or down. Balance changes will move these around.
S-tier: Quincunx Decompiler and Fourier’s Malady
| Weapon | Type | Card DPS | Perk |
|---|---|---|---|
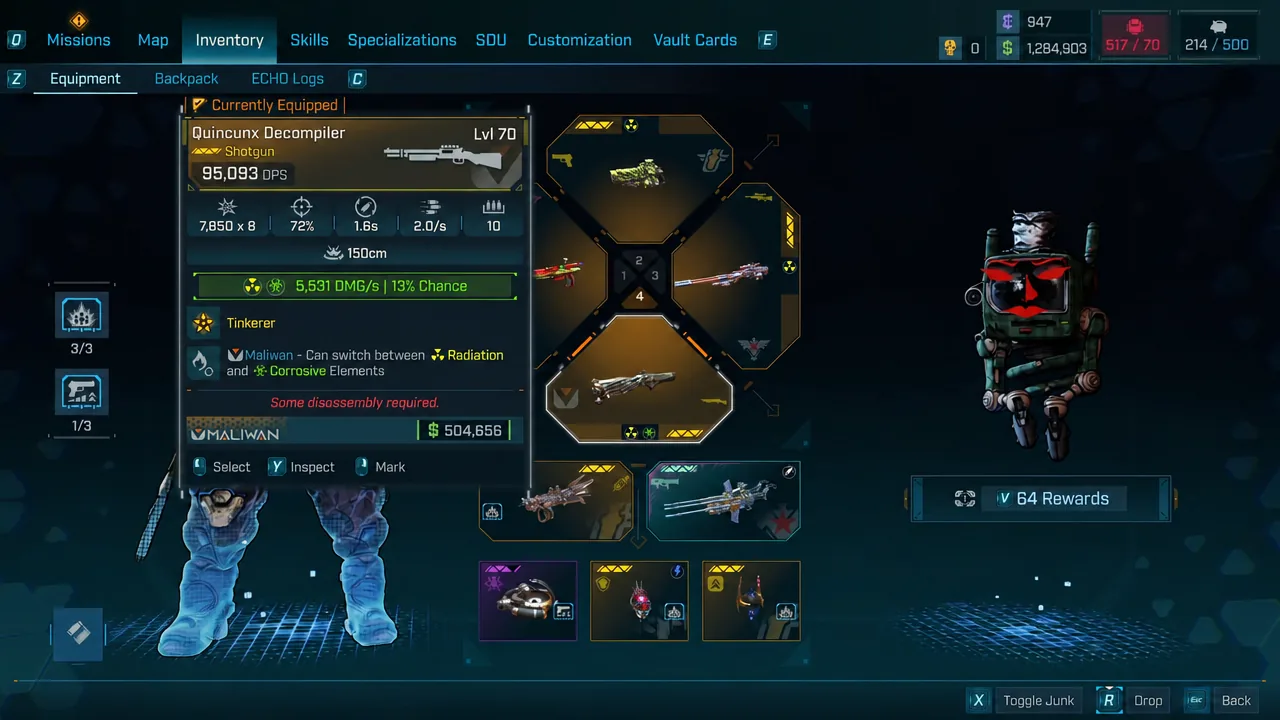
| Quincunx Decompiler | Maliwan shotgun | 95,093 | Tinkerer |
| Fourier’s Malady | Tediore shotgun | 67,213 | Discontinuous |
Quincunx Decompiler is the highest-damage gun in the pack and the easiest to use. It rolls elemental only and swaps between radiation and corrosive, firing a wide spread of energy beams with a 150cm splash radius on each. There is no charge condition, no resource to manage, and no build requirement — it melts single targets and clears groups with the same trigger pull, which is why it sits above everything else.
Fourier’s Malady has a chance on every shot to throw a copy of the gun, and those copies fire on their own while you keep shooting. Damage on each copy is calculated after ammo consumption, so a copy thrown at 15 rounds left behaves as though it had 13. Stack that with Rafa’s Grenazerker class mod, the Digi-Divider Tediore enhancement, and the Replicator reload part and it spawns even more copies.
Fourier’s Malady occasionally spawns a copy directly inside your character, which will hurt you. Keep some distance from cover when you are mag-dumping it.
A-tier: the burst and status damage picks
| Weapon | Type | Card DPS | Perk |
|---|---|---|---|
| Devourer | Ripper sniper rifle | 52,806 | Ruin |
| Hand Frag | Daedalus SMG | 78,332 | Deep Pockets |
| Ripple | Torgue assault rifle | 55,293 | Ripple |
| Critical Decay | Torgue pistol | 39,104 | Decay |
Devourer is the best of this group. Ruin consumes a status effect matching the gun’s current mode on hit and pays out all of its remaining damage instantly, so any build that already stacks burn, corrosion, or radiation converts that pool into a single critical hit. Boss health bars fall apart quickly with it.
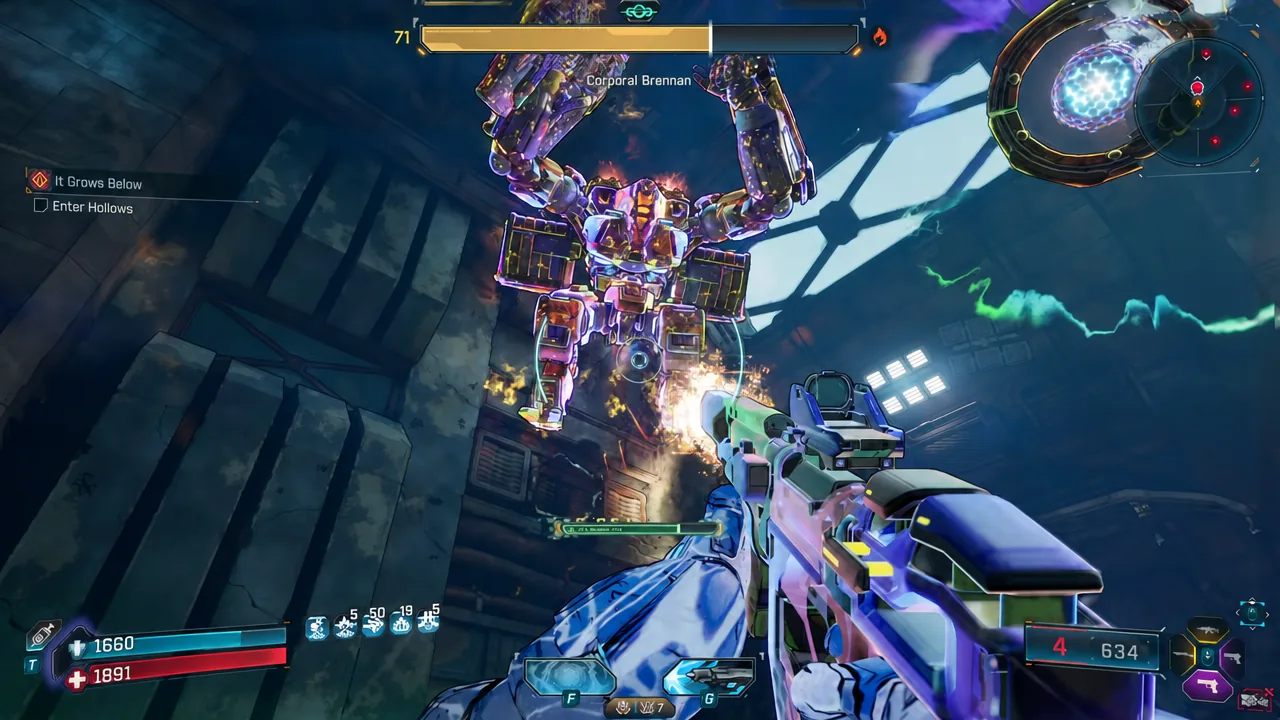
Hand Frag turns reloading into an attack. The blast fires two projectiles as a baseline plus one more for every ten rounds loaded, and it then multiplies damage based on that projectile count, which makes the scaling quadratic rather than linear. A 252-round reload works out to 27 projectiles and a 702x multiplier if every one connects. The rockets do not benefit from Amp.
Ripple stacks Torgue stickies on a target and adds bonus corrosive damage when they detonate against an enemy already suffering a corrosive status effect. Loading the target up and then reloading produces one very large explosion.
Critical Decay is radiation-only and has a 30% chance to attach a Torgue sticky whenever an enemy takes radiation status damage. On its own it is a mid-range option, but paired with Harlowe, Loveless, or the Contamination specialization the sticky generation snowballs enough to justify the A placement.
B-tier: strong guns with a condition attached
| Weapon | Type | Card DPS | Perk |
|---|---|---|---|
| Petanque | Order sniper rifle | 68,907 | Clonk |
| Honeymooner | Maliwan SMG | 67,737 | Rising Action |
| Paperclip | Tediore pistol | 44,945 | Barter |
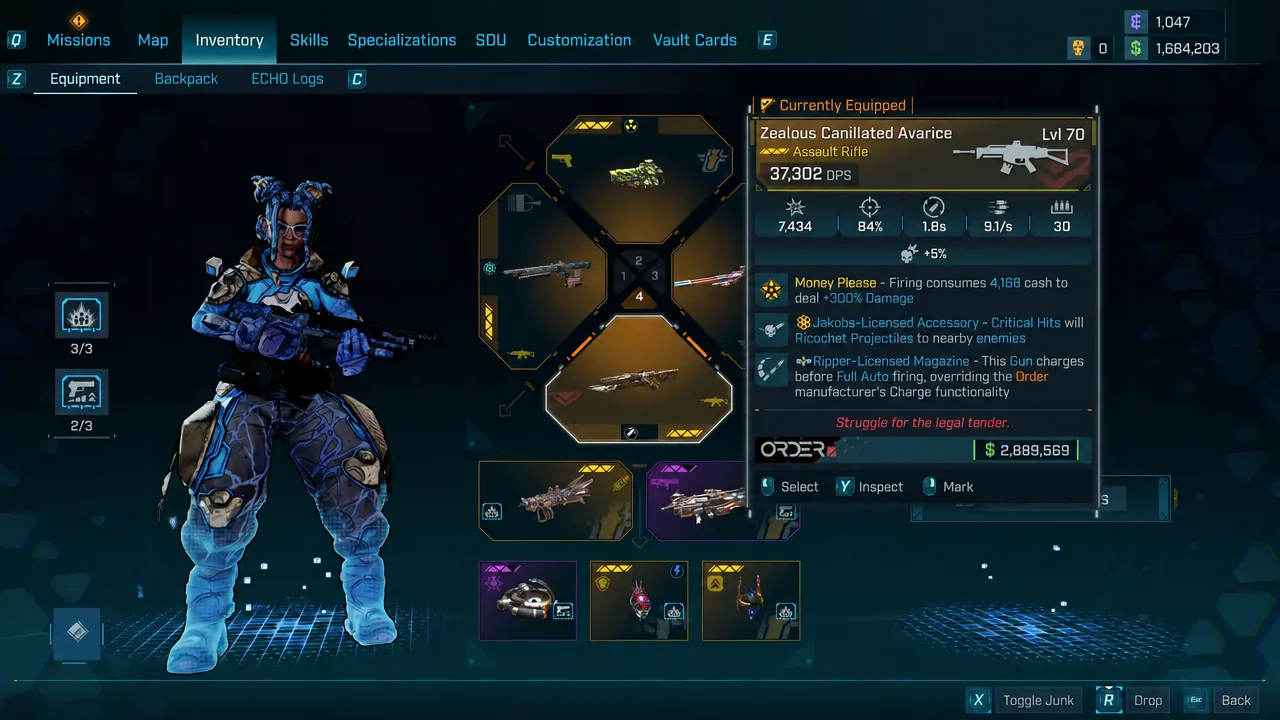
| Avarice | Order assault rifle | 37,302 | Money Please |
| Hippo Gun | Jakobs shotgun | 35,573 | Mud Run |
| Schadenfreude | Assault rifle | 29,128 | Shards |
Petanque sits at the top of this bracket. It is kinetic only, and Clonk sends attached projectiles hopping to a nearby target every time you get a kill, which makes it excellent at chaining through packed rooms and nearly useless against a lone boss.
Honeymooner adds 20% increased status effect damage taken per hit, stacking five times for a 100% ceiling that refreshes as you keep firing. Underbarrels contribute stacks, the element does not have to match the status you are applying, and bonus elements that inherit from the source ramp it faster. The plasma projectiles travel slowly, which is the main thing holding it back.
Paperclip is a purple unique rather than a legendary, and it earns its spot through the homing throw on reload plus fast-ricocheting bullets from its Jakobs and Ripper parts. It is a cheap, reliable filler gun long before you finish farming the rest of the pack.
Avarice spends cash per shot for a flat 300% damage boost, and there is a quirk worth knowing: the boost is Amp, firing the gun once applies it permanently, and it carries over to whatever weapon you swap to afterwards at no further cost. It also applies to the gun’s underbarrels. Even so, sustained firing drains your wallet fast, which keeps it out of A-tier.
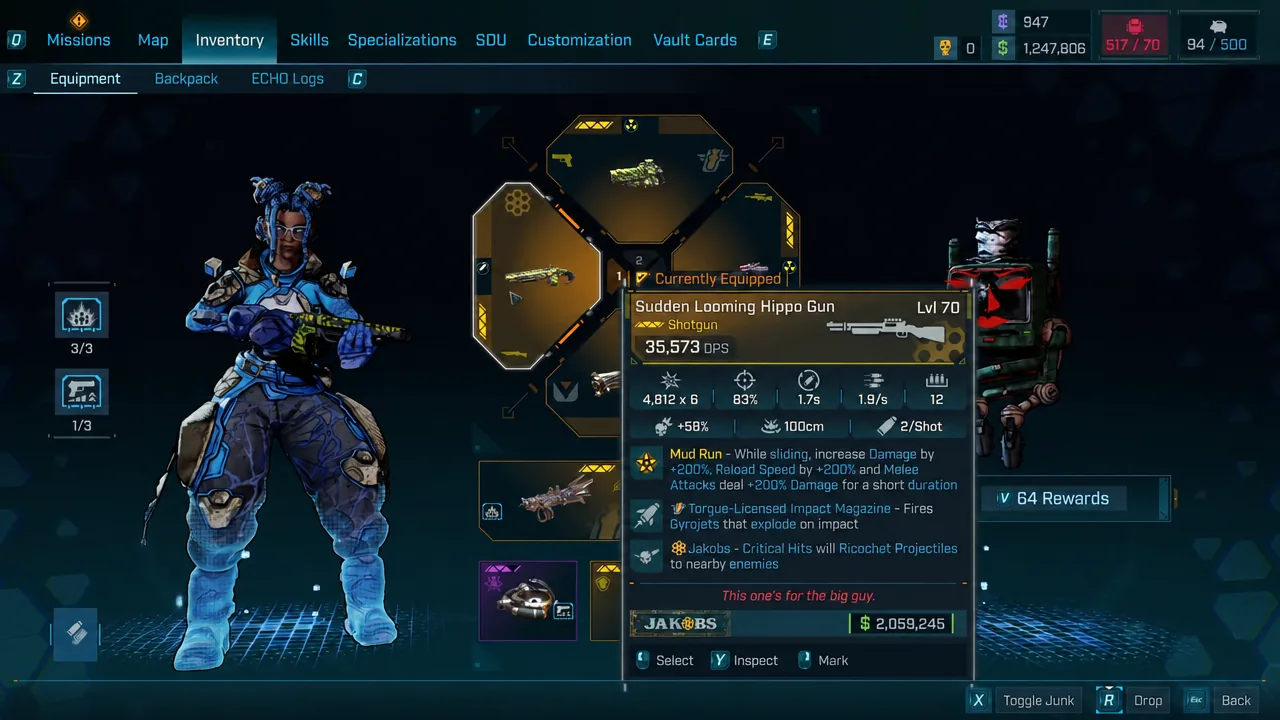
Hippo Gun grants 200% bonus damage, reload speed, and melee damage while sliding, and the buff lingers for one second after the slide ends. The gun bonus is additive with On Shot Gun Damage and works on underbarrels; the melee portion only applies to actual melee attacks, not generic melee damage sources. Its 58% crit modifier and tight pellet spread are good, but you have to keep sliding to see any of it.
Schadenfreude plants sticky cryo projectiles that detonate into exploding pillars when you switch firing modes. It is spectacular to watch and genuinely dangerous to use at close range, since the detonations can hurt you. That, plus the low card damage, puts it at the bottom of B.
C-tier and D-tier: what to leave on the ground
| Weapon | Type | Card DPS | Tier |
|---|---|---|---|
| Secured Relief | Tediore pistol | 51,315 | C |
| Lovelorn | Tediore assault rifle | 30,927 | C |
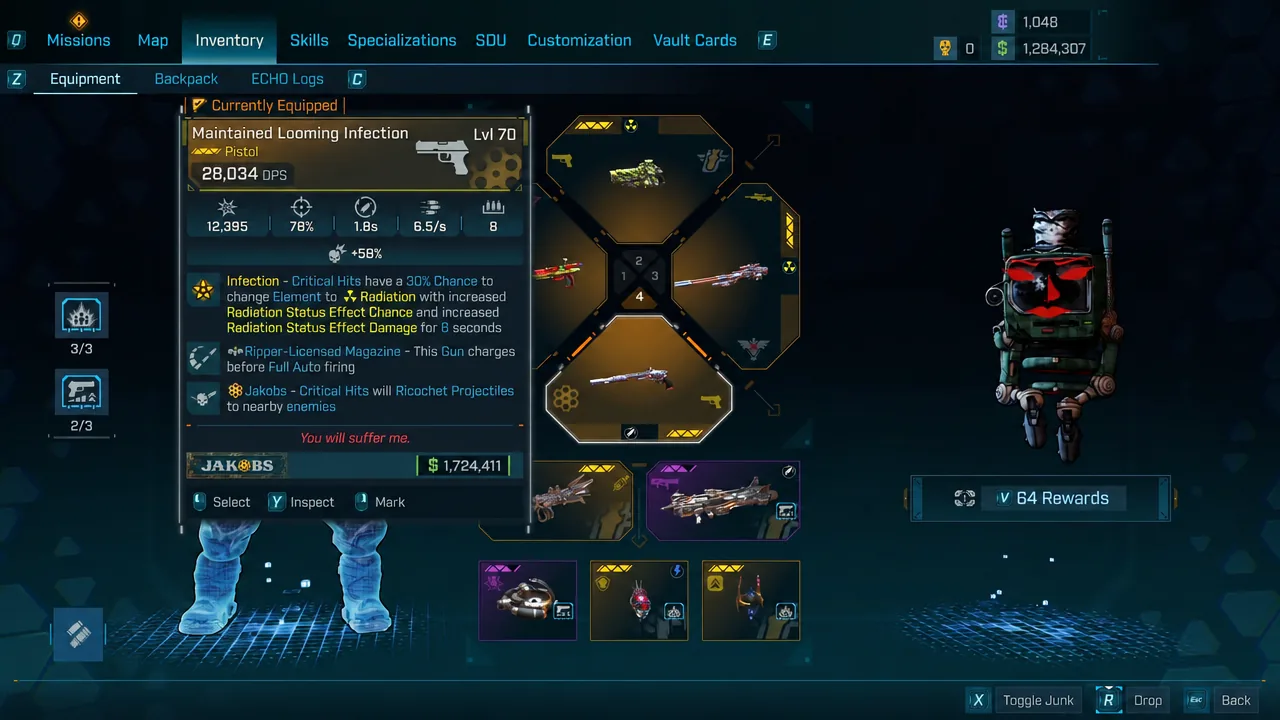
| Infection | Jakobs pistol | 28,034 | C |
| Virtue | Order pistol | 46,983 | D |
Secured Relief is a purple unique whose Clearance effect spawns a MIRV grenade on impact when you throw it. The cluster bombs look good and do respectable damage, but nothing about it competes with the legendaries in the same pack.
Lovelorn launches kill drones on enemy deaths, and the underbarrel fires two Order kill drones that do scale with Amp and On Shot Gun Damage. The problem is the drones spawned from kills get neither of those bonuses, do not chain off their own kills, and spawn inconsistently. At high difficulty tiers their damage is simply too small to matter.
Infection is elemental only and gives critical hits a 30% chance to convert the element with boosted status chance and status damage. The Jakobs ricochets are fun and the radiation procs come often enough, but the base damage does not hold up in late-game content.
Virtue is the one clear miss. Patience lets you charge up to five rounds for a burst, but the payoff does not justify the wind-up, and the projectiles travel slowly enough that you will miss moving targets. Any charge-style pistol you already own will out-damage it.
Where each Story Pack 2 weapon drops
| Weapon | Source | Area |
|---|---|---|
| Quincunx Decompiler | Blackgrin (Digi-Rifts) | Pyroclast Field |
| Fourier’s Malady | Lieutenant Bume | Bagheera Range |
| Devourer | Ducky | Pyroclast Field |
| Hand Frag | RelaxMech | Vinechoked Canopy |
| Ripple | Experiment C-23 | Tediore FOB Bravo Lima 4.2 |
| Critical Decay | Logistics Manager Reyes | Vinechoked Canopy |
| Petanque | Jayson and his Frame | Pyroclast Field |
| Honeymooner | Megan | Bagheera Range |
| Avarice | Vulkorr / Pay to Play mission | Bagheera Range |
| Hippo Gun | Kolavalin | Heart of the Mountain |
| Schadenfreude | Jr. Manager Warrant Baggett | Vinechoked Canopy |
| Infection | Lieutenant Harmony | Tediore FOB Bravo Lima 4.2 |
| Lovelorn | Dr. Elena Smith | The Upper Crust |
| Paperclip | Barter Up mission | Pyroclast Field |
| Secured Relief | The Relieving of the Guard mission | Providence Island |
Boss drops run through Moxxi’s Big Encore stations, so you can re-fight the same target without leaving the area. Mission-locked guns like Paperclip and Secured Relief come back through Replay Missions.
Licensed parts move the needle as much as the base gun on several of these. A Jakobs ricochet accessory spreads damage across a crowd, a Ripper charge mag pushes raw DPS, and Tediore reload variants change how the throw-based guns behave entirely. If you are farming for one keeper, chase the roll rather than settling for the first drop.





