Control Resonant signposts its main path well enough. Dylan Faden gets a marker, a Resonant to kill, and a stretch of broken Manhattan to cross. What it doesn’t do is explain the systems sitting one menu deep — the ones that decide whether you spend 30 hours underpowered or actually build something.
Quick answer: Almost nothing you pick is permanent. Aberrant forms, loadouts, and talent spends can all be changed, and it’s the zone you’re standing in that levels up — not Dylan.
Nothing about your build is permanent
The first weapon form you choose feels like a commitment. It isn’t. The Aberrant is a shapeshifting weapon with five forms, each carrying its own skill tree, and you are never locked into the one you started with.
- Dual Blades
- Axe
- Scythe
- Whip
- Heavy Hammer
Change Aberrant forms in the Gap menu
Progression doesn’t live in a flat menu. It lives in the Gap, a space tied to Dylan’s head where you view the Primary Forms tree, check Aberrant Strength, unlock a new weapon form, or pull points back out and spend them somewhere else. If a form isn’t working for you, open the Gap and move on.
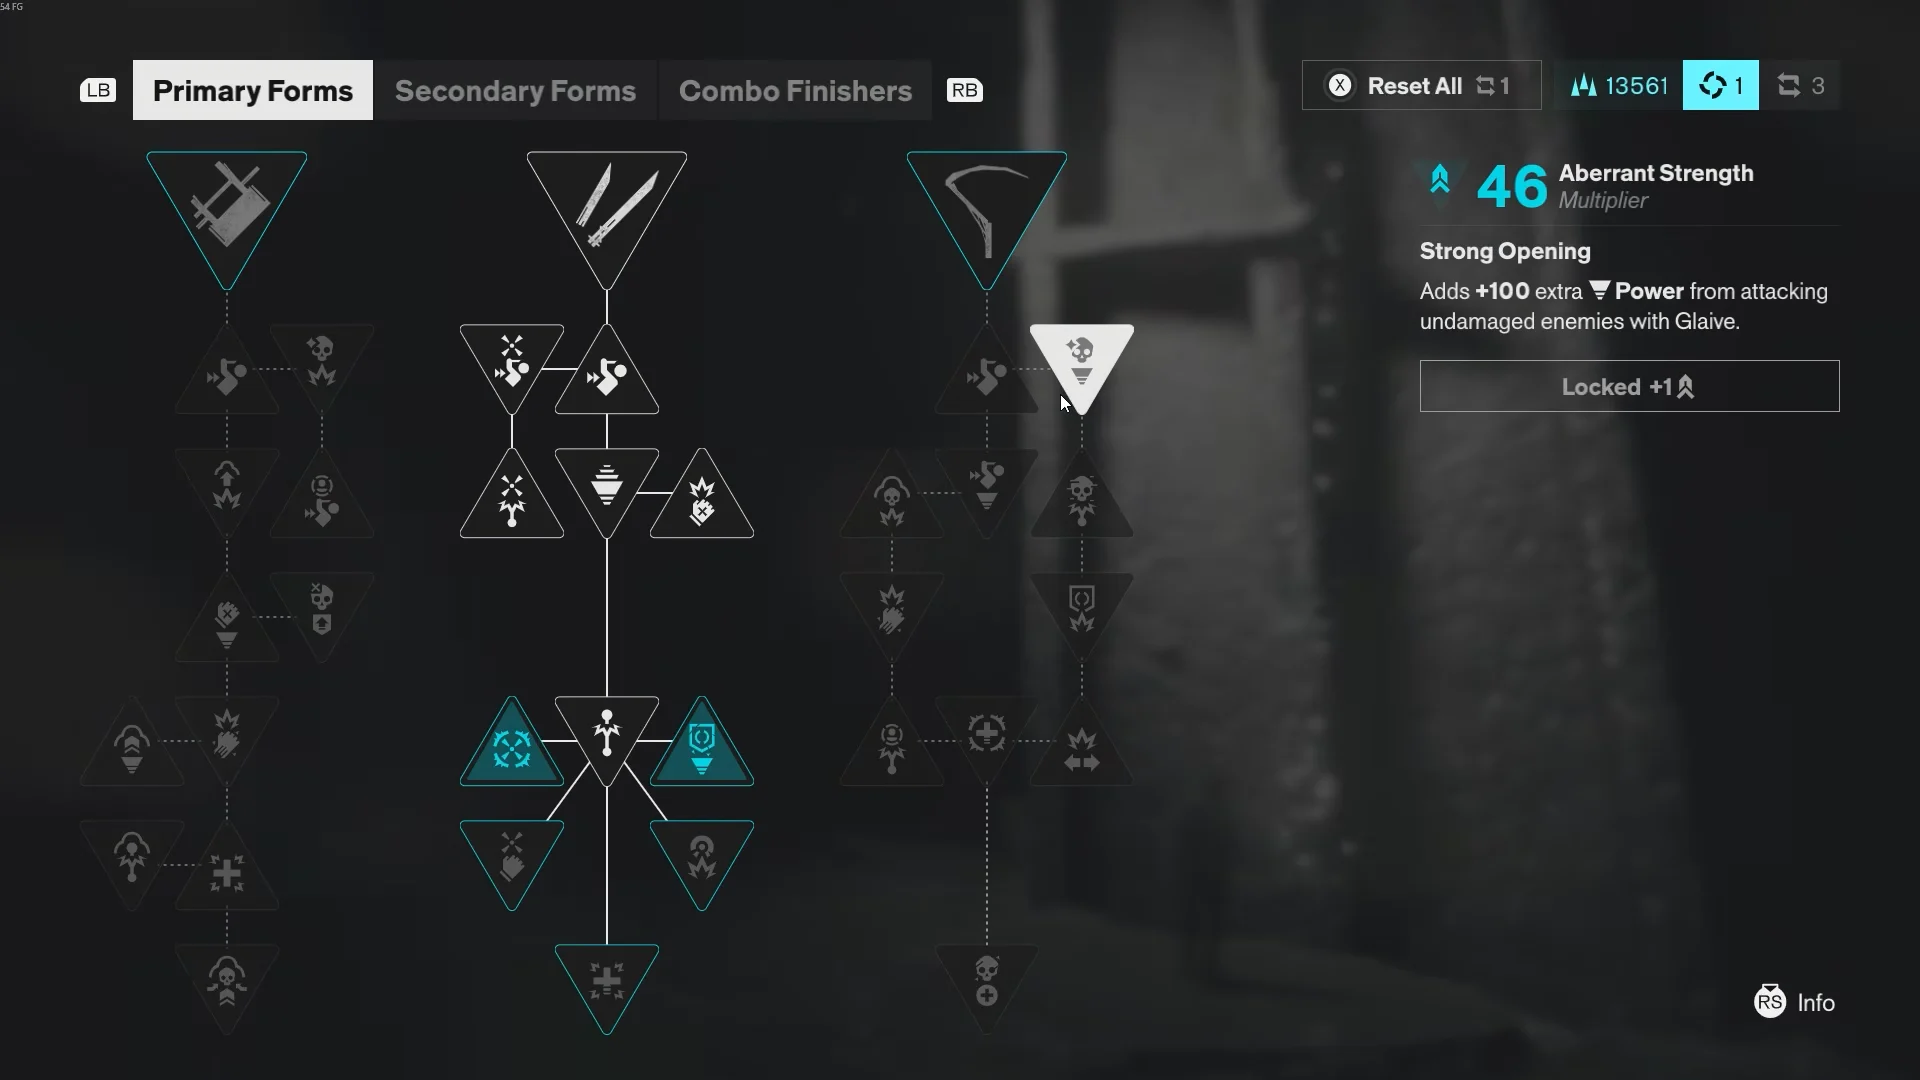
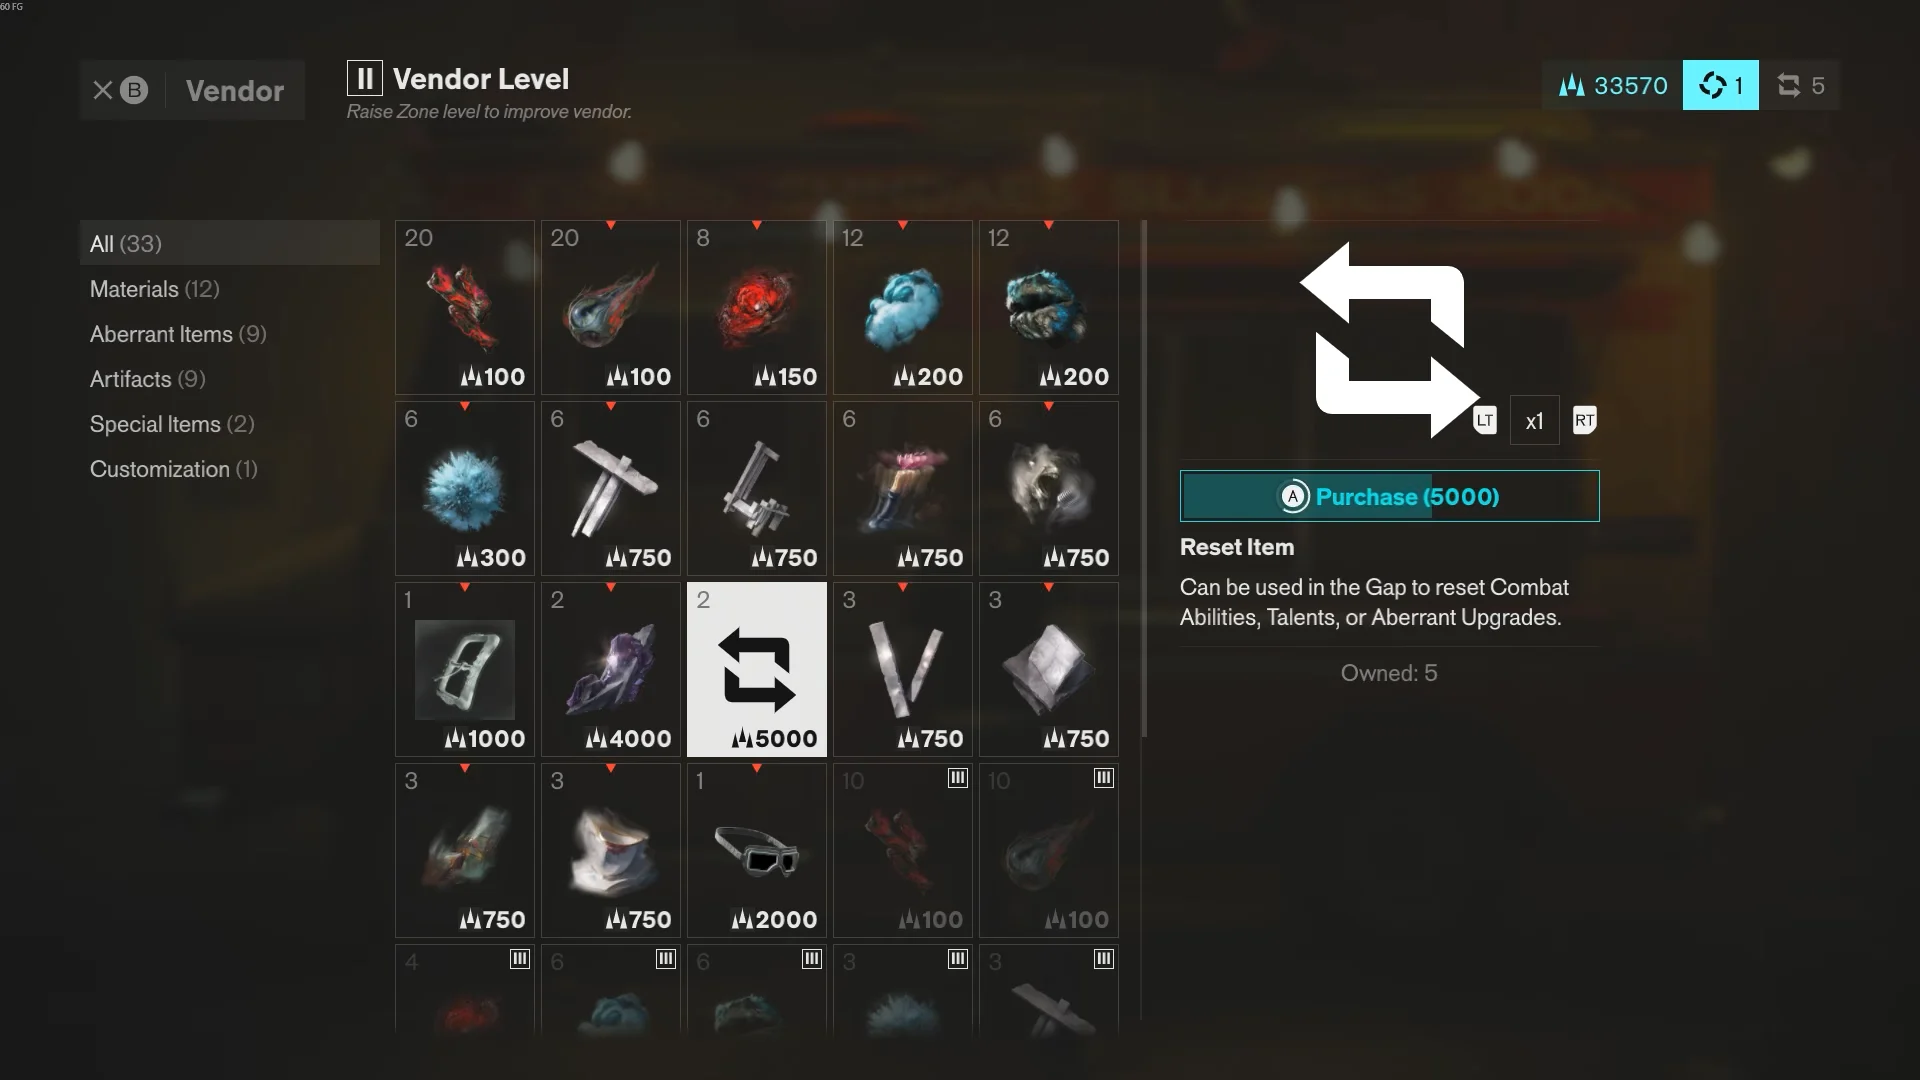
Reset Items cost 5,000 Source — or come free from Resonants
Vendors sell a Reset Item for 5,000 Source, which is a lot of currency early on. You don’t have to buy one. Every Resonant boss you kill hands you a Reset Item as a reward, so respeccing is effectively free on a story cadence. Save your Source for materials and upgrades and let the bosses cover your rebuilds.
Swap your loadout mid-combat
The Loadout screen isn’t a between-fights menu. Weapon forms, artifacts, abilities, and combo finishers can all be changed while a fight is still happening. The only restriction is animation state — you can’t swap while the weapon is mid-attack. Pulled into a room full of armored enemies with a crowd-control build? Change it there and then.
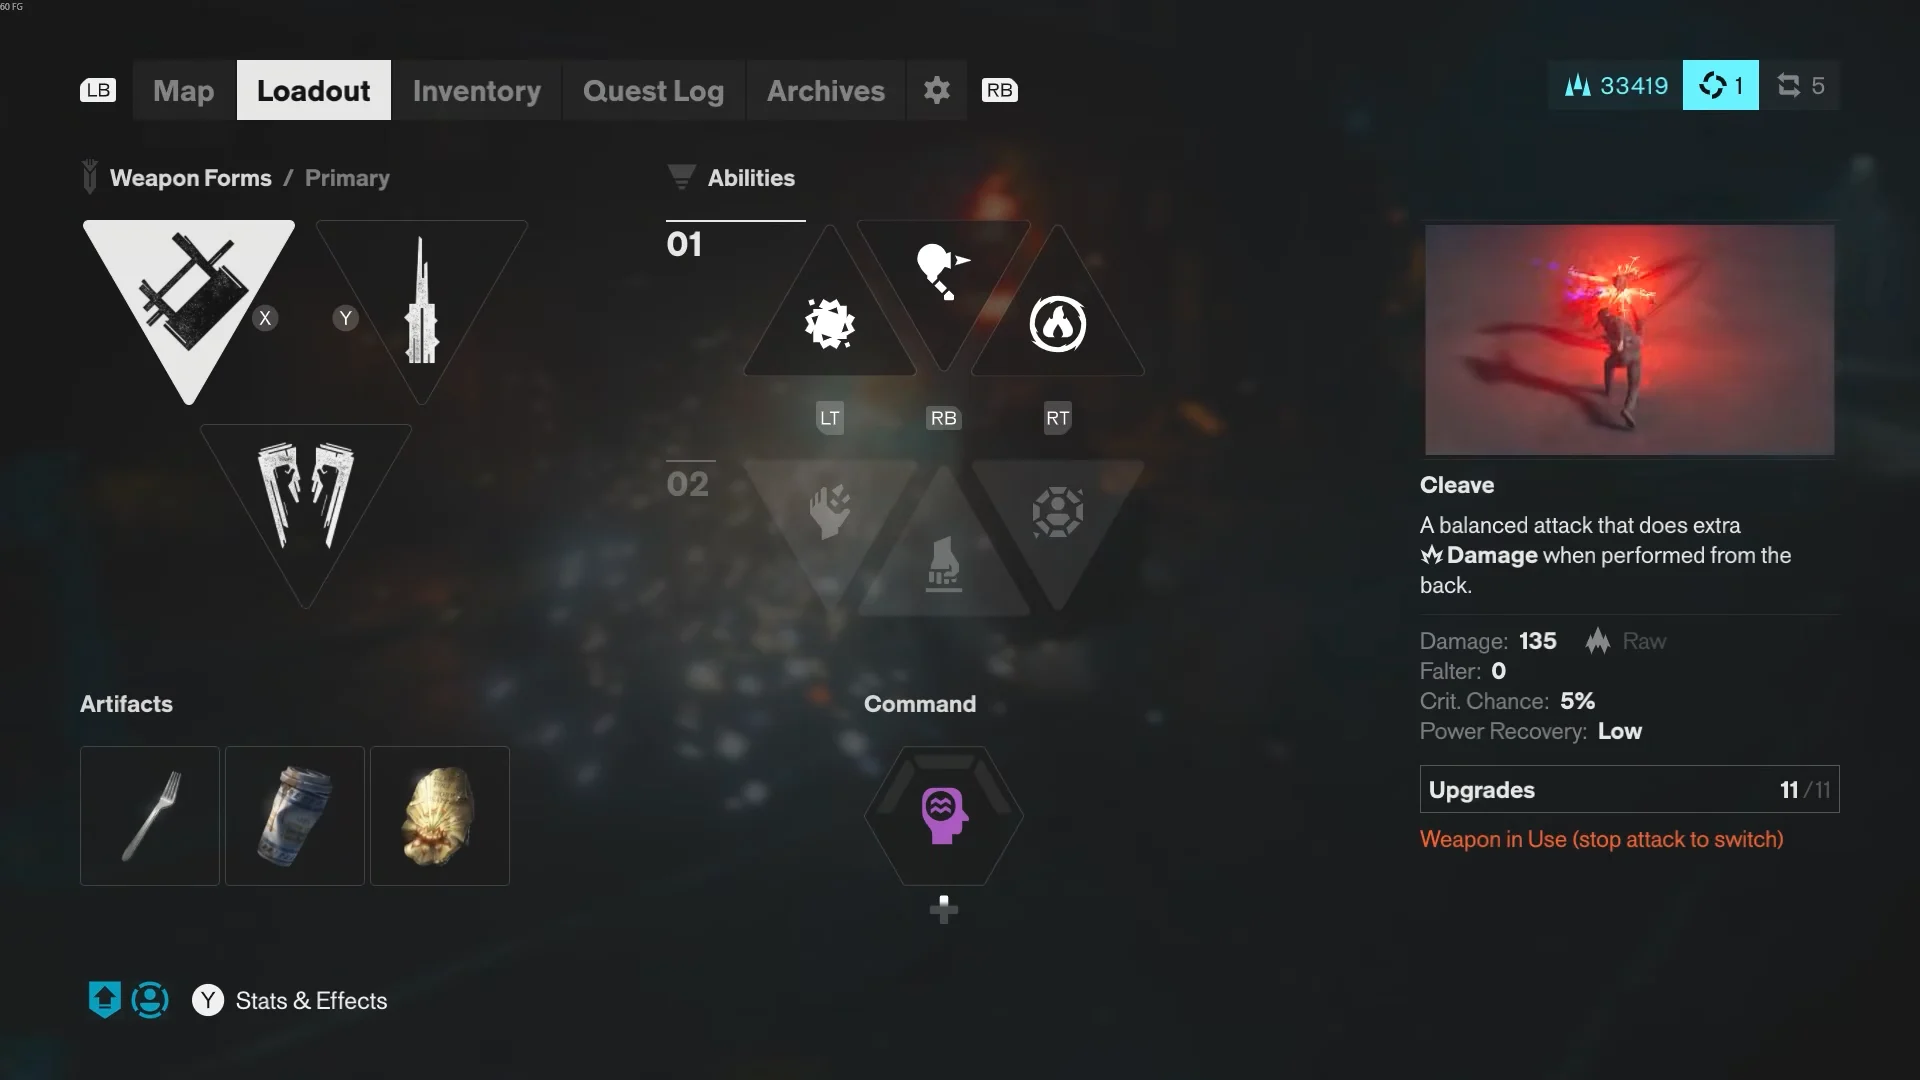
The Aberrant runs three slots, and understanding what each one is for makes those swaps far less random.
| Slot | What it handles |
|---|---|
| Primary | Fast combo starters, crowd management |
| Secondary | Heavy staggering hits, armor breaks |
| Combo Ender | High-damage burst finishers |
Zone levels, not Dylan, set the difficulty
There’s no conventional XP bar here. Dylan doesn’t level — the zone does. Killing enemies, finding treasure, and clearing quests inside a zone pushes that zone’s level up, which raises the threat of everything in it and unlocks perks in return.
Open the map and select a zone to reach the Zone Details screen. That’s where the payouts live, and they don’t collect themselves.
- Talent Points to claim, which feed the main skill tree
- Arcade machines tied to zone progress
- Large resource crate markers revealed on the map
- Perks like merchant upgrades, treasure marking, and more health drops from enemies
Activate the Map Kit in each new zone as you arrive. It makes navigating that area’s layout far easier, and it quietly ticks off a side story along the way.
To check where you actually stand, head to the Loadout menu and open Stats and Effects for your current Power Level. If a mission is chewing through you, that number is the thing to fix.
Large resource crate icons double as secret markers
Once large resource crates appear on your map, treat them as waypoints rather than loot pickups. Remedy places them near other things worth finding. Travel to a crate icon and sweep the surrounding block and you’ll typically turn up FBC outposts, archive documents, and other points of interest that never got a marker of their own.
It’s the most reliable way to explore a zone without wandering. Manhattan is large, its streets repeat visually, and the map does little to distinguish one ruined block from the next, so pinning your route to crate icons gives exploration a shape.
Vendors sell different materials in each zone
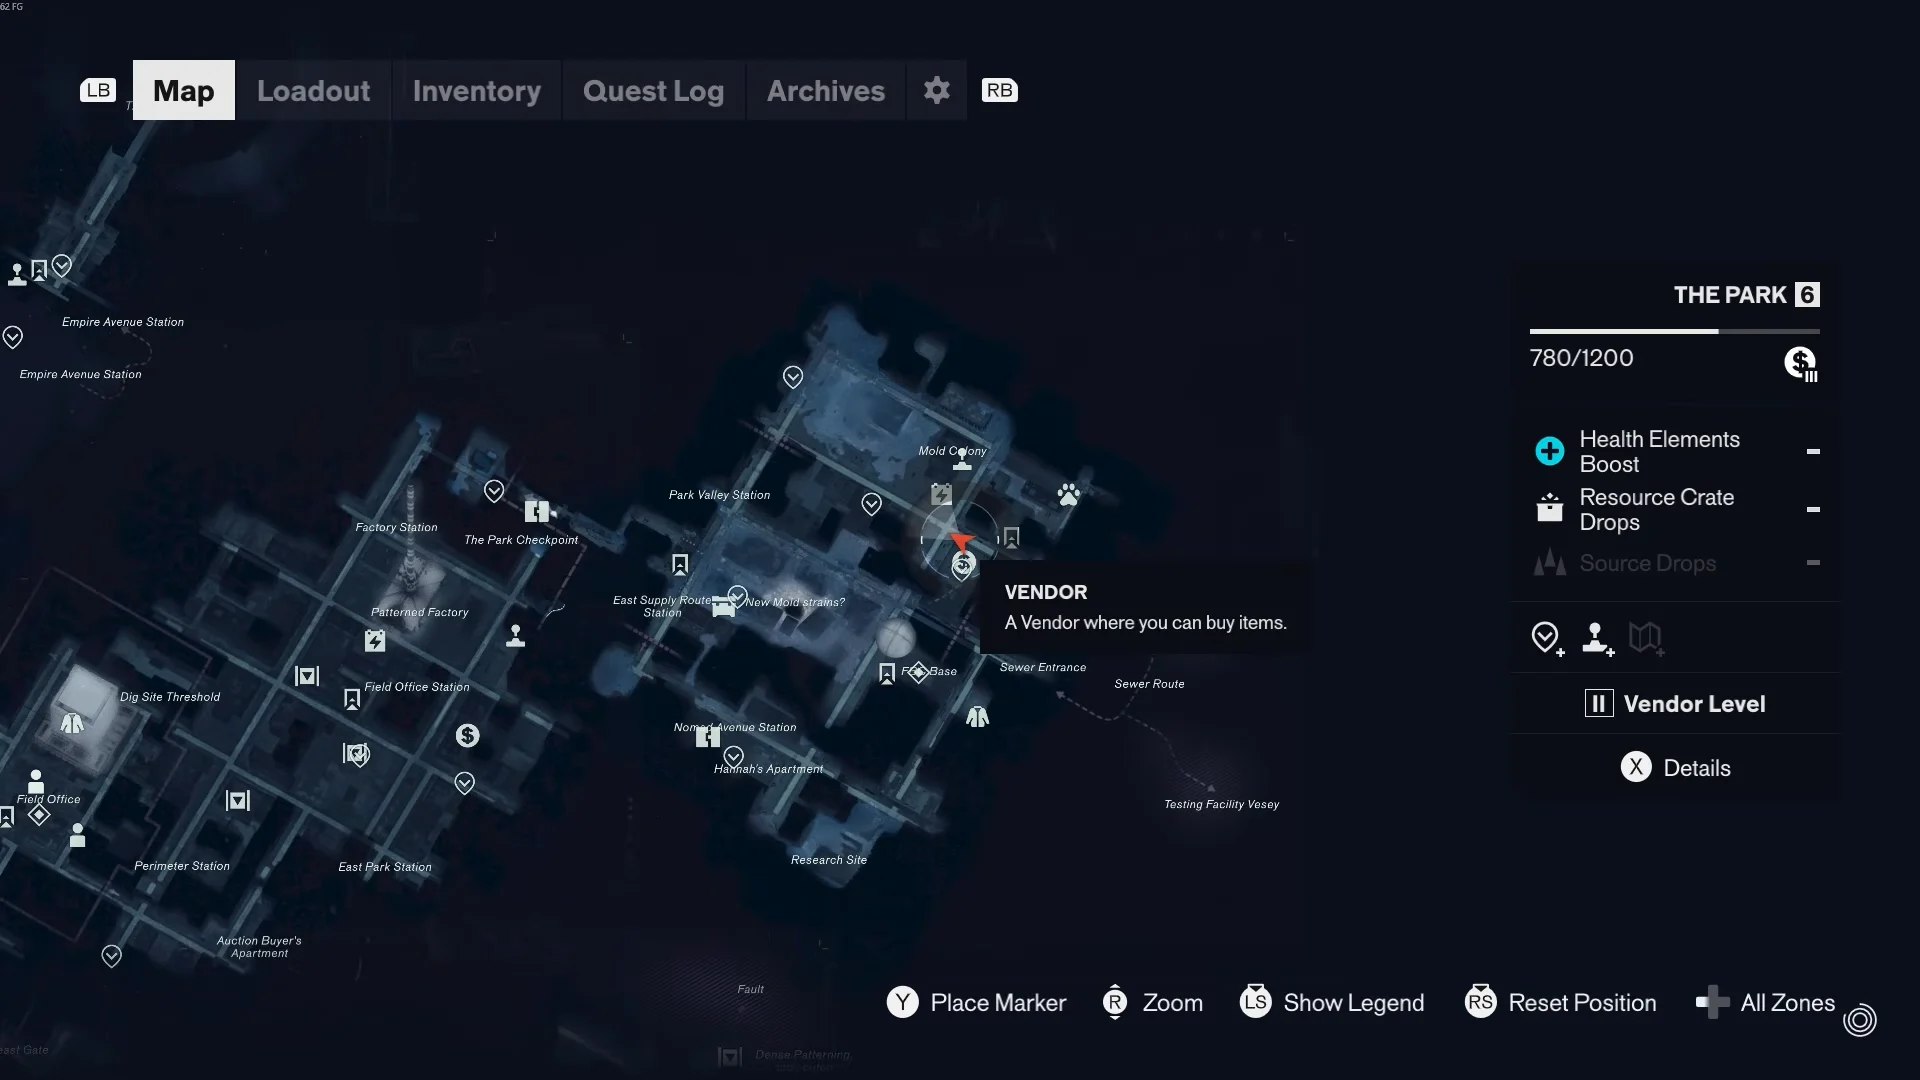
The mobile vendor ice cream trucks are easy to write off as one repeated shop. They’re not. One appears per zone, and each stocks crafting materials themed to that area — the Park truck deals in things like Edible Glob and Fungal Growth, which you won’t pick up from a vendor elsewhere.
If an upgrade is stalling on a material you can’t find, check which zone that material belongs to and go visit its truck rather than grinding drops.
Manhattan storefronts hide permanent upgrade points
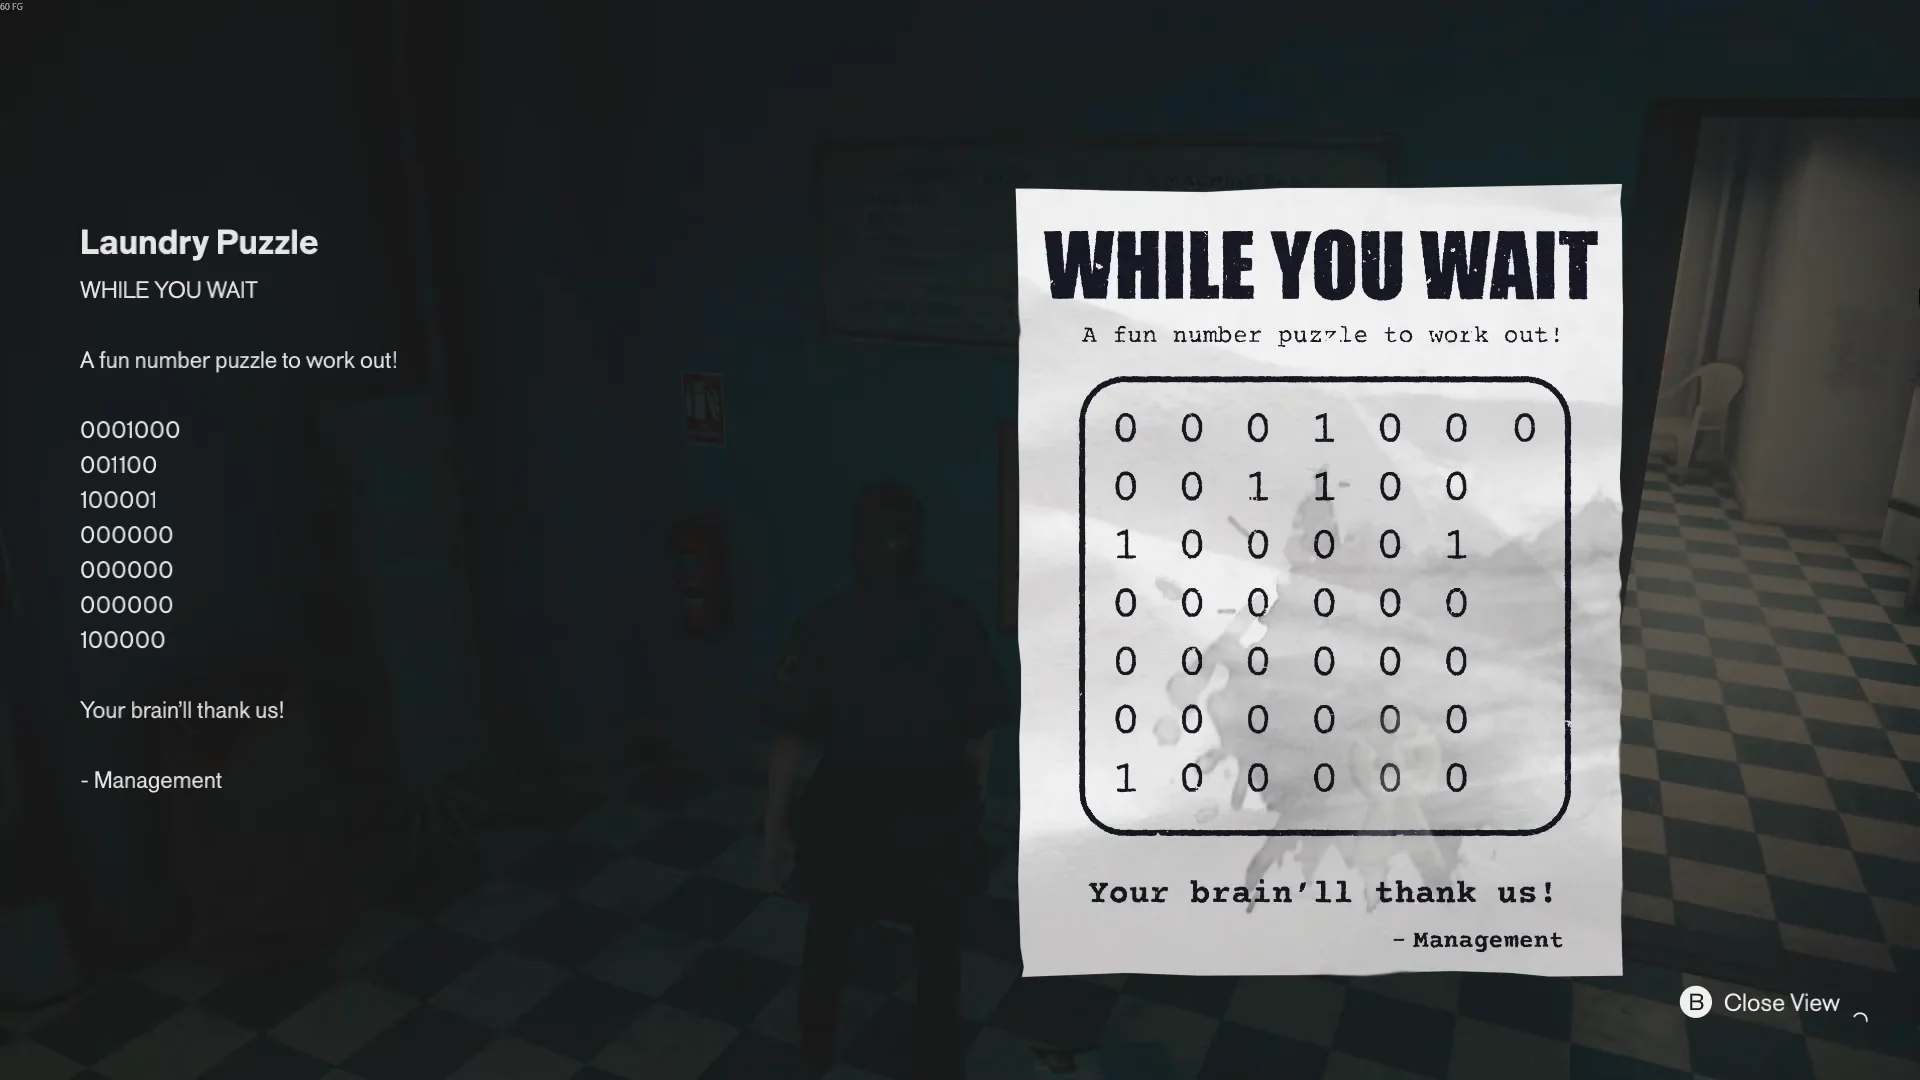
Plenty of shopfronts across the city can be entered, and they’re not set dressing. Laundromats and similar small interiors hold crafting resources, environmental puzzles, and — the important part — permanent Health and Power Upgrade Points. These are flat, permanent gains that don’t depend on zone level or talent spending.
If a door opens, go through it. The puzzles inside are usually built around a note or clue left in the room.
Go back to The Artist’s arena after the prologue
The arena where you fight The Artist during Orientation stays accessible after the prologue, and the game never suggests returning. It’s worth the trip twice over. There’s additional Patterning lore to pick up, and three hidden Power Upgrade Points sitting in the space itself.
Three permanent points for revisiting one room is one of the better returns on time in the opening stretch of the game.
Every Resonant you kill resets and scales the world
When you defeat a Resonant, a cutscene plays and restores every enemy you have killed. The event is called the Resonance Cycle. It functions more like Breath of the Wild’s Blood Moon than a difficulty slider, while also making the revived enemies slightly stronger. The city then gains new threats, tougher existing encounters, and rearranged activities.
It also means open-world content doesn’t sit still. Side quests in higher-tier areas can throw level 4 enemy encounters at you in Downtown while you’re still geared for earlier zones. The practical response is to stop before each Resonant fight, hunt down Health and Power Upgrade Points, upgrade weapon forms, and bank a few Talent Points from zone progress.
Clearing The Central Resonant before you properly explore The Park is worth doing, since the ability it grants makes the Mold there far easier to deal with.
Assist Mode has presets and individual combat sliders
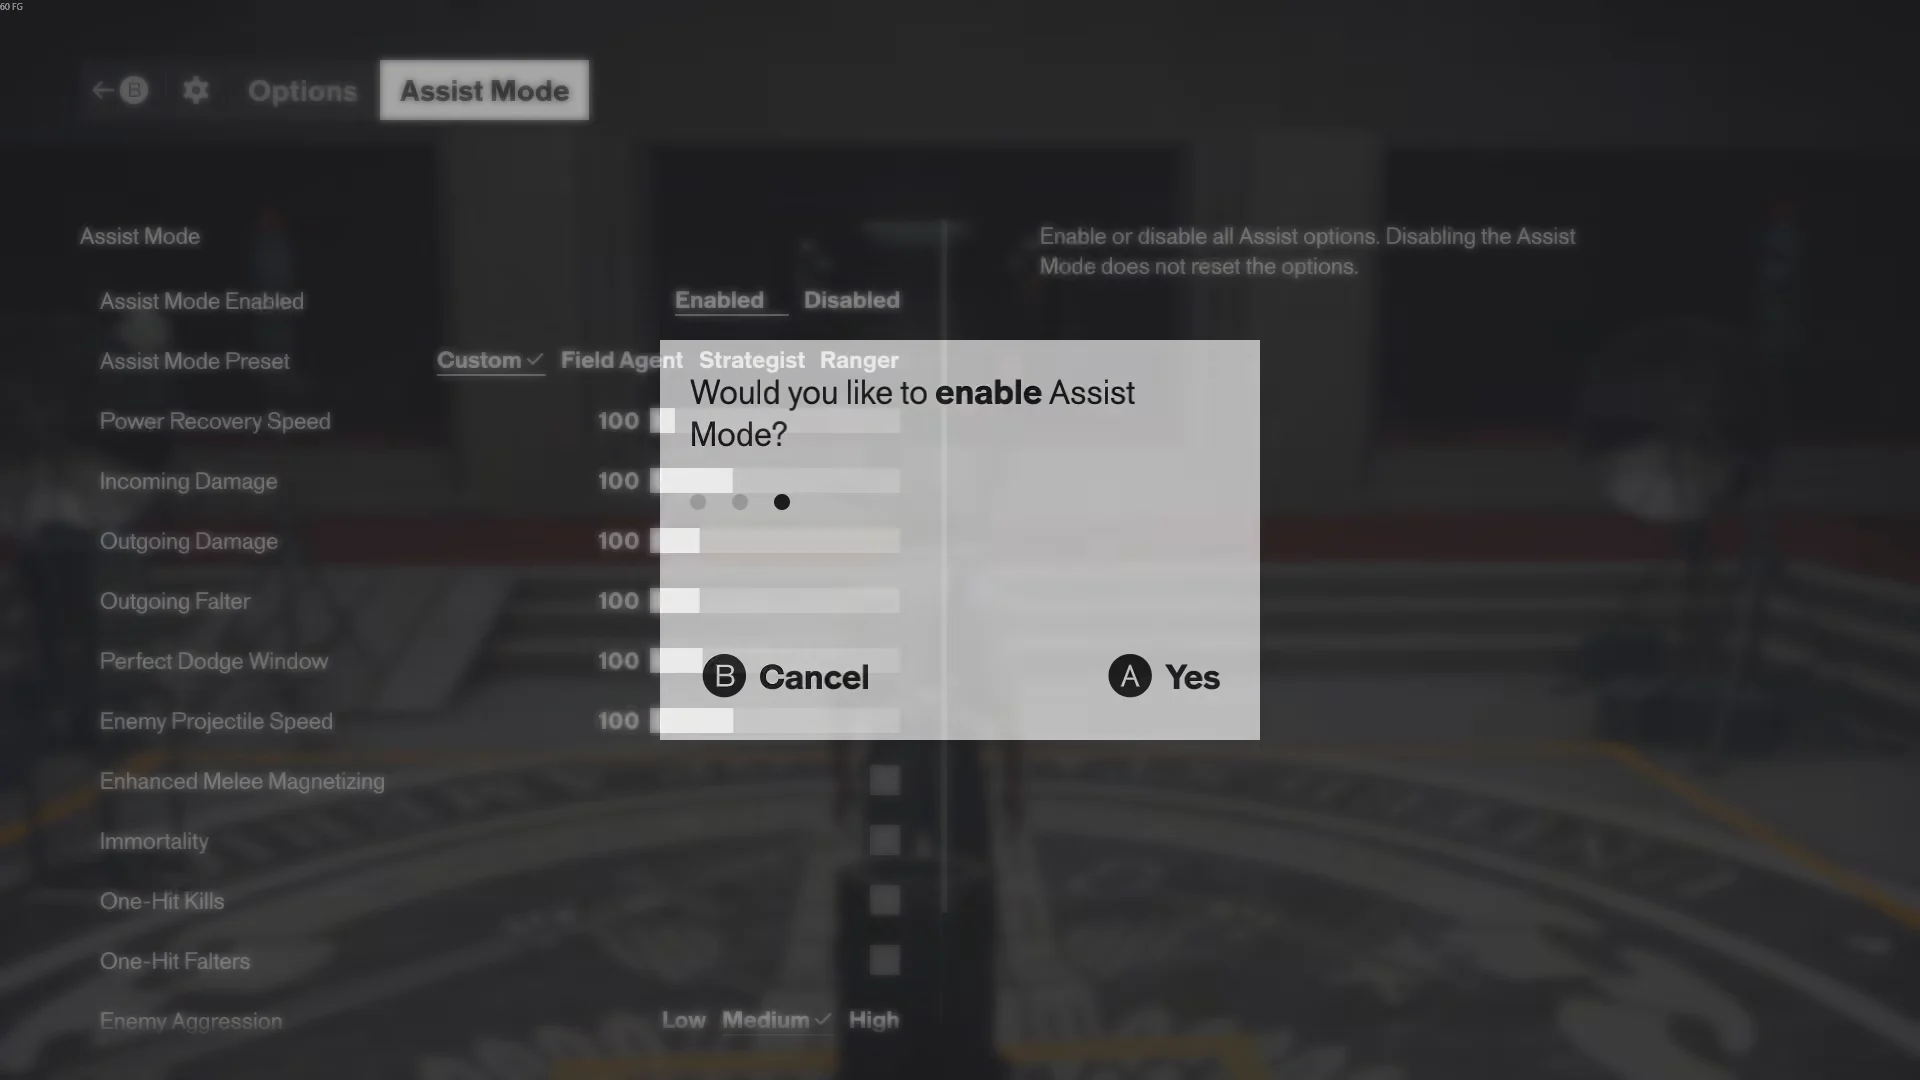
Assist Mode is buried in the options menu and does more than toggle an easy mode. It ships with presets named Field Agent, Strategist, and Ranger, plus custom sliders that let you tune individual parts of combat rather than dropping the whole difficulty. Enabling it brings up a confirmation dialog first.
If one specific thing is blocking you — a boss’s damage output, a stagger window, the pace of a long Hiss fight — the sliders are the surgical option.
One last thing that shapes how you approach all of it. Remedy has confirmed you won’t unlock everything in a single run, and some rewards push Dylan toward a specific playstyle, so specialising is the intended outcome rather than a mistake. Multiple save slots exist this time around, which means a second, differently built campaign can run alongside your first without overwriting anything.