Compressing files into a zip format is a convenient way to package multiple files or folders into a single file for easier sharing or storage. While Windows 10 natively supports zip files, the process of creating one might not be immediately apparent to all users. This guide will walk you through the straightforward steps to create a zip file on your Windows 10 computer.
Steps to create a zip file in Windows 10
Step 1: Open File Explorer and navigate to the location of the files and folders you want to compress. Select the items you wish to include in the zip file. To select multiple files or folders, hold down the Ctrl key and click on each item.
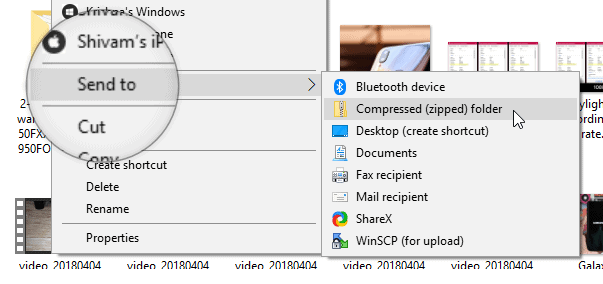
Step 2: With your files and folders selected, right-click on any one of them to open the context menu. Hover over the Send to option, then click on Compressed (zipped) folder from the submenu.

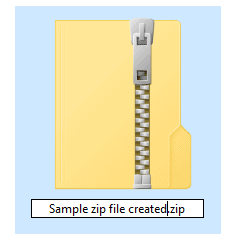
Step 3: Windows will immediately create a new zip file in the same directory. The default name of the zip file will be highlighted, allowing you to rename it. Type in your desired file name and press Enter to save it.

Creating zip files in Windows 10 is a simple process that can help you efficiently manage and share multiple files. With these steps, you can easily compress your files without the need for additional software.
