
Having a virtual assistant like Cortana on your PC is cool, but when it tries to force you to use the Edge browser and Bing search, the whole idea gets less interesting. And the next thing you want to do is disable Cortana on your Windows 10 PC.
But of course, Microsoft doesn’t want Windows users to disable Cortana. That is why the option to disable Cortana on Windows 10 was removed from Windows 10 version 1803 update.
Thankfully, it’s still possible to disable Cortana by tweaking the Local Group Policy on Windows 10 Pro/Enterprise editions, and via a registry hack on Windows 10 Home edition.
How to disable Cortana with a registry edit
Note: This method works only on Windows 10 Home edition devices.
- Press Win + R keys together to open the Run command box.
- Type regedit and click OK.

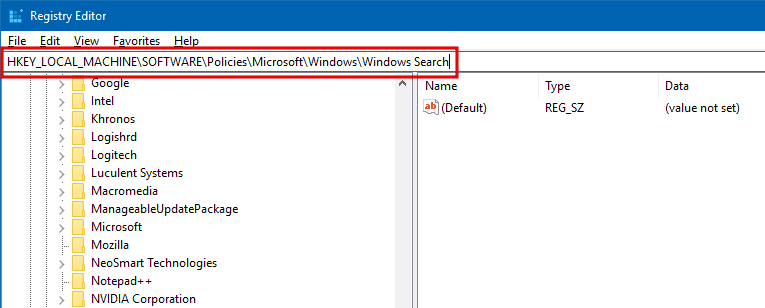
- In the address bar, paste the following address and hit enter.
HKEY_LOCAL_MACHINESOFTWAREPoliciesMicrosoftWindowsWindows Search
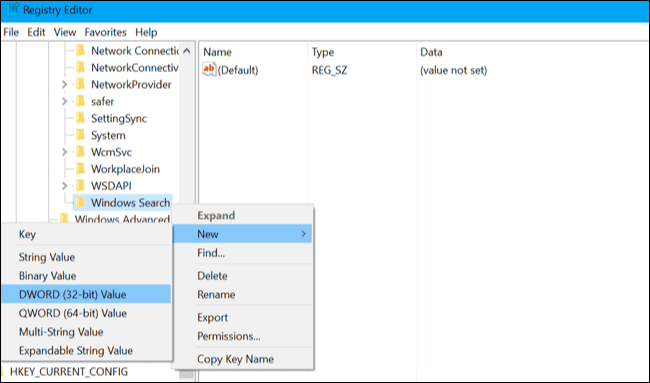
- Right-click on the Windows Search folder located in the left pane » select New » select DWORD (32-bit) Value.
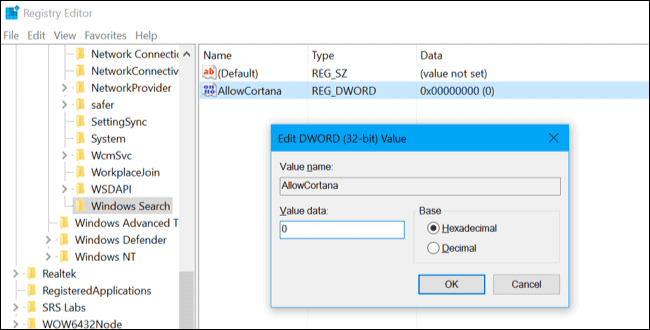
- Set the following values and hit OK:
- Value name: AllowCortana
- Value data: 0
- Base: Hexadecimal
- Now close the Registry Editor, and restart your PC to let the changes take effect.
After the reboot, Cortana should disappear from your PC.
How to Disable Cortana through Local Group Policy
Note: This method works only on Windows 10 Pro and Enterprise edition devices.
- Press Win + R keys together to open the Run command box.
- Type gpedit.msc and click OK.

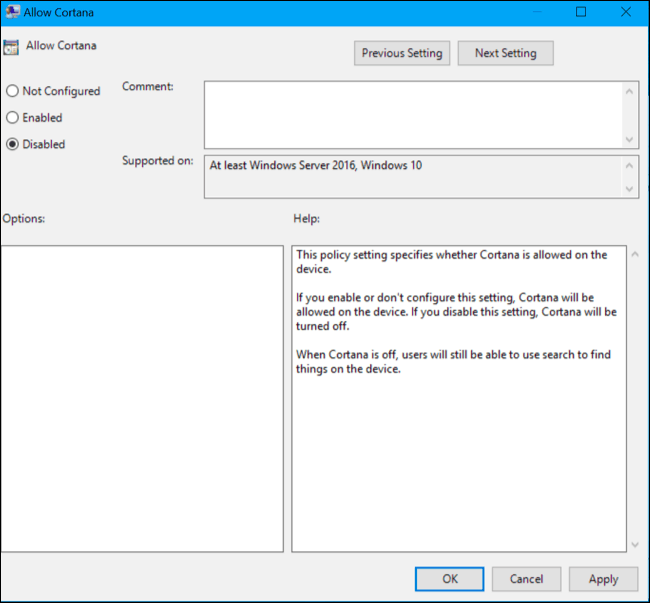
- Navigate to Computer Configuration » Administrative Templates » Windows Components » Search » select the “Allow Cortana” setting in the right pane.
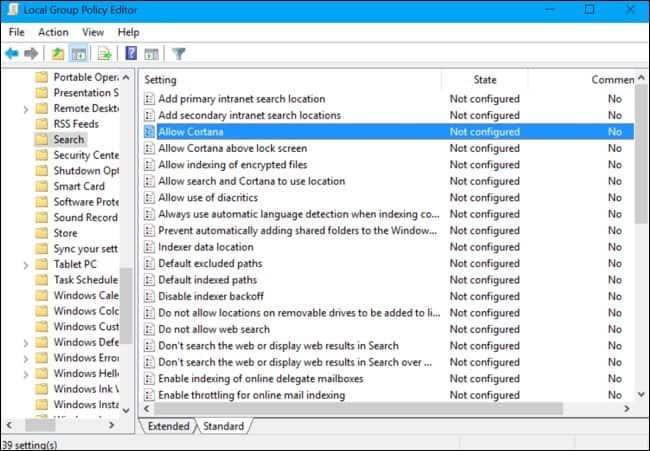
- Double-click on Allow Cortana setting, click the Disabled option, then click Apply and then finally click OK.
- Now close the Local Group Policy Editor, and restart your PC to let the changes take effect.
That’s all! Cortana should be disabled on your Windows 10 PC now.


