Windows 10 has a lot of good features. Since, its release in 2015, there were a number of changes and features added through new updates. But it’s also plagued with numerous issues. The non-working of the ‘Start Menu’ on Windows 10 is also one such issue. It stops working and becomes non-responsive to mouse clicks and keyboard shortcuts.
There are many ways to fix the Start Menu in Windows 10. We have mentioned them below
Restart Windows Explorer
Windows Explorer also known as File Explorer is used to explore files on the computer. It also has the capability to control the Start Menu, Taskbar and other applications.
If the Start Menu is not working, restarting the Windows Explorer might fix the issue. You can restart it through the Task Manager.
Press Ctrl+Alt+Del on your keyboard and click on the ‘Task Manager’ option.
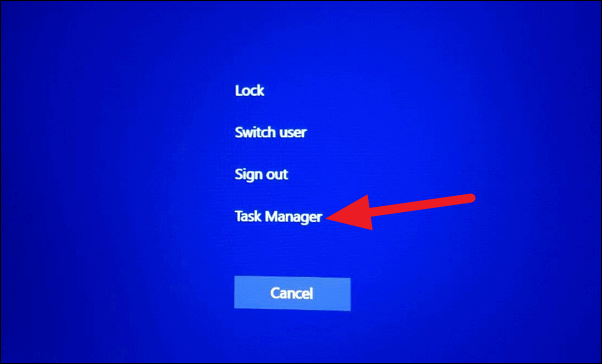
It will show you a warning box asking you to confirm opening Task Manager. Click on the ‘Yes’ button.
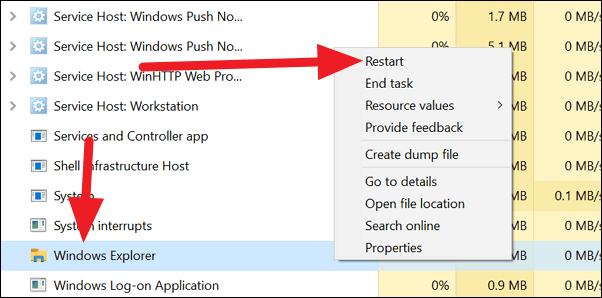
It will open the ‘Task Manager’. You will see the list of programs that are running on your PC. Scroll through the list to find ‘Windows Explorer’. Right-click on it and click on the ‘Restart’ option.
You will notice a brief flash while ‘Windows Explorer’ is restarting. After that, try opening the Start menu, it work as usual. If not, try the next fix.
Repair Corrupt or Missing Windows System Files
Accidents do happen. Maybe you have accidentally deleted important system file while you are curiously going deeper into the system files or an update might have corrupted an important system file.
In such a case, restoring the deleted or corrupted Windows file might fix the Start menu issue. You can do this using Command Prompt.
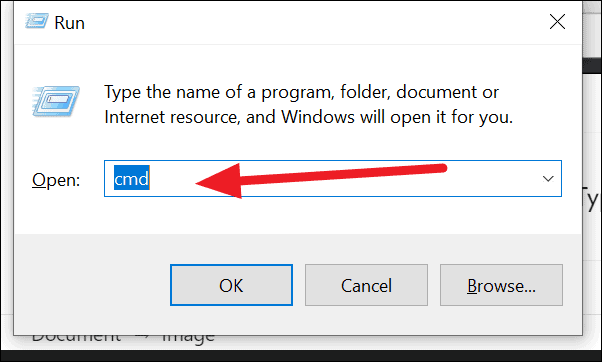
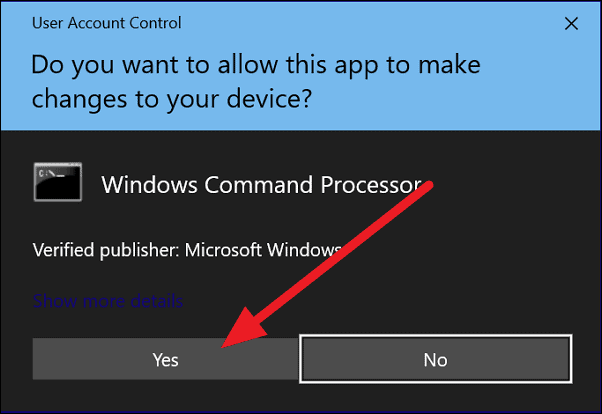
To open Command Prompt, press Windows + R on your keyboard and type cmd in the text box and press Ctrl+Shift+Enter on the keyboard to open it with administrator settings.
It will show you a warning box. Click on the ‘Yes’ button.
In the Command Prompt window, type the following command and press Enter.
sfc /scannow
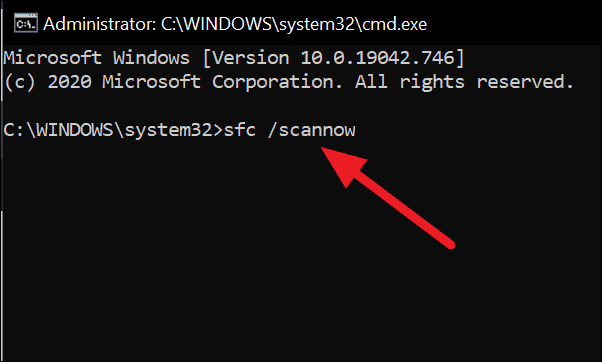
The command will initiate the ‘System File Checker’ process which will scan your PC to find any corrupt or missing files. The entire scan process will take 5-10 minutes.
If it found any files missing or corrupted, it will replace them or correct them. If it does not find any problem, it shows the same on the Command Prompt window.
After the process is finished, restart your computer and see if the Start menu problem is resolved. If not, follow the next method.
Reset the Start Menu
Resetting the Start Menu entirely might fix the issue. Resetting Start Menu alone will not be possible. You have to reset even the default Windows 10 apps.
To reset the Start Menu and default Windows 10 apps, you have to open PowerShell as an administrator as Command Prompt cannot run the commands to reset Start Menu.
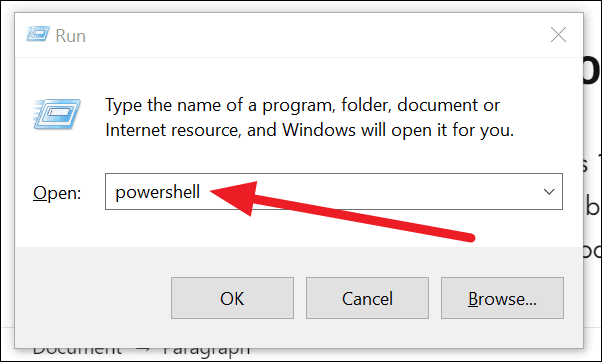
To open PowerShell with administrator controls, open the Run box by pressing Windows + R on your keyboard and enter powershell in the text box. Then press Ctrl+Shift+Enter.
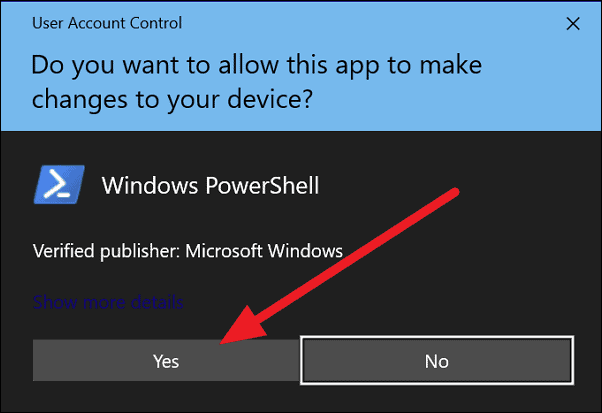
You will see a dialog box with a warning. Click on the ‘Yes’ button to continue opening PowerShell with administrator controls.
In the Powershell window, copy and paste the following command and run it by pressing Enter.
Get-AppXPackage -AllUsers | Foreach {Add-AppxPackage -DisableDevelopmentMode -Register "$($_.InstallLocation)\AppXManifest.xml"}It will take 5-10 minutes to reset. Do not close PowerShell until it is completed.
When the process is completed, close the PowerShell and restart your PC. Check if the start button is working now. If it does not, try the next method.
Uninstall Dropbox
If you use Dropbox on Windows 10, there is a possibility that it lead to the non-working of ‘Start Menu’ or the Windows button. This doesn’t happen very often but some users have complained that the issue occured because of installing Dropbox.
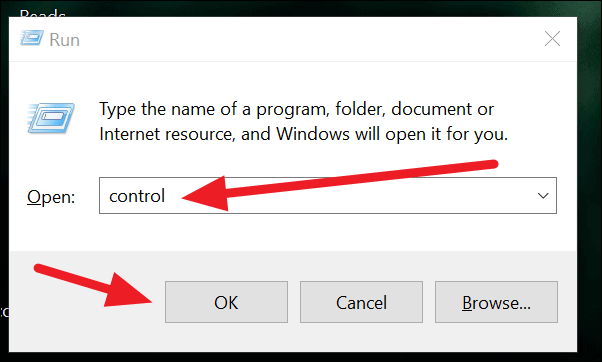
Uninstalling Dropbox fixes the issue. To uninstall Dropbox, open the Run box by pressing Windows + R on the keyboard and type control and click on the ‘Ok’ button.
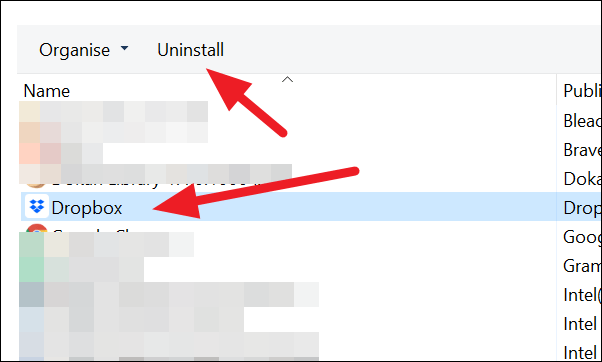
It will open the ‘Control Panel’. Click on ‘Uninstall a program’ in the ‘Programs’ section in the Control Panel.

It will show you the list of programs installed on your PC. Click on the Dropbox app and then click on the ‘Uninstall’ button at the top of the list.
Then follow the instructions shown on the screen to uninstall the app.
Edit Windows Registry
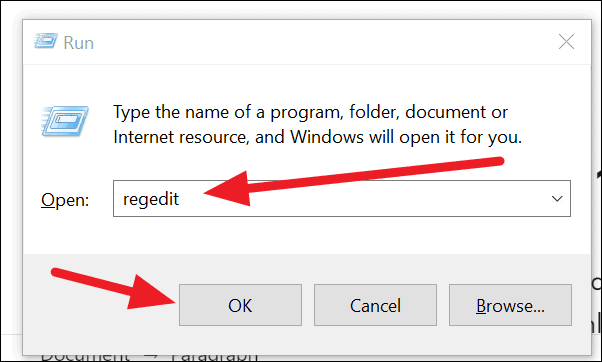
There are many chances that editing Windows Registry might fix the issue. To edit the ‘registry’ open the ‘Run’ application by pressing Windows + R on your keyboard.
Type regedit in the box and click on the ‘OK’ button.
It will open the ‘Registry Editor’ window. Paste the following address in the address bar and press enter.
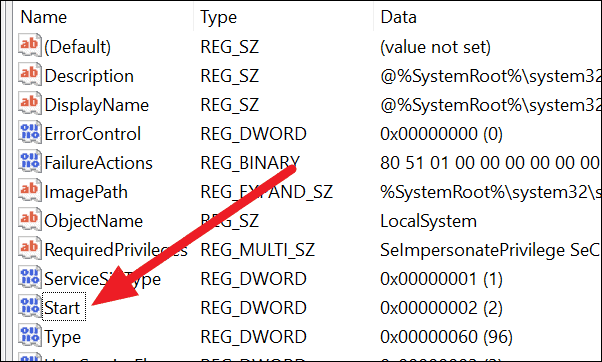
HKEY_LOCAL_MACHINE\SYSTEM\CurrentControlSet\Services\WpnUserService
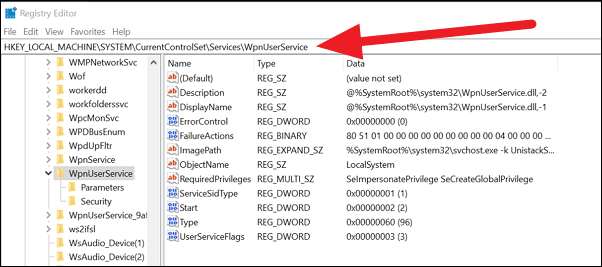
Double-click on the ‘Start’ registry key from the list of services.
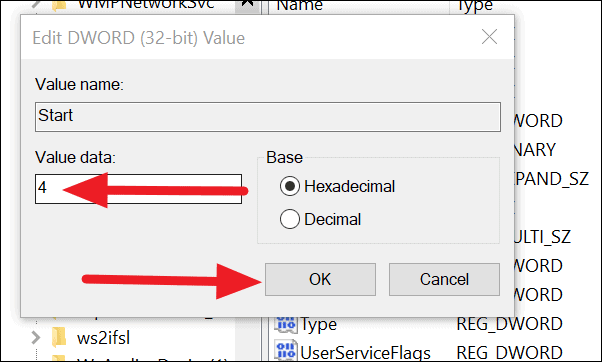
A box will open where you can change/edit the registry value. Enter ‘4’ in the ‘Value data’ field and click on the ‘OK’ button.
Restart your PC and your Start button should work fine.
Check for Windows Update
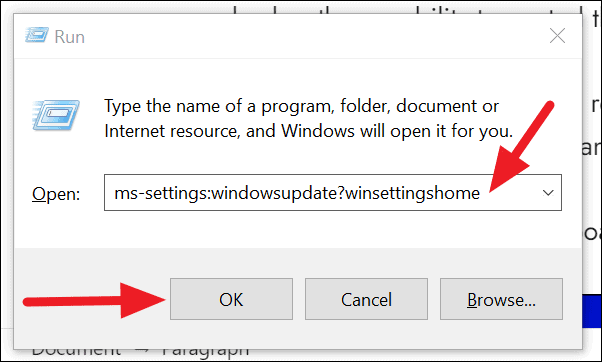
Verify that your system is up to date, press Windows + R on your keyboard. It will open the ‘Run’ application. Type/paste ms-settings:windowsupdate?winsettingshome in the box and click on the ‘OK’ button.
It will open ‘Windows Update’ page. Click on the ‘Check for updates’ button.
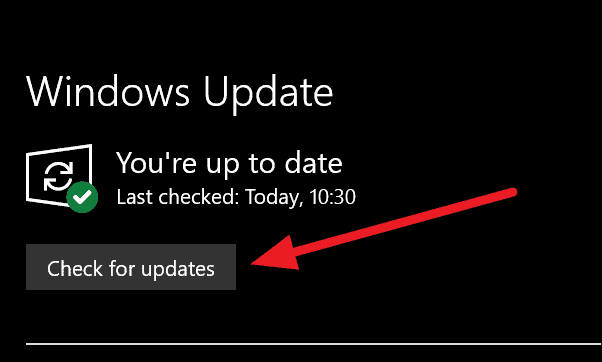
It will check and notify you if there are any updates available. Install the updates and see if fixes the problem.
Reset Windows 10
If none of the fixes above worked, the final fix you have is to reset Windows 10. Remember, this method must only be tried when no other fix work in resolving the issue.
Resetting Windows 10 takes back your PC to the position it was when you installed the OS. It removes all the drivers and programs you have installed. The data you stored on other local disks other than the disk which has Windows files will remain intact.
To be in safer side, backup your data to an external hard drive or online cloud drives.
After completing the backup, open PowerShell with administrator settings (like in the previous methods).
In the PowerShell window, enter systemreset and press the Enter button on your keyboard.
It will show you options to keep your files or remove everything. If you want to keep your files and reset everything, Click on ‘Keep my files’ option. If not, click on ‘Remove everything’.
When you have made a choice, it will analyze your PC and show you the list of programs that will be removed. Click on the ‘Next’ button in the bottom-right of the window and follow the instructions to reset your Windows 10.
After resetting your Windows 10, you have to start installing programs you use and do everything to get it back to normal as before. The Start menu will also start functioning.


