
Customizing which applications launch when you sign into Windows 11 can enhance your efficiency by having your preferred programs ready to use. By accessing the Startup folder, you can add or remove programs that run automatically at startup. This guide will walk you through the methods to access the Startup folder and how to add programs to it.
Ways to access the Startup folder
1. Using the Run command
Accessing the Startup folder via the Run command is quick and straightforward.
Enter to open the Startup folder in File Explorer.shell:startup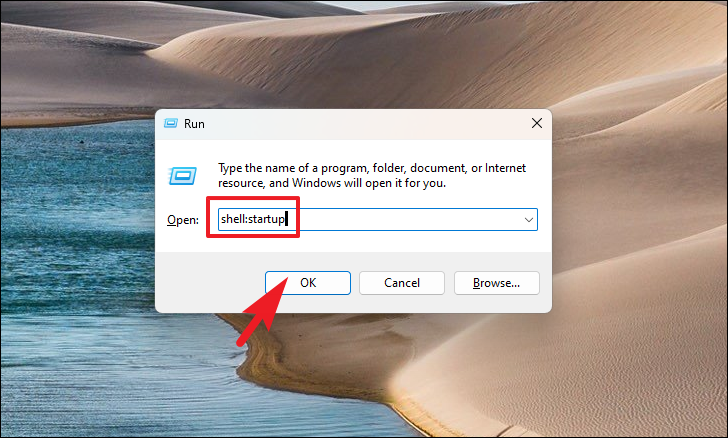
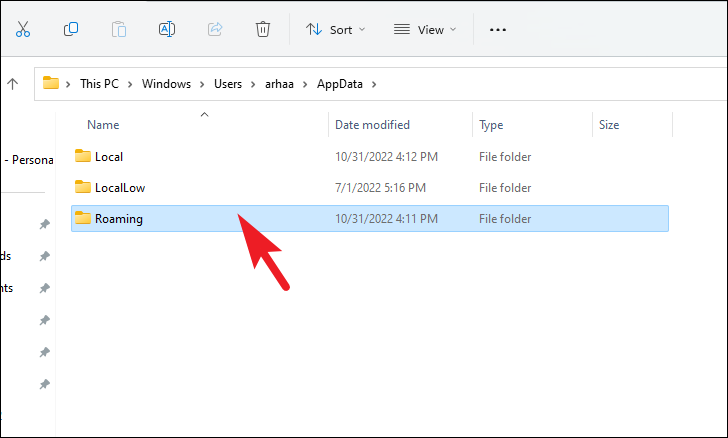
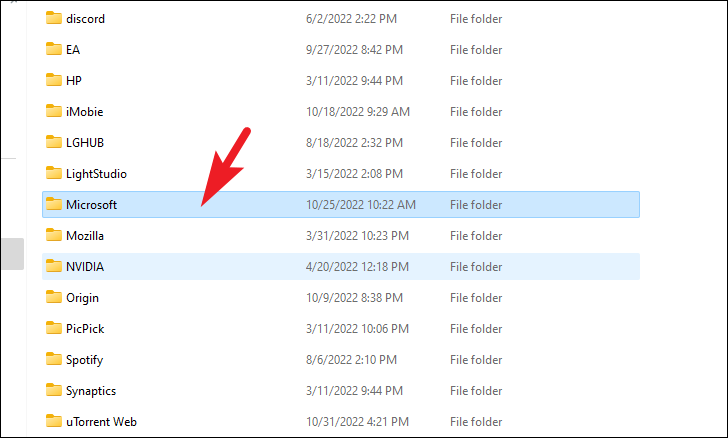
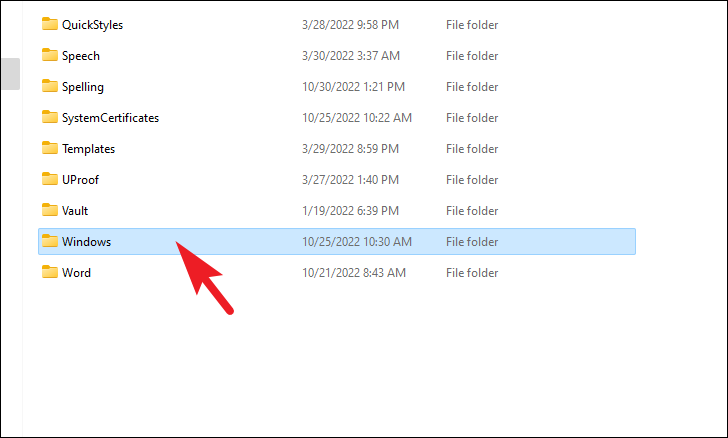
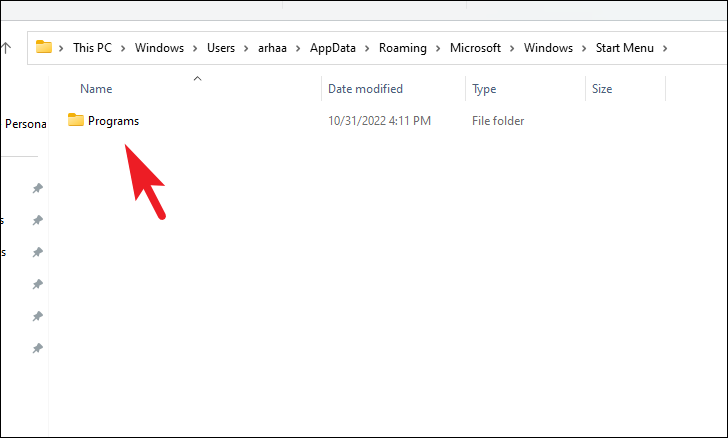
%appdata%\Microsoft\Windows\Start Menu\Programs\Startup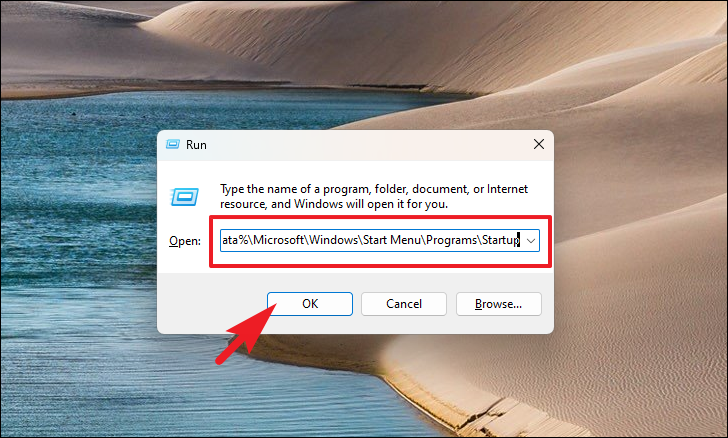
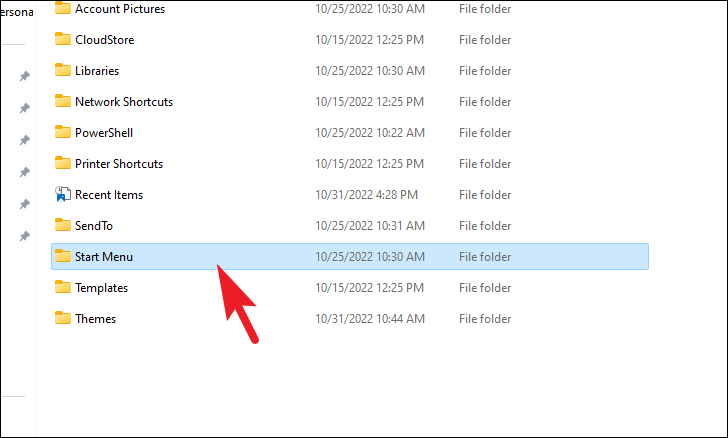
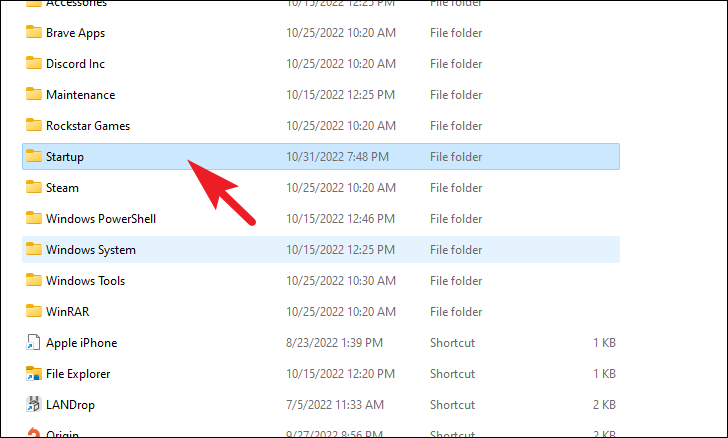
2. Using File Explorer
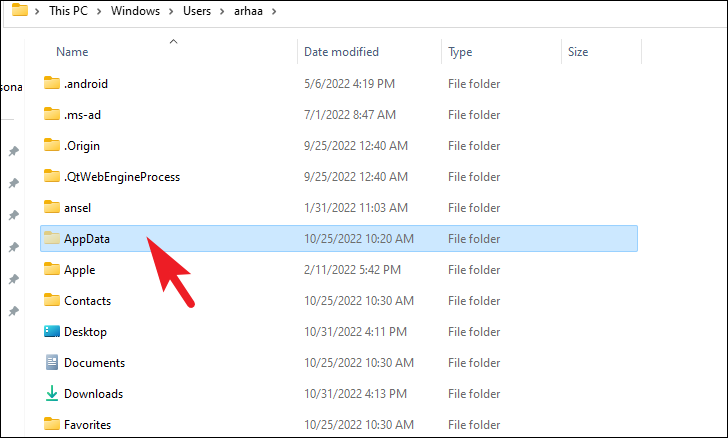
You can also navigate to the Startup folder directly through File Explorer.
This PC icon on your desktop or by pressing Windows+E on your keyboard.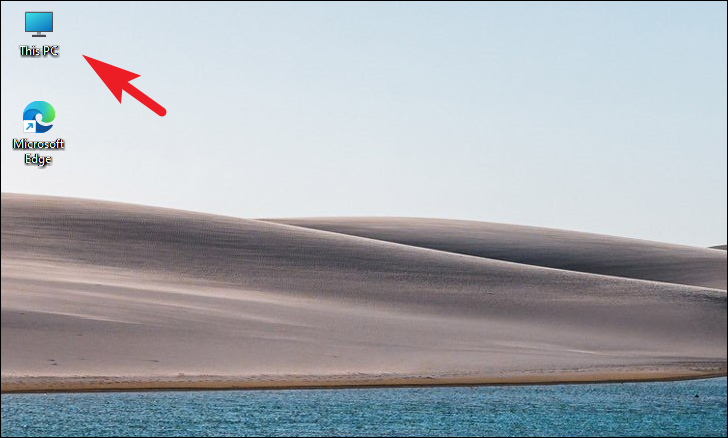
Options.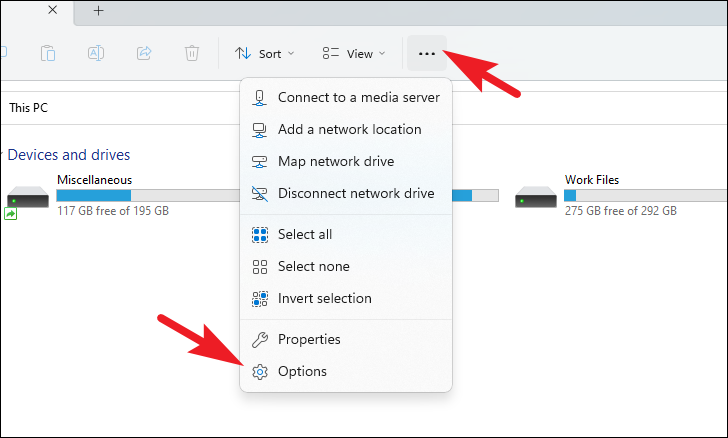
View tab. Under Advanced settings, select Show hidden files, folders, and drives. Click Apply and then OK.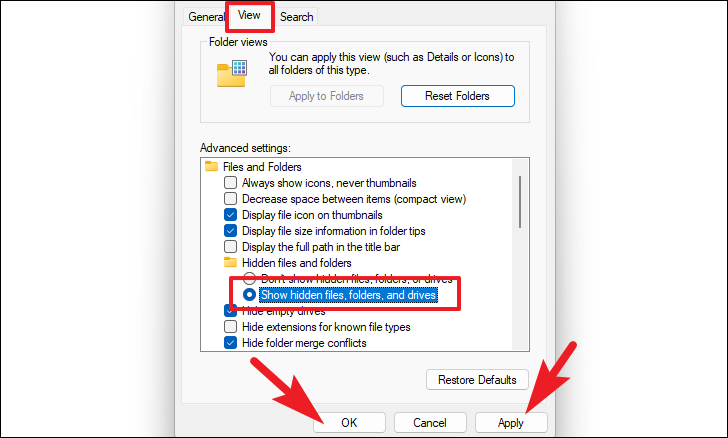
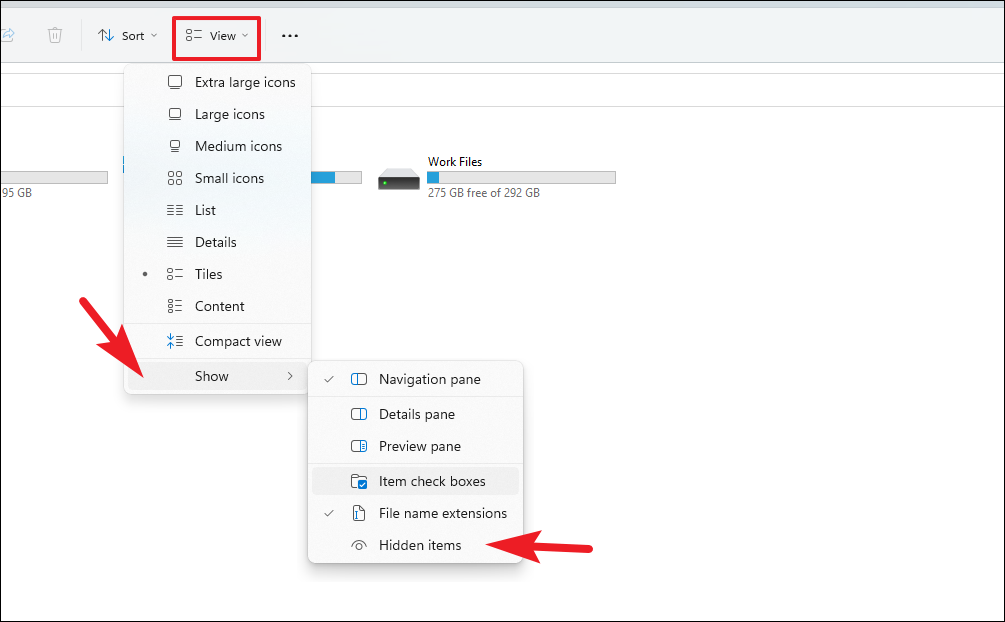
Alternatively, you can quickly show hidden items by:
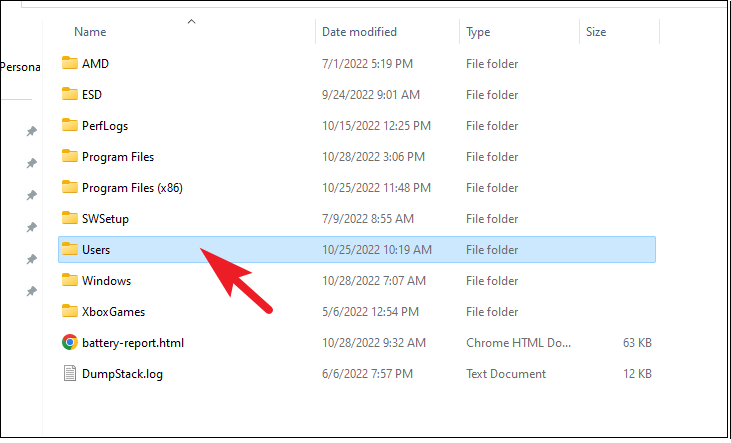
Local Disk (C:) and often marked with the Windows logo.
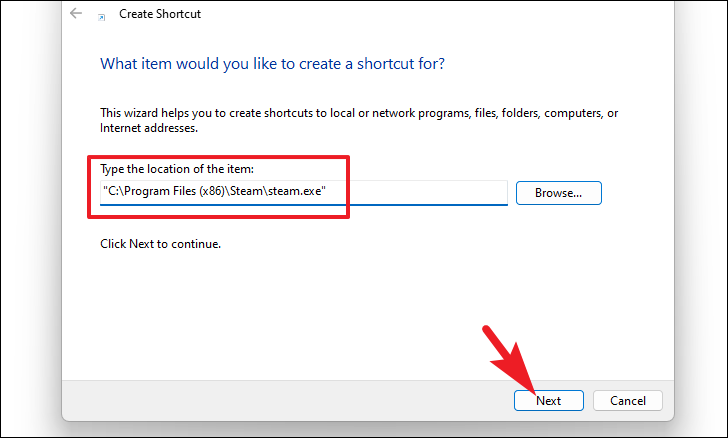
Add programs to the Startup folder
With access to the Startup folder, you can add programs to launch automatically when you sign in to Windows.
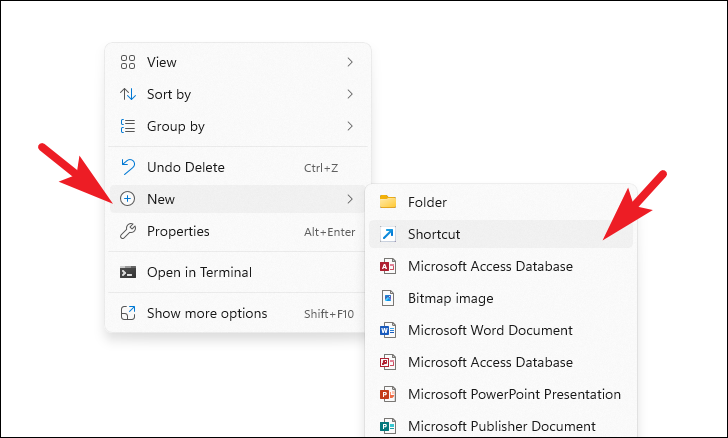
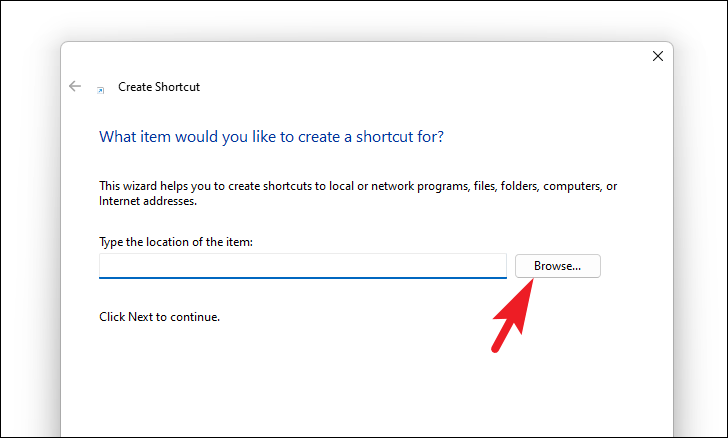
.exe file, and click OK.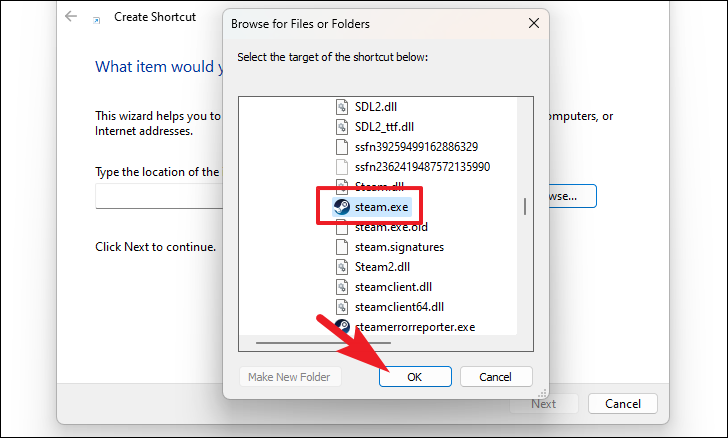
Finish to create the shortcut in the Startup folder.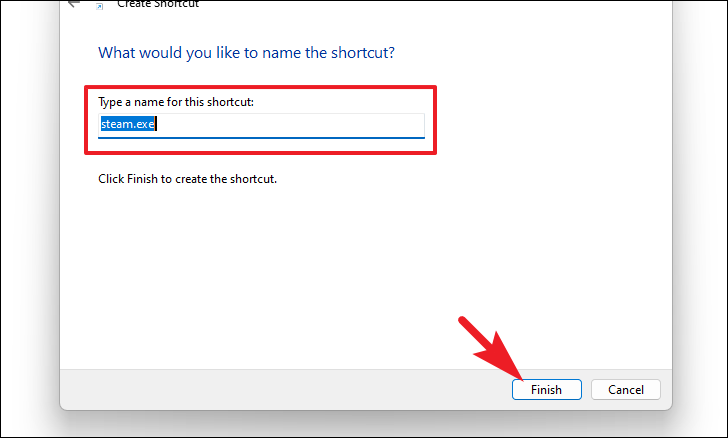
The program you added will now launch automatically every time you sign in to your Windows account.
By utilizing the Startup folder, you can ensure your essential applications are ready to use immediately upon logging in, enhancing your productivity and saving time.


