
Microsoft has introduced a new free tool called PC Manager, designed to optimize and clean up Windows 10 and Windows 11 computers. Similar to third-party applications like CCleaner and AVG TuneUp, PC Manager offers a one-click solution to enhance your PC’s performance by cleaning temporary files, managing startup apps, freeing up memory, and more. This lightweight app consumes minimal system resources and helps protect your PC with features like virus scanning and browser protection.
This guide will walk you through downloading, installing, and using Microsoft PC Manager to boost your computer’s performance on Windows 10 and 11.
Downloading and Installing Microsoft PC Manager
Before proceeding, ensure your device is running Windows 10 version 1809 or later, or Windows 11. You can verify your Windows version by navigating to Settings > System > About on your PC.
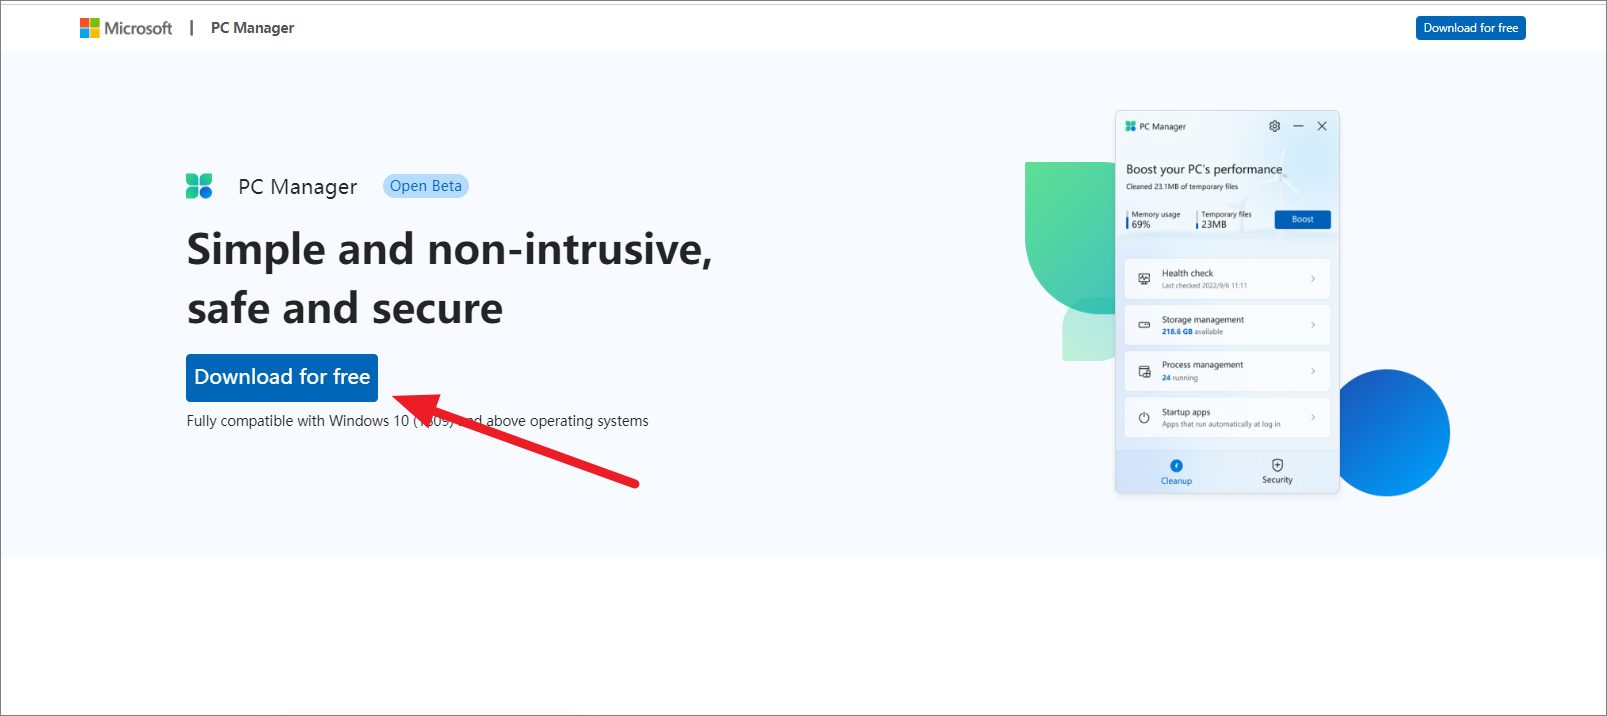
To get started, download Microsoft PC Manager from the official website. Click the ‘Download for free’ button to obtain the installer.
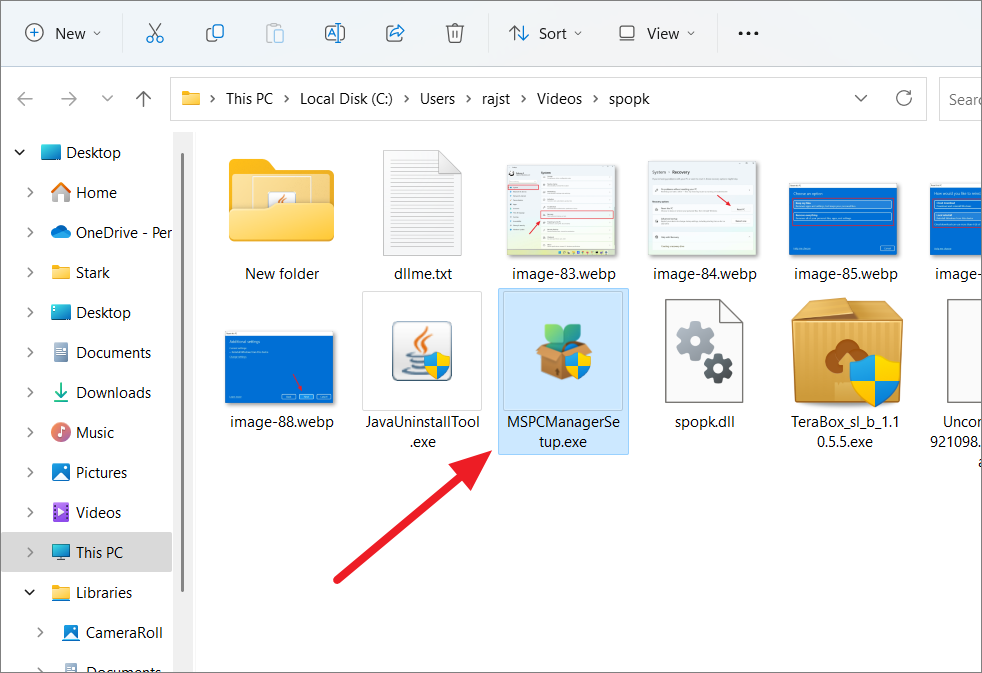
Once the download is complete, run the ‘MSPCManagerSetup.exe’ file to begin the installation.
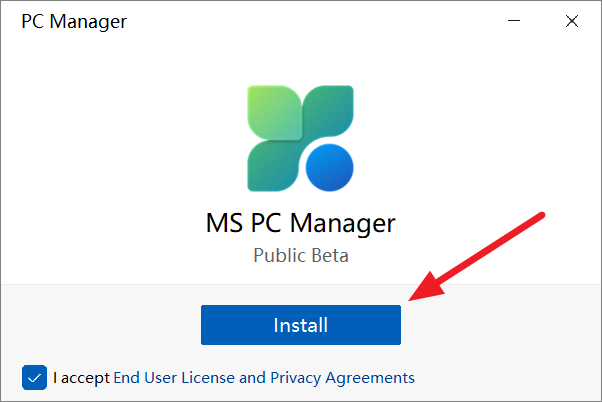
Accept the End User License Agreement by checking the box and then click ‘Install’ to proceed.
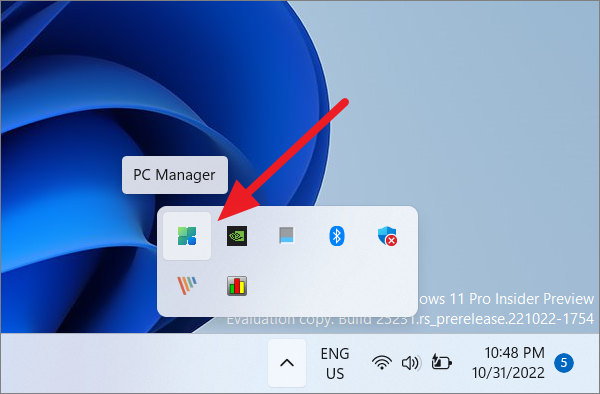
After installation, launch the PC Manager application.

You can open the app from the desktop shortcut or access it from the system tray. PC Manager will automatically run at startup and operate in the background, allowing easy access whenever needed.
Using Microsoft PC Manager
Upon opening PC Manager, you’ll notice two primary tabs at the bottom of the interface: ‘Cleanup’ and ‘Security’. Each tab offers a range of features to optimize your PC.
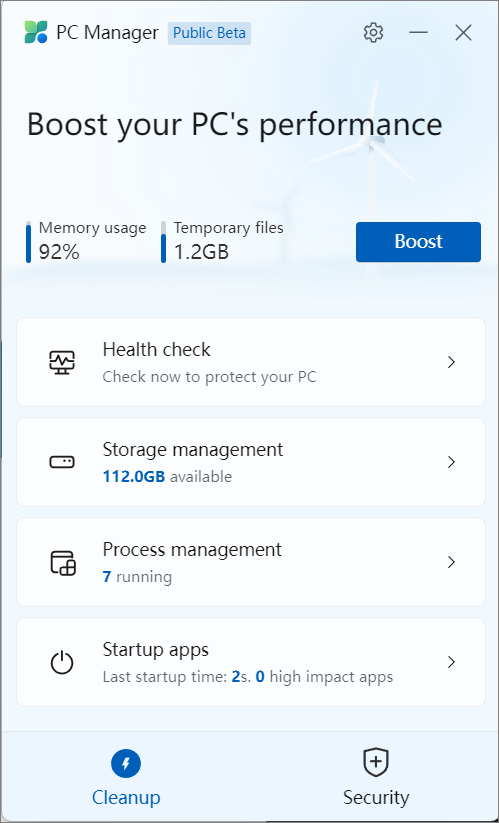
Cleanup Features
The ‘Cleanup’ tab provides several options to enhance your system’s performance:
- Boost
- Health check
- Storage management
- Process management
- Startup apps
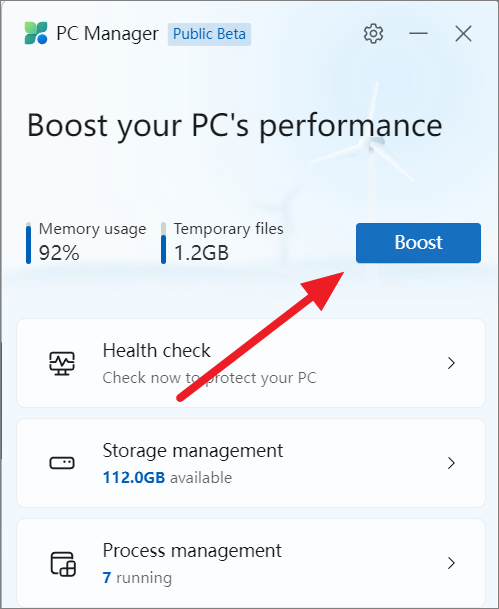
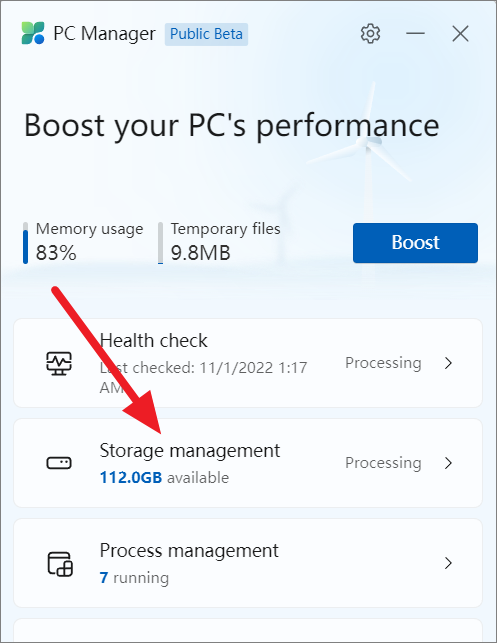
Boosting PC Performance
If you notice high memory usage or accumulated junk files, you can quickly optimize your system. For example, if your PC is using 92% of its memory with 1.2 GB of junk files, it’s likely to perform sluggishly.
Click the ‘Boost’ button at the top of the app to clear temporary files and free up memory. This action can significantly improve your PC’s responsiveness.
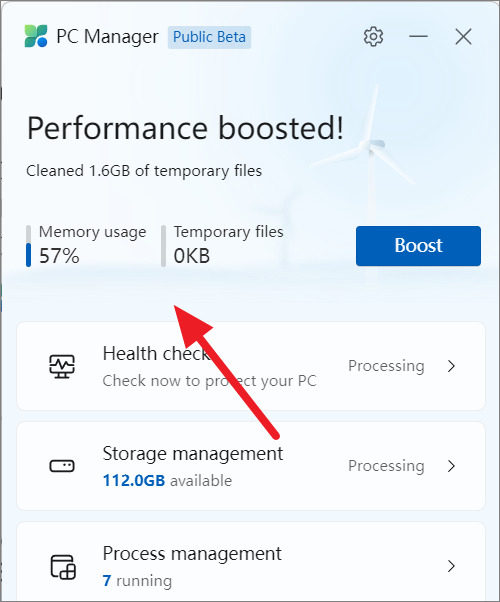
After boosting, you might see memory usage drop to 57%, and temporary files will be removed. This feature is handy whenever your system feels slow.
Performing a Health Check
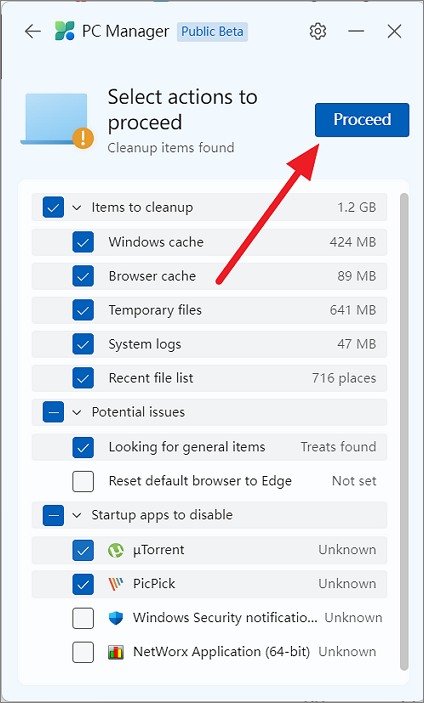
For a comprehensive cleanup, select ‘Health Checkup’. This feature scans for junk files, potential issues, and unnecessary startup apps that might be slowing down your PC.
The scan will identify items like Windows cache, browser cache, temporary files, system logs, and recent file lists. Review the list and select the items you wish to clean.
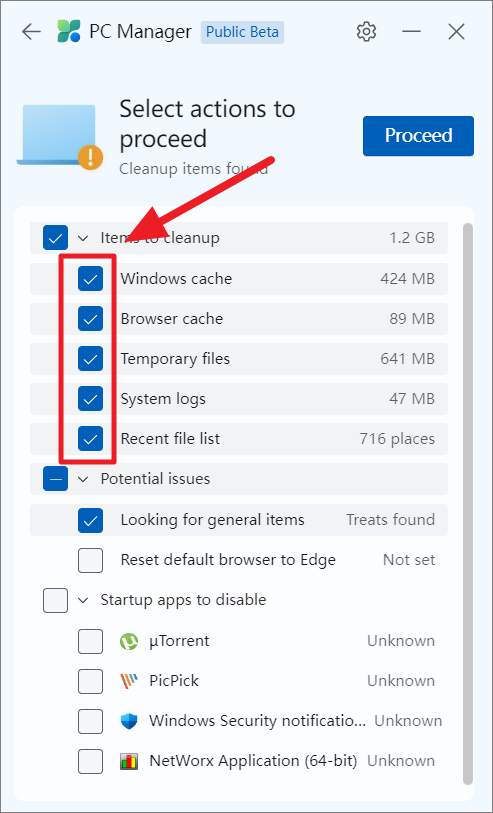
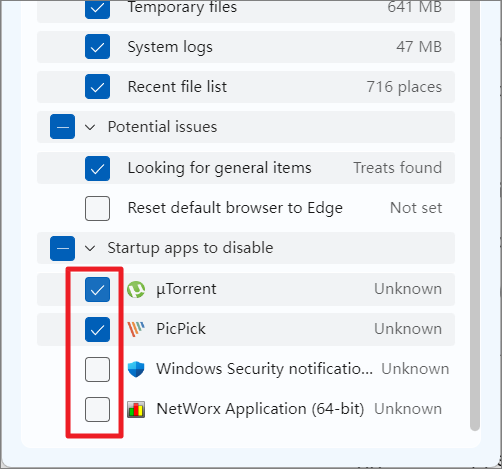
Additionally, it suggests startup apps that you can disable to speed up your system’s boot time.
You may also encounter recommendations to change settings, such as switching your default browser to Microsoft Edge. If you prefer your current browser, you can ignore this suggestion. After making your selections, click ‘Proceed’ to enhance your PC’s health.
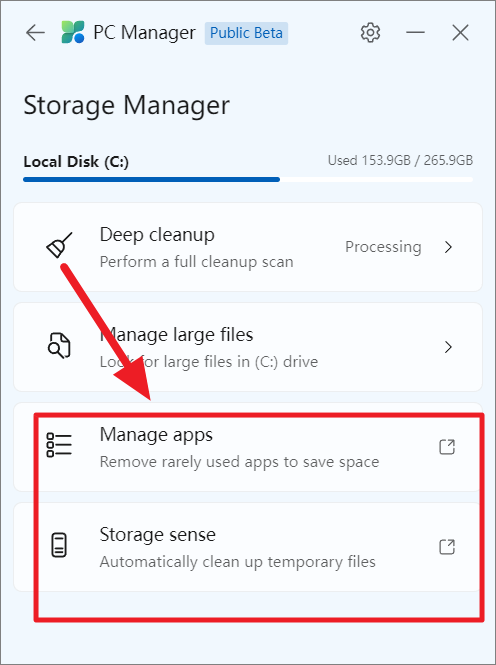
Managing Storage
To free up disk space, choose ‘Storage Management’. This feature offers options to clean up files, manage large files, uninstall unused apps, and configure Storage Sense.
Select ‘Deep cleanup’ for an in-depth scan to find and remove unnecessary files like Windows Update leftovers, error reports, and recycle bin contents. Review the found items, select what you wish to delete, and click ‘Proceed’.
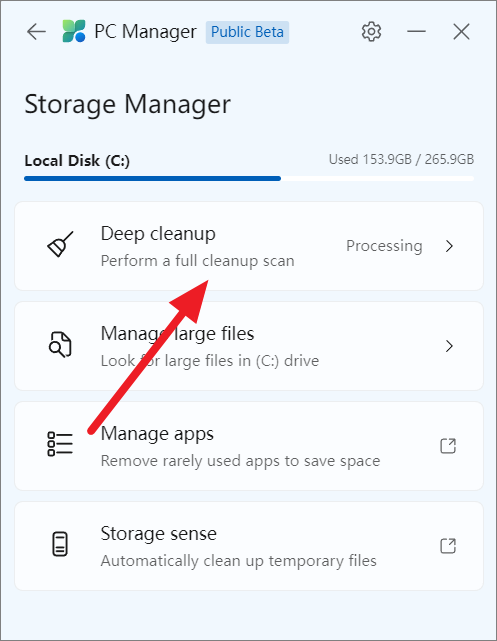
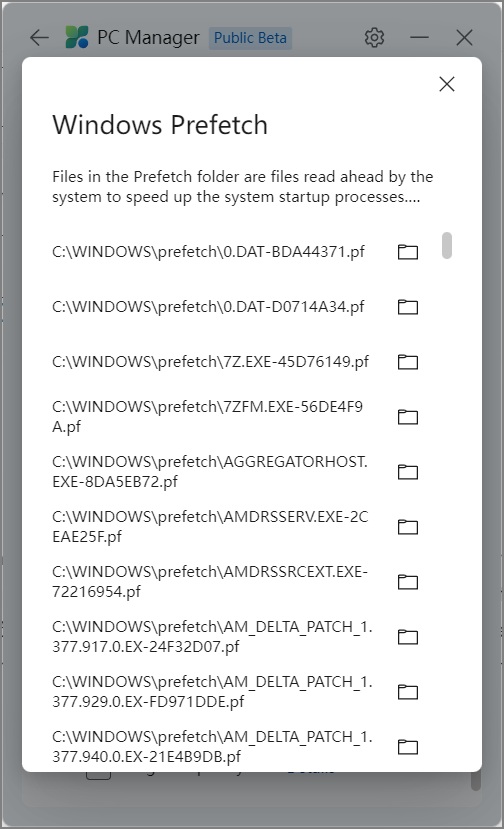
For more details on specific files, click the ‘Details’ link next to each item to see their locations and decide whether to keep or remove them.
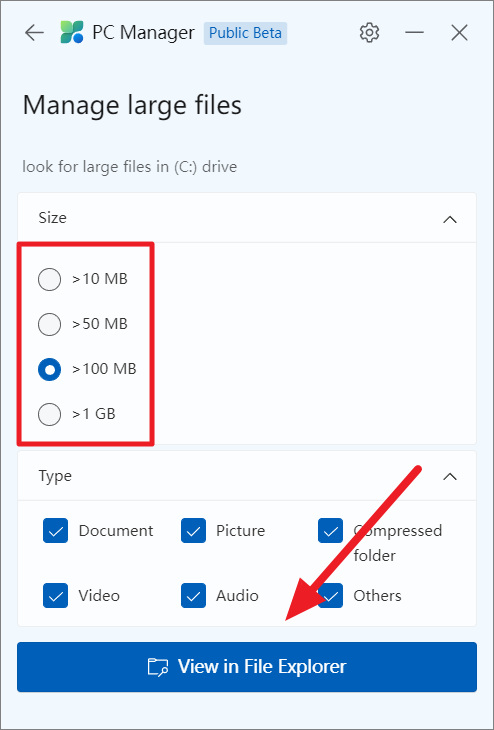
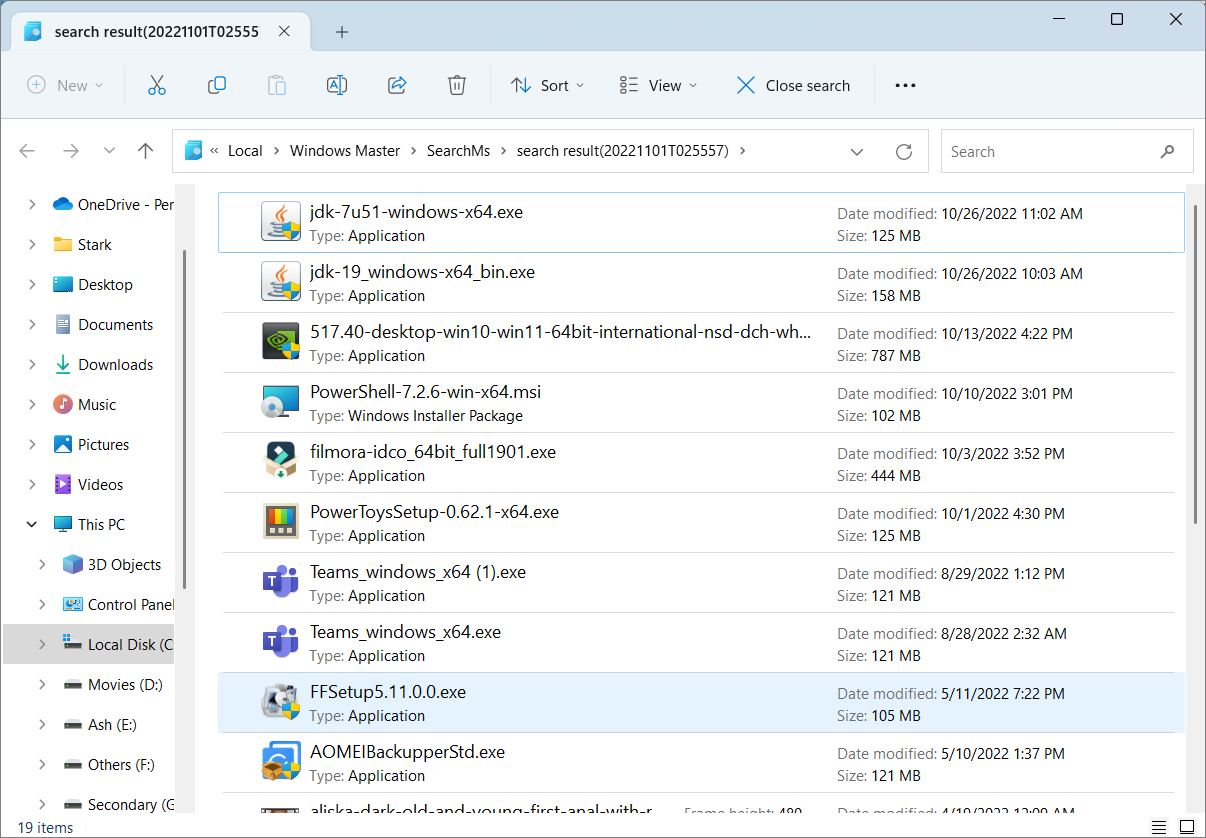
To identify and manage large files consuming significant space, select ‘Manage large files’. Choose the file size criteria (e.g., files larger than 10MB, 50MB, 100MB, or 1GB) and the file types you’re interested in. Click ‘View in File Explorer’ to see these files and decide whether to delete them.
The ‘Storage Management’ section also provides quick access to ‘Manage apps’ and ‘Storage sense’, linking you directly to Windows settings where you can uninstall unused applications and configure automatic cleanup of temporary files, respectively.
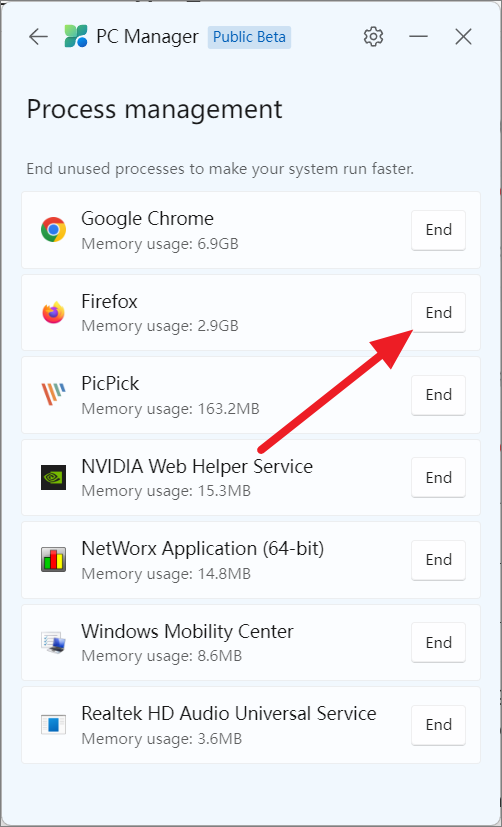
Managing Background Processes
High memory usage by background processes can slow down your PC. Under ‘Process management’, you’ll find a list of resource-intensive processes currently running. To terminate an unnecessary process, click the ‘End’ button beside it. This can help free up memory and improve performance.
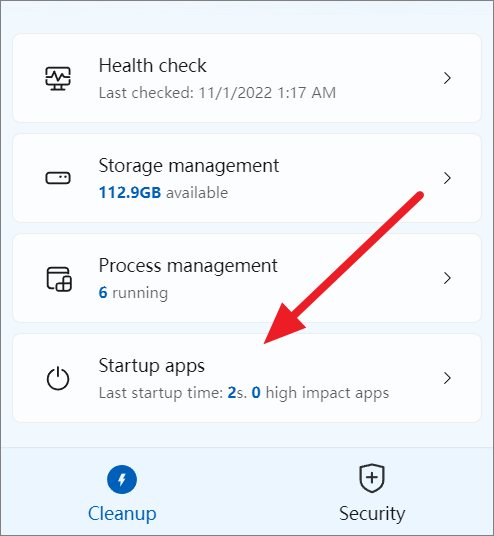
Disabling Startup Apps
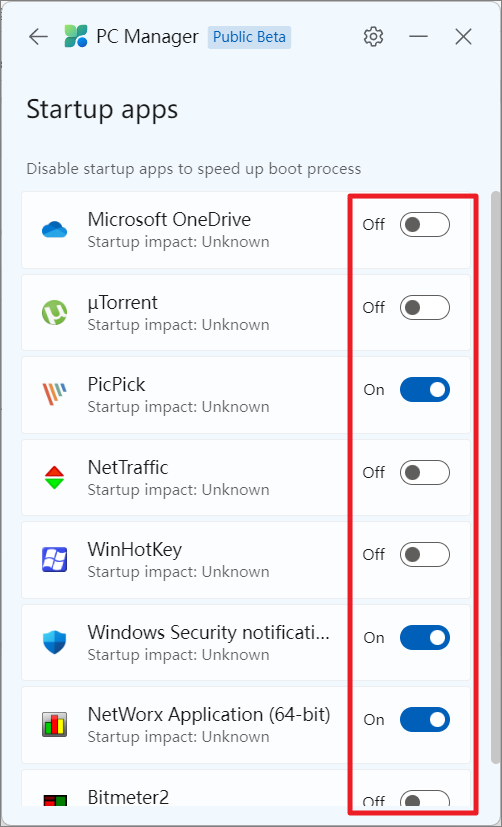
Too many programs launching at startup can significantly slow down your boot time. To manage these, select ‘Startup apps’ from the ‘Cleanup’ tab. Here, you can toggle off the apps you don’t need to start automatically when Windows boots, helping your system start faster and run more smoothly.
Adjust the toggles next to each app to enable or disable them at startup, optimizing your system’s performance from the moment it boots.
Security and Updates Management
The ‘Security’ tab offers tools to protect your PC from threats and keep it updated. Here, you can scan for viruses, manage Windows updates, protect your default browser, and control pop-up notifications.
Scanning for Threats
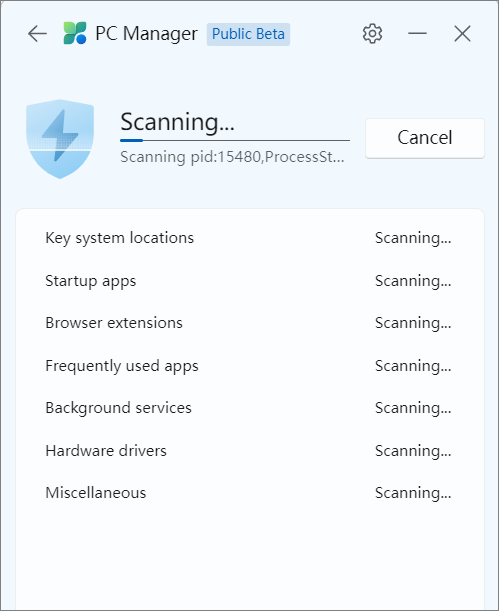
PC Manager integrates Microsoft Defender to help you scan your computer for malware and viruses. Click the ‘Scan’ button on the ‘Security’ tab to perform a quick system scan, checking key areas like system files, startup apps, and browser extensions.
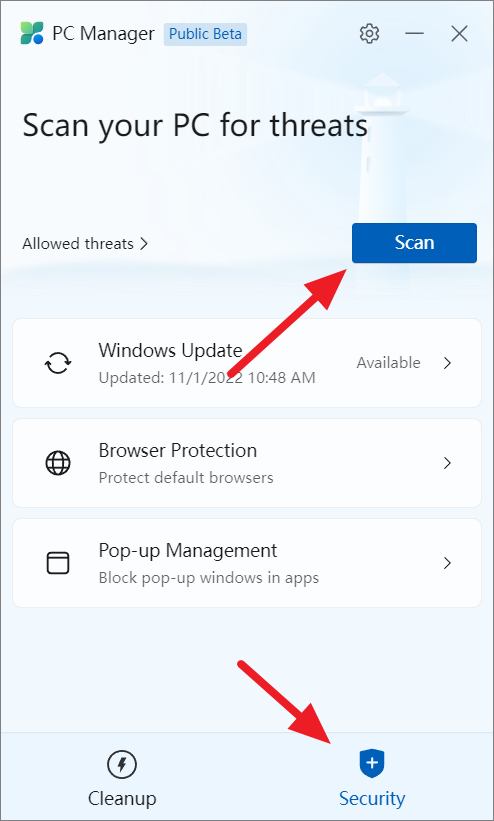
The scan will identify and remove any detected threats. For further details or to manage allowed threats, you can access the Windows Security app through the ‘Allowed threats’ option.
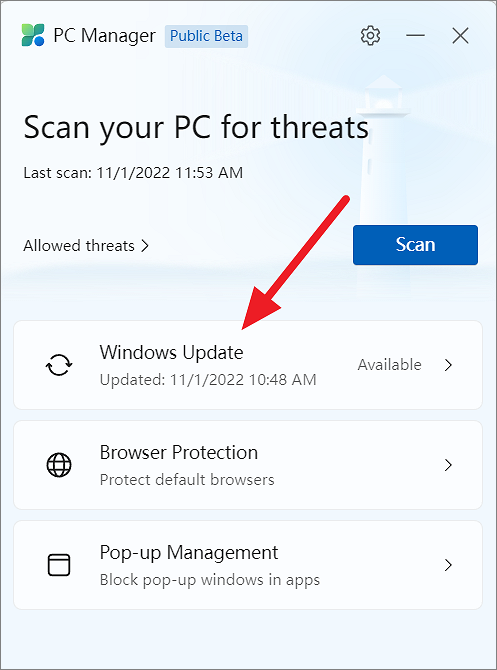
Updating Windows
Keeping your system updated is crucial for security and performance. PC Manager simplifies this by checking for feature updates, quality updates, and driver updates. Click ‘Windows Update’ to view available updates.
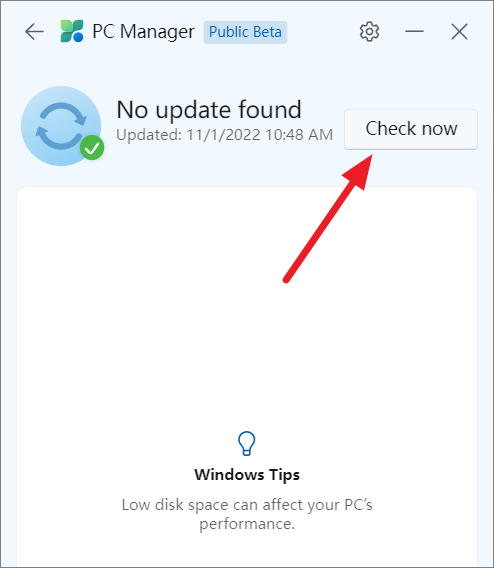
If no updates are displayed, click ‘Check now’ to search for the latest updates. Select the updates you wish to install and click ‘Update’ to proceed.
Protecting Your Default Browser
The ‘Browser Protection’ feature helps safeguard your default browser settings. Enable the ‘Block change by malicious apps’ option to prevent unauthorized programs from altering your default browser.
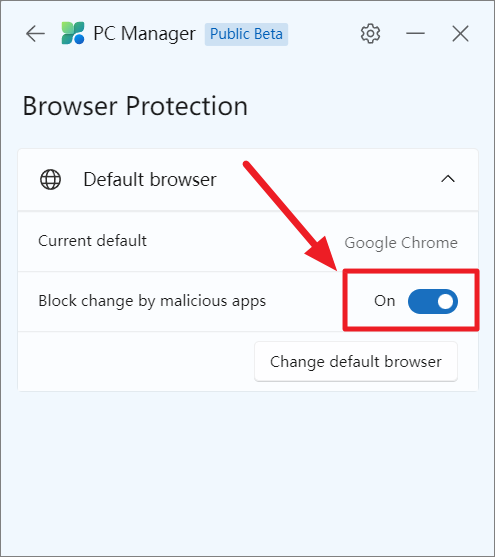
To manually set your default browser, click ‘Change default browser’ and select from supported browsers like Edge, Chrome, or Firefox. Then, click ‘Set as default’ to confirm your choice.

Be aware that if you’re using a browser other than Edge, PC Manager may prompt you to switch. While this is optional, Microsoft Edge is optimized for performance on Windows systems.
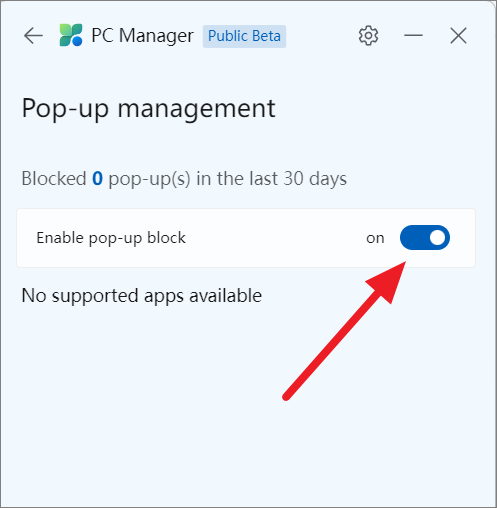
Managing Pop-up Notifications
To reduce distractions from unwanted pop-up prompts within applications, use the ‘Pop-up Management’ feature. Enable the ‘Enable pop-up block’ toggle to prevent these interruptions and maintain focus.
Adjusting PC Manager Settings
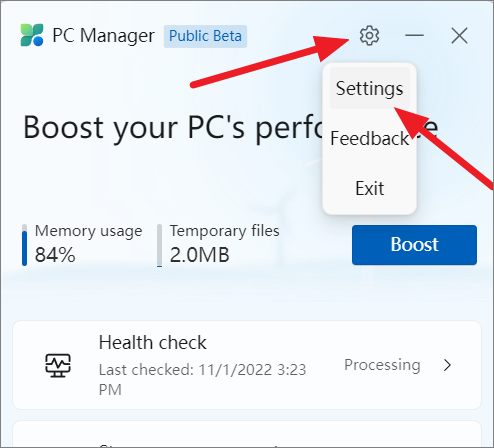
To customize PC Manager’s behavior, click the gear icon at the top of the application and select ‘Settings’.
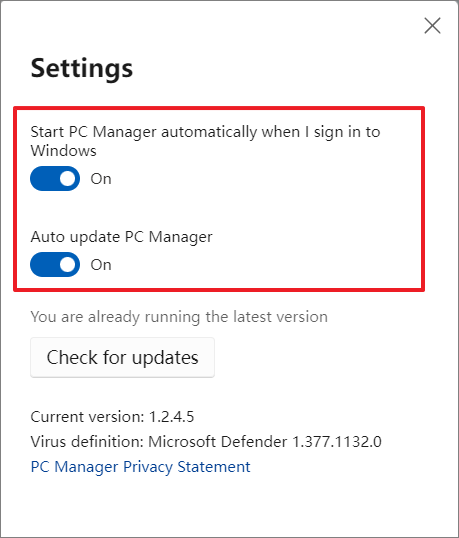
In the settings menu, you can choose whether PC Manager runs at startup and enable or disable automatic updates for the application.
With Microsoft PC Manager, you have a convenient and efficient tool to optimize your Windows 10 or 11 PC. By regularly using its features, you can keep your system running smoothly without relying on third-party applications.


