
Adding multiple user accounts to your Windows 11 PC can be beneficial in various situations. Whether you share your computer with family members or colleagues, having separate user accounts ensures that everyone’s settings and files remain organized and private. Windows 11 provides several methods to add new users, both with Microsoft accounts and as local users. Here’s how you can add another user to your system.
Method 1: Add another user from the Settings app
Start Menu and select the Settings icon from the pinned apps. If it’s not visible, type Settings into the search bar and open it from the results.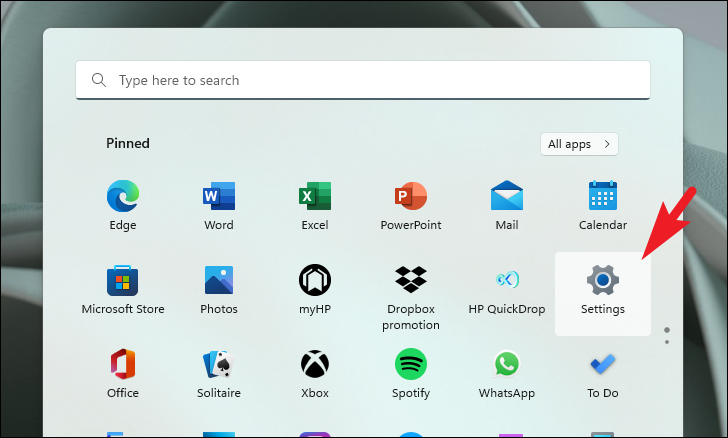
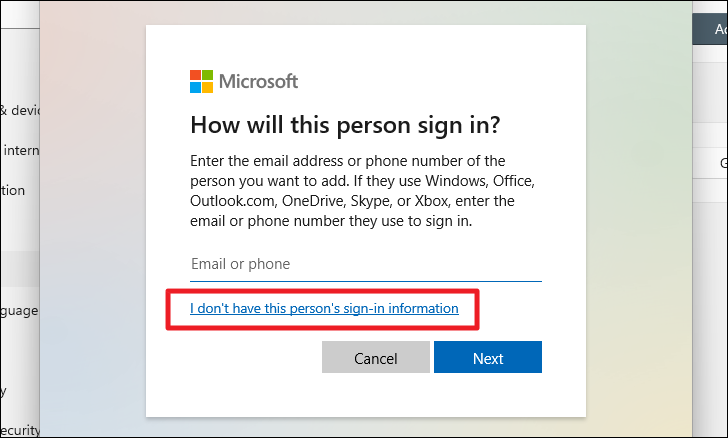
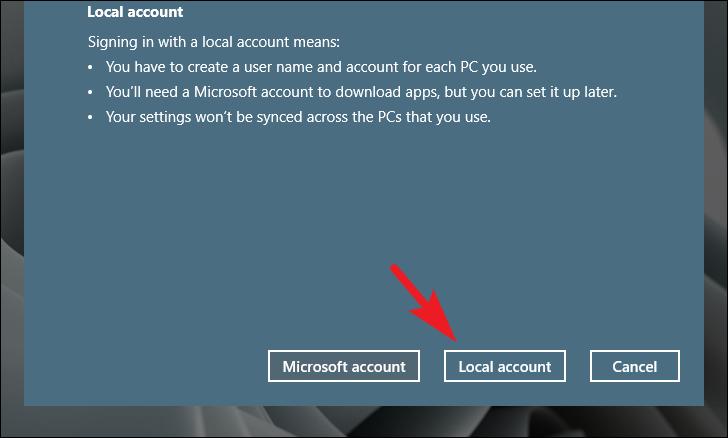
You have the option to add a user with a Microsoft account or create a local user. Adding a Microsoft account allows the user to sync settings and access additional features, but it’s not mandatory.
To add a user with a Microsoft account:
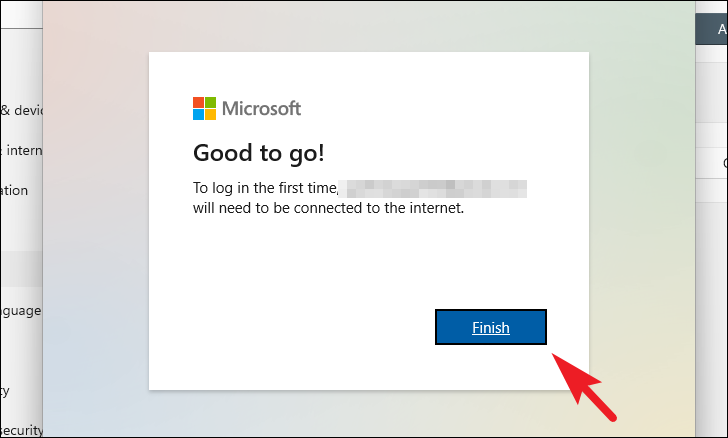
Finish to complete the process. The new user will need an internet connection the first time they sign in.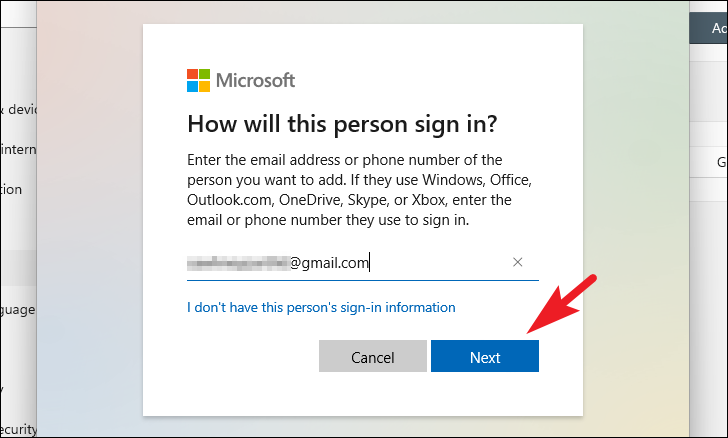
Note: An active internet connection is required the first time the new user signs in.
To add a local user:
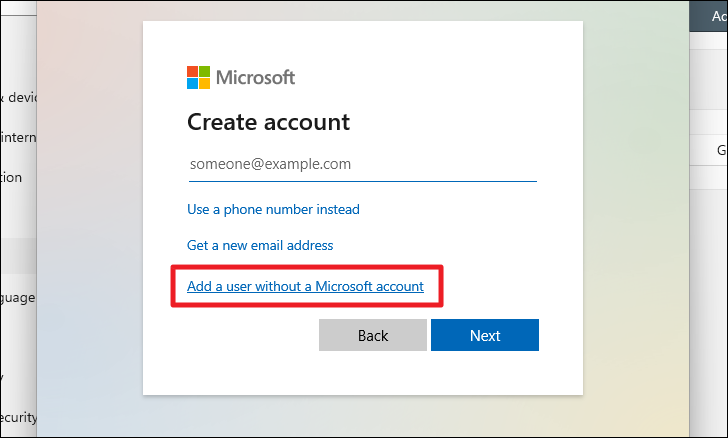
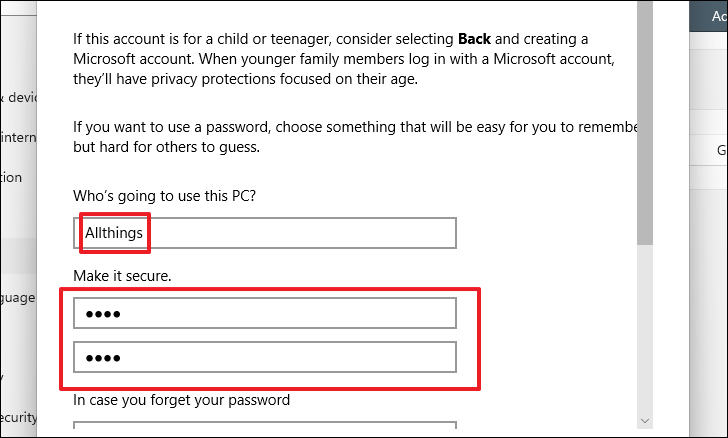
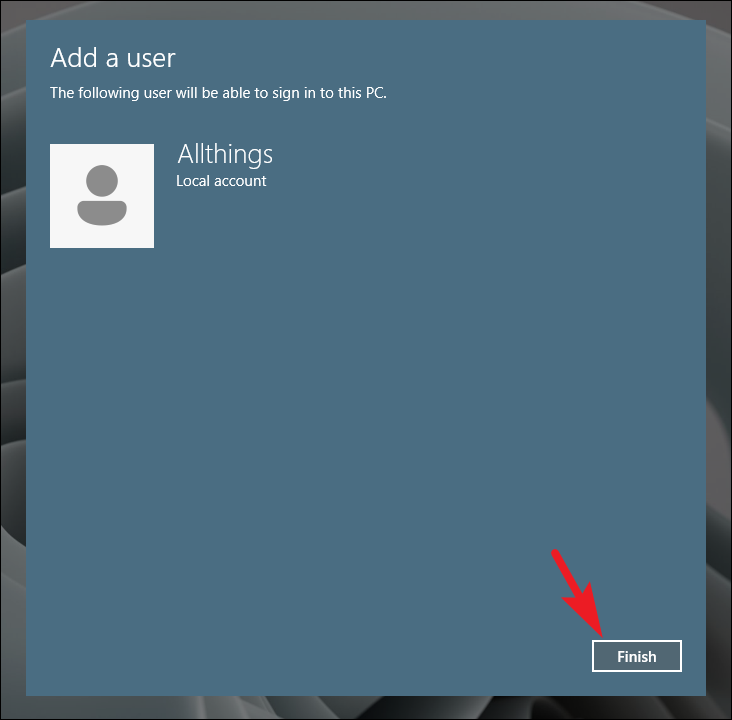
Next to create the account.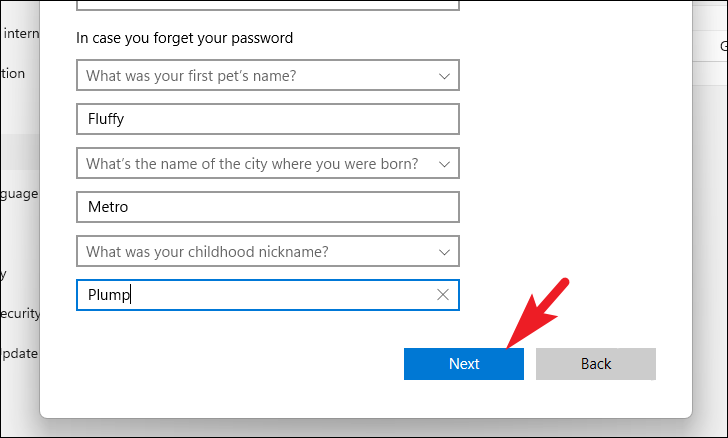
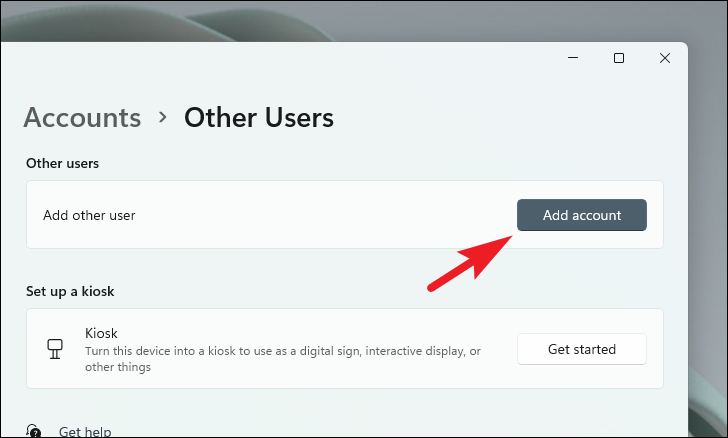
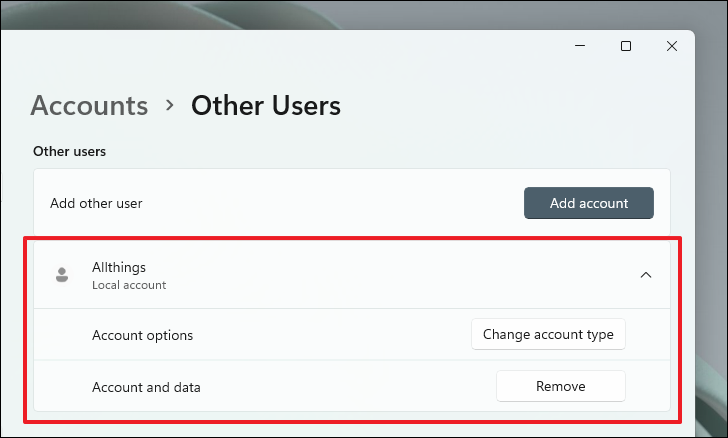
Once completed, the new local user account will appear under the Other users section.
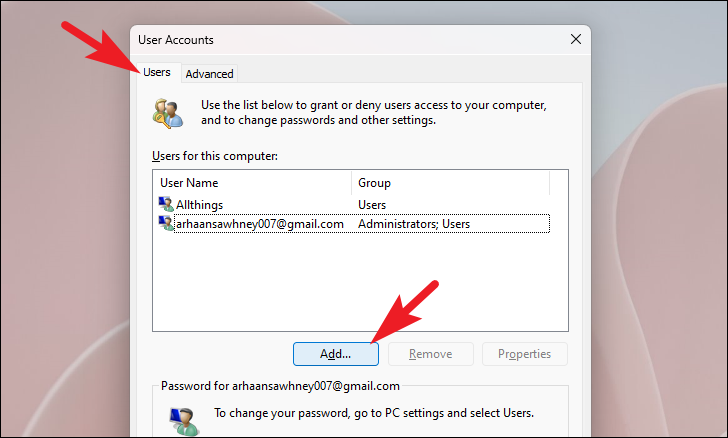
Method 2: Add an additional user using the User Accounts wizard
This method utilizes the classic User Accounts wizard accessible via the Run command.
Windows + R to open the Run dialog. Type netplwiz and press Enter to open the User Accounts window.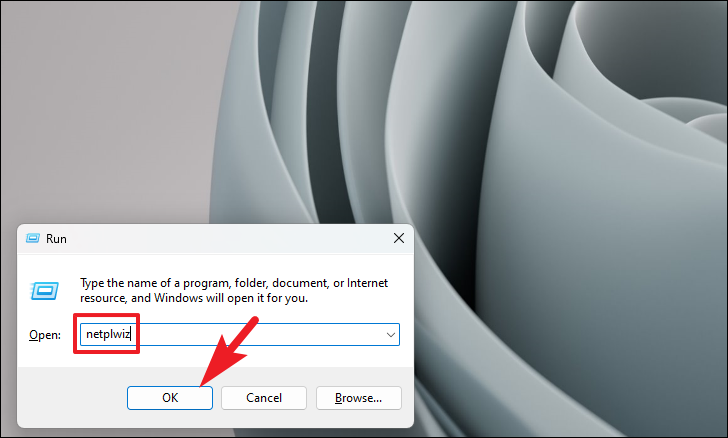
To add a user with a Microsoft account:
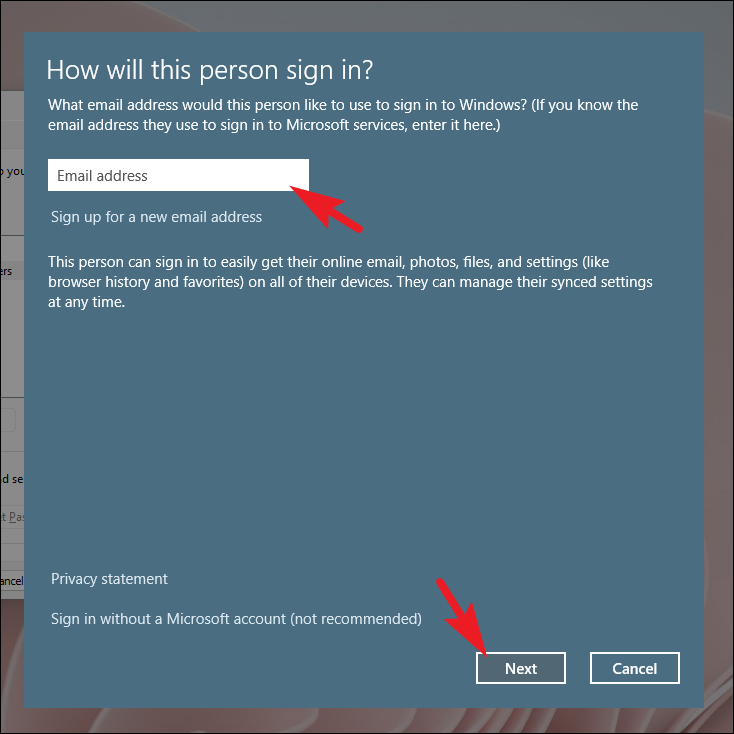
Finish to complete the process. The user will need internet access the first time they log in.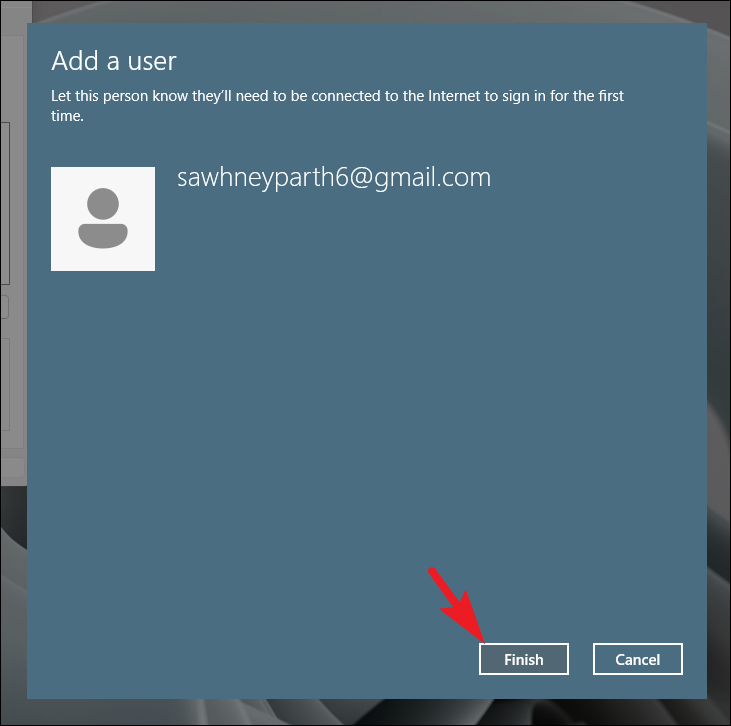
To add a local user:
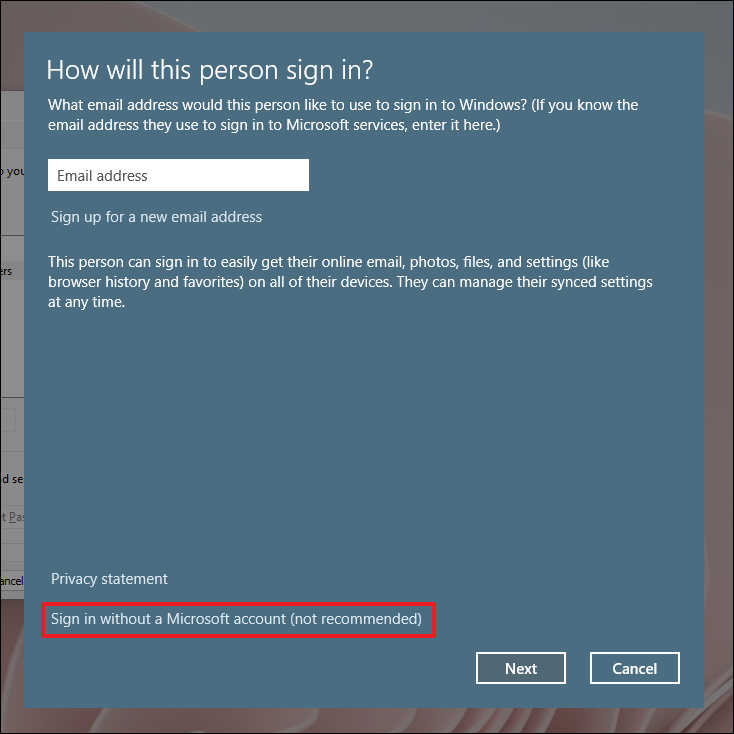
Next to create the account.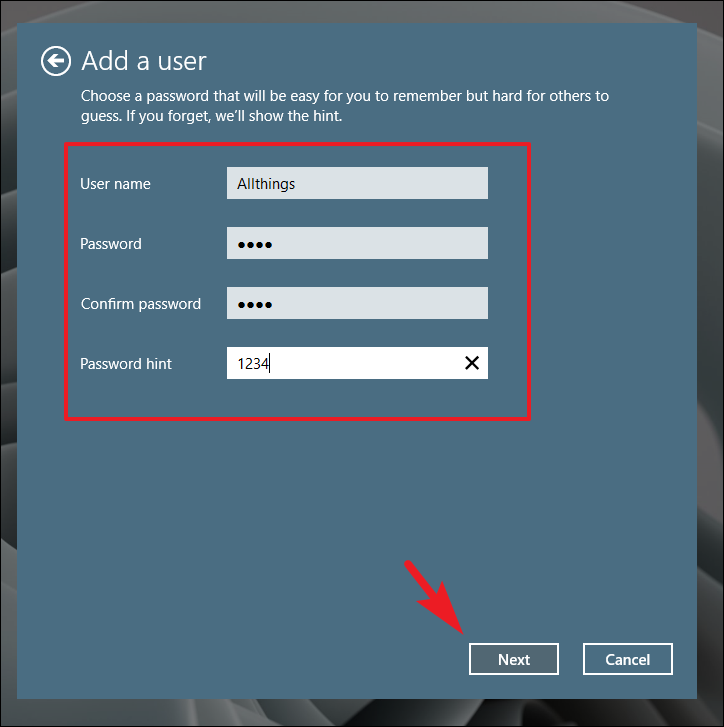
The new user will now appear in the User Accounts list.
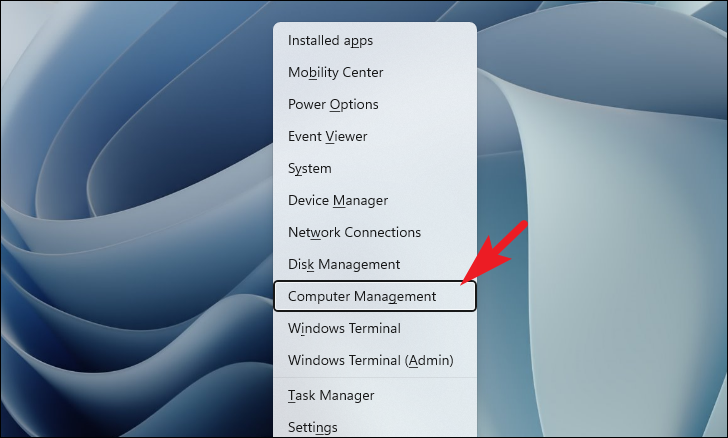
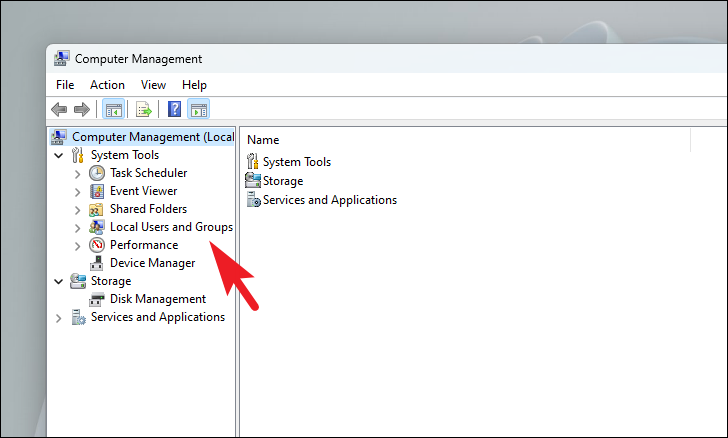
Method 3: Add a new local user using Computer Management
You can also add a local user through the Computer Management tool.
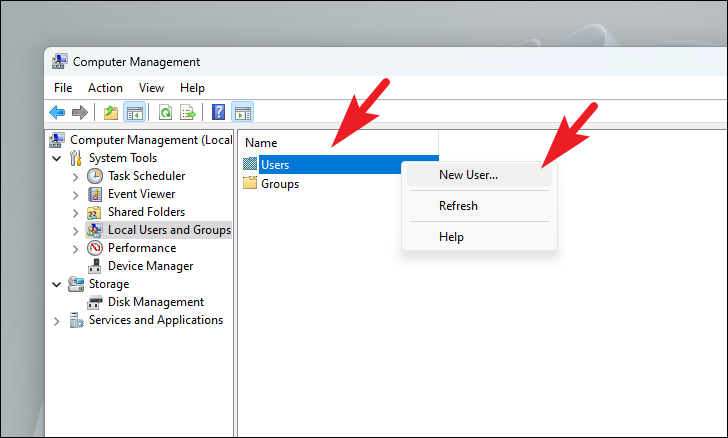
Create when done.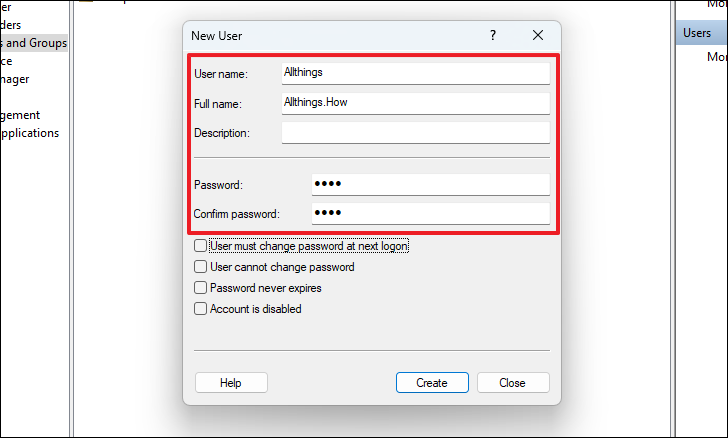
The new user account will be added and available at the next login.
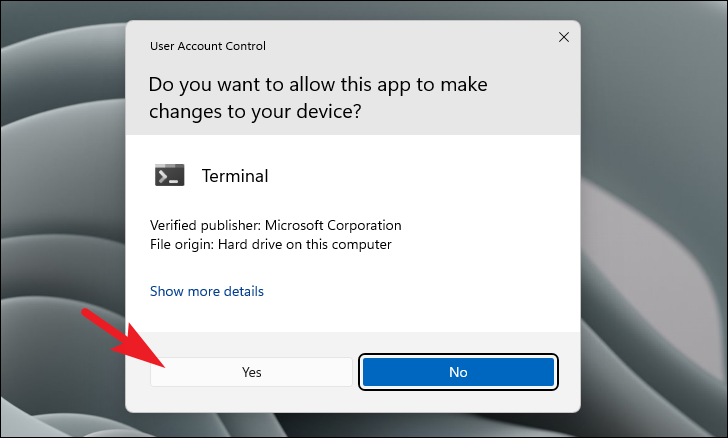
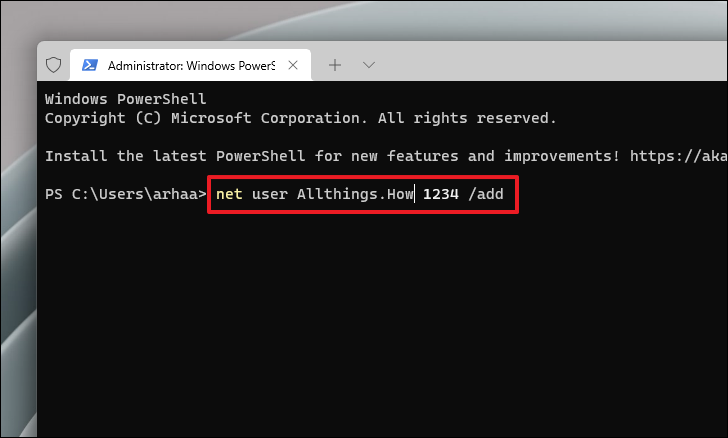
Method 4: Add a user using a command-line tool
If you prefer using the command line, you can add a user via the Terminal.

net user <username> <password> /addReplace <username> with the desired username and <password> with a password for the new account.
You will receive a confirmation message once the user is added.
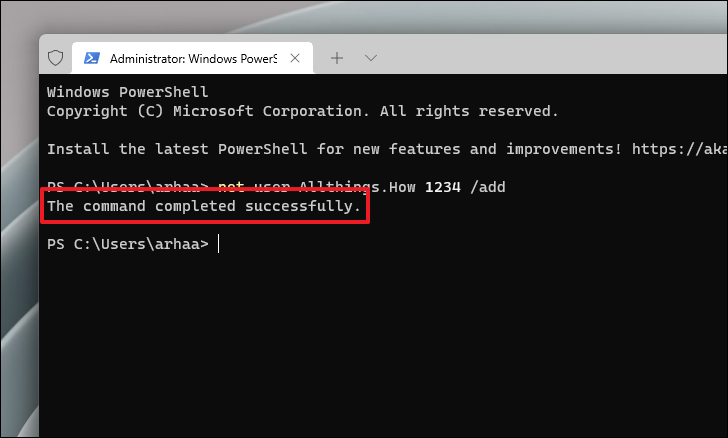
The new user account will be available during the next login session.
By following these methods, you can easily add new users to your Windows 11 PC, allowing multiple people to use the computer with their own personalized settings and files.


