
There are tons of programs on your system and most of them are constantly connected to the Internet. Most of the time, this benefits you, since you don’t have to update them or spend time loading information onto them from the Internet. There are also times when you want to block a program from accessing the internet in Windows 10.
There could be several reasons why you may want to deny internet access to a program. For example, you may have an app that works perfectly fine offline, but when connected to the Internet, it starts displaying annoying ads. Logically, you wouldn’t want the program to have internet access. Or, you may simply want to block some programs from accessing the Internet to avoid automatic updates.
Blocking a program from accessing the internet on Windows 10 is simple and can be done real quick.
Blocking a Program from Accessing the Internet
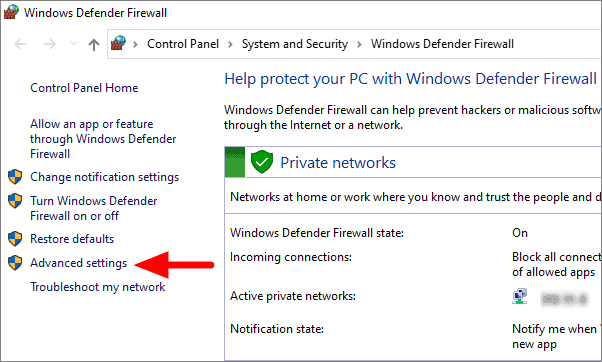
Search for ‘Windows Defender Firewall’ in the Windows search menu and then select it.

In ‘Windows Defender Firewall’, click on ‘Advanced Settings’ located on the left of the window.
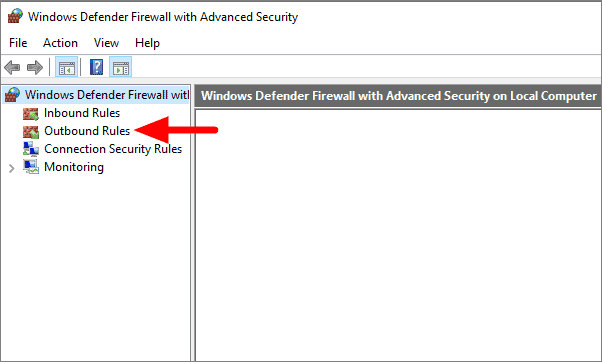
On the next window, click on ‘Outbound Rules’ under Windows Defender Firewall with Advanced Security on Local Computer section.
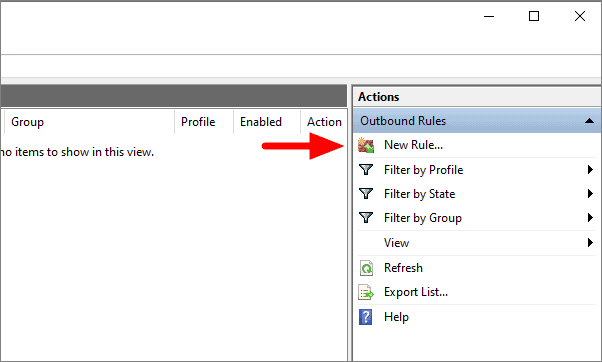
Select ‘New Rules’ under Actions on the right of the window.
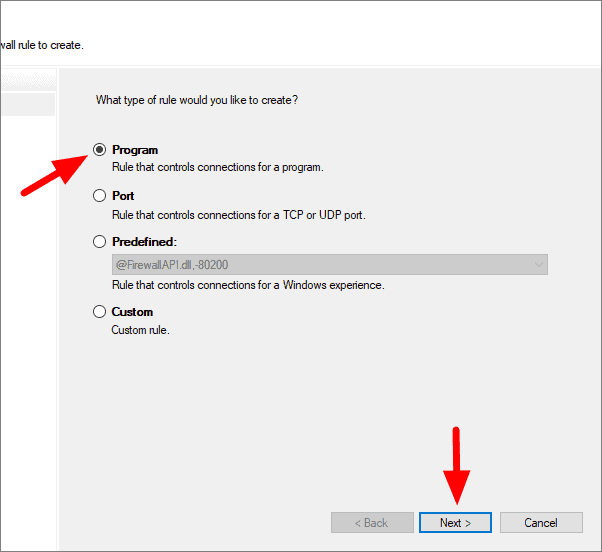
A new window, New Outbound Rule Wizard will open up. You can now set up to block a program from accessing the internet. This consists of five steps. On the first step, that is Rule Type, select program and click on ‘Next’.
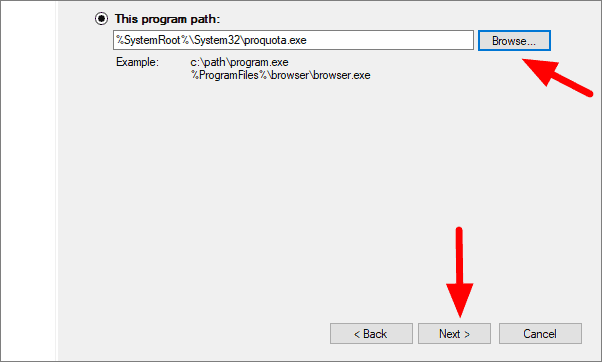
In the next step, you have to select the program. Click on browse to find and select the program, and then click on ‘Next’.
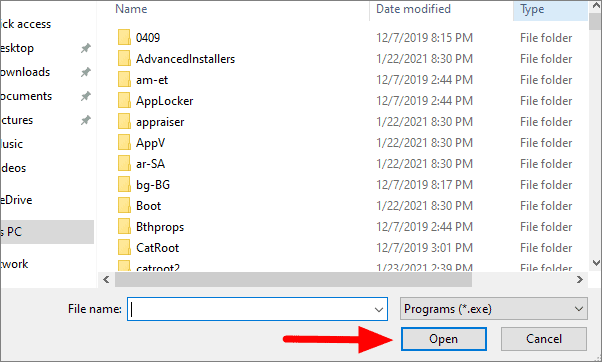
After you click on ‘Browse’, select the program and click on ‘OK’.
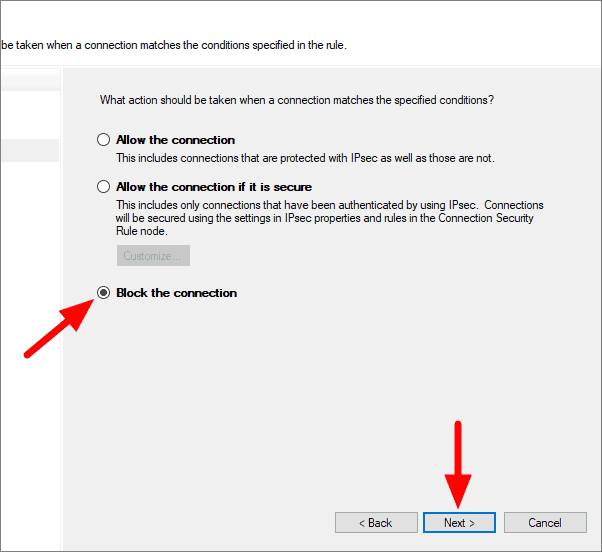
You can now select from the various options displayed on the window. However, it is recommended that you tick the checkbox right behind ‘Block the connection’ to select this option. Then click on ‘Next’.
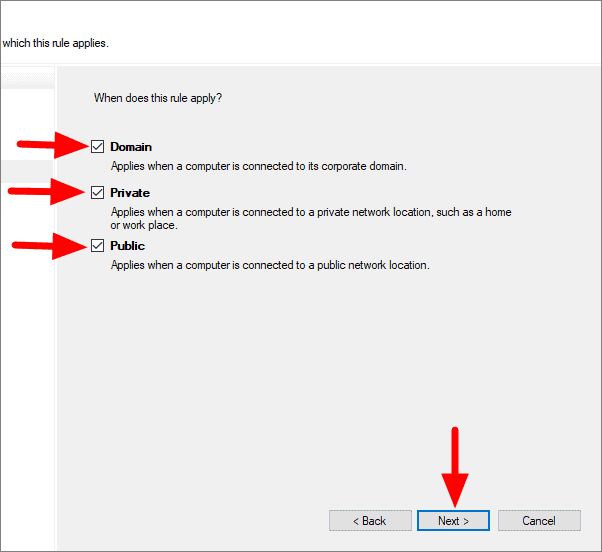
On the next step, select when you want the rule to apply. All the options are explained there for a better understanding and to clear things up. To completely block the program from accessing the internet, tick the checkbox right behind all the options and then click on ‘Next’ at the bottom.
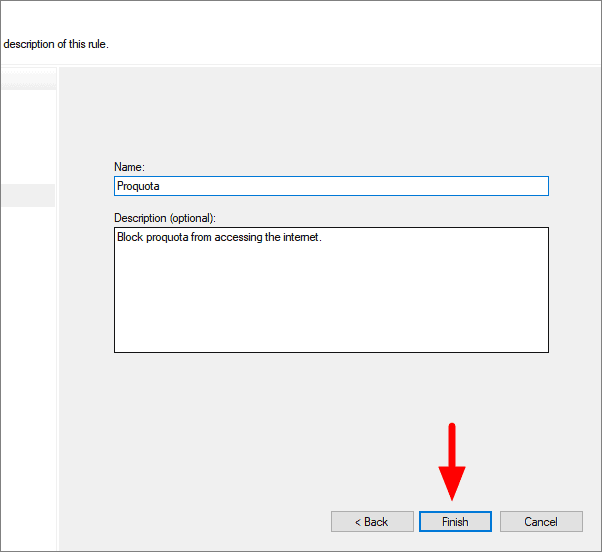
In the final step, you have to name the rule while the description is optional. Use a relevant name that will help you remember the outbound rule at a later point in time. You can also give a short description of the rule and then click on ‘Finish’.
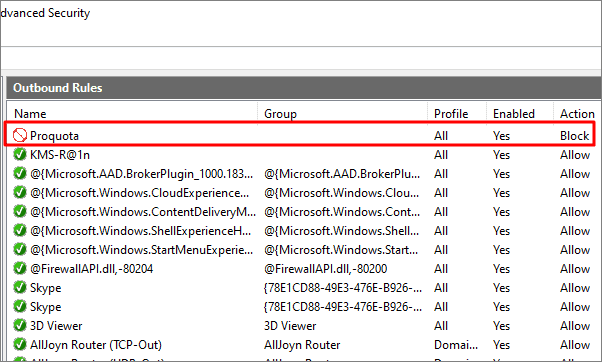
Your outbound rule has been created and will be visible at the top. The program will no longer have access to the internet.
Now that you have learned how to block a program from accessing the internet, you can use it as per your requirement and restrict access. Windows also give you the option to either go for a blanket ban or allow Internet access on certain networks like home or public.


