Desktop icon font color is one of the important aspects for every user which has not been given enough consideration in Windows 10. The default font color is white and there is no straightforward setting to change it.
The need to change the font color arises when you change the background wallpaper and suddenly the text isn’t distinct anymore. In some cases, Windows automatically adjusts the font color to something more readable. Also, if you are someone who likes to experiment with such stuff, there are a couple of hacks to change the desktop icon font color.
Changing Desktop Icon Font Color in Advanced System Settings
You can change the desktop icon font color from white to black in the ‘Advanced System Settings’.
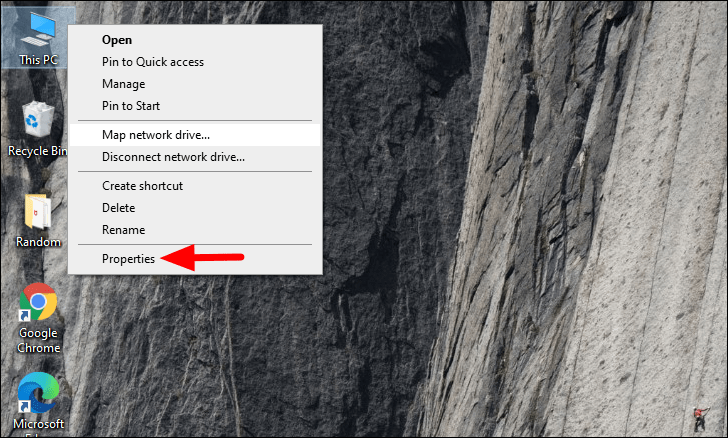
To change the icon font color, right-click on the ‘This PC’ icon on the desktop and then select ‘Properties’ from the context menu.
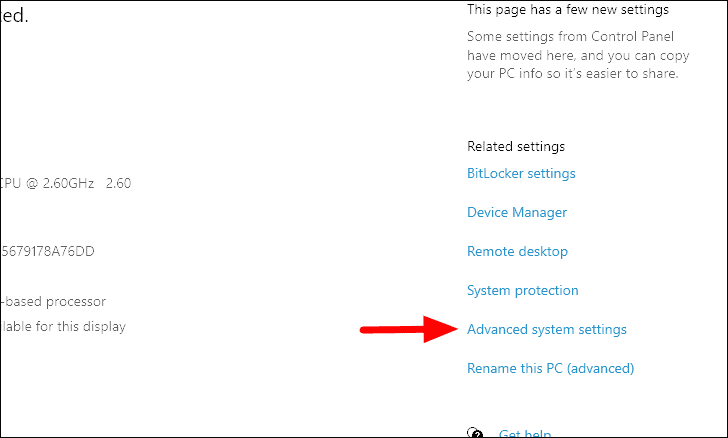
The System settings window will open with the ‘About’ tab on the screen by default. On the right end of the page, you will find ‘Advanced system settings’ under ‘Related settings’ heading. Click on the ‘Advanced system settings’ to change the font color of the desktop icon.
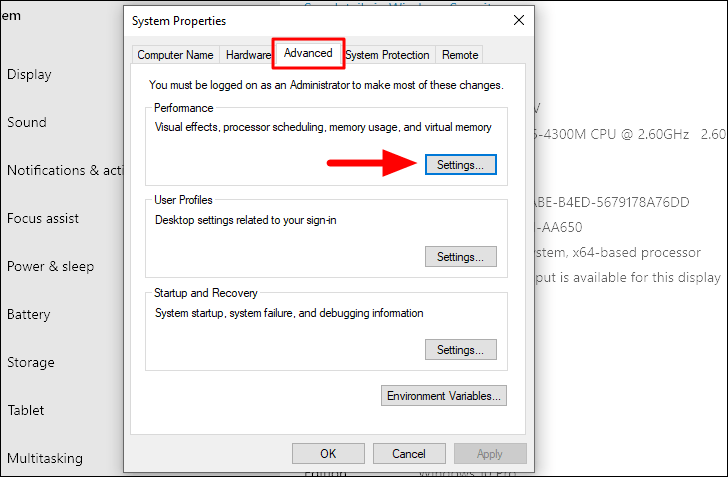
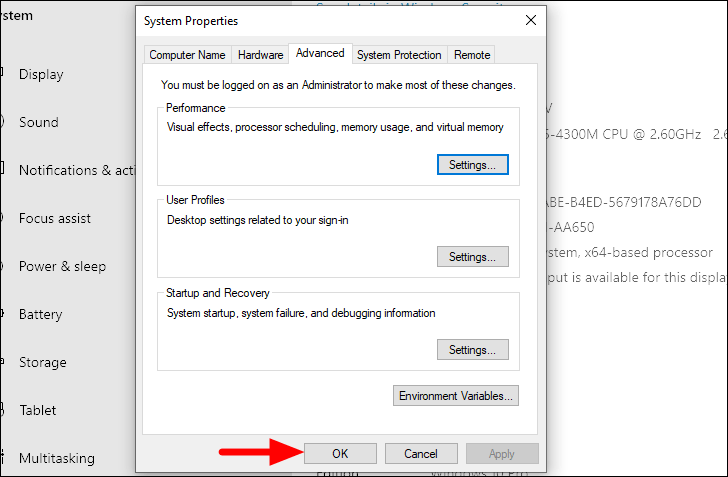
The ‘System Properties’ window opens up and you will be in the ‘Advanced’ tab by default. Next, click on the ‘Settings’ icon under performance to change visual effects, memory usage amongst other settings.
Since we want to change the font color, select the ‘Visual Effects’ tab and uncheck the box before ‘Use drop shadows for icon labels on the desktop’, the last option. Once you have made the changes, click on ‘OK’ at the bottom.
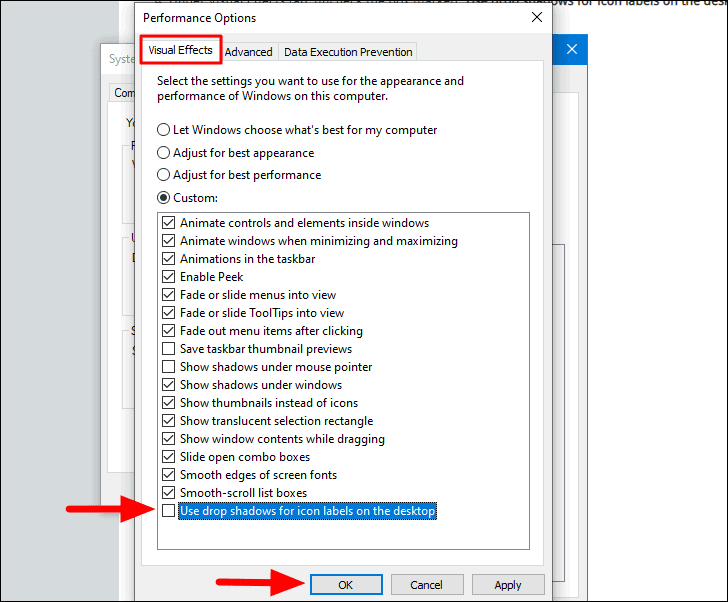
Again, click on ‘OK’ in the system properties window to finalize the changes and apply it to the system.
Minimize or close the settings window to move to the desktop. You will notice that the Desktop icon font color has changed from white to black.

If at any time, you want to revert to the default color, just tick the checkbox that we unchecked earlier.
Changing Desktop Icon Font Color by Switching to High Contrast
Another hack to change the desktop icon font color is by switching to high contrast display. It will change the desktop background to white and the Windows will automatically adjust the font color accordingly to black.
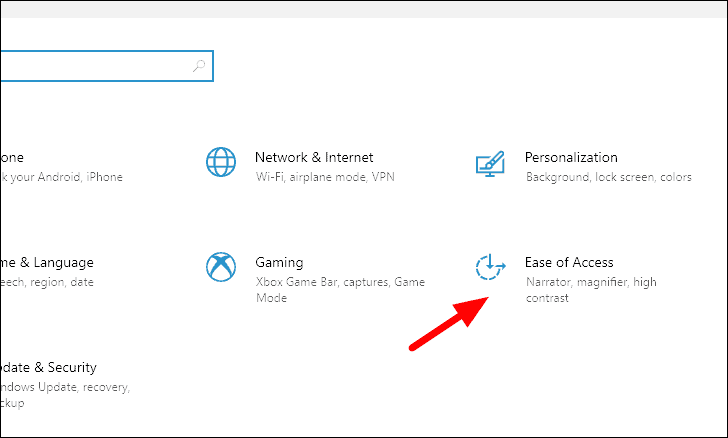
To change the contrast settings, press WINDOWS + I to open system settings and then select ‘Ease of Access’ from the options.
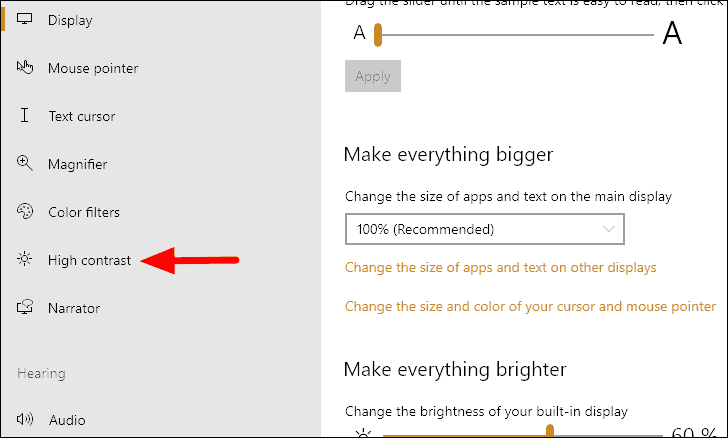
You will now see various tabs on the left under different headings. Since we are here to switch to high contrast settings, click on ‘High contrast’ under the ‘Vision’ heading.
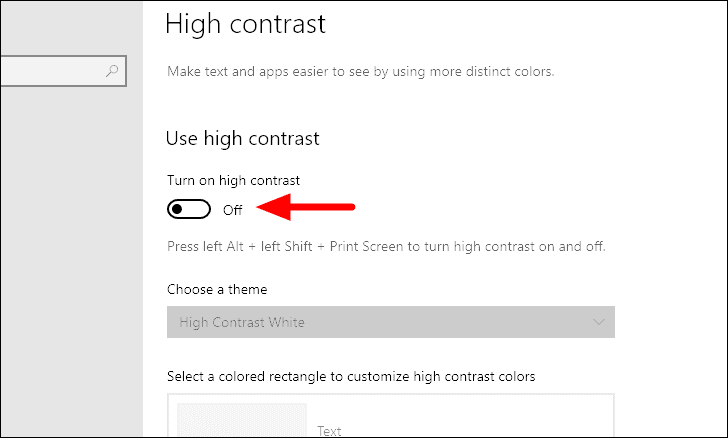
Next, click on toggle under ‘Use high contrast’ to turn on high contrast.
Next, click on the box to view the other high contrast options. In the drop-down menu, you will see four options, select the last one, i.e., High Contrast White.
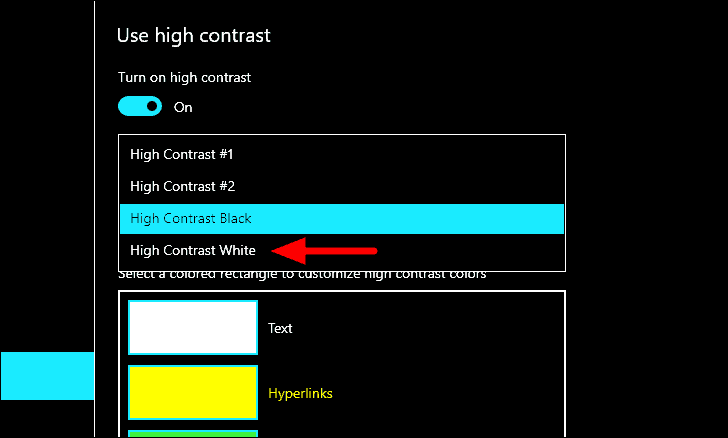
Once Windows switch to ‘High Contrast White’, the background changes to white throughout the system.
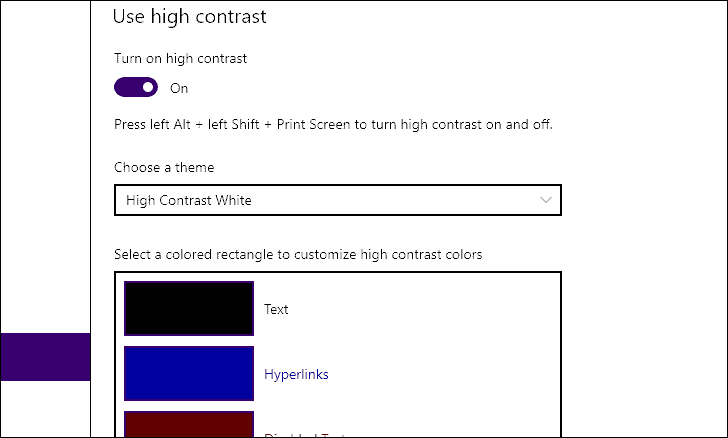
Now, move to the desktop, and you will find that the desktop icon font color has changed to ‘Black’ and the background color changed to white.

Changing the desktop icon font color isn’t just appealing but also becomes a necessity at times. Therefore, every Windows user must know how to change it. Also reverting to the default color is simple and straightforward, and none of the changes that you make carry the potential to harm your computer.
There are some third-party apps that do the same function but their source cannot be trusted and they can carry infect your system with malware and viruses. Therefore, use them at your own discretion after thorough verification.




Member discussion