Different ways you can change Display Scaling in Windows 11 to get the settings that suit you.
Different ways you can change Display Scaling in Windows 11 to get the settings that suit you.
by Raj Kumar
Adjusting the display scaling in Windows 11 can greatly enhance your viewing experience, whether you prefer larger text and icons for easier readability or smaller elements to maximize screen space. Display scaling affects how content is sized on your screen, making it an essential setting for customizing your computer to your personal needs.
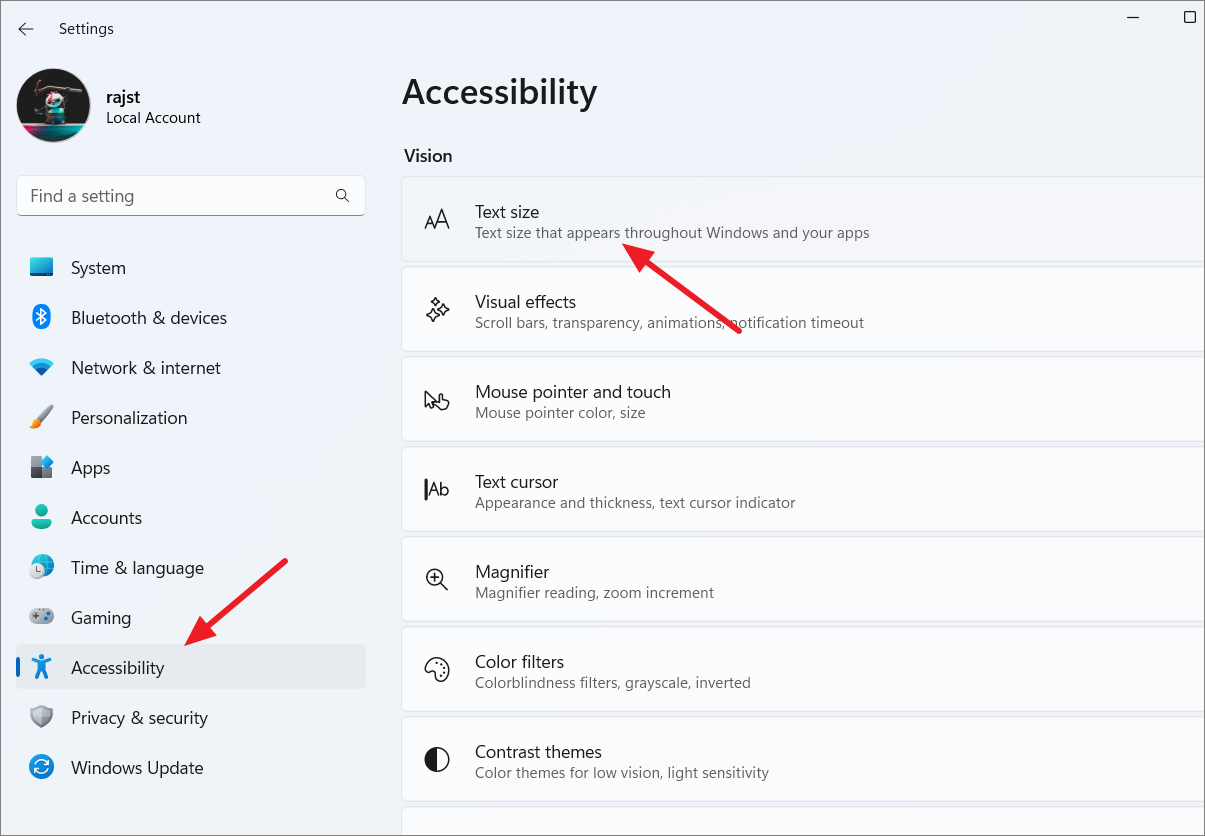
Changing Display Scaling in Windows 11
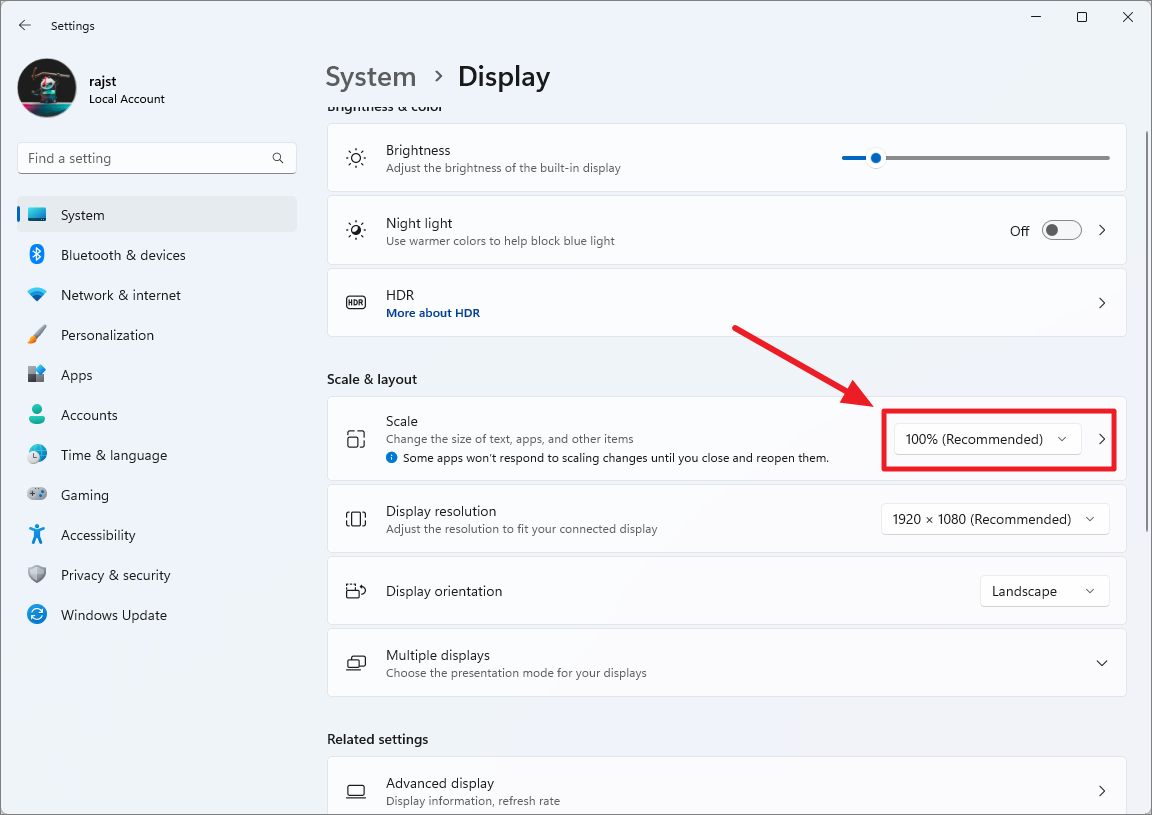
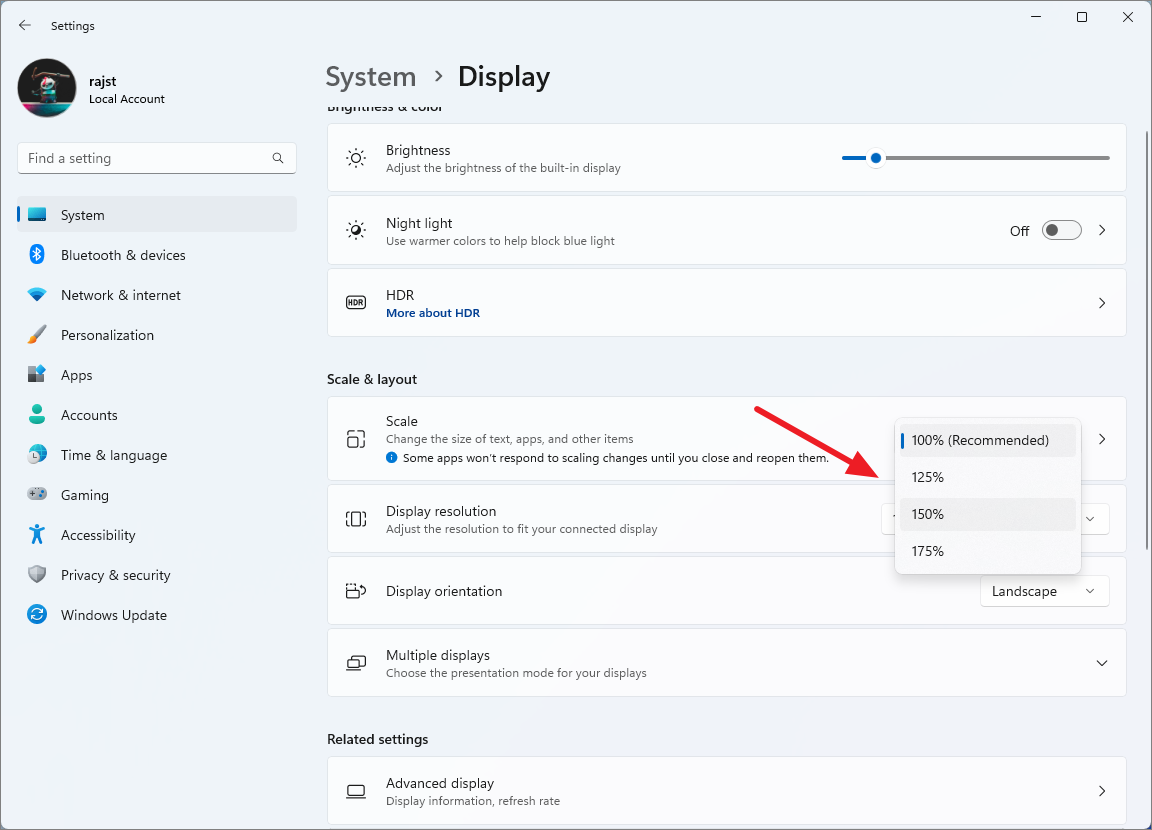
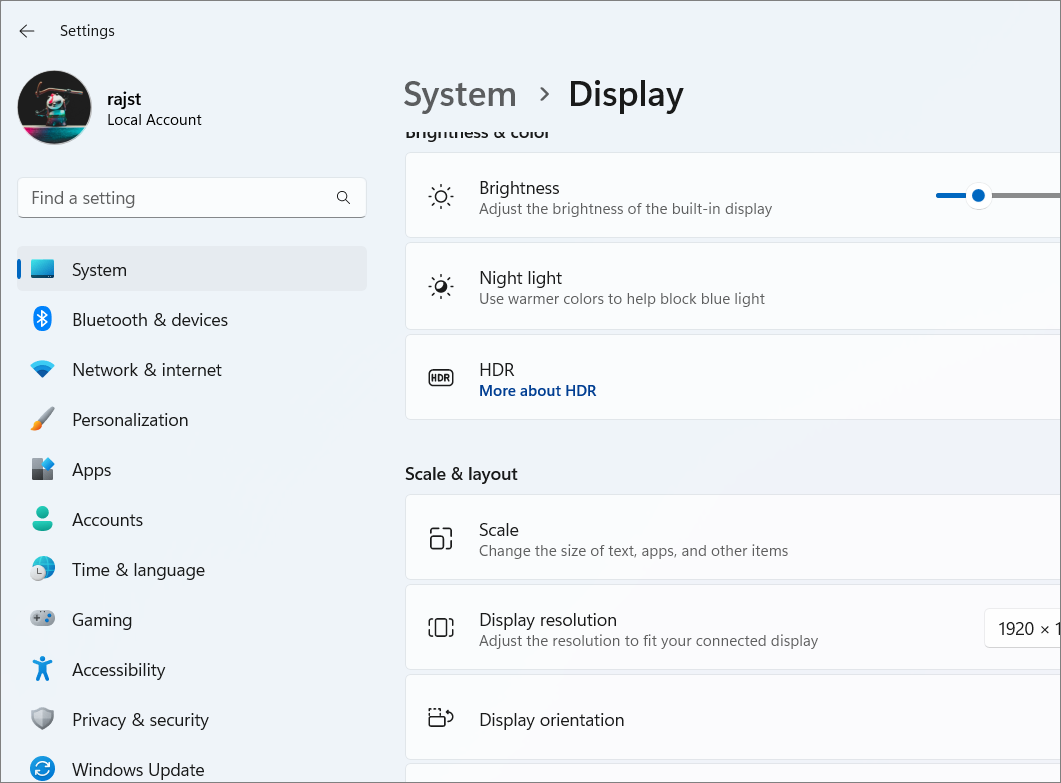
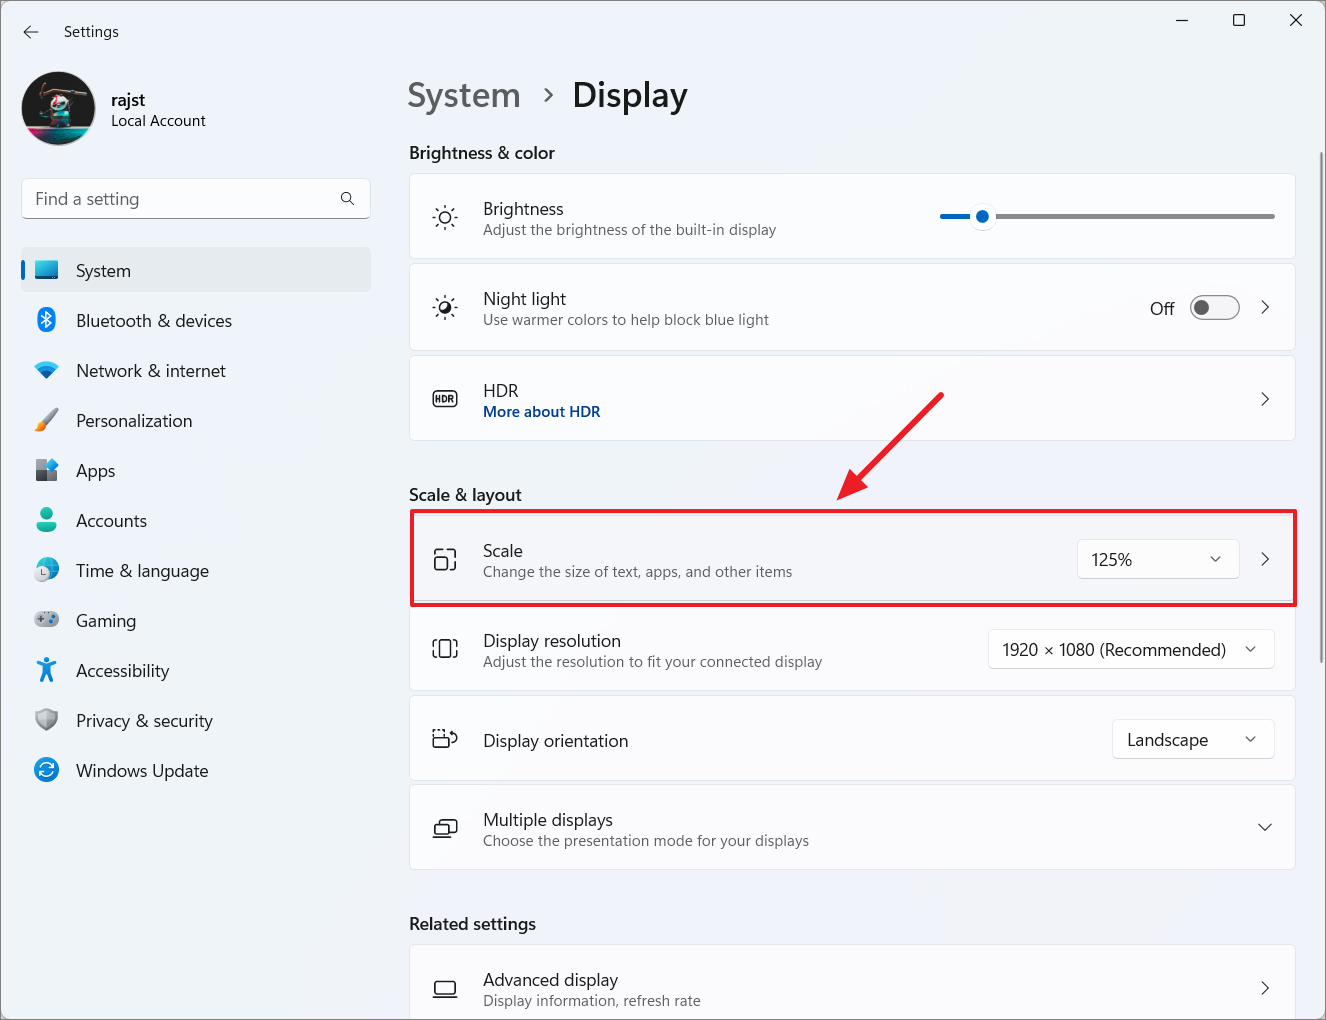
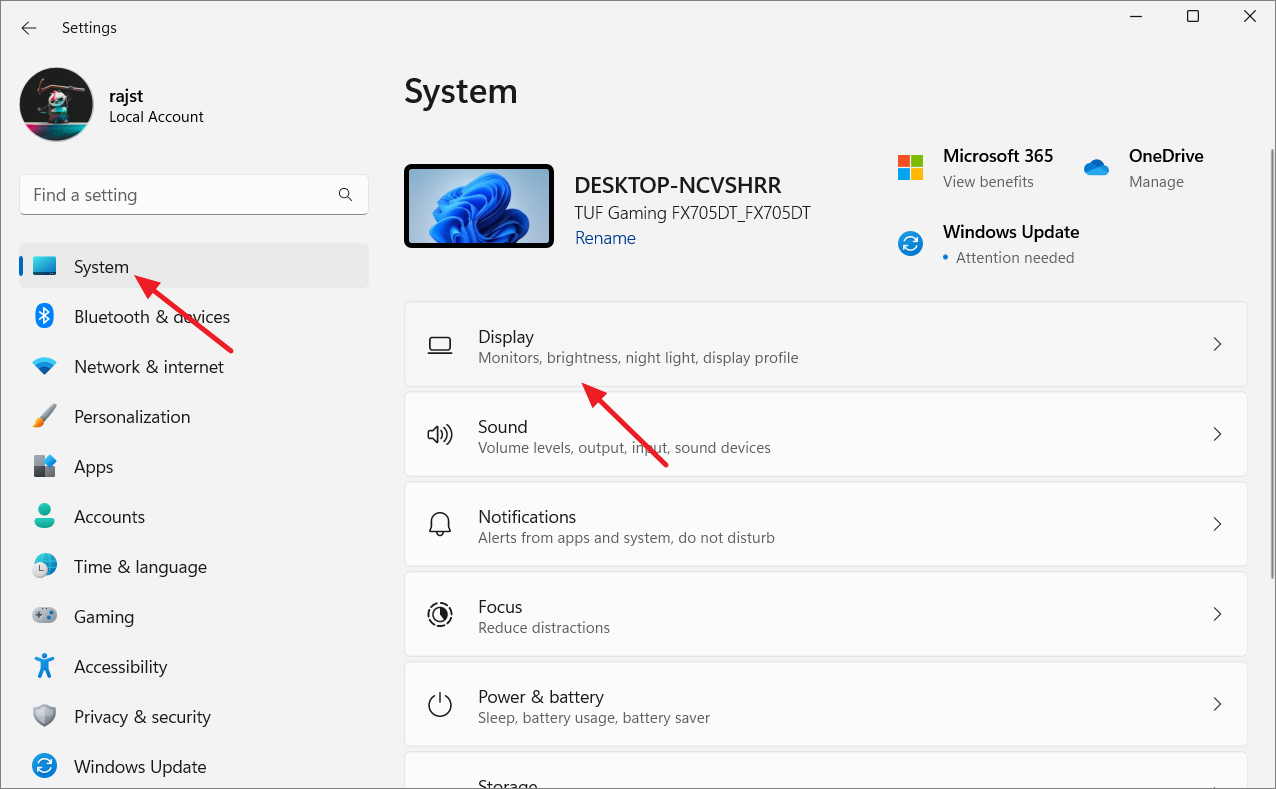
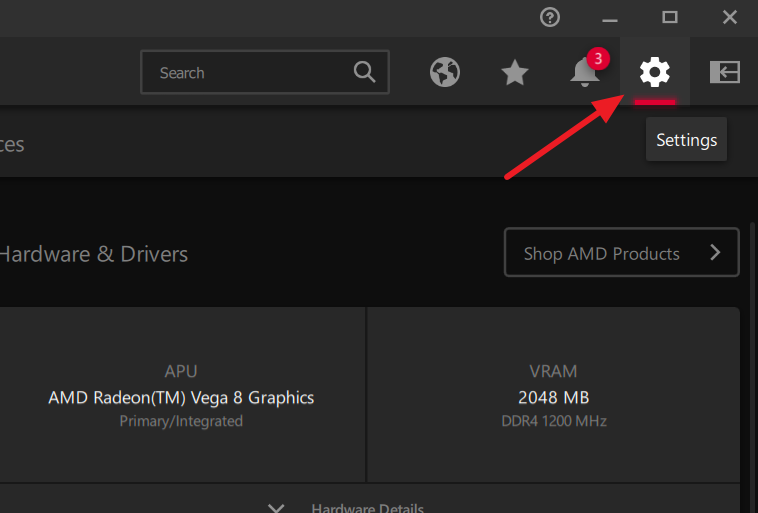
The simplest way to modify the display scaling in Windows 11 is through the Settings app.
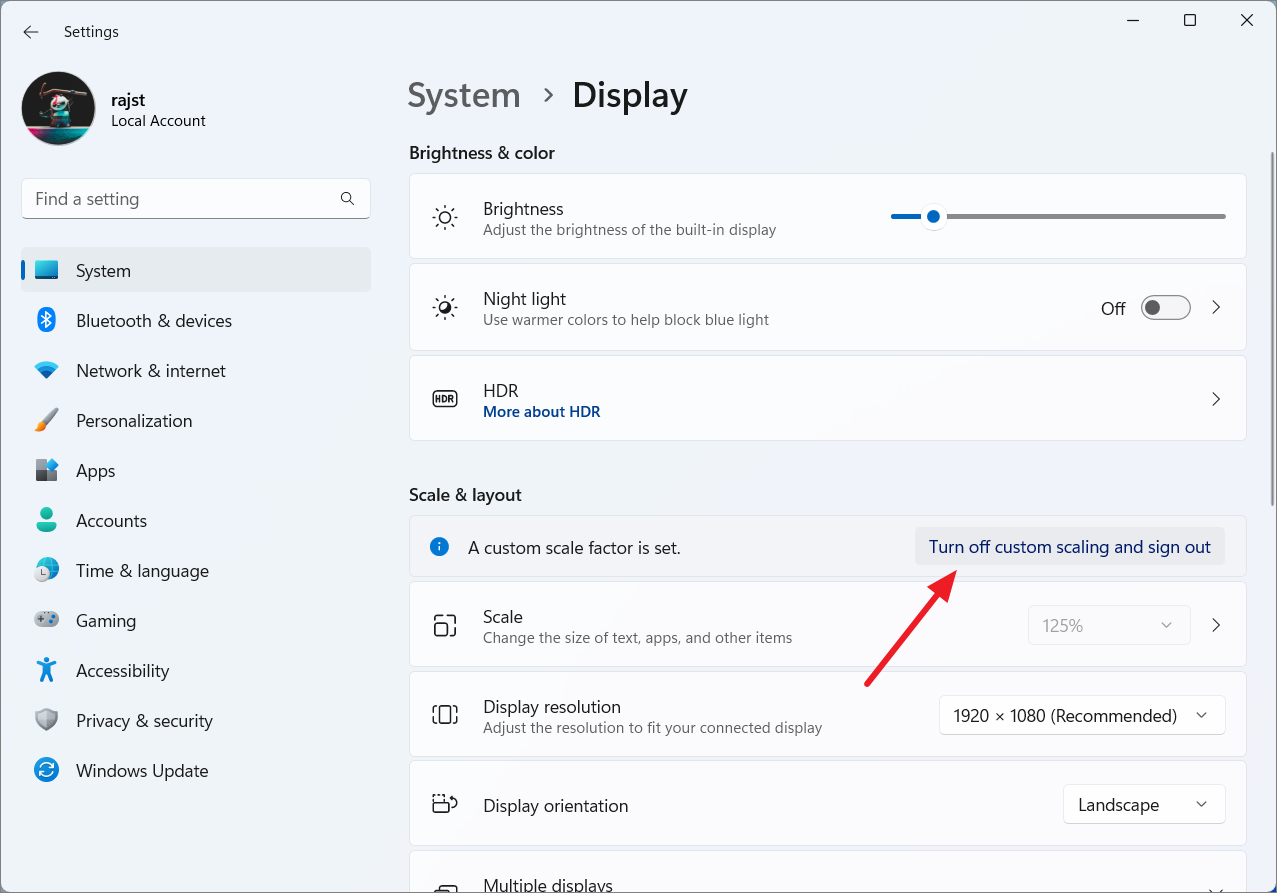
To apply the custom scaling, click on ‘Sign out now’ and sign back into your account.
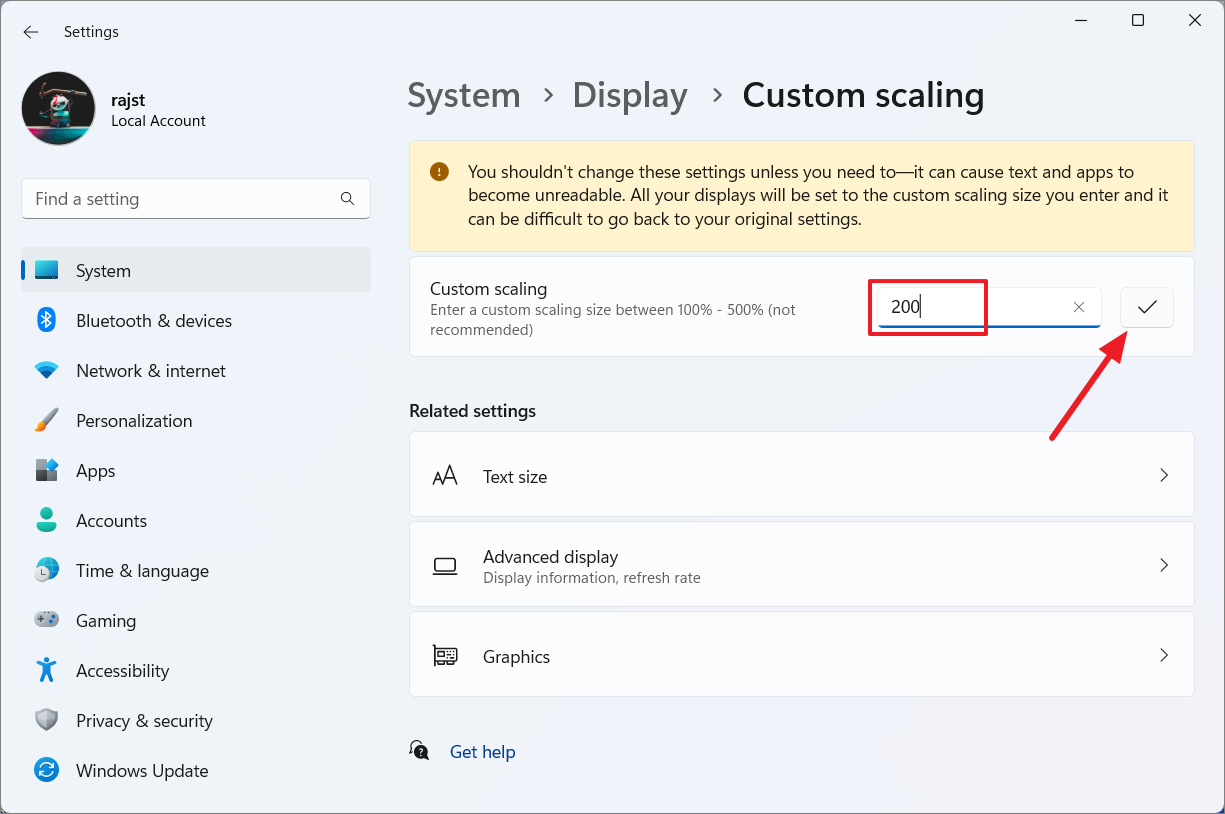
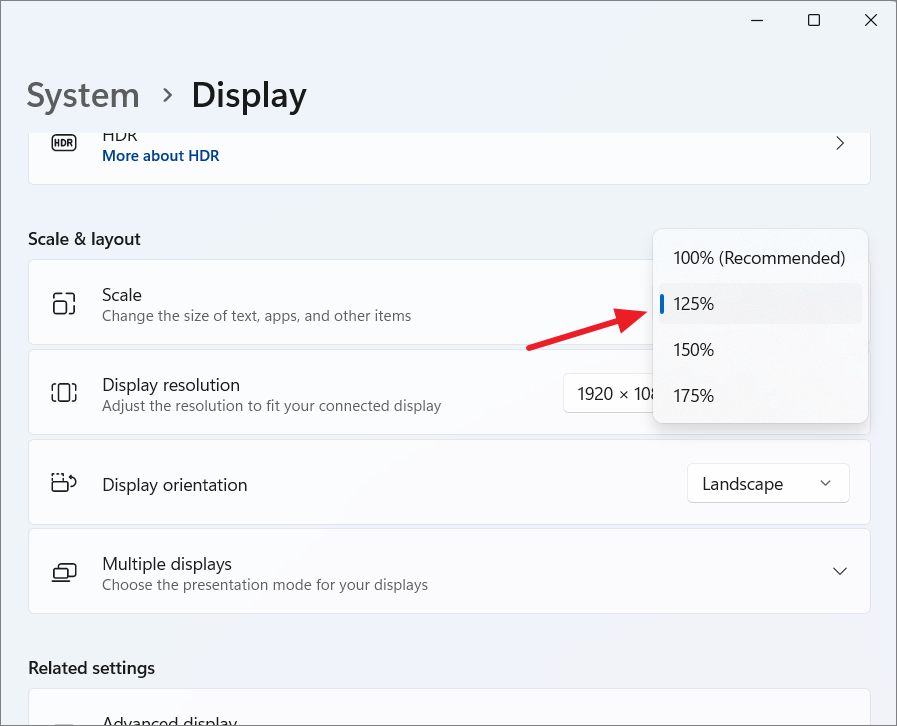
After setting a custom scaling value, you’ll notice that the dropdown menu in the ‘Scale’ section becomes grayed out. This is because custom scaling overrides the preset options. If you wish to return to the default scaling settings, you’ll need to disable custom scaling.
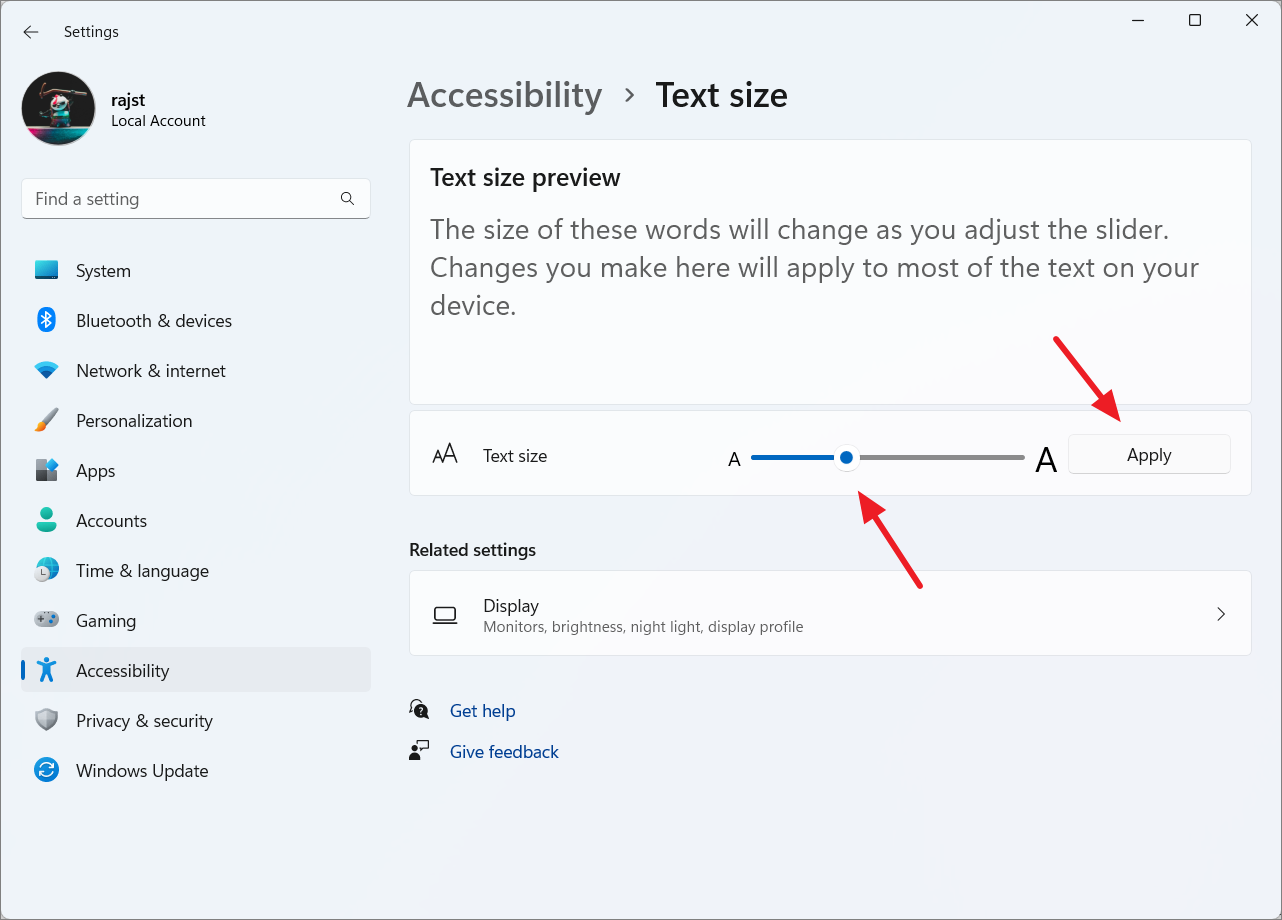
Use the slider under ‘Text size’ to increase or decrease the font size. A preview is displayed to show you how the text will look. Once you’ve chosen your desired size, click ‘Apply.’
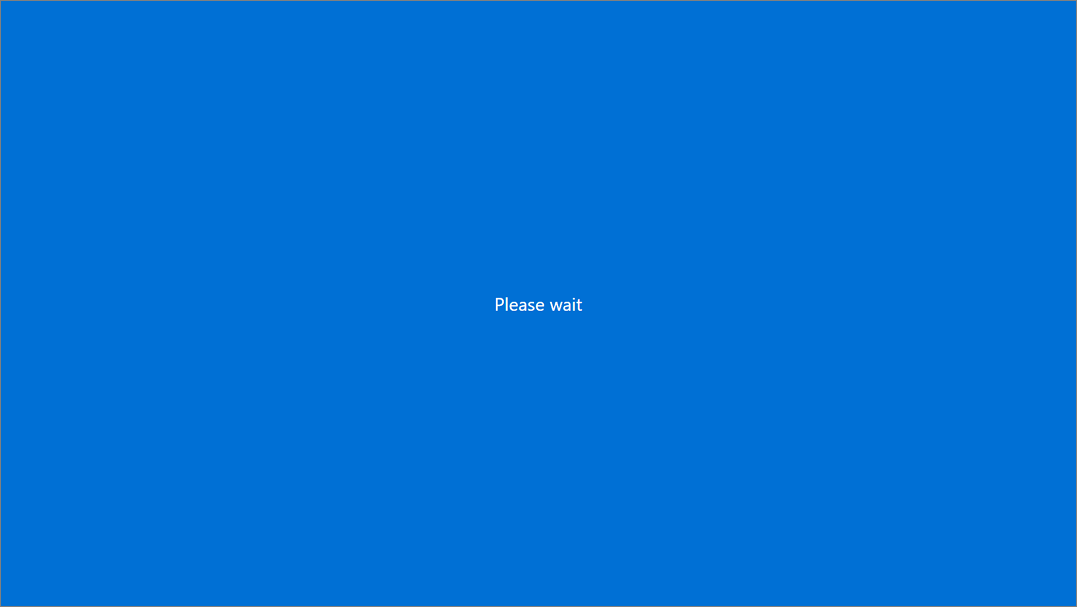
A ‘Please wait’ screen will briefly appear as Windows applies the new text size.
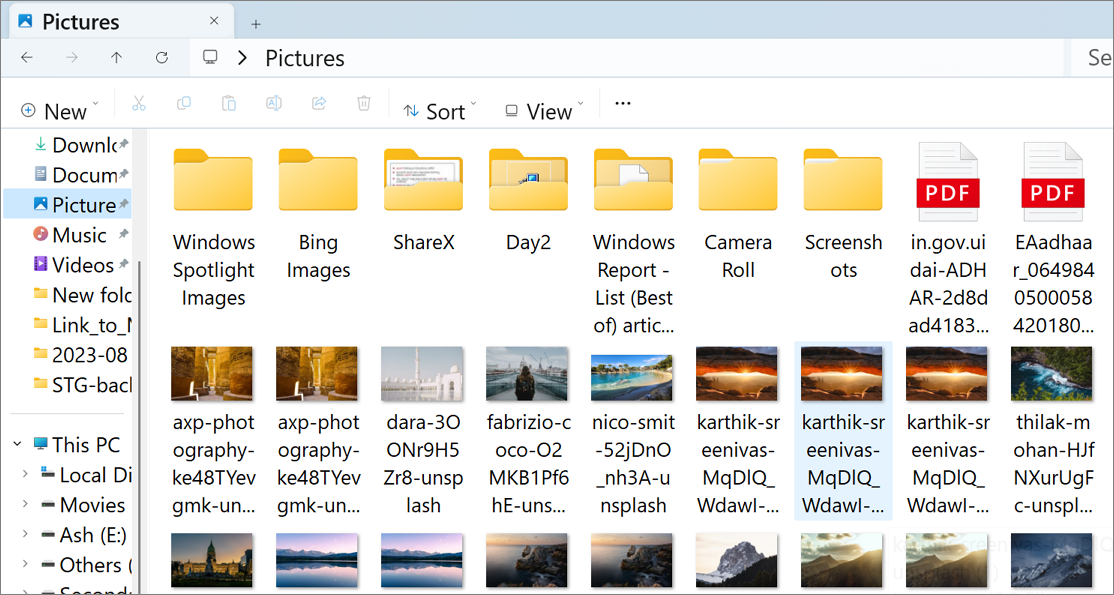
After applying, you’ll notice that the text size has changed, while other elements like icons and buttons remain the same.
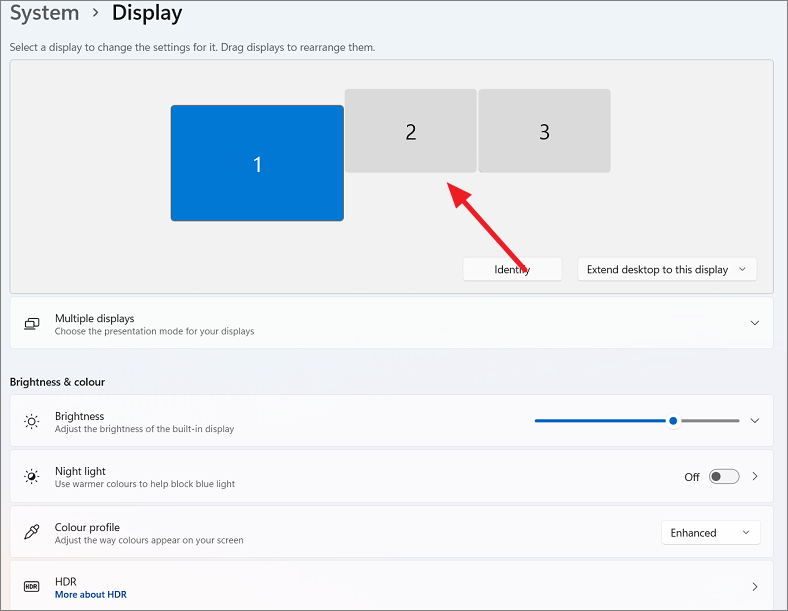
Changing Display Scaling for Multiple Monitors
If you use multiple displays, you can set different scaling levels for each one.
Scroll down to the ‘Scale & layout’ section and select the desired scaling option for that particular display. You can also set a custom scaling value if needed.
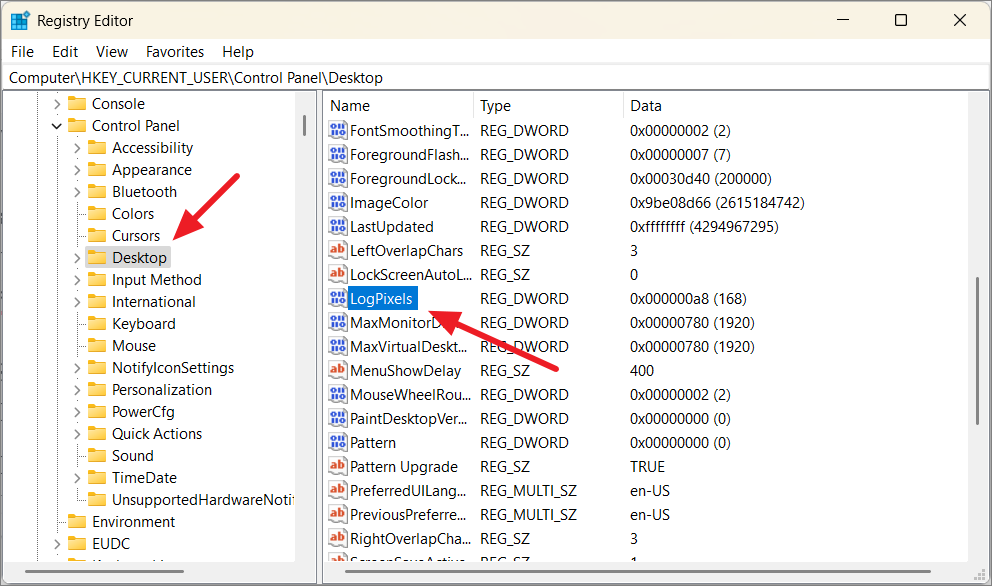
Changing DPI Scaling Using the Registry Editor
As an alternative method, you can adjust the DPI scaling through the Registry Editor. This method is advanced and should be used cautiously. It’s recommended to back up your registry before making any changes.
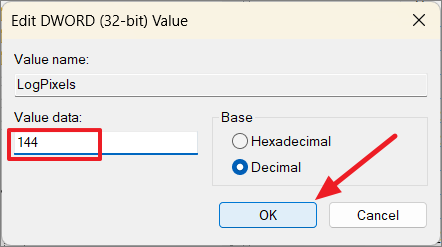
Look for the entry named ‘LogPixels’ in the right pane. If it doesn’t exist, right-click in the right pane, select ‘New’ > ‘DWORD (32-bit) Value’, name it LogPixels, and press Enter.
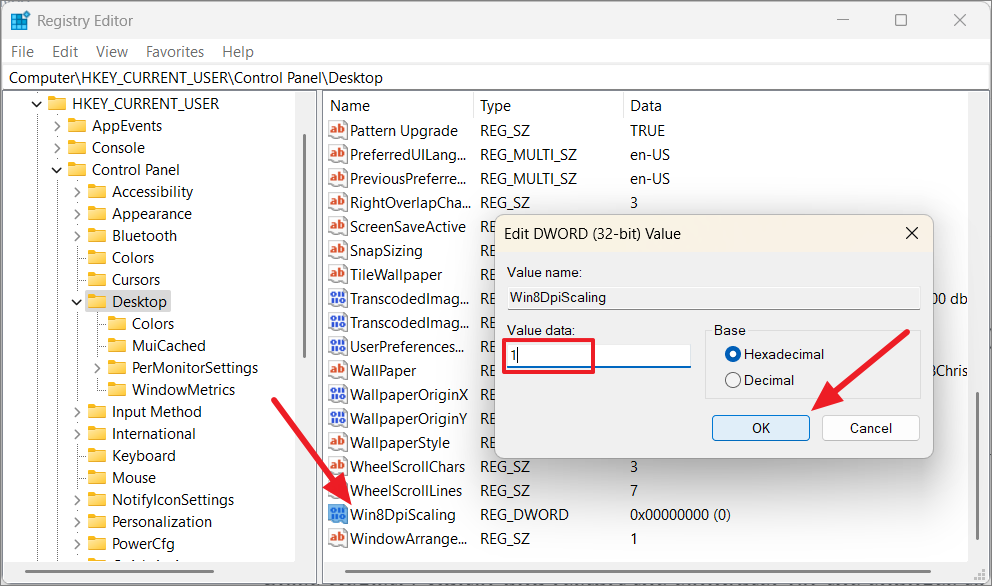
Next, locate the entry named Win8DpiScaling. If it doesn’t exist, create it by right-clicking in the right pane, selecting ‘New’ > ‘DWORD (32-bit) Value’, naming it Win8DpiScaling, and pressing Enter.
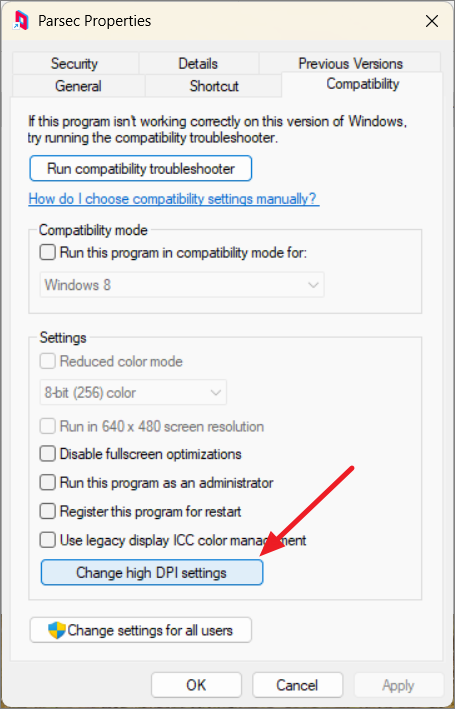
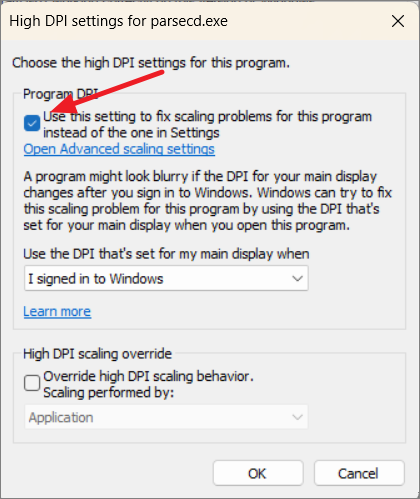
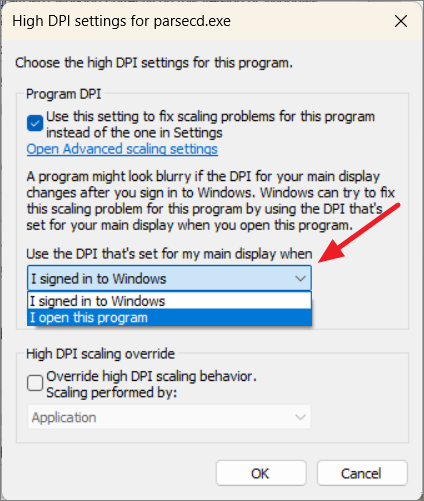
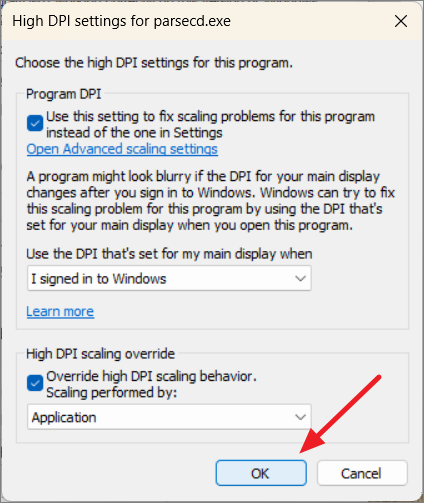
Under ‘Program DPI,’ check the box for ‘Use this setting to fix scaling problems for this program instead of the one in Settings.’ This tells Windows to use a specific DPI setting for this application.
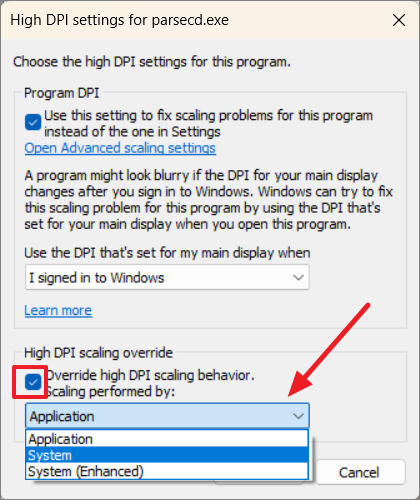
Under ‘High DPI scaling override,’ check the box for ‘Override high DPI scaling behavior.’ From the dropdown menu, select how scaling should be performed:
Application: The app controls its own scaling.
System: Windows scales the app based on the system DPI settings, which may cause blurriness.
System (Enhanced): Windows attempts to scale the app for better clarity.
Click ‘OK’ to save the settings, then relaunch the application.
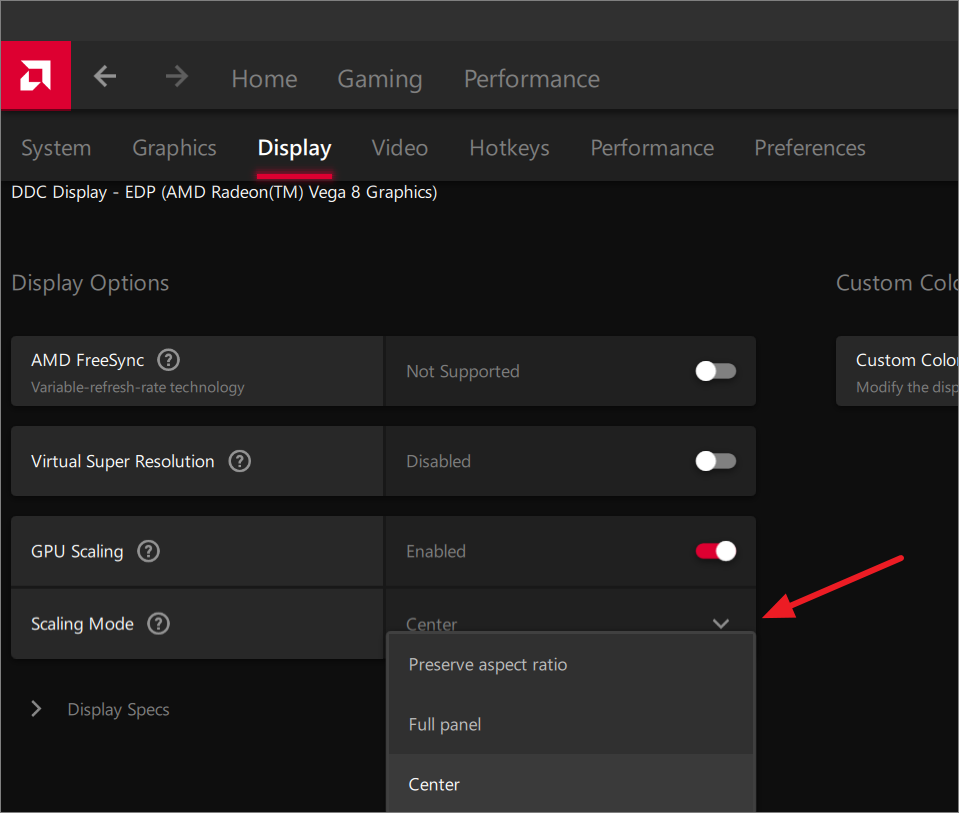
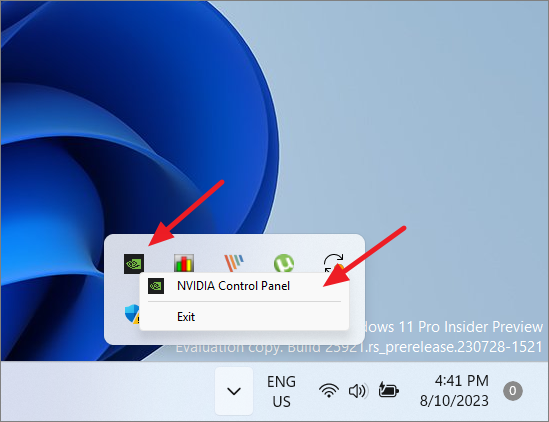
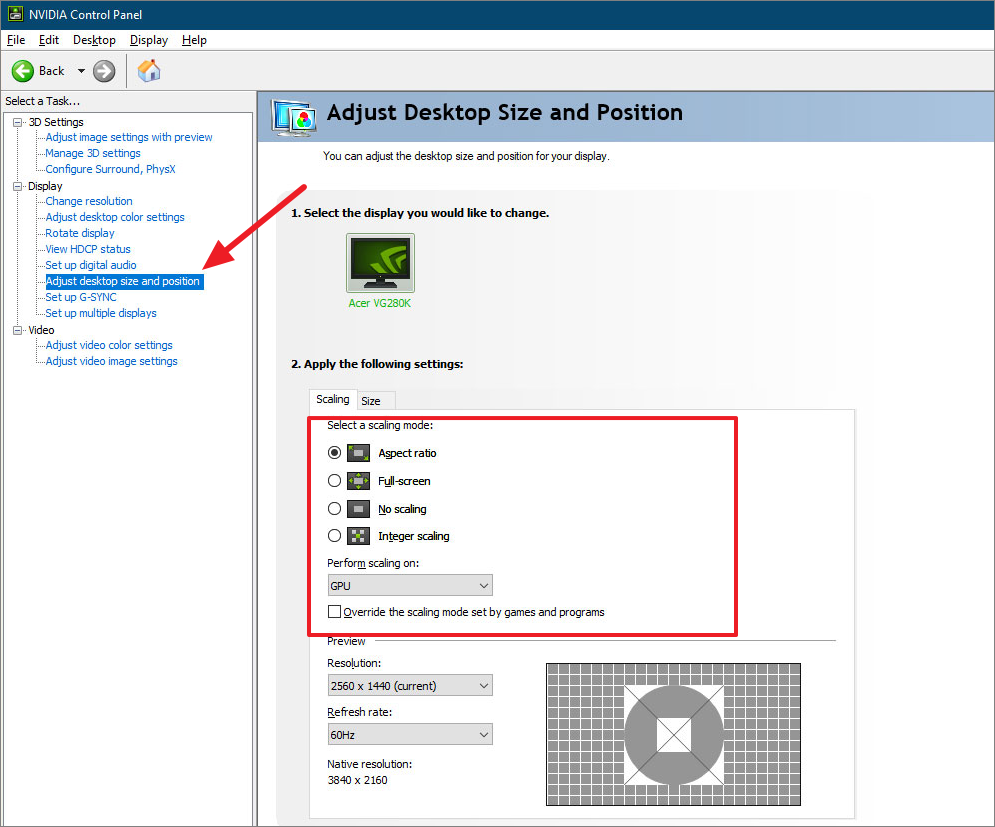
Adjusting Scaling Mode in GPU Control Panels
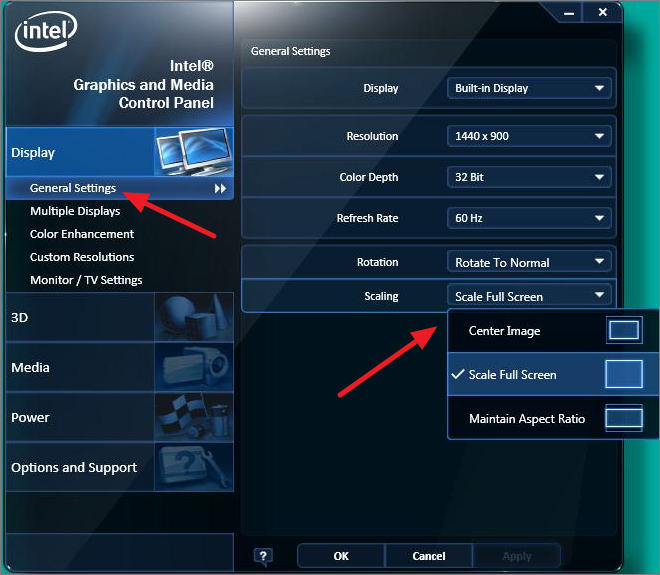
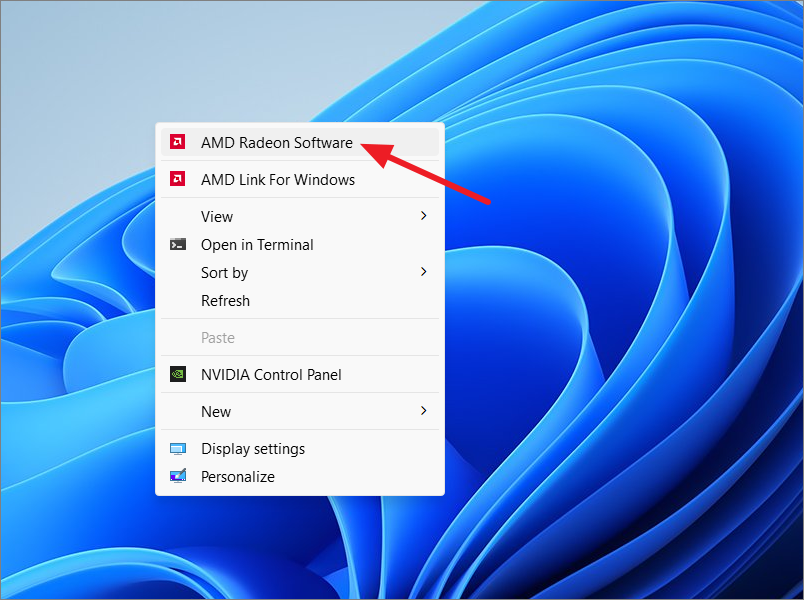
You can also modify display scaling through your graphics card’s control panel. The steps vary depending on whether you have an Intel, AMD, or NVIDIA graphics card.
In the Intel Graphics Control Panel, go to the ‘General Settings’ tab. Under ‘Scaling,’ select your preferred scaling mode: Maintain Display Scaling, Maintain Aspect Ratio, Scale Full Screen, or Center Image.
By following these methods, you can adjust the display scaling in Windows 11 to suit your preferences, ensuring a comfortable and clear viewing experience.