Personalizing your Windows 11 PC can make it feel more like your own, and changing the taskbar color is a simple way to customize your desktop experience. Whether you prefer a specific accent color or want your taskbar to match your current wallpaper, adjusting this setting is straightforward.
Changing the Taskbar Color in Windows 11
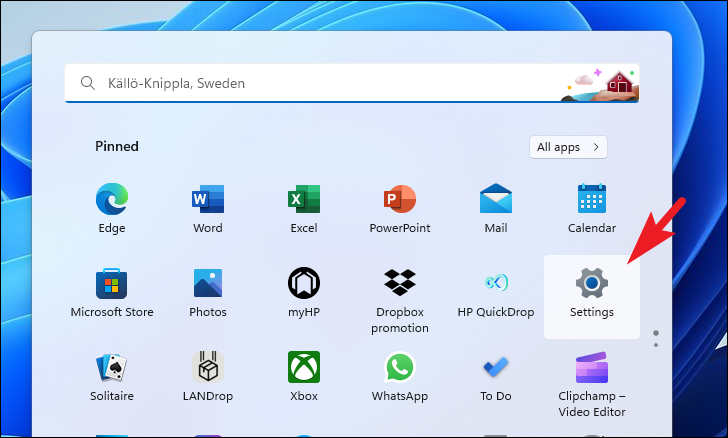
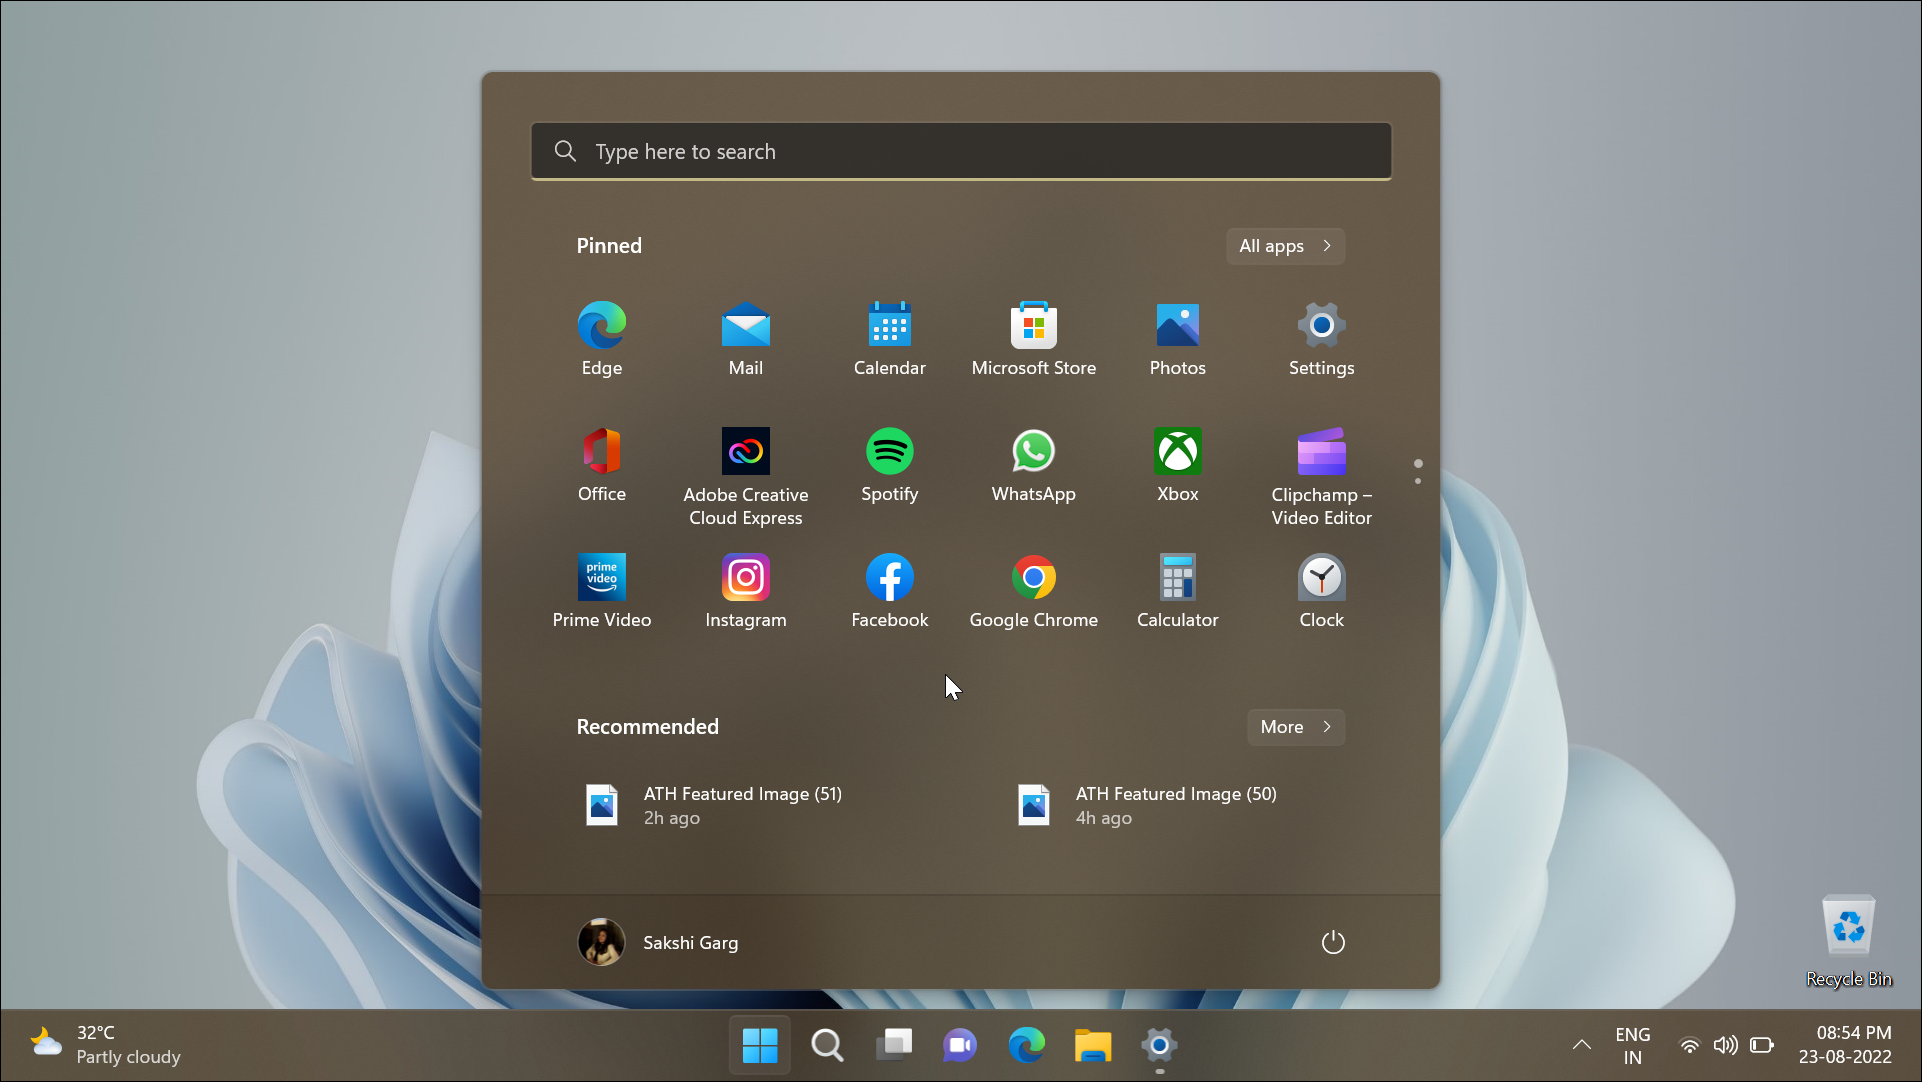
Step 1: Open the Settings app on your computer. You can do this by clicking on the Start menu and selecting the Settings icon, or by pressing Windows + I on your keyboard.
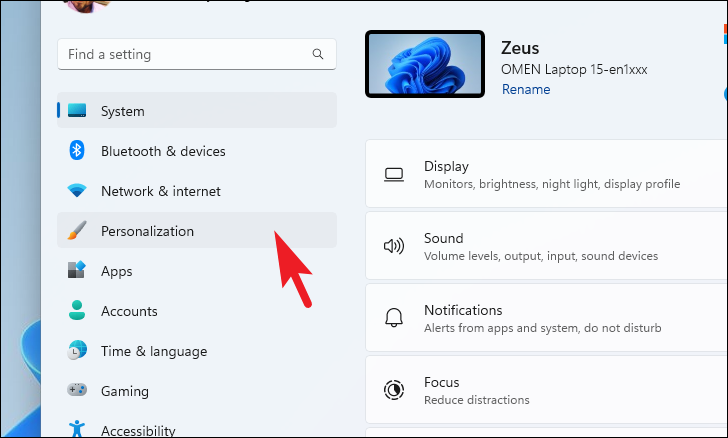
Step 2: In the Settings window, navigate to the Personalization section by clicking on it in the left-hand menu.
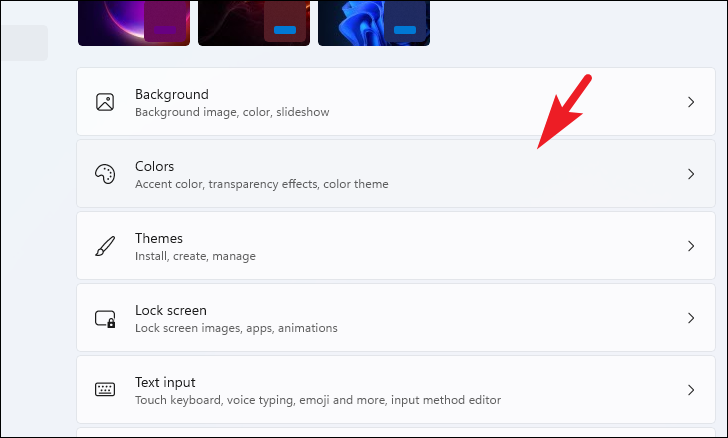
Step 3: Within Personalization, select the Colors option on the right side.
Note: The taskbar color option isn't available when using the Light mode in Windows 11. To enable it, you'll need to switch to either Dark or Custom mode.
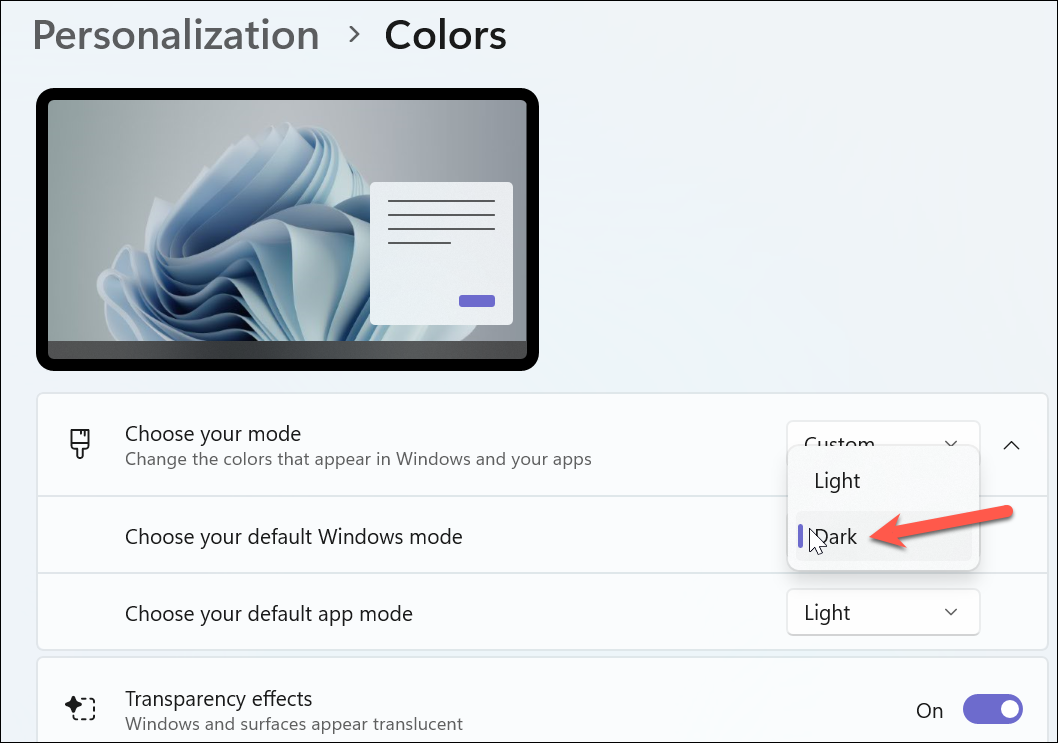
Step 4: Under the Choose your mode dropdown menu, select either Dark or Custom. Choosing Dark will apply the dark theme to Windows and apps, while Custom allows you to set different themes for Windows and apps.
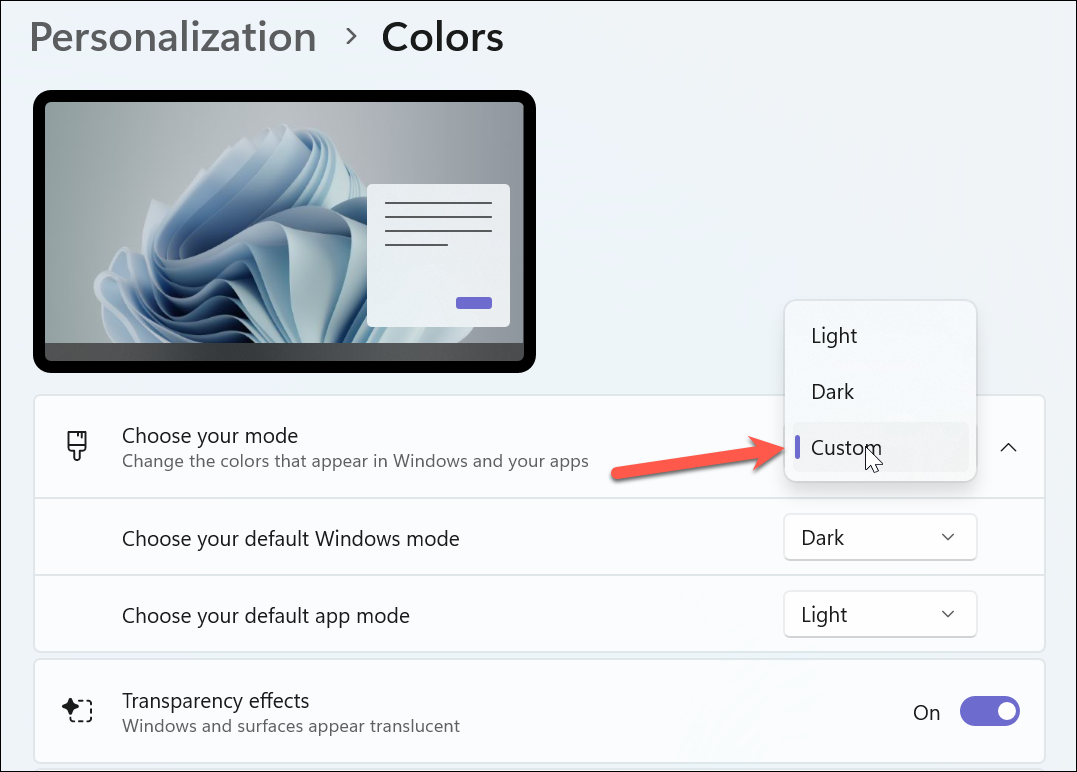
Step 5: If you opt for Custom, make sure to set the Default Windows mode to Dark. This setting is necessary to access the taskbar color options. You can leave the Default app mode as Light if you prefer.
Step 6: Next, decide how you want to choose your accent color. Under the Accent color section, you can select Automatic or Manual. Selecting Automatic will allow Windows to pick an accent color based on your current wallpaper.
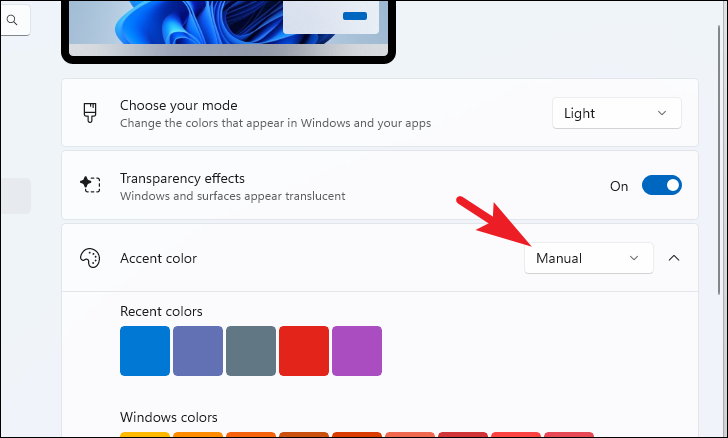
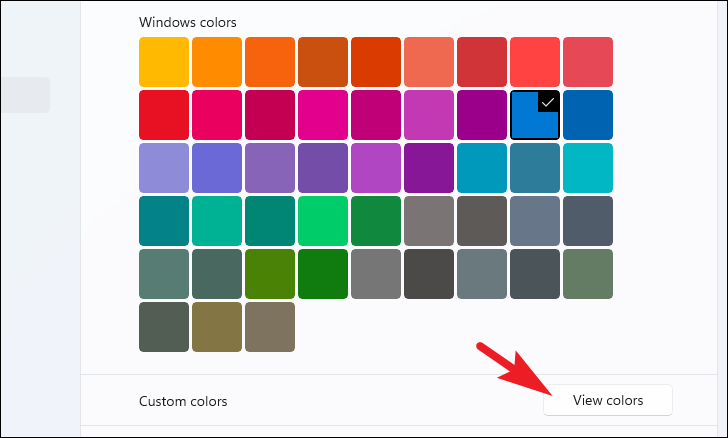
Step 7: If you choose Manual, you can select your preferred color from the palette provided. You also have the option to click on View colors to access a color picker for more customization.
Step 8: After selecting your accent color, toggle on the option Show accent color on Start and taskbar. This will apply your chosen color to the taskbar and Start menu.
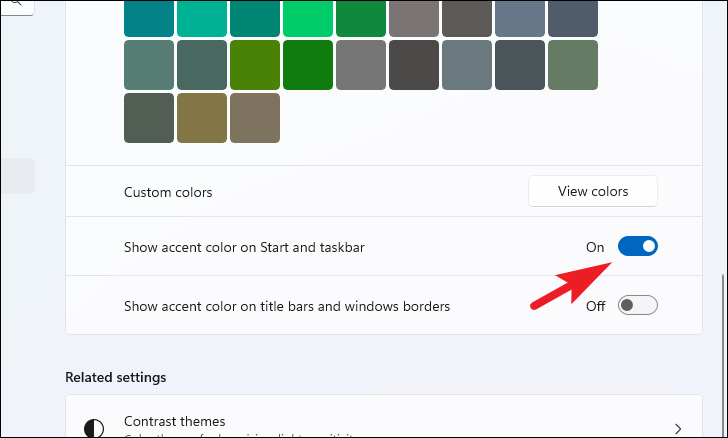
Note: The accent color will be applied to both the taskbar and the Start menu. There isn't an option to apply the color to the taskbar only.
Step 9: Once you've enabled this setting, you should see the taskbar and Start menu reflect your new accent color.
Changing the Taskbar Color Without Windows Activation
If your copy of Windows isn't activated, the personalization settings are typically locked. However, you can still change the taskbar color by making some changes in the Registry Editor. Be cautious when editing the registry, as incorrect changes can affect system stability.
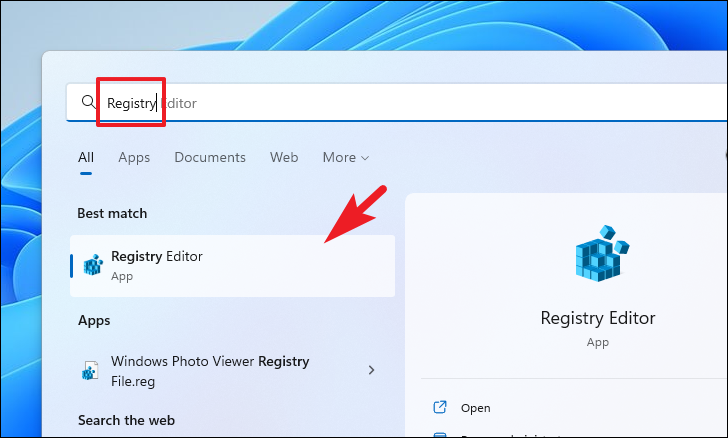
Step 1: Open the Registry Editor by clicking on the Start menu, typing Registry Editor, and selecting it from the search results.
Step 2: In the Registry Editor, navigate to the following path by copying and pasting it into the address bar and pressing Enter:
HKEY_CURRENT_USER\SOFTWARE\Microsoft\Windows\CurrentVersion\Themes\Personalize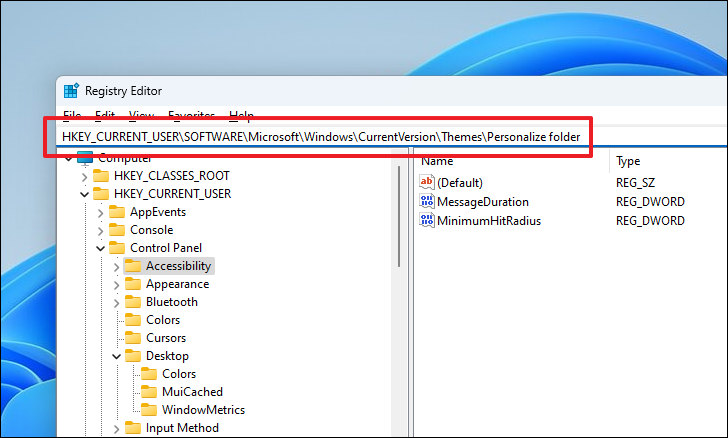
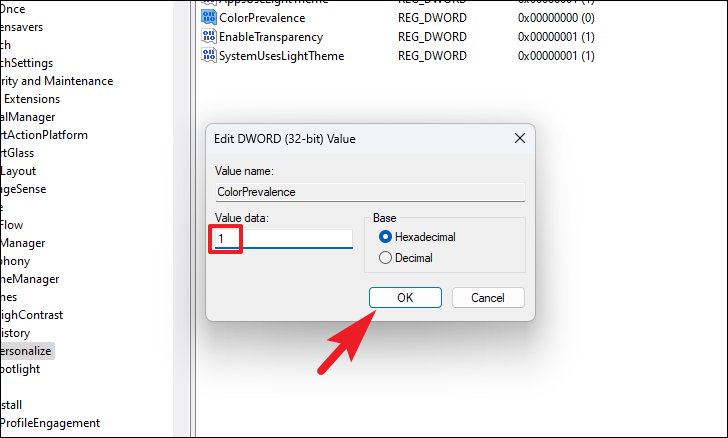
Step 3: In the right pane, find the ColorPrevalence DWORD entry and double-click on it to edit its value.
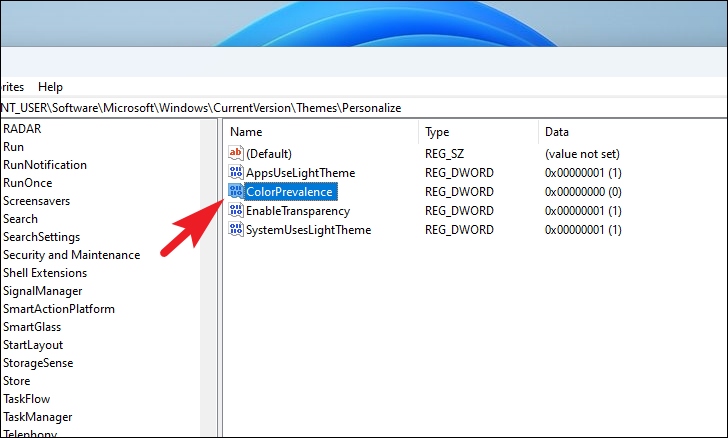
Step 4: Change the Value data to 1 and click OK to save the changes.
Step 5: Next, navigate to the following registry path:
HKEY_CURRENT_USER\Control Panel\Desktop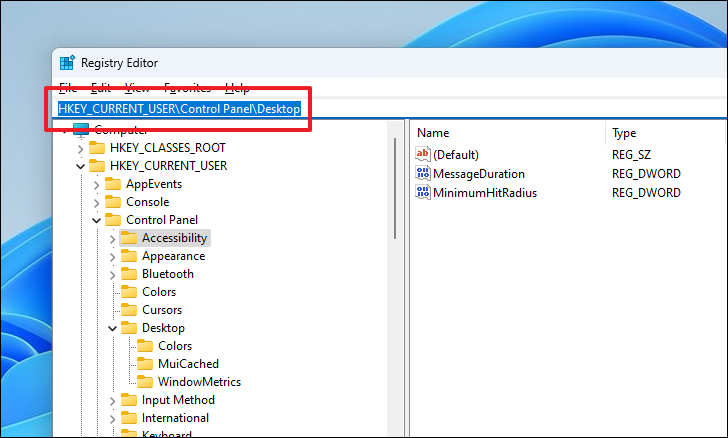
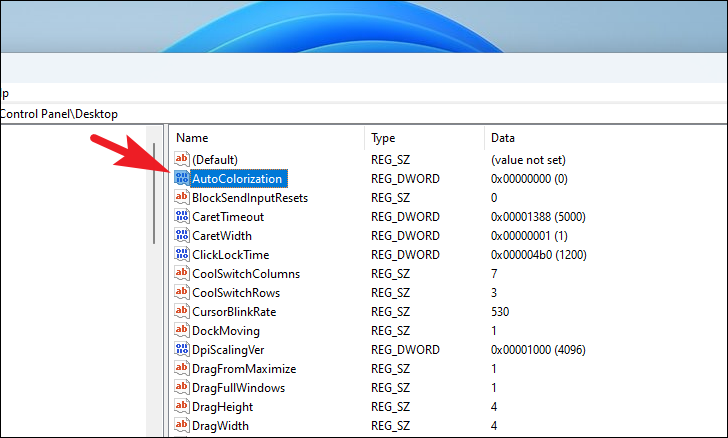
Step 6: Locate the AutoColorization DWORD entry and double-click on it.
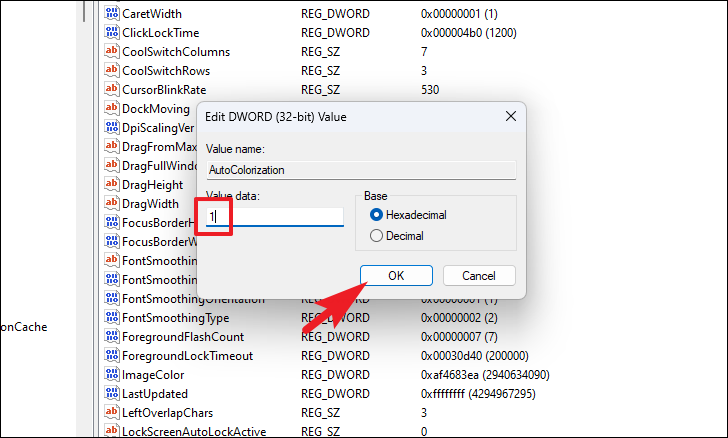
Step 7: Set the Value data to 1 and click OK to apply the changes.
Step 8: Close the Registry Editor and restart your computer for the changes to take effect. After rebooting, your taskbar and Start menu should now display an accent color that matches your current wallpaper.
By following these steps, you can customize your taskbar color in Windows 11, whether your system is activated or not, giving your desktop a personalized touch.


