Windows 11's Fast Startup feature helps your computer boot up more quickly by combining elements of a cold shutdown and hibernation. While this can be convenient, it might cause issues such as problems with Windows updates, difficulties in dual-boot environments, or unexpected errors like the Blue Screen of Death (BSOD). If you're experiencing any of these issues, disabling Fast Startup could help. Below are several methods to turn off Fast Startup in Windows 11.
Using the Control Panel
Step 1: Click on the Start menu and type Control Panel into the search bar. From the search results, select the Control Panel application.
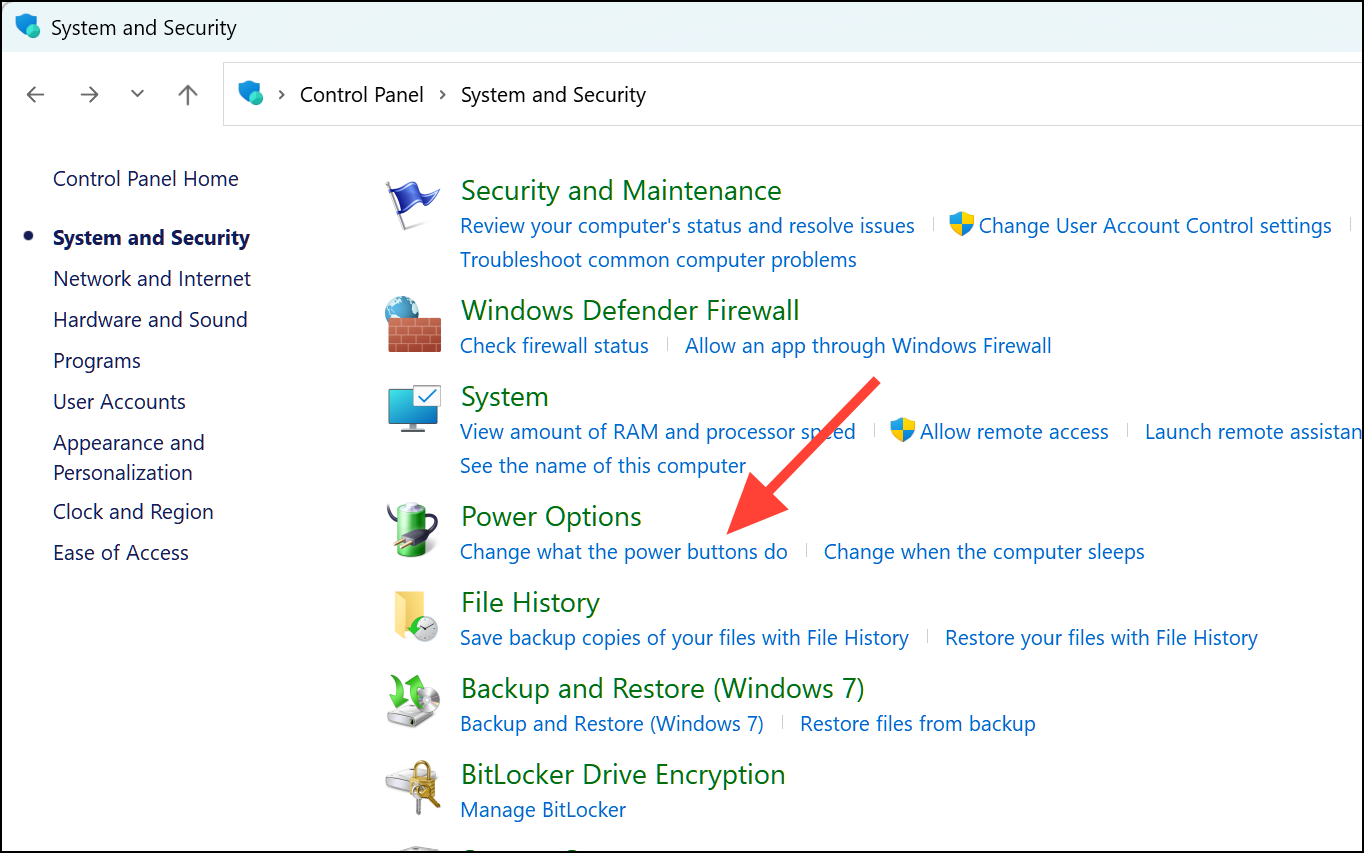
Step 2: In the Control Panel window, click on System and Security.
Step 3: Under the Power Options section, click on Choose what the power buttons do.
Step 4: Click on Change settings that are currently unavailable at the top of the window.
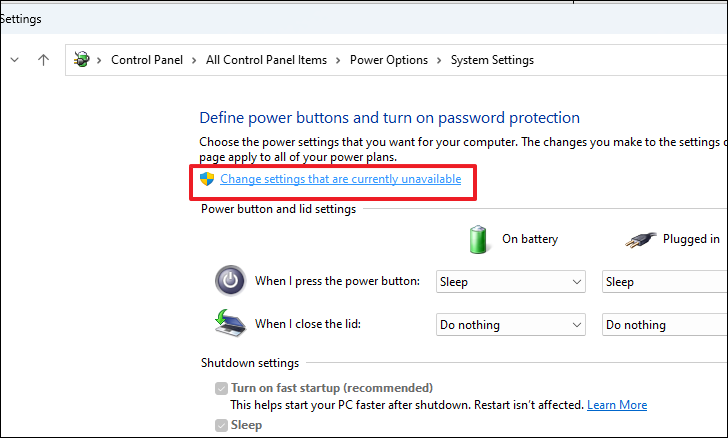
Step 5: If prompted by User Account Control (UAC), click Yes to grant administrative access.
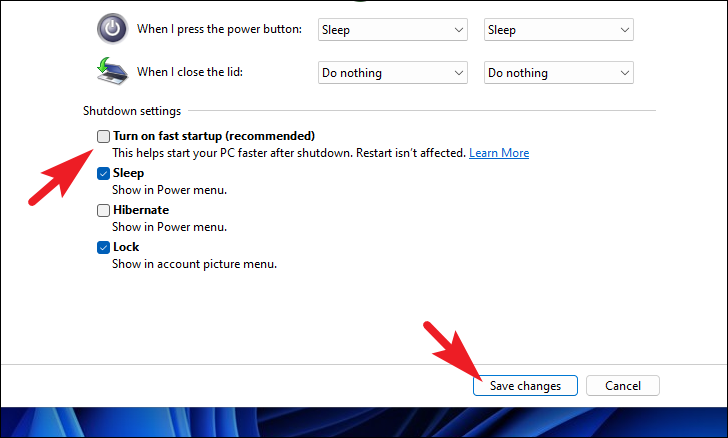
Step 6: Scroll down to the Shutdown settings section. Uncheck the box next to Turn on fast startup (recommended).
Step 7: Click the Save changes button at the bottom of the window to apply the new settings.
Step 8: Close the Control Panel window.
Step 9: Restart your computer to ensure the changes take effect. After rebooting, Fast Startup will be disabled.
Using Command Prompt
Step 1: Open the Start menu and type Command Prompt in the search bar.
Step 2: Right-click on the Command Prompt app from the search results and select Run as administrator.
Step 3: If prompted by User Account Control (UAC), click Yes to confirm administrative privileges.
Step 4: In the Command Prompt window, type the following command and press Enter:
powercfg -h offStep 5: This command disables hibernation and Fast Startup on your system.
Step 6: Close the Command Prompt window. There's no need to restart your computer; Fast Startup is now disabled.
If you'd like to confirm, you can check the setting in the Control Panel under Choose what the power buttons do, as described in the first method.
Using the Registry Editor
Step 1: Open the Start menu and search for Registry Editor. Click on the Registry Editor app from the search results.
Step 2: If a User Account Control (UAC) prompt appears, click Yes to grant administrative access.
Step 3: In the Registry Editor window, navigate to the following path:
HKEY_LOCAL_MACHINE\SYSTEM\CurrentControlSet\Control\Session Manager\PowerStep 4: In the left pane, expand the folders to reach Power. In the right pane, locate the DWORD value named HiberbootEnabled.
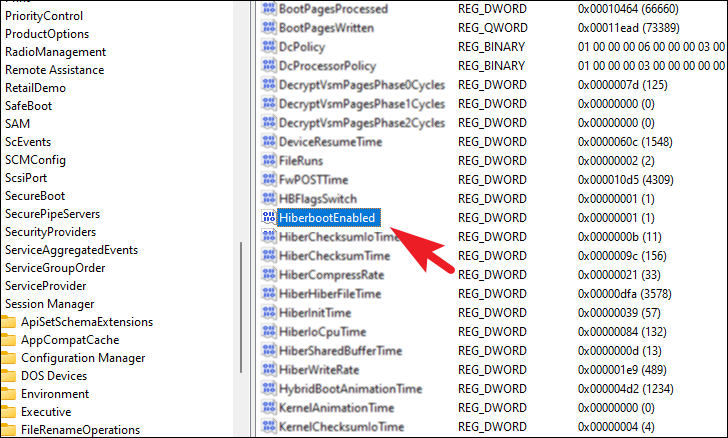
Step 5: Right-click on HiberbootEnabled and select Modify from the context menu.
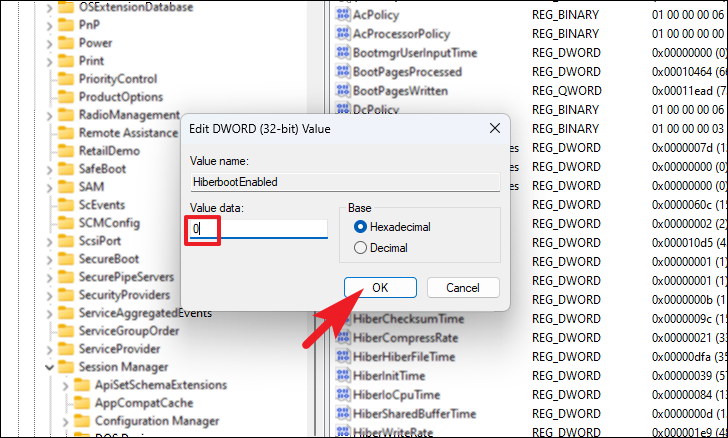
Step 6: In the Edit DWORD (32-bit) Value window, change the Value data field to 0 to disable Fast Startup.
Step 7: Click OK to save the changes.
Step 8: Close the Registry Editor window.
Step 9: Restart your computer to apply the changes. Once your system boots up, Fast Startup will be disabled.
Using the Group Policy Editor
Step 1: Open the Start menu and type gpedit.msc or Group Policy in the search bar. Click on the Group Policy Editor to open it.
Step 2: If a User Account Control prompt appears, click Yes to grant administrative access.
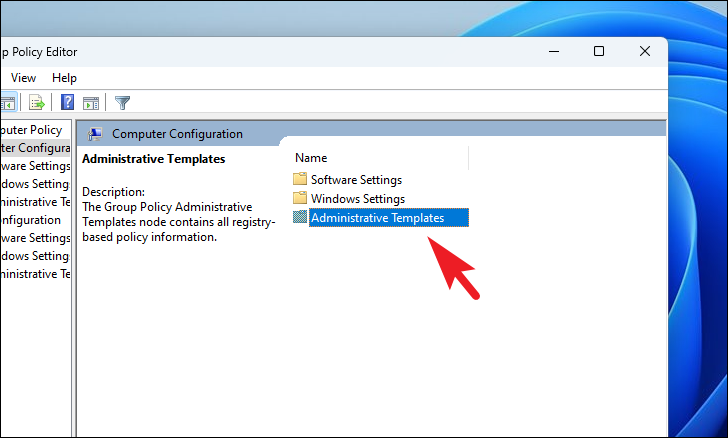
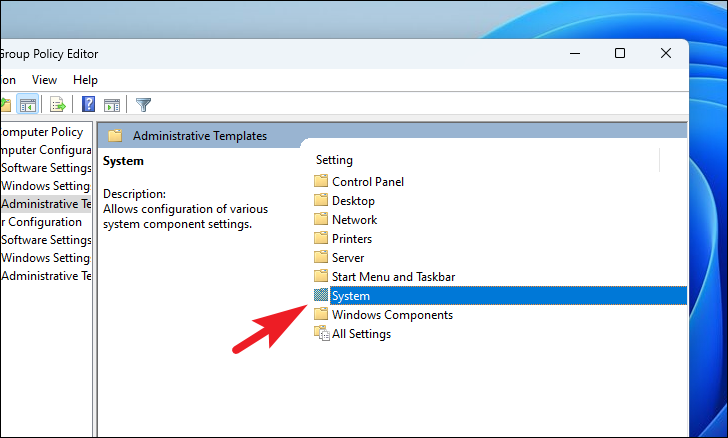
Step 3: In the left pane of the Group Policy Editor, navigate to the following path:
Computer Configuration > Administrative Templates > System > Shutdown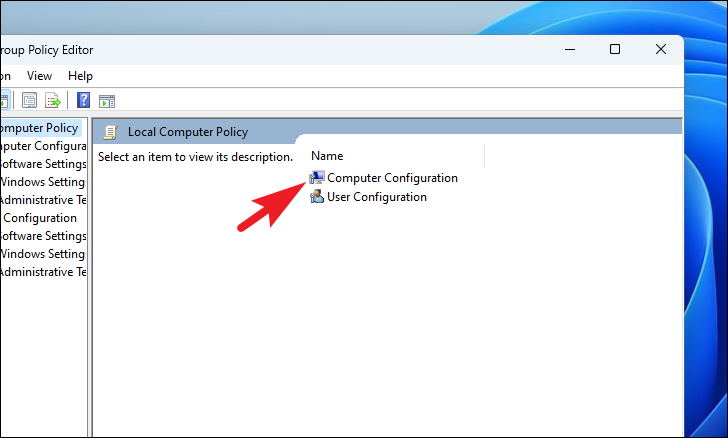
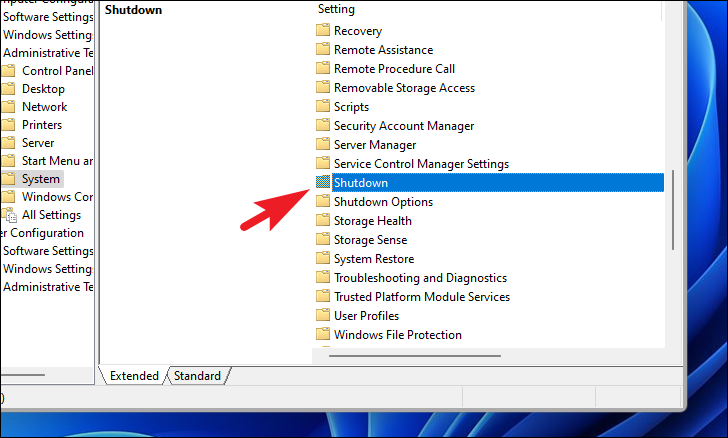
Step 4: In the right pane, find the policy named Require use of fast startup and double-click on it.
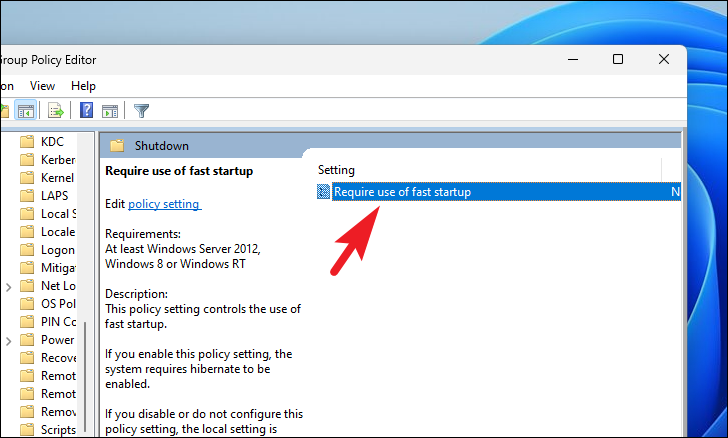
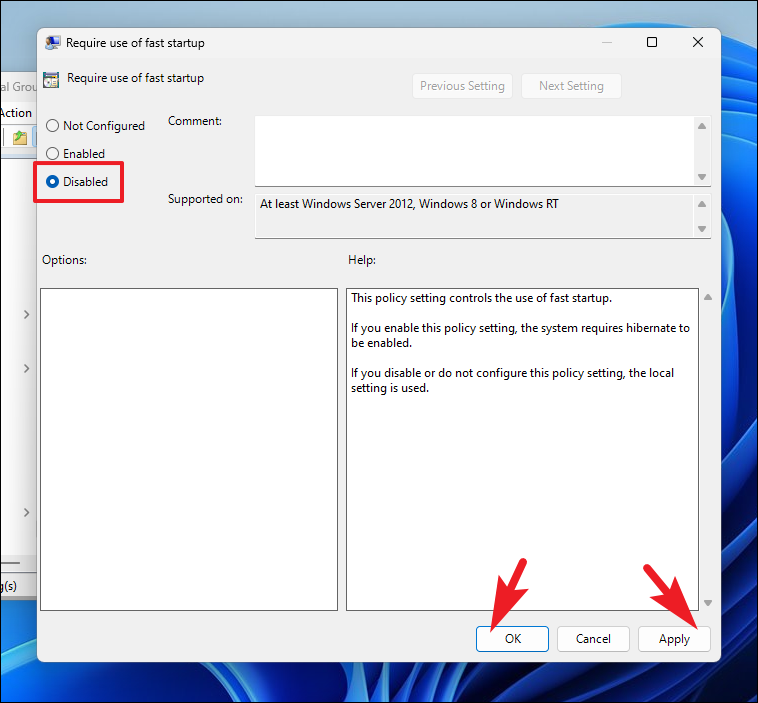
Step 5: In the policy settings window, select the Disabled option to turn off Fast Startup.
Step 6: Click Apply and then OK to save the changes.
Step 7: Close the Group Policy Editor window.
Step 8: Restart your computer to apply the changes. After the reboot, Fast Startup will be disabled.
Disabling Fast Startup can help resolve issues related to system updates, dual-boot configurations, and unexpected errors. Keep in mind that turning off this feature may slightly increase your system's boot time.




Member discussion