The clipboard history feature in Windows 11 allows you to keep track of the items you've copied, making it convenient to access them later. However, if you've been handling sensitive information, you might want to clear your clipboard history to maintain privacy. Here are several methods to help you clear your clipboard history in Windows 11.
Clear the clipboard history from the clipboard
You can quickly clear your clipboard history directly from the clipboard itself. This method is straightforward and doesn't require navigating through settings.
Step 1: Press the Windows + V keys together on your keyboard to open the clipboard history panel.
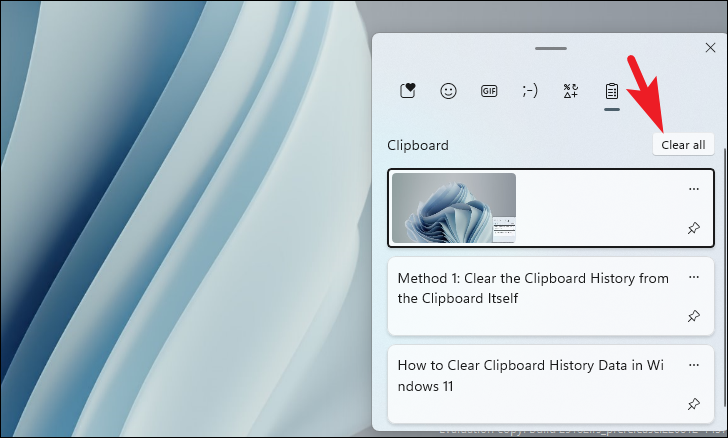
Step 2: Click on the 'Clear All' button at the top of the clipboard panel to remove all items from your clipboard history.

If you prefer to delete a single item from your clipboard history:
Step 1: In the clipboard history panel, find the item you want to remove and click on the 'ellipsis' (three dots) icon on that item.
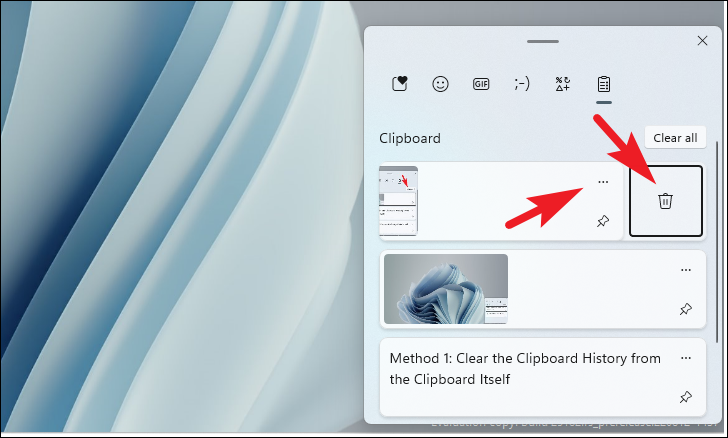
Step 2: Click on the 'Trash' icon to delete that specific item from your clipboard history.
Clear clipboard history via Settings app
Another way to clear your clipboard history is through the Settings app. This method is useful if you're already in Settings or prefer using the graphical interface.
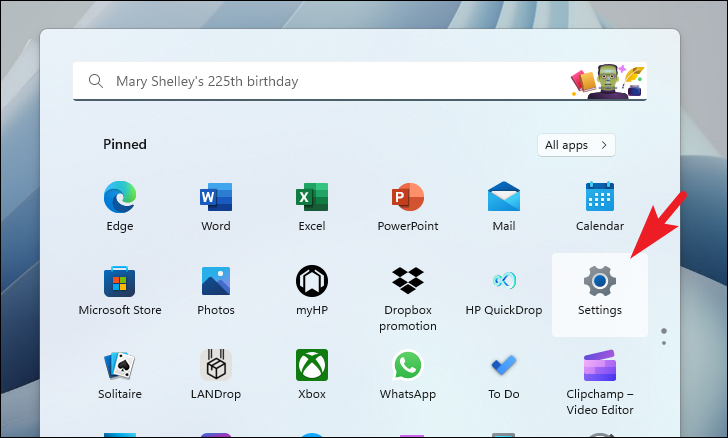
Step 1: Open the Start Menu and click on the Settings icon. You can also press Windows + I to open the Settings app directly.
Step 2: In the Settings window, select the 'System' tab from the left sidebar.
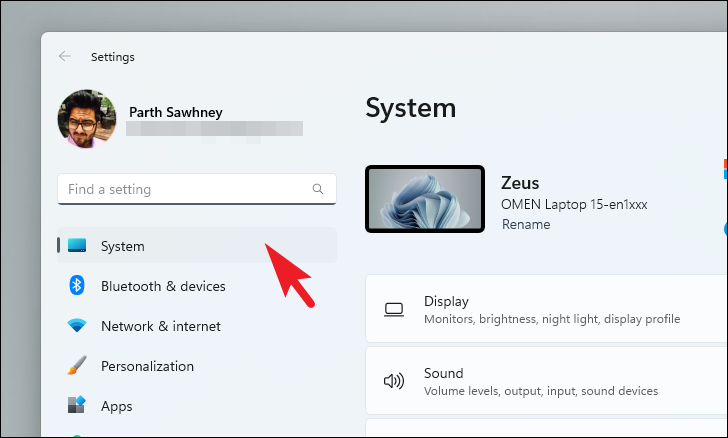
Step 3: On the right side, scroll down and click on 'Clipboard'.
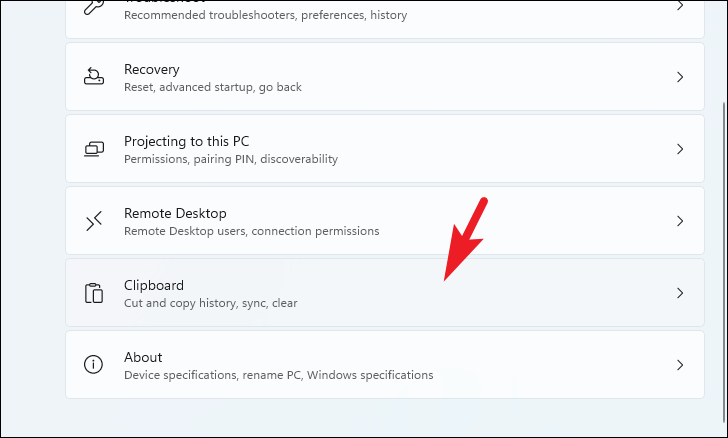
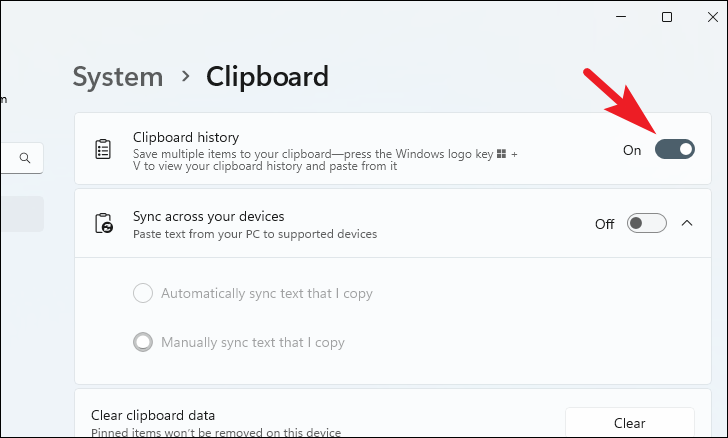
Step 4: Under the 'Clear clipboard data' section, click on the 'Clear' button to erase all clipboard history data.
Use Run command to clear clipboard history
If you prefer using the Run dialog, you can clear the clipboard history with a simple command.
Step 1: Press the Windows + R keys together to open the Run dialog box.
Step 2: In the Run dialog, type or paste the following command and press Enter:
cmd /c echo.|clip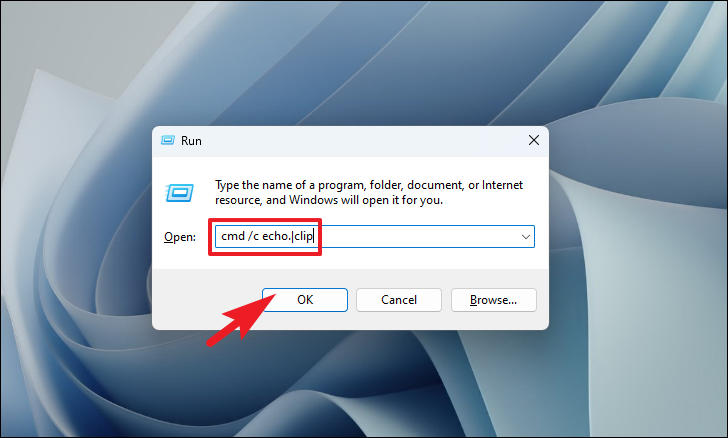
This command clears the current clipboard content and history.
Create a shortcut to clear clipboard data
For even quicker access, you can create a desktop shortcut that clears the clipboard history with a double-click.
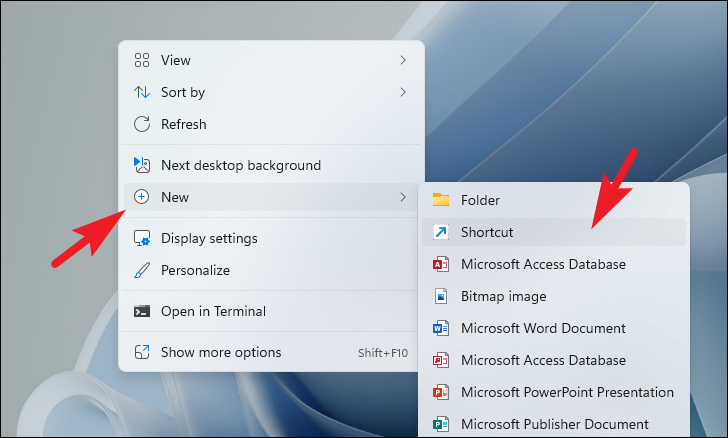
Step 1: Right-click on an empty area of your desktop, hover over 'New', and select 'Shortcut' from the context menu.
Step 2: In the 'Create Shortcut' window, enter the following command into the text field, then click 'Next':
cmd /c echo.|clip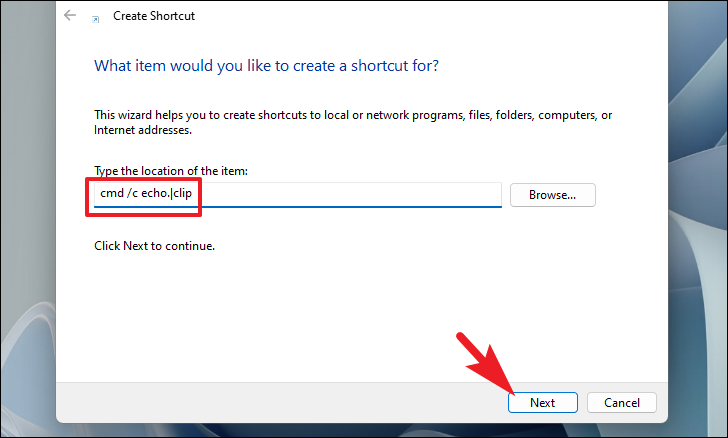
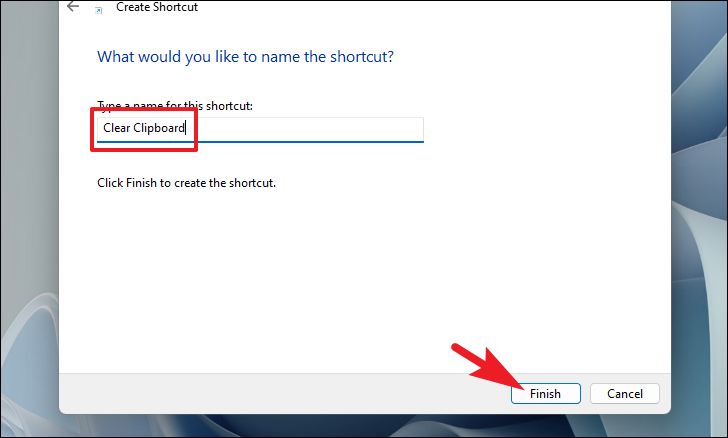
Step 3: Name the shortcut (e.g., 'Clear Clipboard') and click 'Finish'.
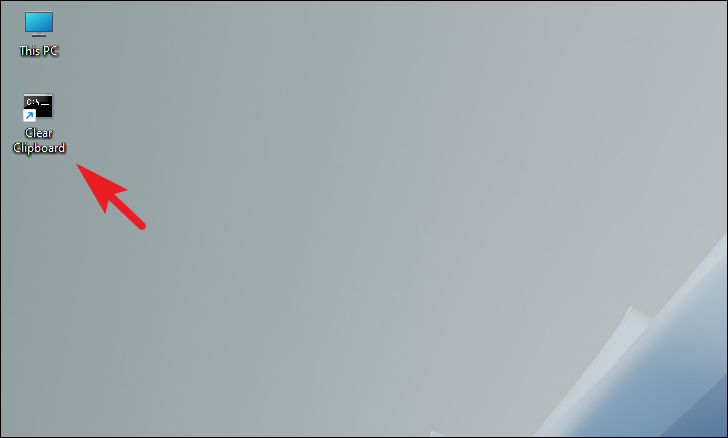
The shortcut will appear on your desktop. Double-click it anytime to clear your clipboard history.
To assign a keyboard shortcut to this action:
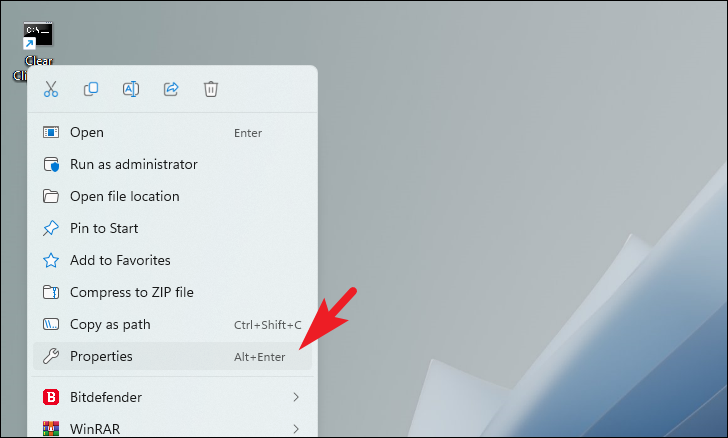
Step 4: Right-click the 'Clear Clipboard' shortcut and select 'Properties'.
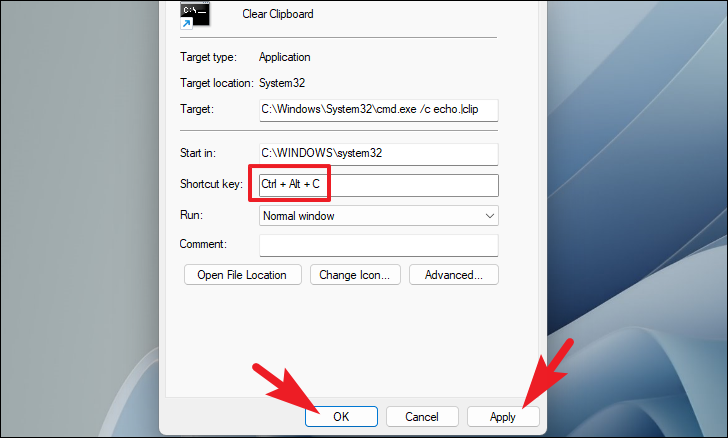
Step 5: In the 'Shortcut key' field, press the key combination you want to assign (e.g., Ctrl + Alt + C). The shortcut will display in the field. Click 'Apply' and then 'OK'.
Step 6: Press Windows + R to open the Run dialog again. Type or paste the following command and press Enter:
shell:Start menu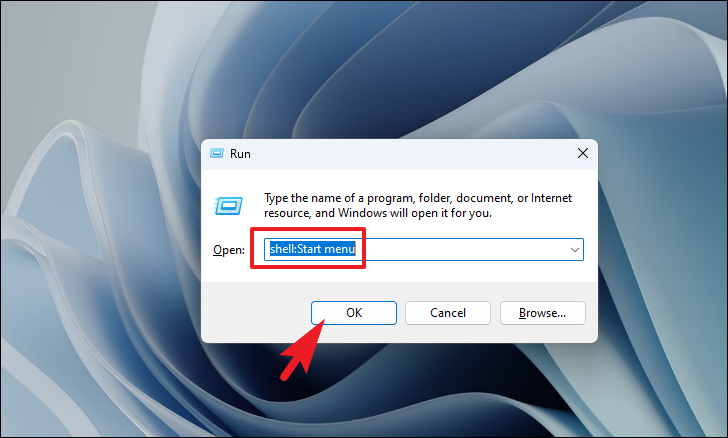
Step 7: In the File Explorer window that opens, double-click the 'Programs' folder.
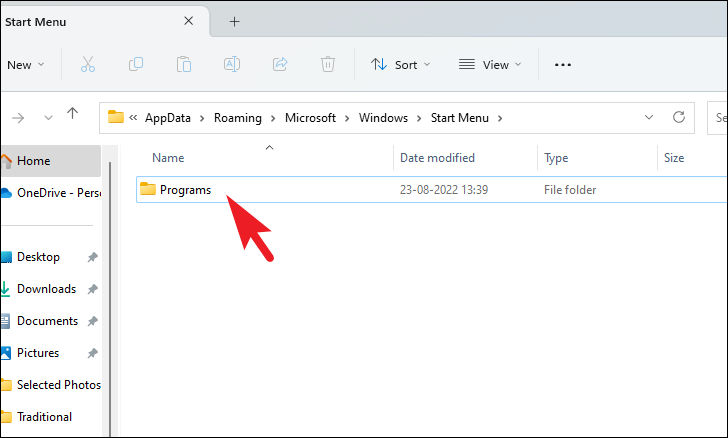
Step 8: Copy the 'Clear Clipboard' shortcut from your desktop and paste it into the 'Programs' folder. This allows the keyboard shortcut to work from anywhere in Windows.
Disable clipboard history on Windows 11
If you prefer not to use clipboard history at all, you can disable it entirely through the Settings app.
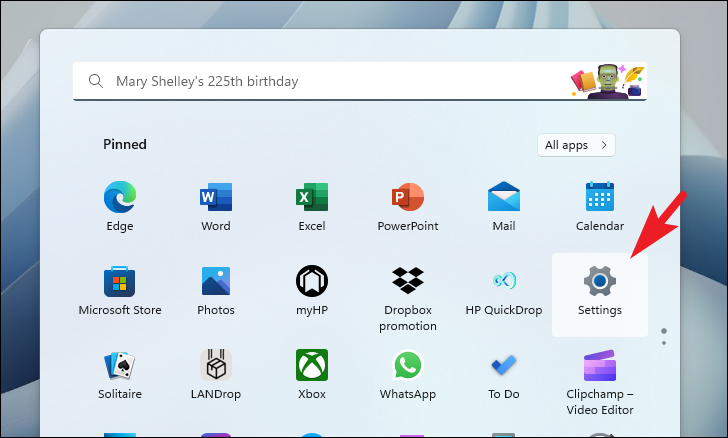
Step 1: Open the Settings app by clicking the Settings icon in the Start Menu or by pressing Windows + I.
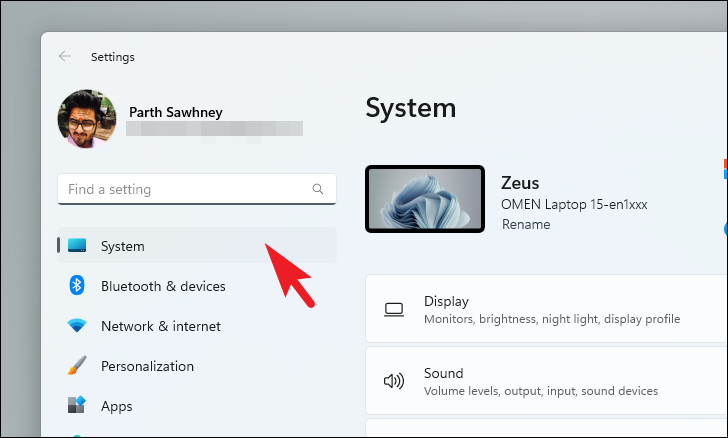
Step 2: Select the 'System' tab from the left sidebar.
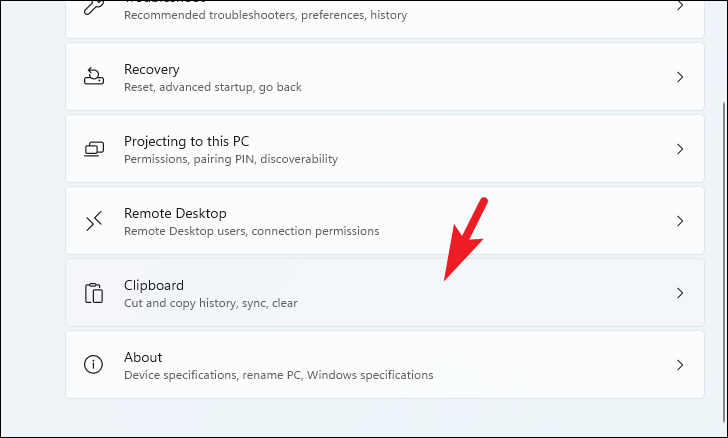
Step 3: Click on 'Clipboard' in the right pane.
Step 4: Toggle off the switch next to 'Clipboard history' to disable the feature.
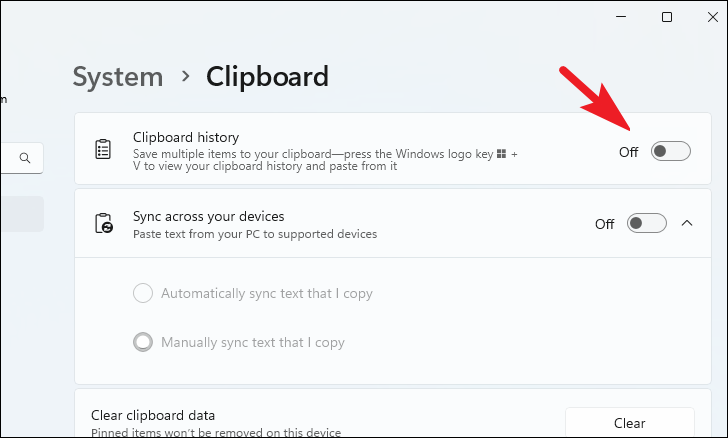
You can re-enable clipboard history at any time by toggling the switch back on.
By using these methods, you can manage your clipboard history effectively and maintain your privacy on Windows 11.

