Windows 11’s Search feature is a powerful tool that allows you to find almost anything on your computer—from apps and files (both local and cloud-based) to settings and even web content. However, it’s important to note that Windows records all your search activities, including files, folders, apps, services, settings, and web queries made through Bing.
While this feature can enhance your user experience by providing quick access to recent searches, it can also be a privacy concern. Anyone with access to your PC can view your recent searches in the ‘Recent’ section of the Windows Search menu.
If you prefer to keep your search history private, there are several methods to clear and manage your search history in Windows 11. This guide will walk you through the most effective ways to clear your search history, disable future tracking, and manage your activity data.
Disable recent search history on Windows 11
Preventing Windows from saving your search history is an effective way to safeguard your privacy. By disabling the recent search history feature, you ensure that your searches are not recorded. Here’s how to do it:
- Press
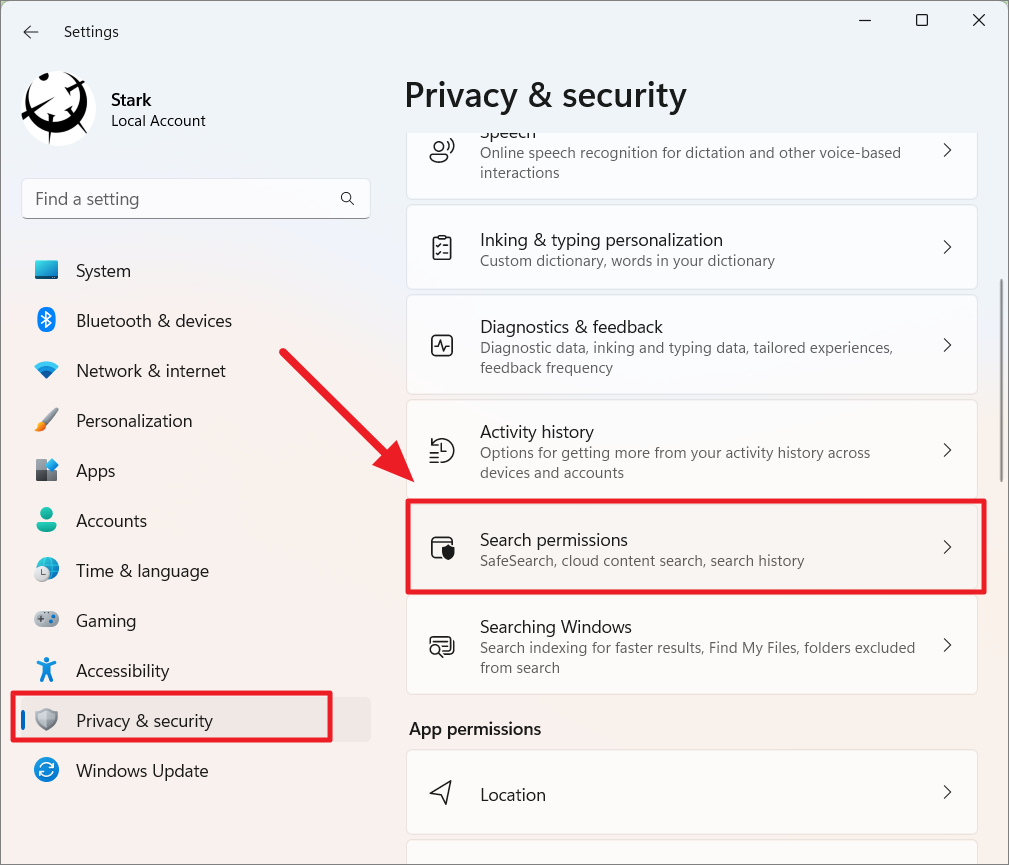
Windows+Ito open the Settings app. - In the Settings window, select Privacy & security from the left-hand menu.
- On the right, click on Search permissions under the Windows permissions section.
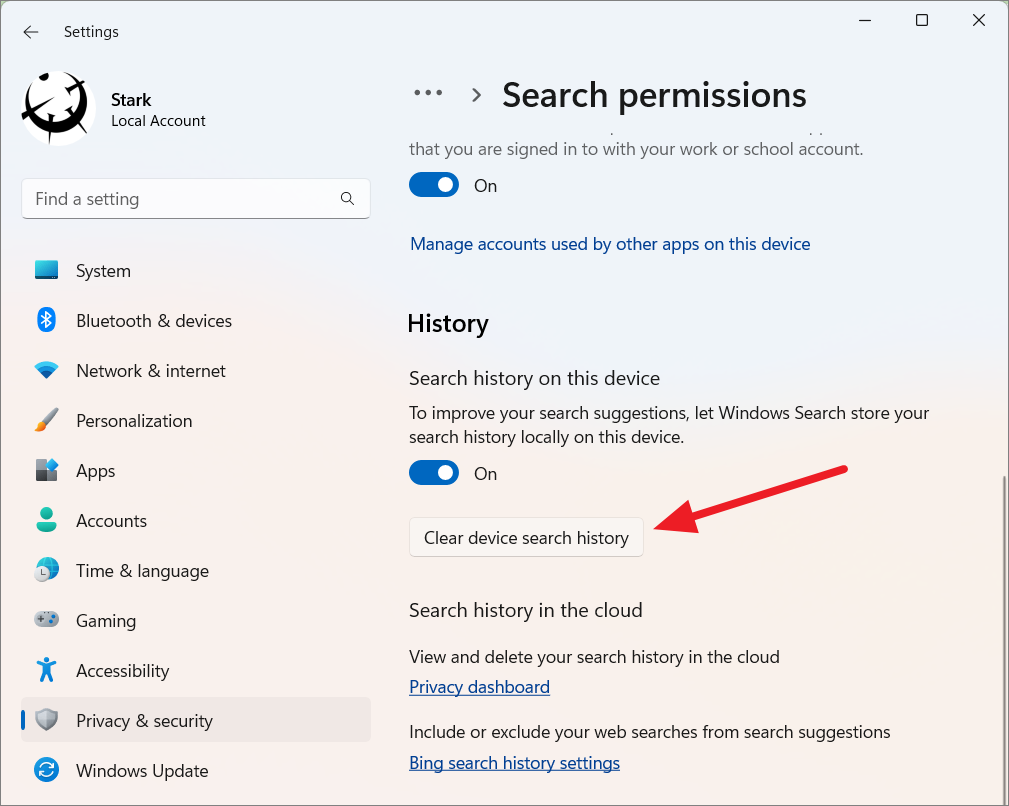
- Scroll down to the History section.
- Toggle off the switch next to Search history on this device.
Once disabled, Windows will no longer store your search history. The Search menu will only display suggested apps and settings, keeping your search activities private.
Disable recent search history via Registry Editor
If you prefer using the Registry Editor, you can also disable search history through it. Follow these steps carefully:
- Press
Windows+Rto open the Run dialog box. - Type
regeditand pressEnterto launch the Registry Editor.
- Navigate to the following path:
HKEY_CURRENT_USER\Software\Microsoft\Windows\CurrentVersion\SearchSettings
- In the right pane, double-click on IsDeviceSearchHistoryEnabled. If it doesn’t exist, right-click in the pane, select New > DWORD (32-bit) Value, and name it IsDeviceSearchHistoryEnabled.
- Set the Value data to
0and click OK.
- Close the Registry Editor and restart your computer for the changes to take effect.
Clear Windows 11 search history via Settings
If you prefer to clear your existing search history without disabling the feature entirely, you can do so through the Settings app:
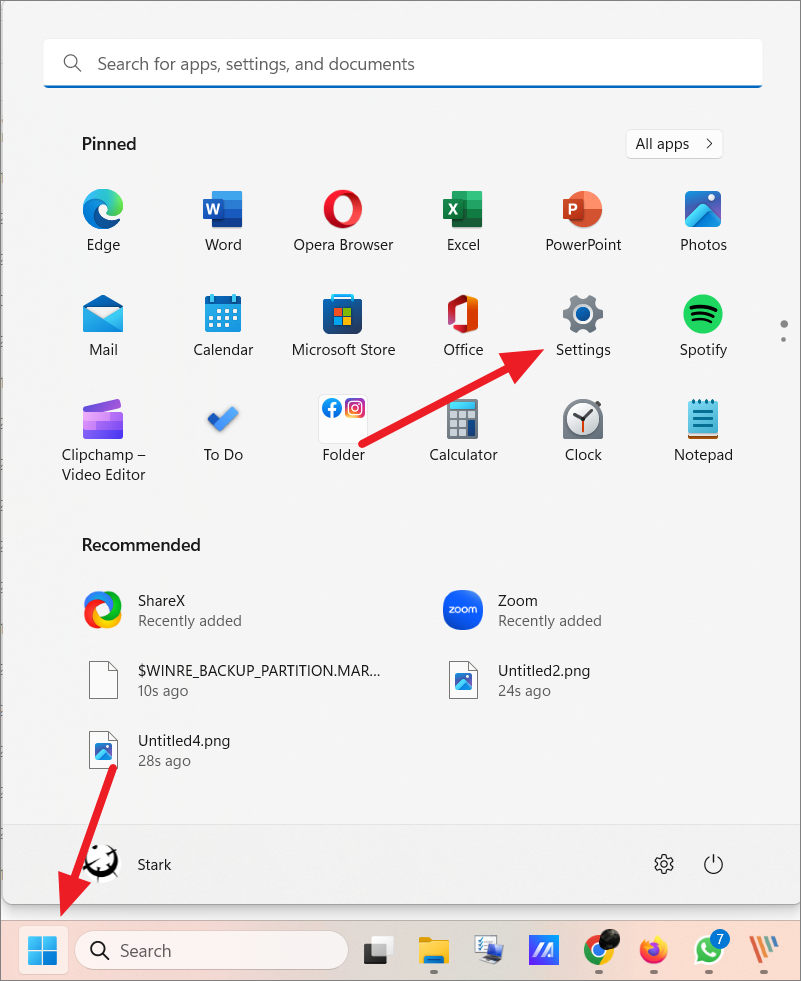
- Click the Start button and select Settings, or press
Windows+I.
- In Settings, choose Privacy & security from the left menu.
- Click on Search permissions on the right.
- Under the History section, click on Clear device search history.
This action will delete all your local search history from the device.
Clear search history from the cloud
When using Windows Search to look up information on the web, your queries are stored in your Microsoft account. Clearing this data ensures that your search history isn’t used for suggestions or targeted ads. Follow these steps:
- Open Settings and select Privacy & security.
- Click on Search permissions.
- In the History section, click the Privacy dashboard link.
- This will open your browser. Click on SIGN IN WITH MICROSOFT and enter your credentials.
- Once logged in, scroll to Search history and click to expand it.
- To remove individual search entries, click the trash icon next to each query. To delete all, click on Clear all search history.
After clearing, you can sign out and close the browser.
Clear File Explorer search history on Windows 11
File Explorer keeps a record of your recent searches to provide quick suggestions. If you want to clear this history, follow these steps:
- Open File Explorer by clicking the folder icon on the taskbar or pressing
Windows+E. - Click on the three dots in the toolbar and select Options.
- In the Folder Options dialog, under the General tab, click Clear next to Clear File Explorer history.
Clear File Explorer search history via Registry Editor
You can also remove search history using the Registry Editor:
- Open the Registry Editor by pressing
Windows+R, typingregedit, and pressingEnter.
- Navigate to:
HKEY_CURRENT_USER\Software\Microsoft\Windows\CurrentVersion\Explorer\WordWheelQuery
- Select all the entries in the right pane, right-click, and choose Delete.
- Confirm the deletion by clicking Yes when prompted.
- Restart your computer to apply the changes.
Clear recent files from AppData folder
To remove recent files using the AppData folder:
- Press
Windows+Rto open the Run dialog. - Type
%AppData%\Microsoft\Windows\Recent\and pressEnter.
- Select all items, right-click, and choose Delete, or press
Shift+Deleteto permanently remove them.
Disable File Explorer search history in Windows 11
If you’d prefer that File Explorer never saves your search history, you can disable this feature entirely.
Disabling File Explorer search history using Group Policy Editor
- Press
Windows+R, typegpedit.msc, and pressEnterto open the Local Group Policy Editor.
- Navigate to:
User Configuration > Administrative Templates > Windows Components > File Explorer
- In the right pane, double-click on Turn off display of recent search entries in the File Explorer search box.
- Select Enabled, click Apply, and then OK.
- Restart your computer to apply the changes.
Disabling File Explorer search history using Registry Editor
- Press
Windows+R, typeregedit, and pressEnter.
- Navigate to:
HKEY_CURRENT_USER\Software\Policies\Microsoft\Windows\Explorer
- If the Explorer key doesn’t exist, right-click on Windows, select New > Key, and name it Explorer.
- Right-click on Explorer, select New > DWORD (32-bit) Value, and name it DisableSearchBoxSuggestions.
- Double-click on DisableSearchBoxSuggestions, set the Value data to
1, and click OK.
- Close the Registry Editor and restart your PC.
Clear activity history on Windows 11
Windows 11 collects data about your activities to improve your experience. If you want to clear this data, follow these steps:
Delete your Windows activity history
- Press
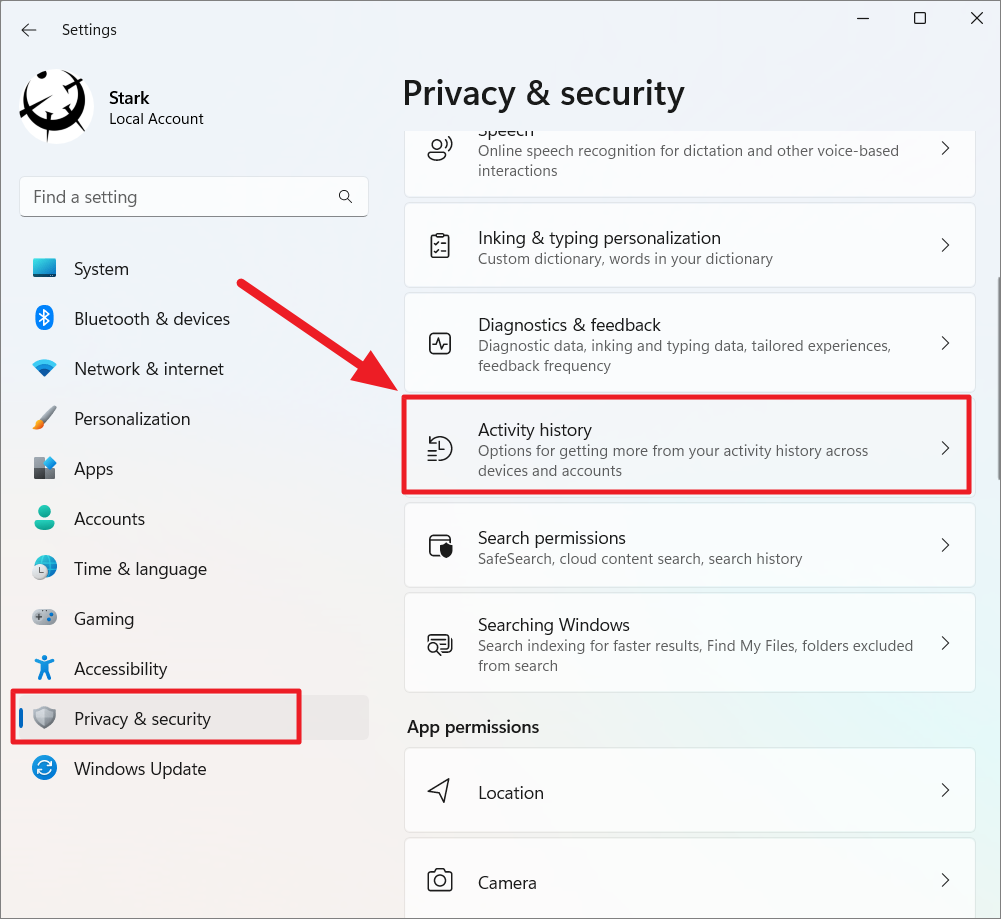
Windows+Ito open Settings. - Select Privacy & security from the left menu.
- Click on Activity history on the right.
- Under Clear activity history, click Clear.
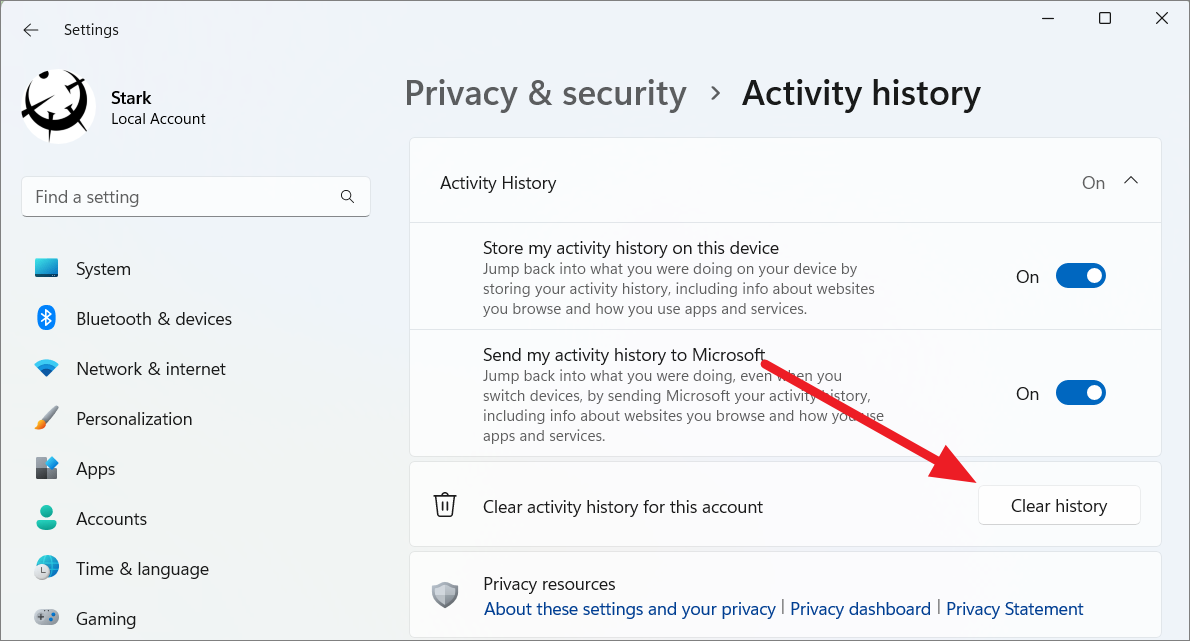
You can also prevent Windows from storing this data by unchecking the options under Activity history.

Clear location history in Windows 11
To clear your location history:
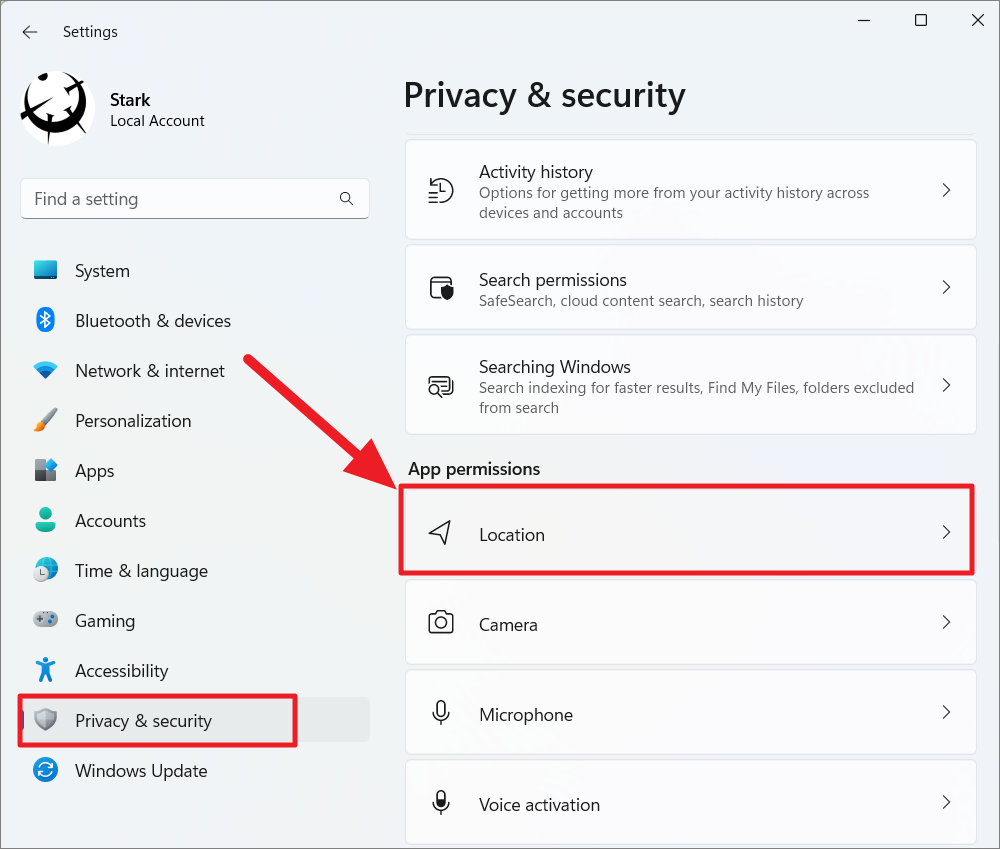
- In Settings, go to Privacy & security and click on Location.
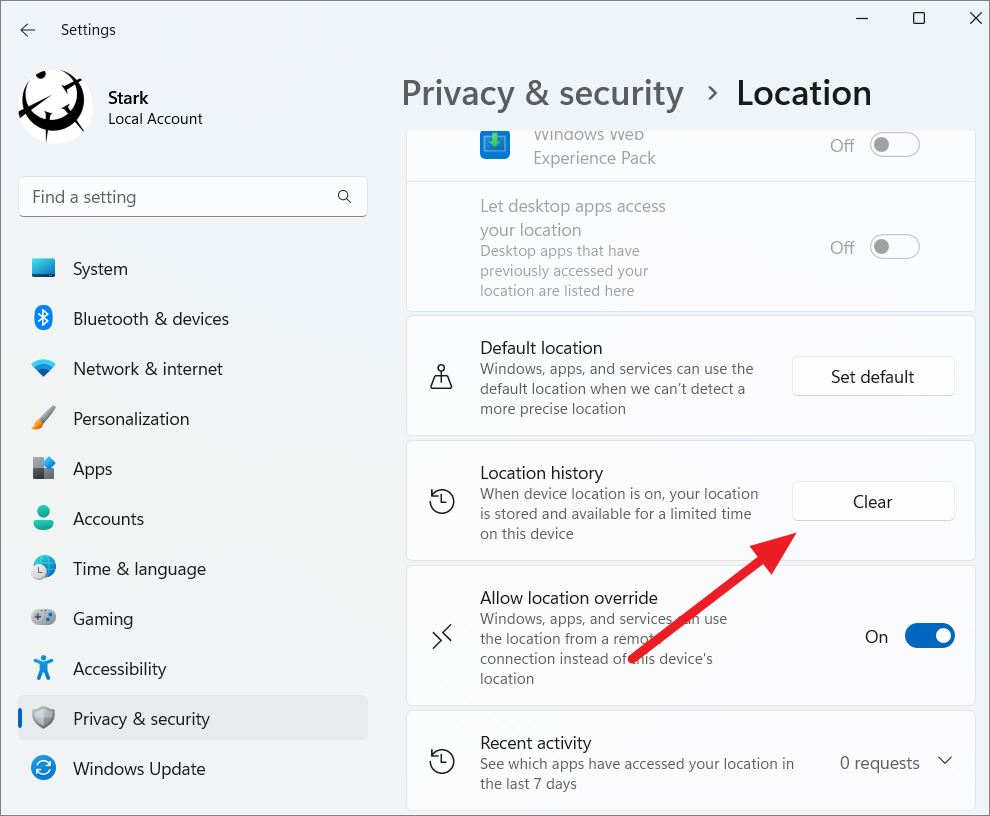
- Scroll down and click Clear next to Location history.
Clear activity history from Microsoft account
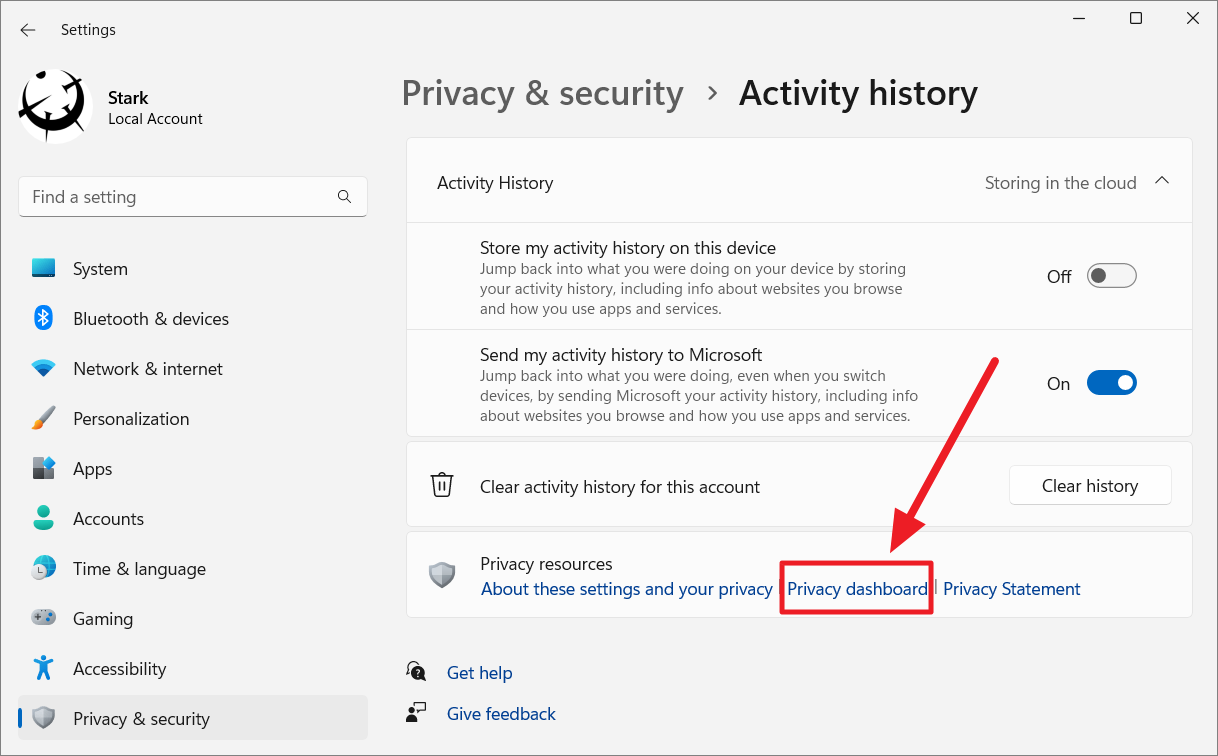
- In Settings, go to Privacy & security > Activity history.
- Click on the Privacy dashboard link.
- Sign in to your Microsoft account.
- Under App and service activity, click on Clear all app and service activity.
Confirm the action to delete your activity data from the cloud.
Clear recommended history from Windows 11 Start menu
The Start menu’s Recommended section displays recently used files and apps. To clear this history:
To remove individual items:
- Open the Start menu.
- Right-click on the item you want to remove.
- Select Remove from list.
To remove all items:
- Open Settings and go to Personalization.
- Click on Start.
- Turn off the toggles for Show recently added apps, Show most used apps, and Show recently opened items in Start, Jump Lists, and File Explorer.
The Recommended section will now be cleared.
By following these methods, you can effectively manage and clear your search history and activity data on Windows 11, ensuring your privacy is maintained.


