
Installing the correct HP printer driver on your Windows 11 computer is essential for printing. Without the appropriate driver, your computer may not communicate properly with your printer, preventing you from printing documents or photos. This guide provides several methods to help you download and install HP printer drivers on your Windows 11 PC.
1. Head to the HP official support website
Downloading the driver directly from HP’s official support website ensures you get the latest and most compatible software for your printer model.
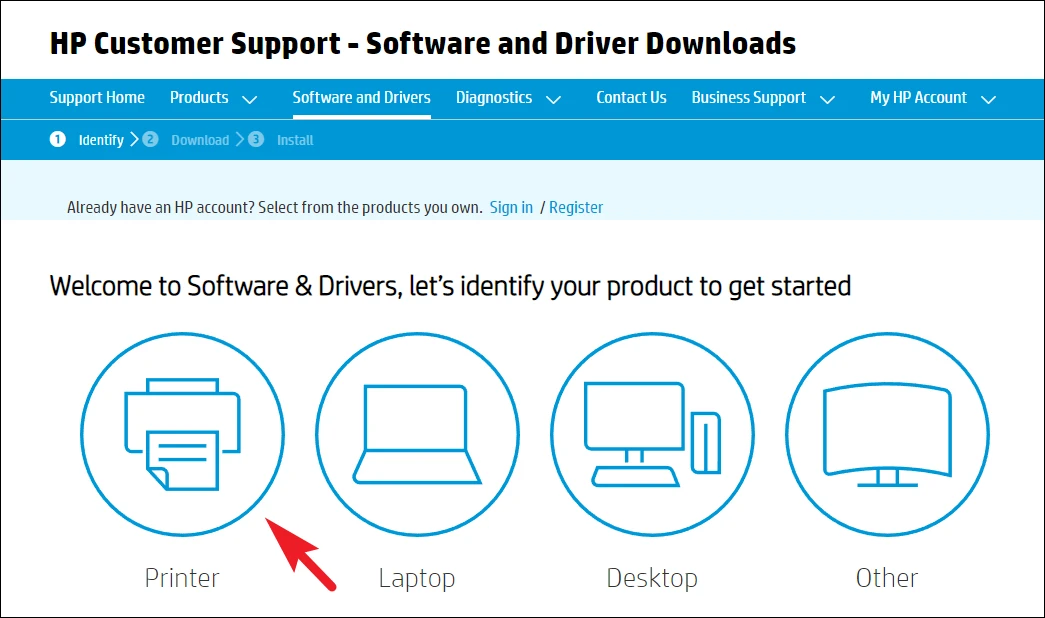
- Open your preferred web browser and navigate to the HP Support – Software & Drivers website.
- Click on the “Printer” option.
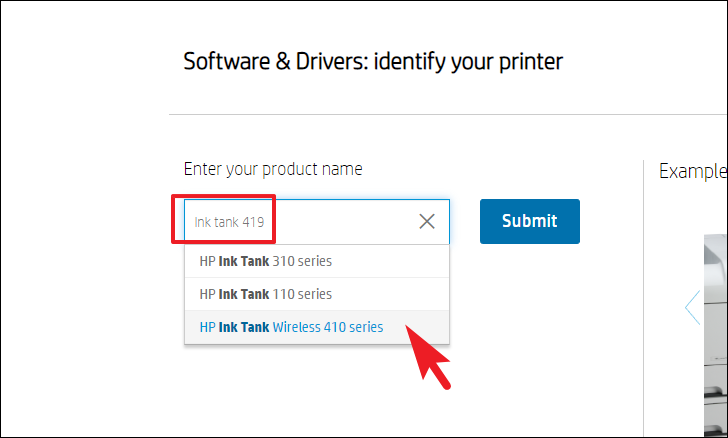
- Enter your printer’s model number in the search bar and select the correct series from the suggestions.
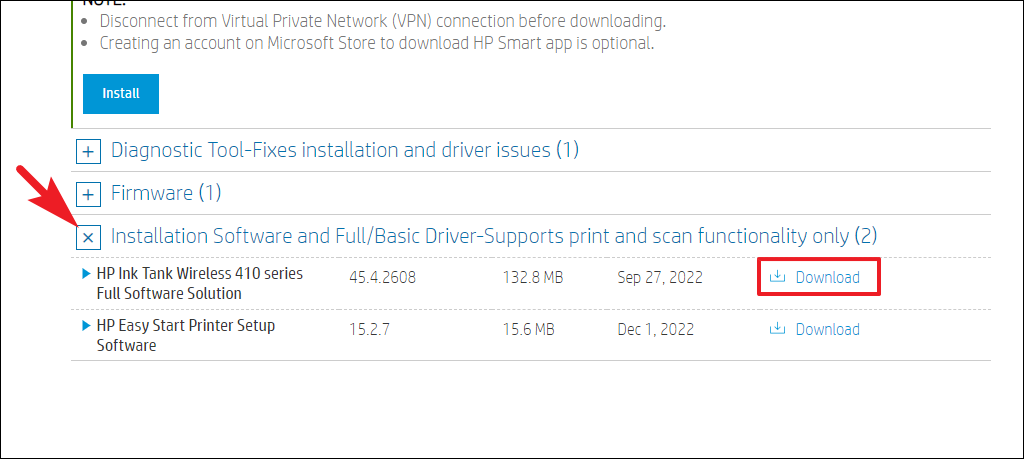
- On the driver’s page, expand the “Installation Software” section.
- Click the “Download” button next to “HP Full Software Solution”.
- Choose a location on your computer to save the file and click “Save”.
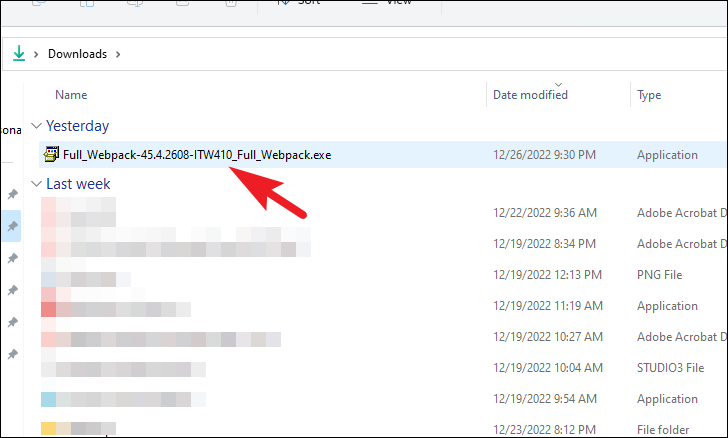
- Once the download is complete, navigate to the downloaded
.EXEfile and double-click it to start the installation.
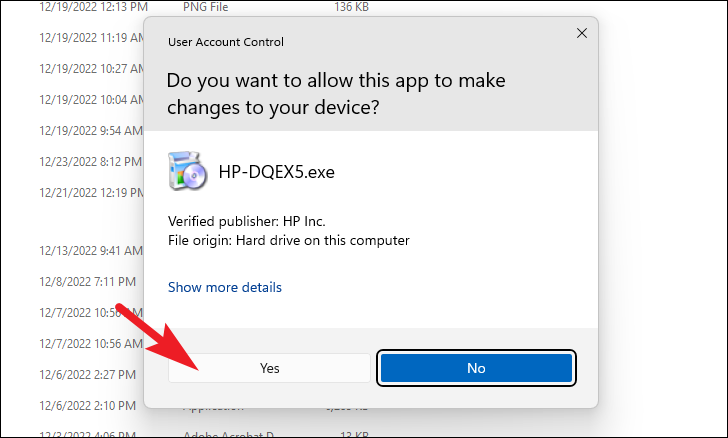
- If prompted by User Account Control (UAC), click “Yes” to allow the installer to make changes to your device.
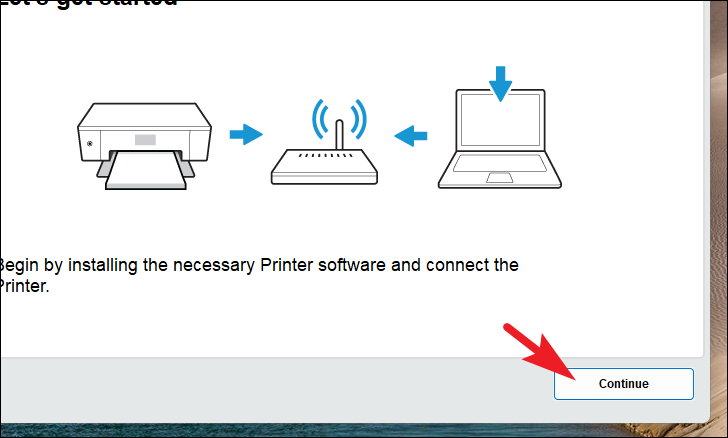
- In the installer window, click “Continue” to proceed.
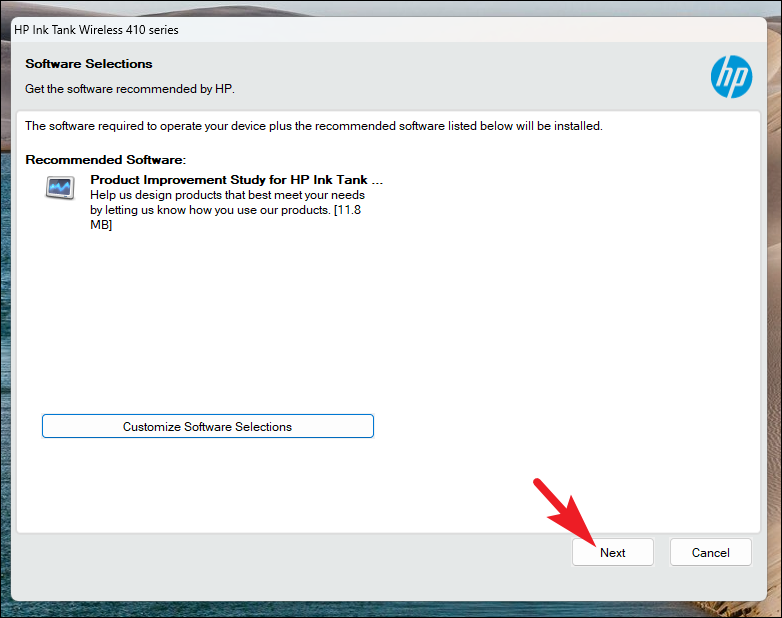
- Click “Next” to begin the installation process.
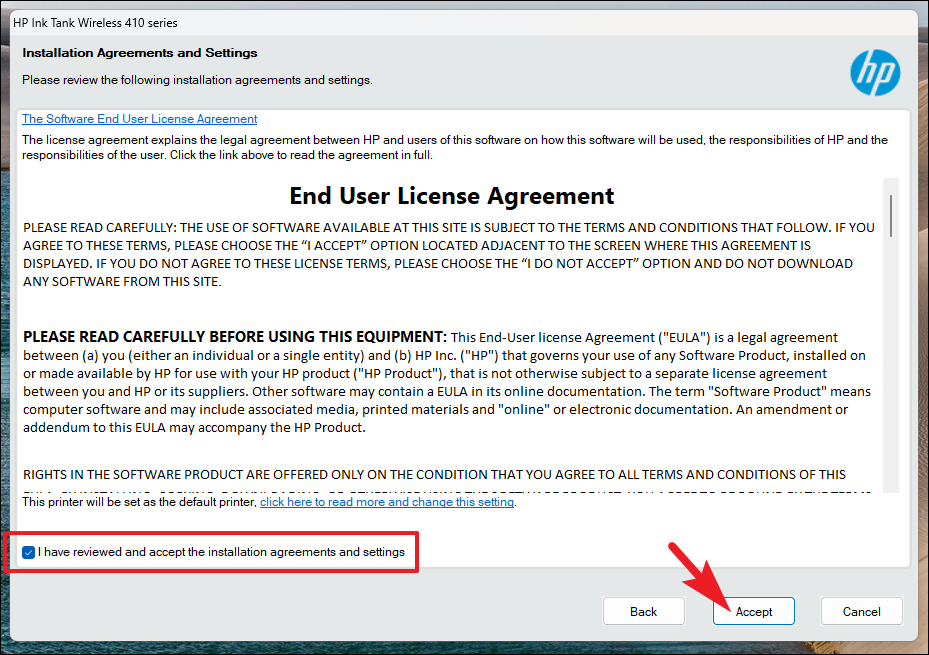
- Review the installation agreements and settings, select the checkbox to accept them, and then click “Accept”.
- If prompted to enable web printing features, choose “Yes” if desired.
- Wait for the installer to complete the installation of the software and drivers.
- Once the installation is finished, restart your computer to apply the changes.
After restarting, your HP printer driver should be successfully installed, and your printer will be ready for use.
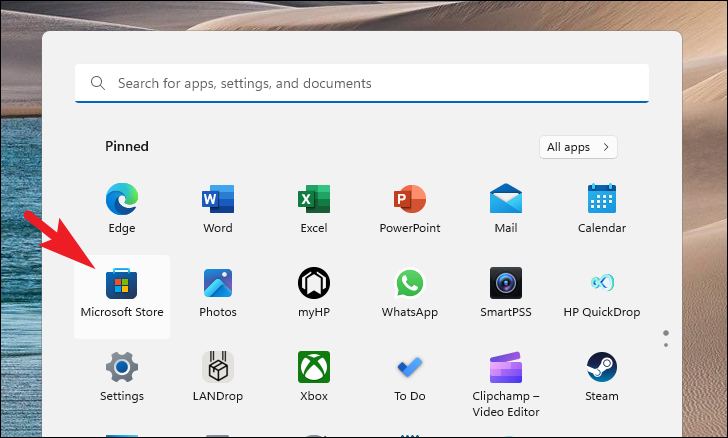
2. Use HP Smart from Microsoft Store
The HP Smart app simplifies printer setup and management, allowing you to print and scan documents effortlessly. While it doesn’t install the driver explicitly, it configures your printer and ensures all necessary software is installed.
- Open the Microsoft Store from the Start Menu or by searching for
Store.

- In the Microsoft Store search bar, type
HP Smartand pressEnter.

- Click the “Install” button to download and install the HP Smart app.
- Once installed, open the HP Smart app by searching for
HP Smartin the Start Menu and clicking the app icon.
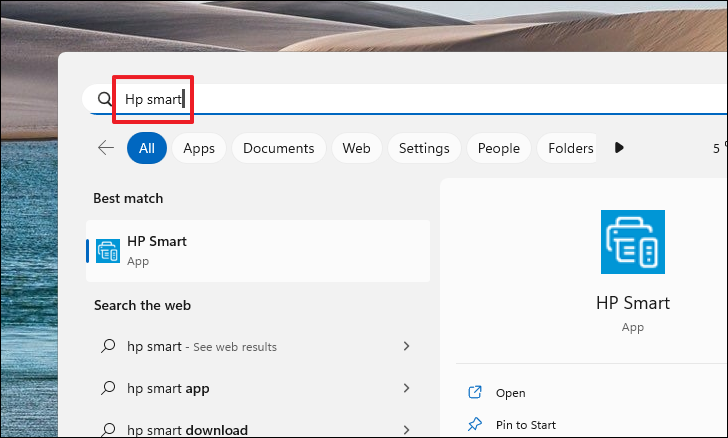
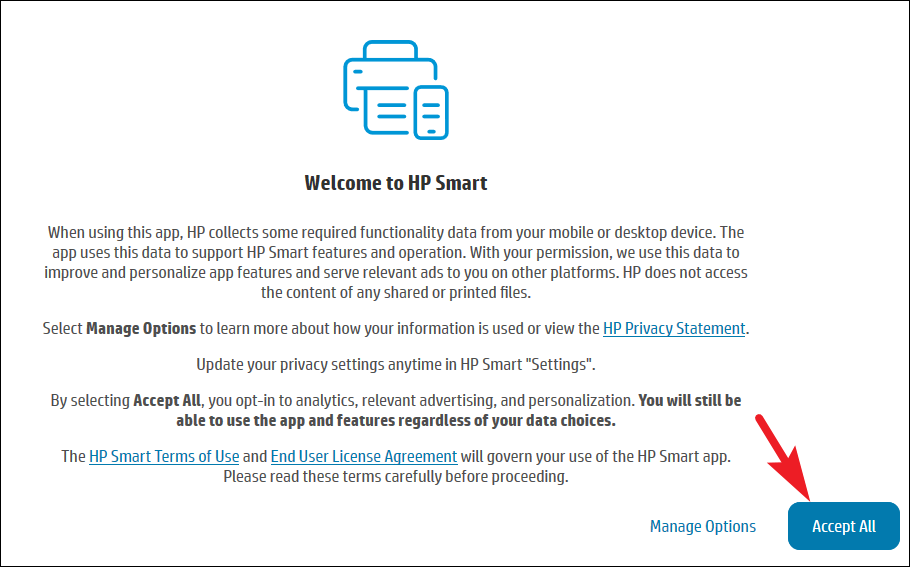
- Accept the terms and conditions by clicking “Accept All”.
- Click on “Set Up a New Printer” to begin the setup process.
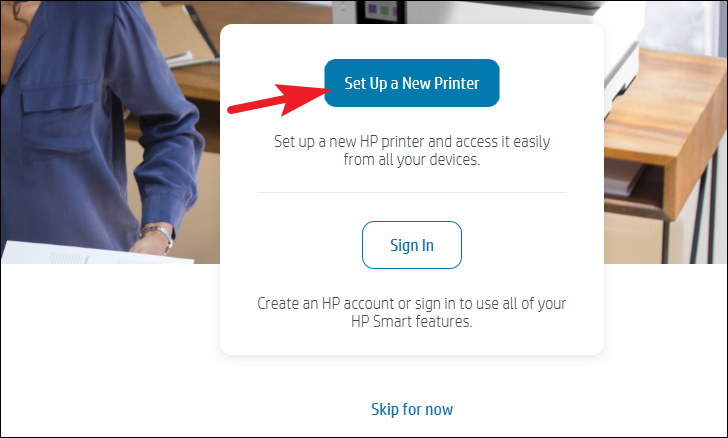
- The app will search for connected printers. Once your printer is detected, select it to continue.
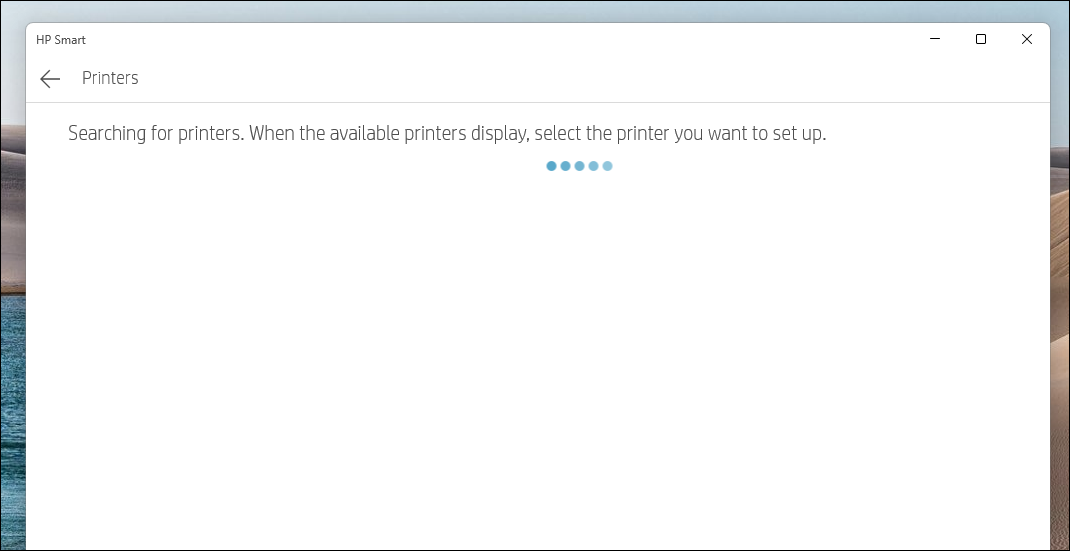
- Follow the on-screen instructions to complete the printer setup and installation of necessary drivers.
After the setup is complete, you can use the HP Smart app to print, scan, and manage your printer directly from your Windows 11 PC.
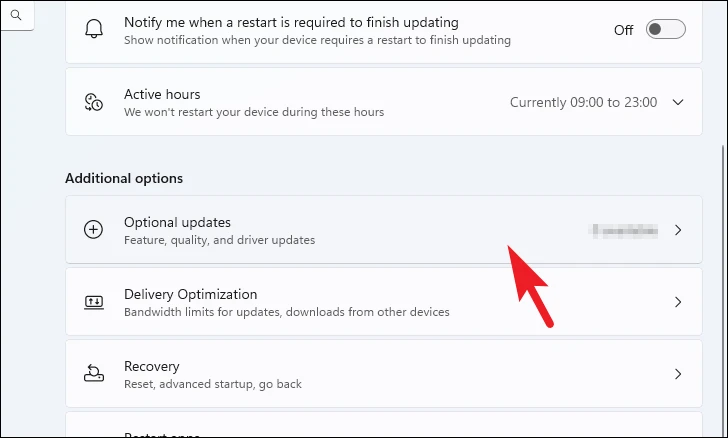
3. Check for optional updates
Sometimes, Windows Update can detect missing drivers and offer them as optional updates. This method allows you to install the printer driver without visiting the manufacturer’s website.
Note: Before proceeding, ensure your printer is connected to your computer.
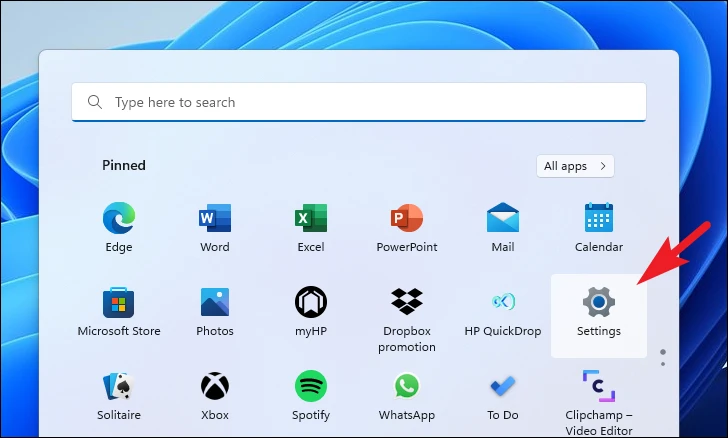
- Click the Start Menu and select “Settings”.
- In the Settings window, click on “Windows Update” from the left sidebar.
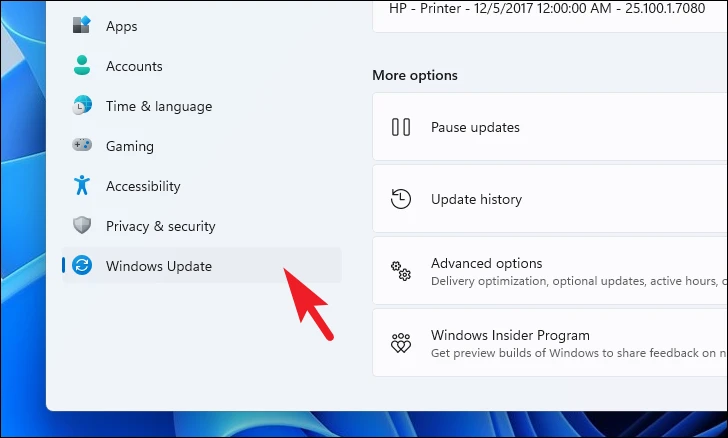
- On the right side, click on “Advanced options”.
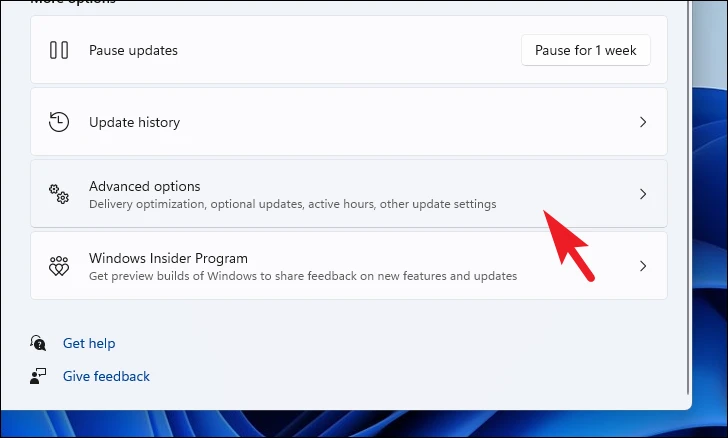
- Scroll down and select “Optional updates”.
- In the list of available updates, locate the printer driver (it may have “printer” in its name).
- Check the box next to it and click “Download & install”.
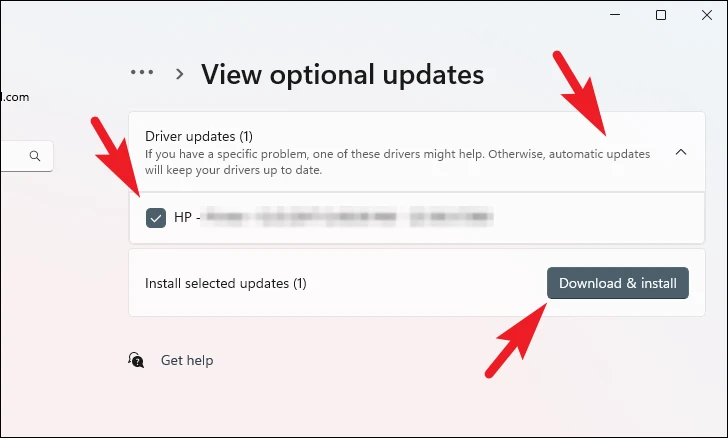
- Once the installation is complete, restart your computer if prompted.
The printer driver should now be installed on your computer, and you can start using your printer.
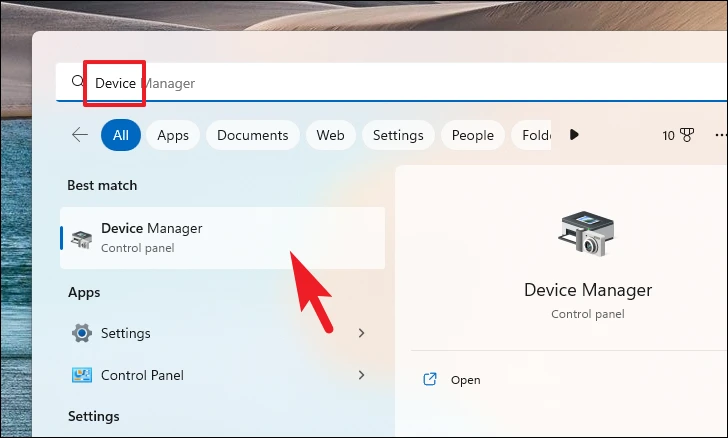
4. Use Device Manager
If the driver isn’t available through Windows Update, you can use Device Manager to search for the driver manually.
- Press the
Windows keyand typeDevice Manager, then click on the app from the search results.
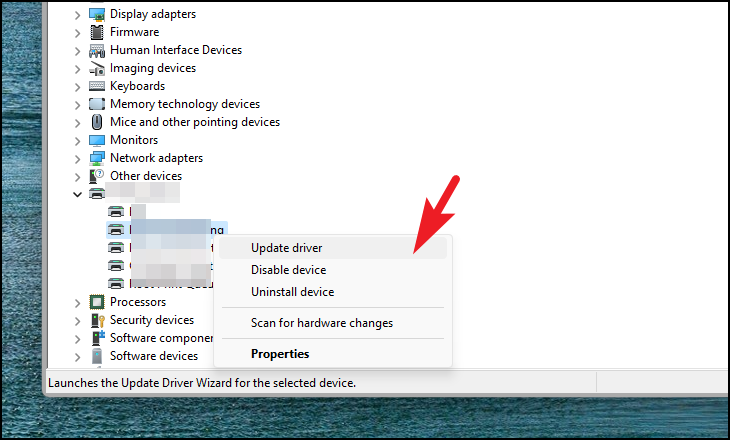
- In Device Manager, locate and right-click on “Printers”, then select “Scan for hardware changes”.
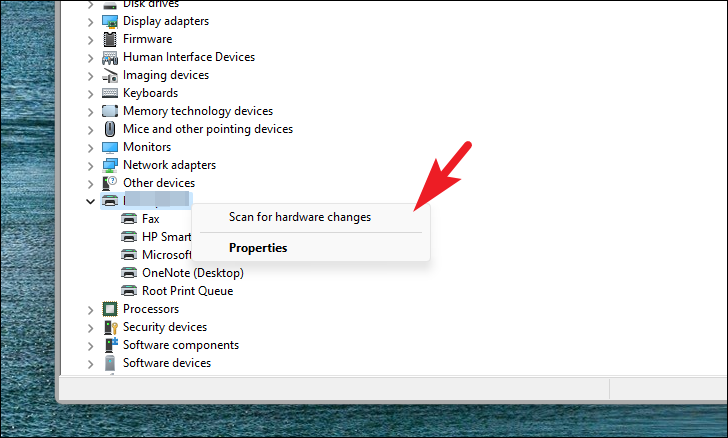
- Right-click on your HP printer in the list and choose “Update driver”.
- Select “Search automatically for drivers”. Windows will search online for the latest driver.
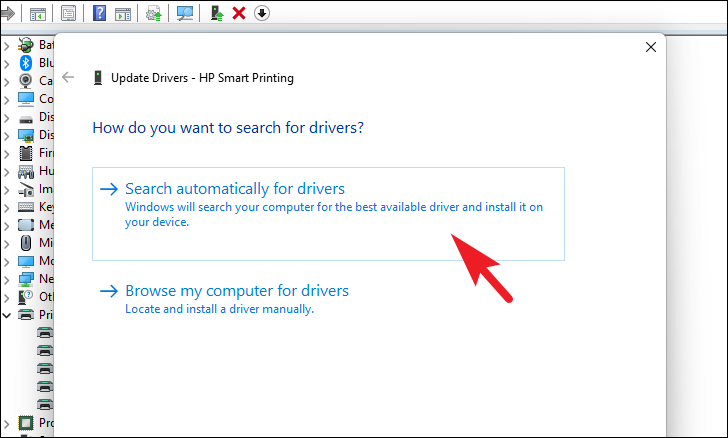
- If a driver is found, follow the prompts to install it. If not, consider using one of the other methods.
By following these methods, you can easily download and install the HP printer drivers on your Windows 11 PC, ensuring your printer functions correctly and efficiently.


