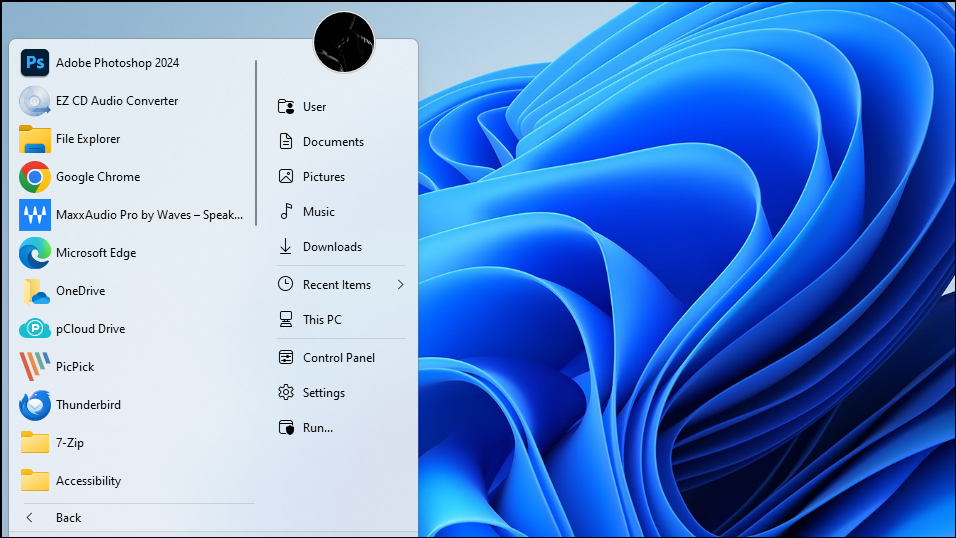
Windows 11 introduced a sleek and minimalistic Start menu, departing from the customizable interface of its predecessors. However, many users desire more personalization options to tailor the Start menu to their preferences. Fortunately, third-party applications allow you to modify and enhance the Windows 11 Start menu to suit your needs. In this guide, we'll show you how to customize your Start menu using these tools.
Using StartAllBack
StartAllBack is a third-party application that transforms your Windows 11 Start menu into a more customizable and familiar interface. For a one-time fee of $4.99, it offers several themes inspired by previous versions of Windows, allowing you to select a style that matches your preferences. With StartAllBack, you can adjust the Start menu's style and functionality, modify the taskbar position, and even change the user interface of the File Explorer. It enables you to alter icon sizes, highlight new apps, create shortcuts, and restore features that were removed in Windows 11.
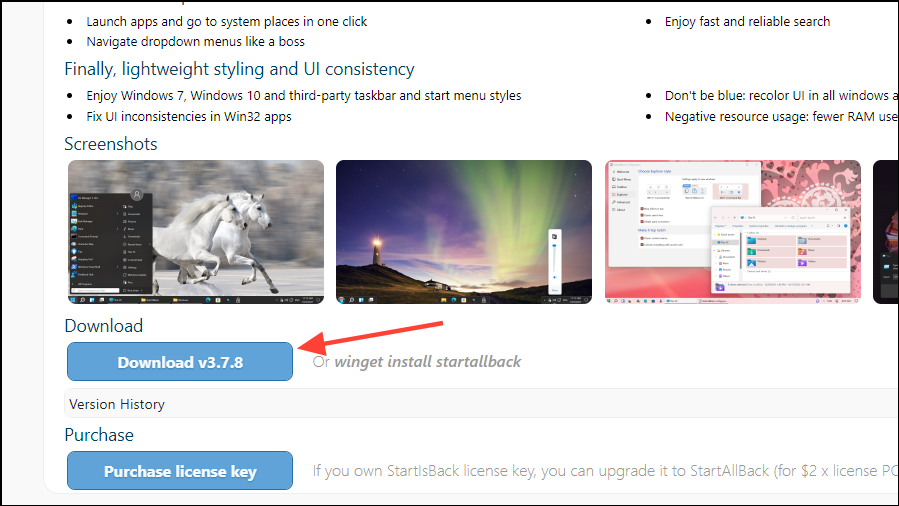
Step 1: Visit the StartAllBack website and click the 'Download' button to download the application. If you wish to purchase a license key, you can click on 'Buy Now' instead.
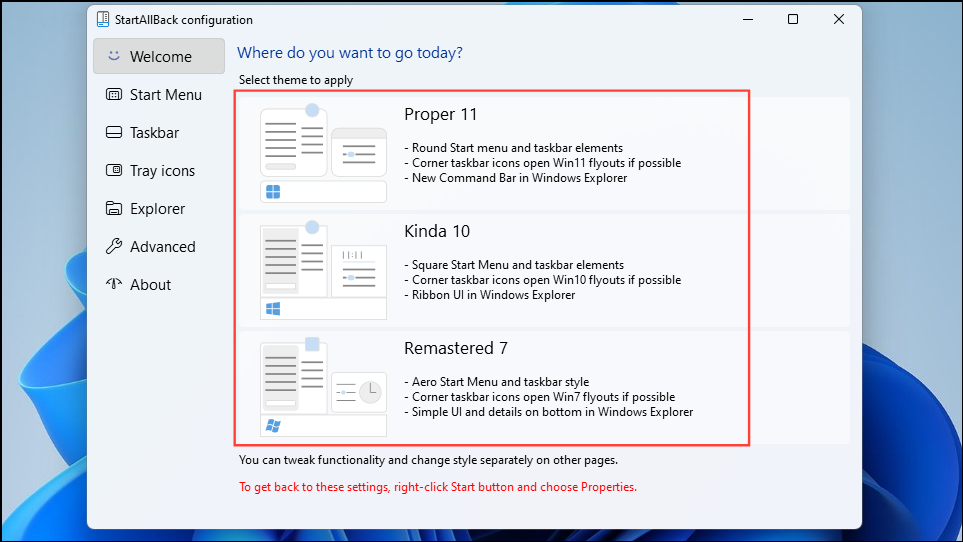
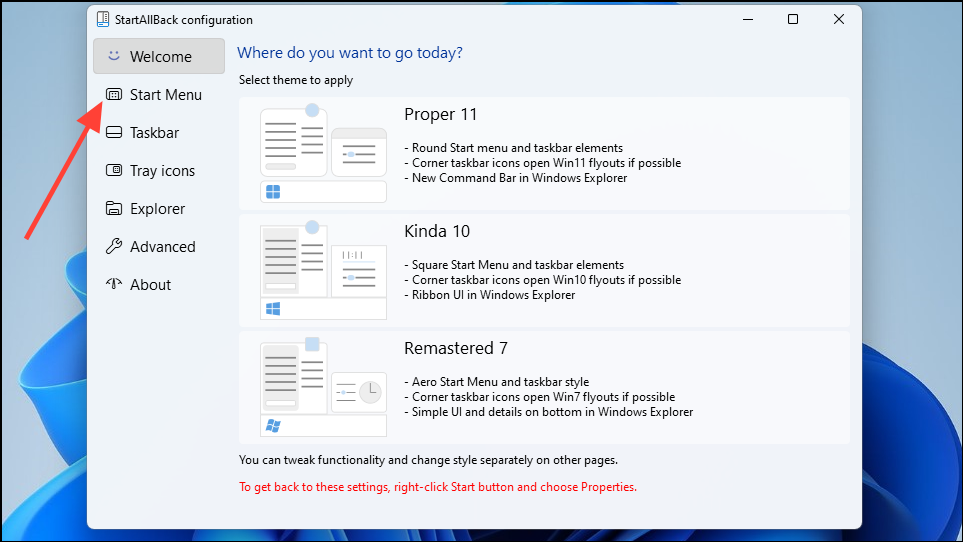
Step 2: Run the downloaded installer to install StartAllBack on your computer. Once the installation is complete, you'll be prompted to choose a theme for your Start menu. Select your preferred theme by clicking on it.
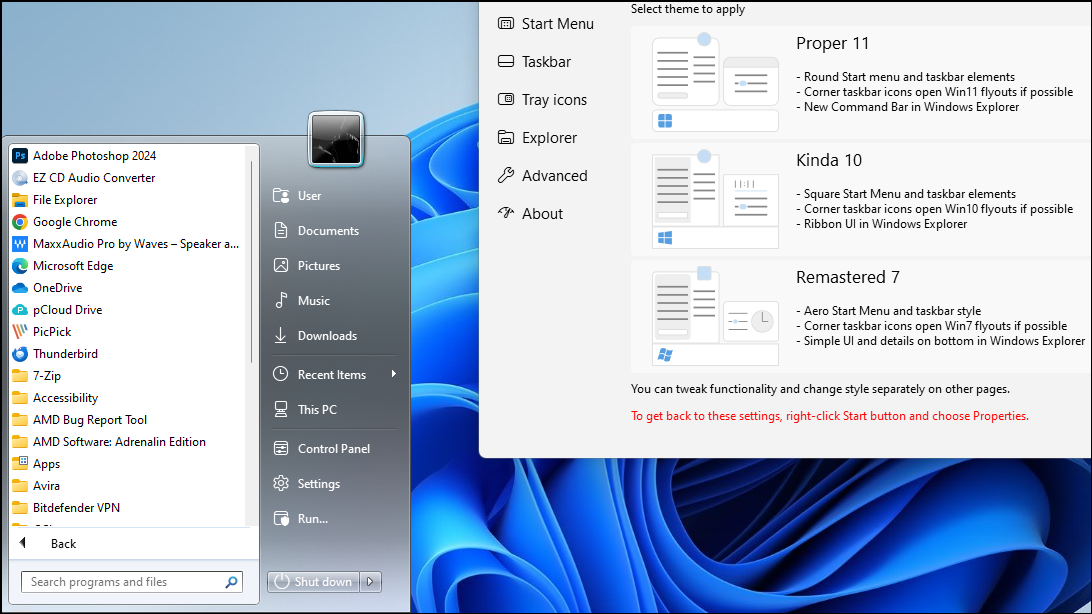
Step 3: The chosen theme will be applied immediately, transforming your Start menu into a two-panel layout similar to the classic Windows 7 Start menu.
Step 4: To further customize the Start menu, click on the 'Start Menu' option in the left panel of the StartAllBack settings window. Here, you can adjust how programs appear, customize the search functionality, and choose which icons are displayed. Modify these settings according to your preferences.
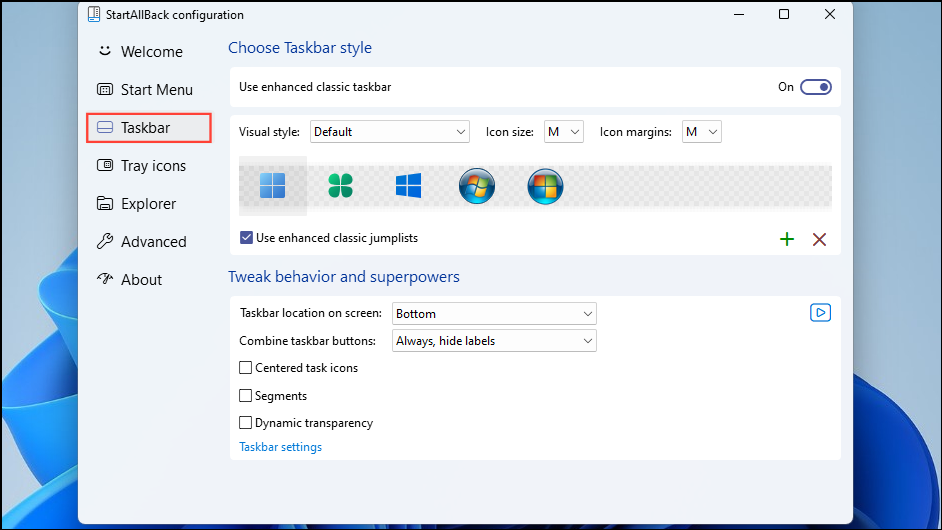
Step 5: To customize the taskbar, select the 'Taskbar' option from the left panel. StartAllBack allows you to change the appearance and behavior of the taskbar, including its position, icon size, and more.
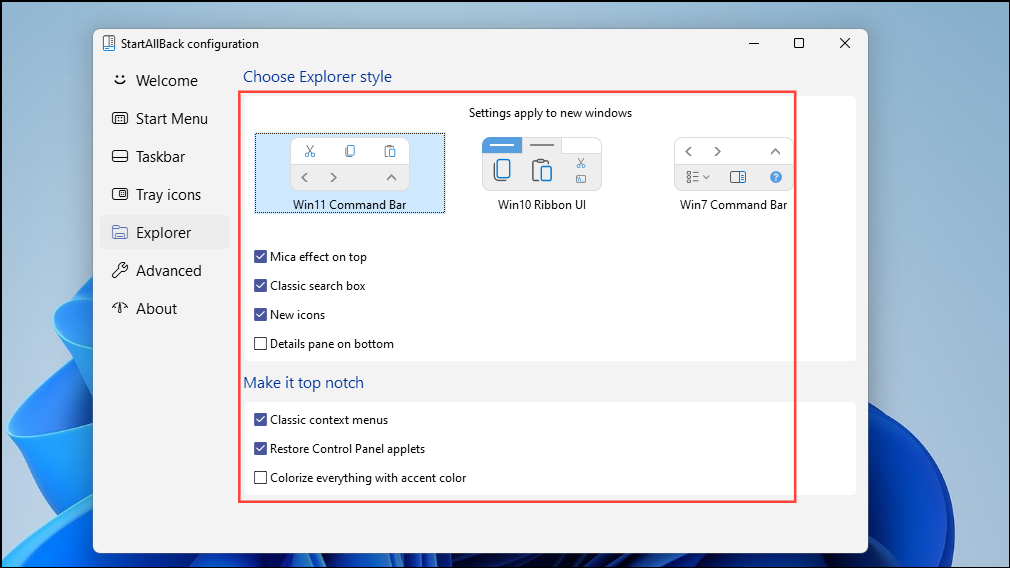
Step 6: If you want to control which icons appear on the taskbar's right side, click on 'Tray Icons' in the left panel. To modify the appearance of the File Explorer, select the 'Explorer' option, where you can adjust various UI elements to your liking. Additional customization options, such as setting custom colors for the Start menu, are available in the 'Advanced' section.
Step 7: If you enjoy the features provided by StartAllBack and wish to continue using it, consider purchasing a license key. This will allow you to use the application without limitations and support the developers.
Using Start11
Another powerful tool for customizing the Windows 11 Start menu is Start11 by Stardock. Available for $5.99, Start11 offers four different Start menu layouts, enabling you to personalize the appearance, design, and functionality of each option. With Start11, you can configure your app list, edit shortcuts, adjust colors, and choose how to activate the Start menu. It provides a high level of customization to tailor the Start menu to your preferences. A free 30-day trial is available if you'd like to try it out before purchasing.
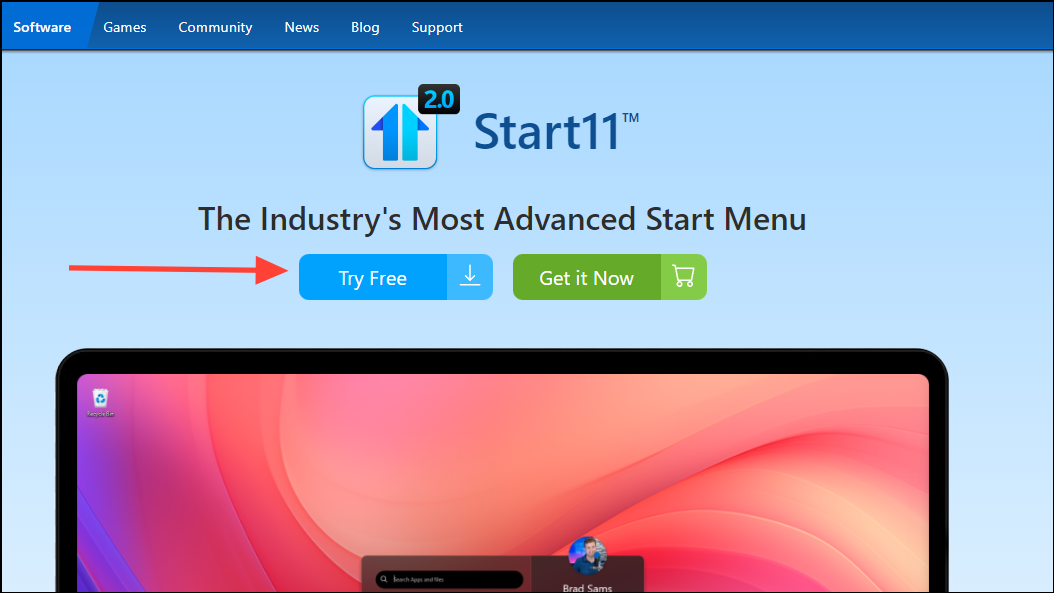
Step 1: Download Start11 from the official Stardock website by clicking on the 'Try Free' button.
Step 2: After the download completes, run the installer to begin the installation process.
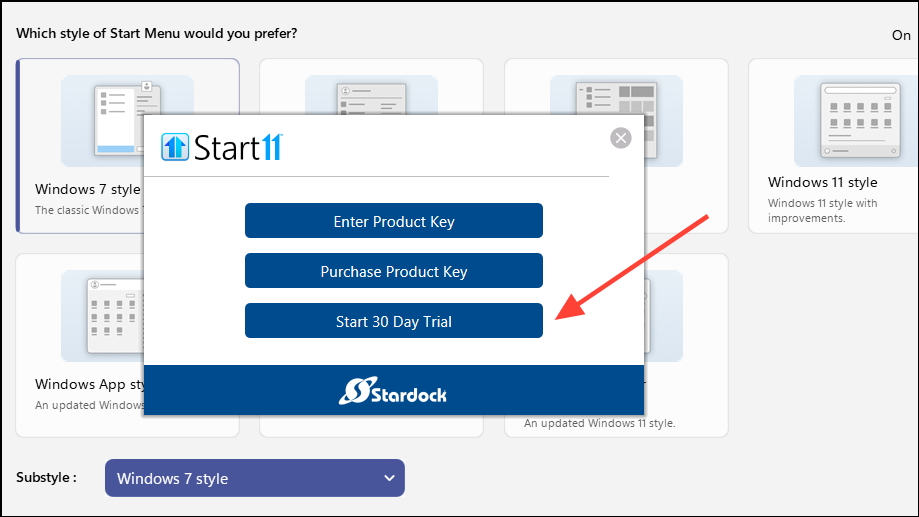
Step 3: During installation, you'll be presented with options to purchase a license, enter an existing product key, or start a free trial. If you don't have a product key, click on 'Start 30 Day Trial'.

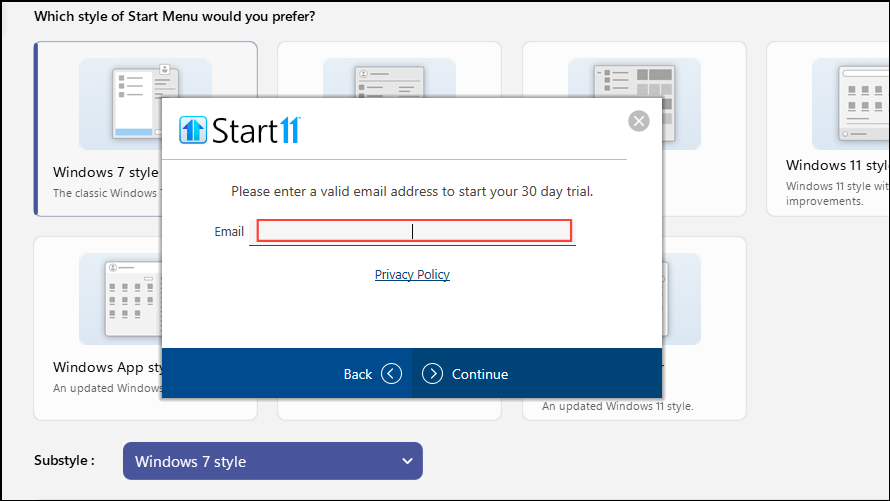
Step 4: Enter your email address in the provided field. Stardock will send you a verification email to confirm your email address.
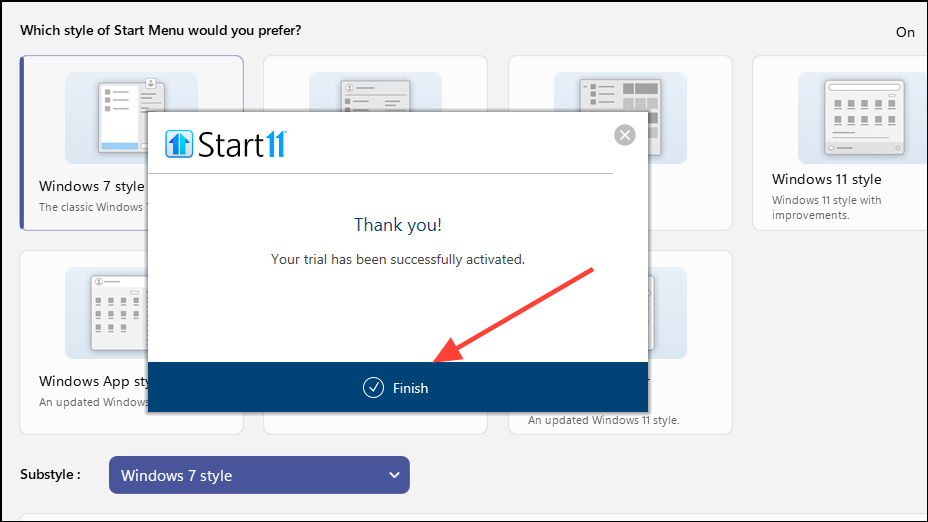
Step 5: After verifying your email, you'll receive a confirmation message. Click on the 'Finish' button to start using Start11.
Step 6: Choose whether you want your Start button alignment to be left or center-aligned. Select your preferred option and click 'OK'.
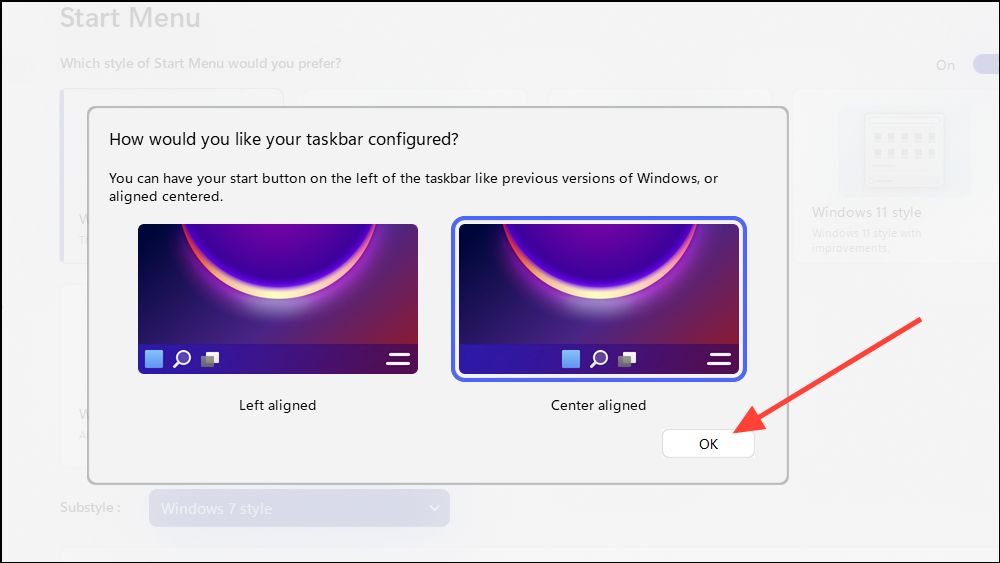
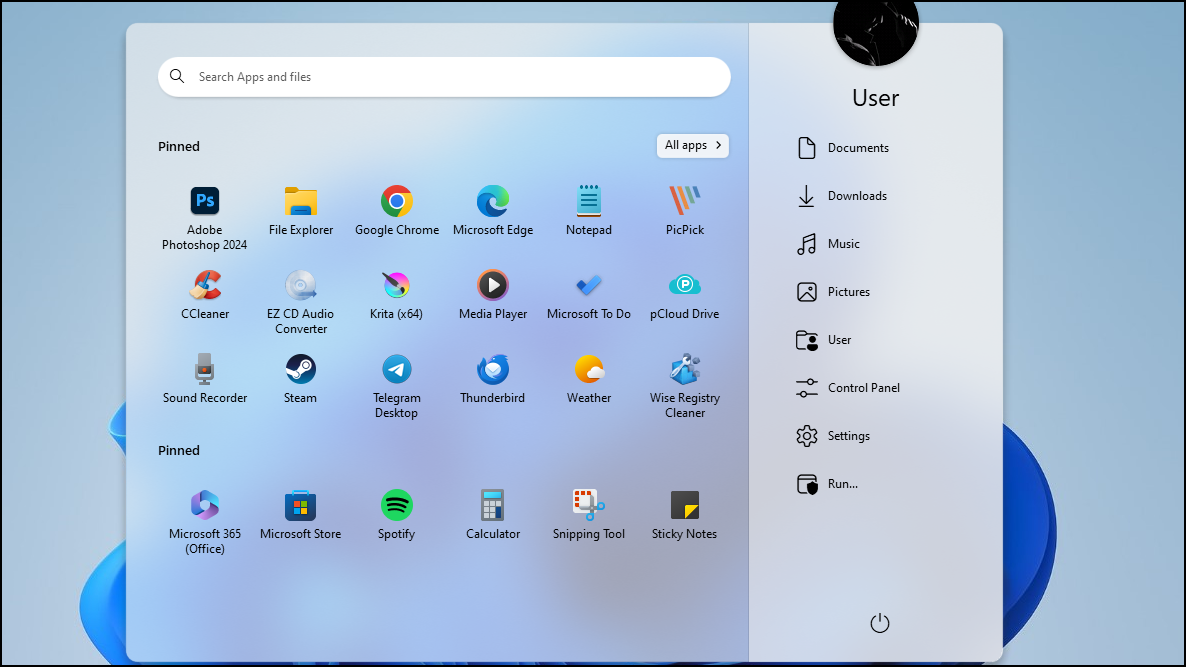
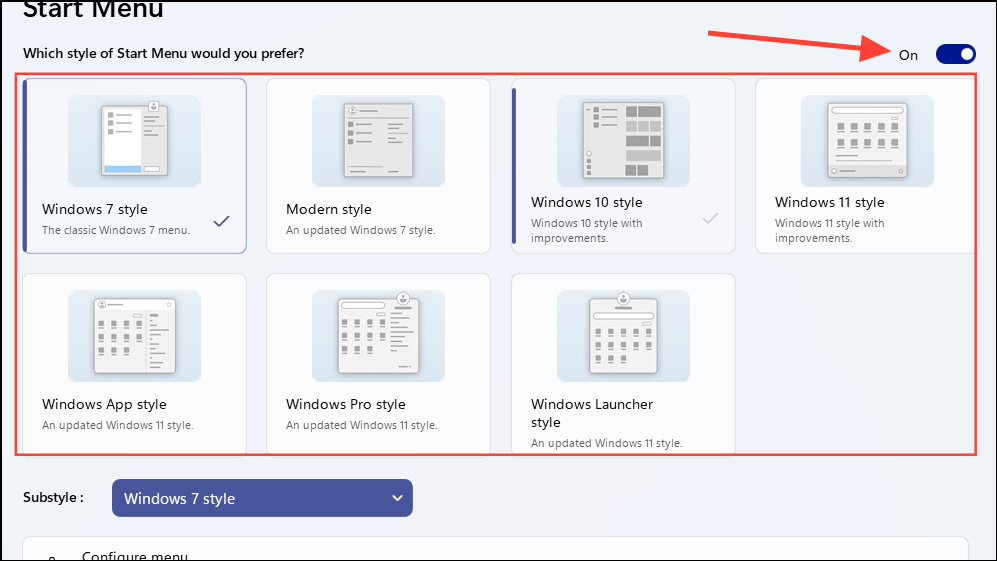
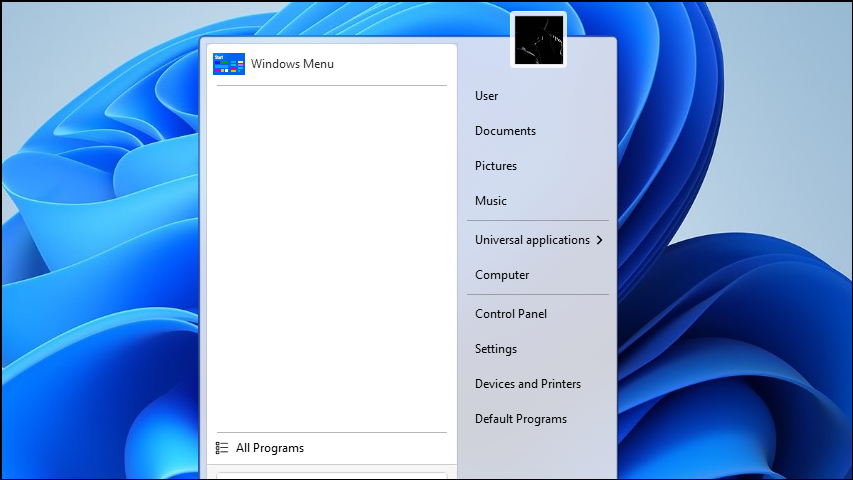
Step 7: On the next screen, select your preferred Start menu style from options like Windows 7 style, Windows 10 style, Windows 11 style, and more. Click on the style you wish to apply. You can also toggle the style option off by clicking the button at the top right.
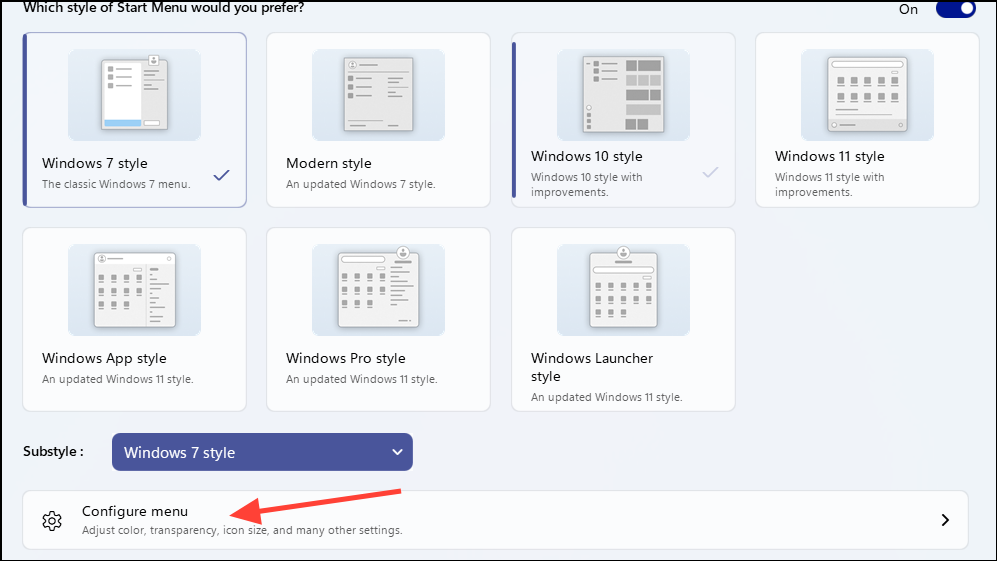
Step 8: Click on the 'Configure Menu' button at the bottom to proceed with customizing your Start menu.
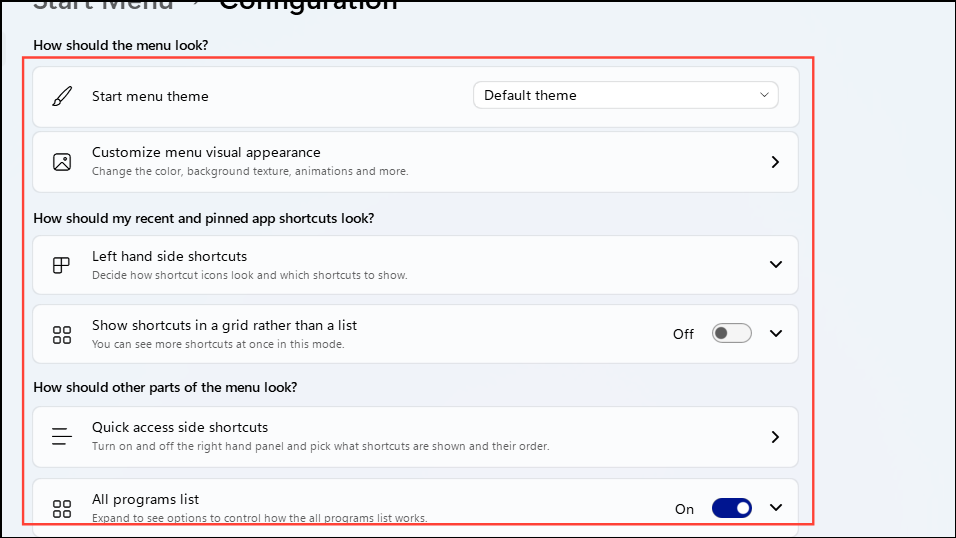
Step 9: Customize the Start menu's appearance, including how pinned apps and shortcuts are displayed, and configure the power button's function. Use the available options to turn features on or off according to your preferences.
Step 10: Use the left panel to access different Start menu elements and customize each one individually. Adjust settings such as the appearance of the app list, background transparency, and more.
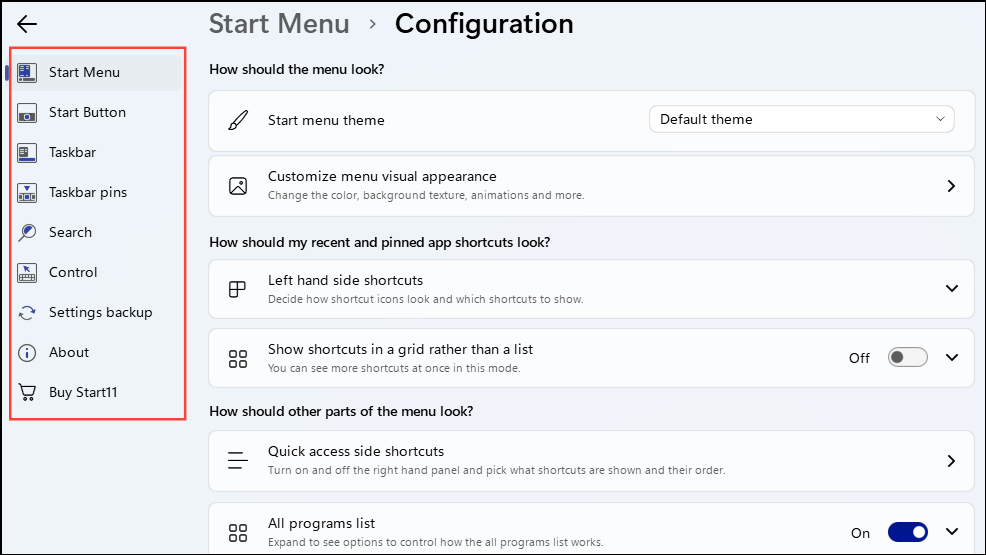
Step 11: Once you've finished customizing, close the Start11 application. Your Start menu will now reflect the changes you've made.
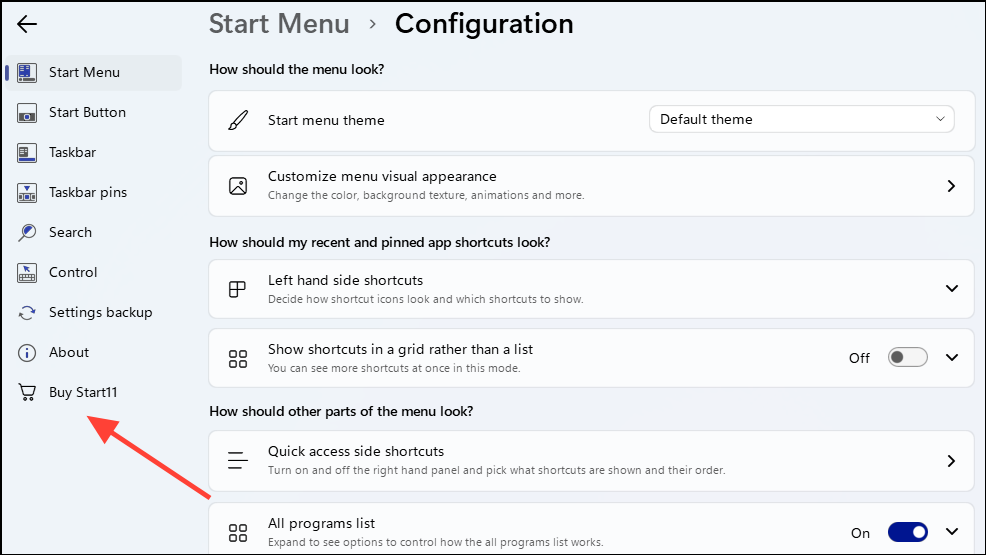
Step 12: If you're satisfied with the customizations and want to continue using Start11 beyond the trial period, consider purchasing the software. You can do this by clicking on the 'Buy Start11' option within the application.
These third-party applications can significantly enhance your ability to customize the Windows 11 Start menu, restoring functionalities and personalization options that were removed by Microsoft. Another alternative is to use the Open Shell app, which offers a classic Start menu experience that you can tweak and adjust as needed.

Remember to create a system restore point before installing these applications. This way, if you encounter any issues, you can easily revert your system to its previous state.


Member discussion