
While Windows 11 introduces a sleek new design and features, some users find the changes to the user interface less accommodating. The revamped Start menu, centered taskbar, and updated File Explorer may not suit everyone’s preferences, especially those who appreciated the classic Windows look. If you’re longing for more control over your interface and a return to familiar designs, Open Shell offers a solution. This free, open-source software allows you to customize various elements of the Windows 11 UI to better suit your needs.
Downloading and Installing Open Shell on Windows 11
Open Shell is an open-source continuation of the original Classic Shell project, providing tools to modify the Start menu, taskbar, File Explorer, and more. Here’s how to download and install Open Shell on your Windows 11 system.
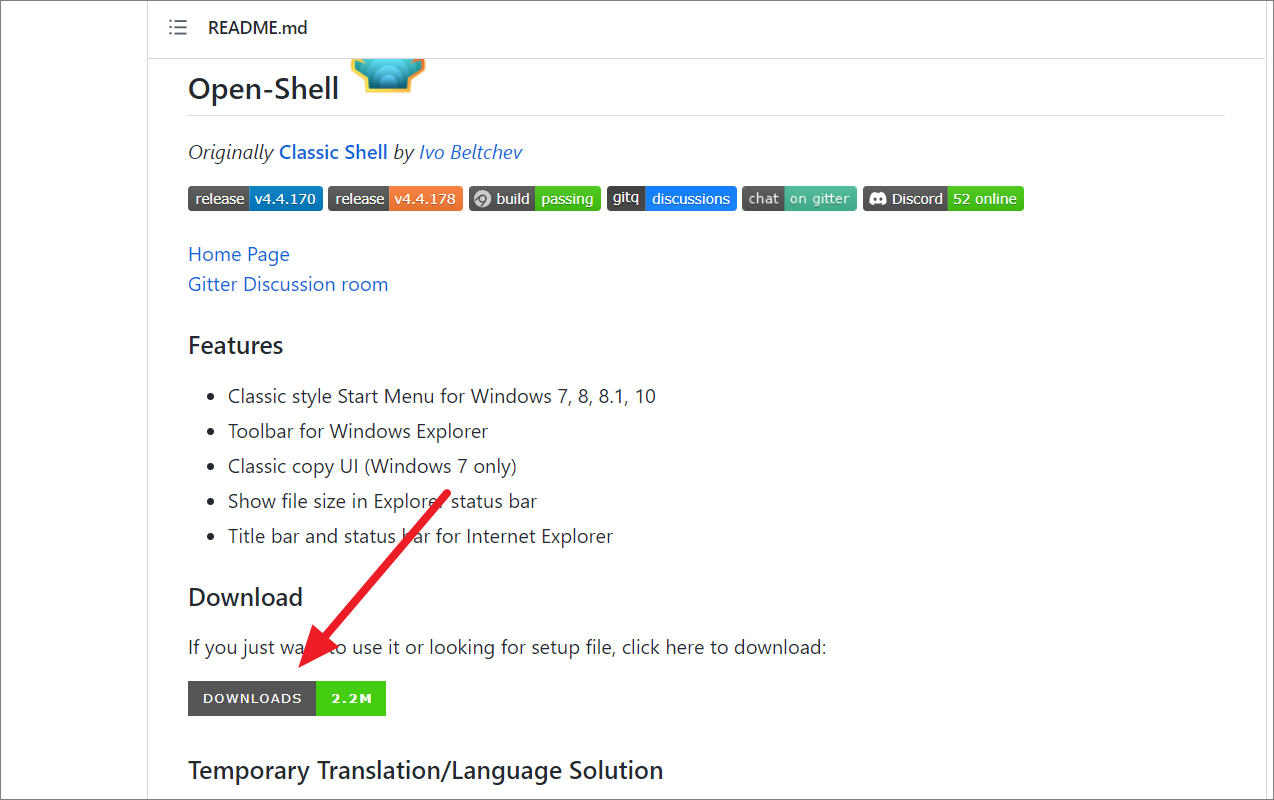
Begin by opening your web browser and navigating to the Open Shell GitHub repository using this Download Link. Scroll down until you find the ‘Downloads’ section, then click on the ‘Downloads’ button.
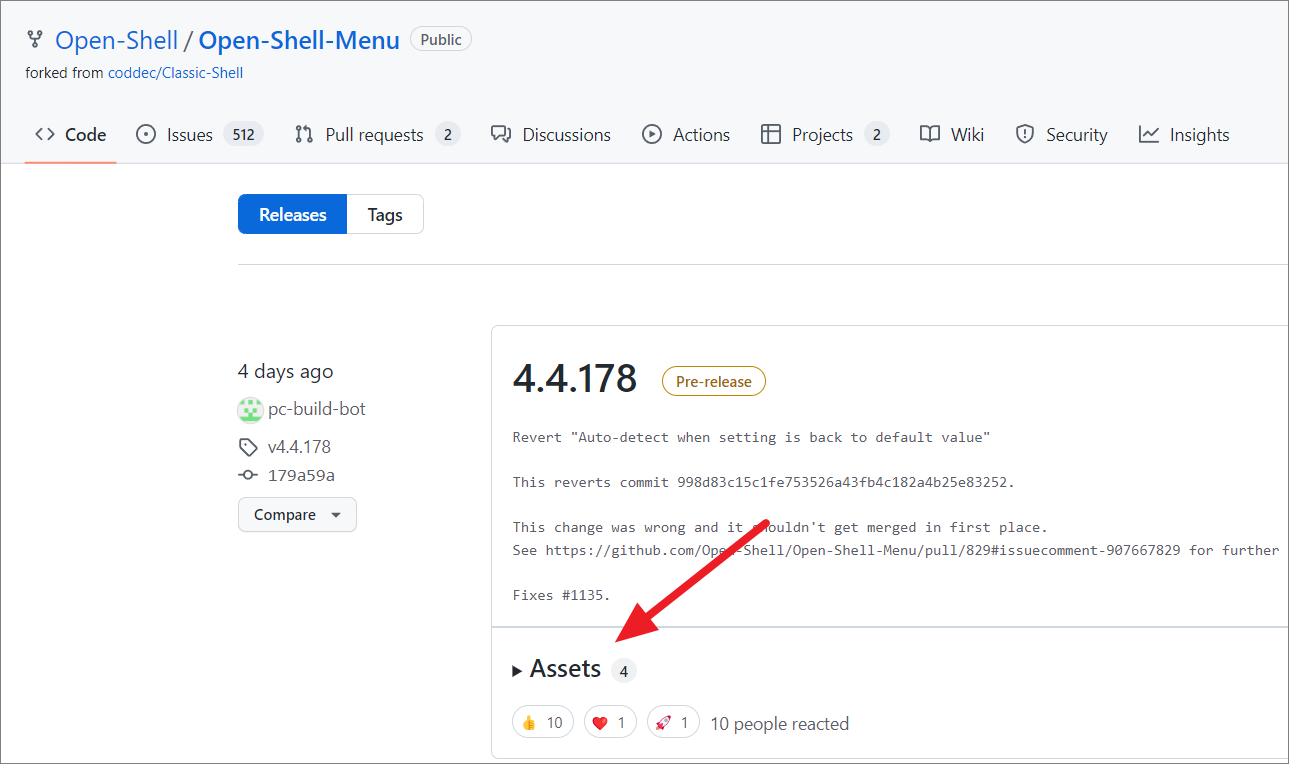
This action will direct you to the Releases page, where all versions of Open Shell are listed. The latest version is typically at the top. Locate the most recent release, move to the ‘Assets’ section, and click to reveal the available download files.
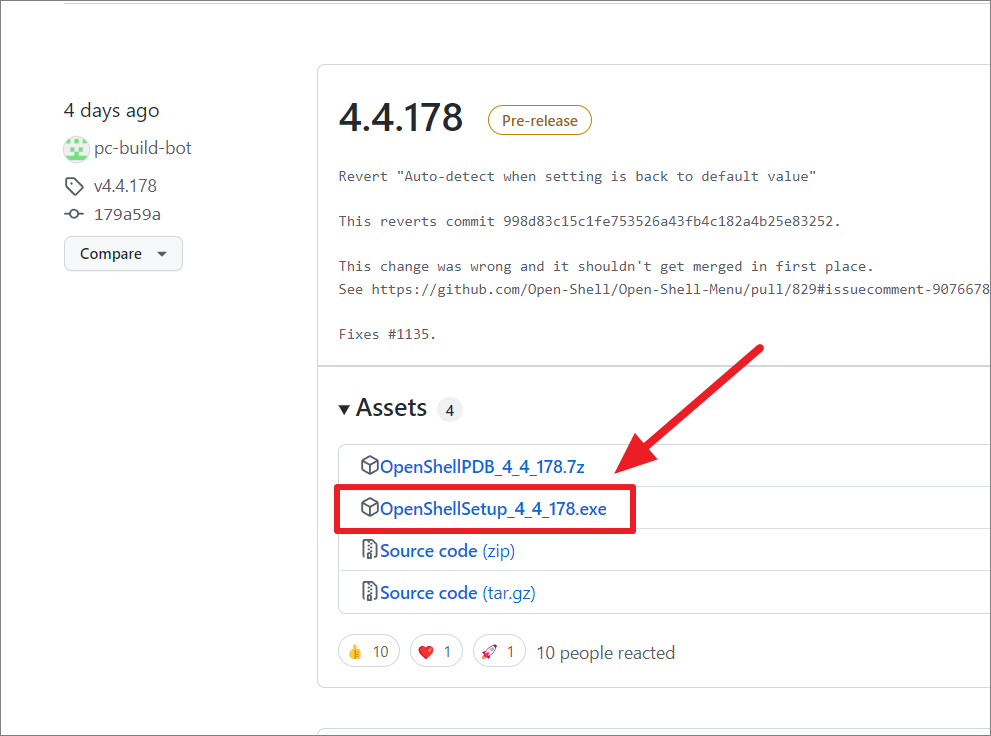
Click on ‘OpenShellSetup_x_x_xxx.exe’ to download the installer directly to your computer. Alternatively, you can download the installer in a compressed (.7z) file and extract it later.
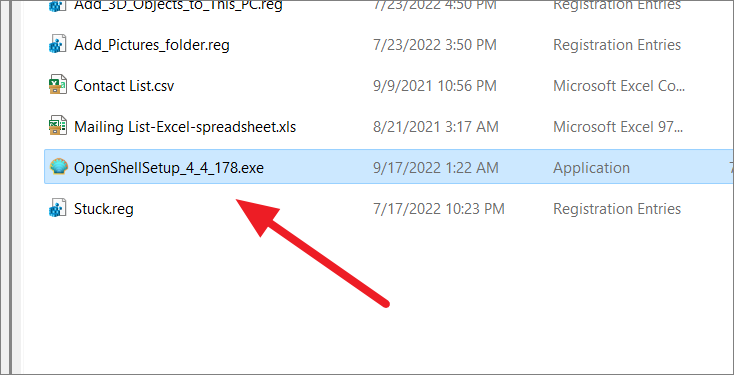
Once the download is complete, navigate to your downloads folder and double-click the EXE file to initiate the installation process.
You may encounter a warning from Windows Defender stating ‘Windows protected your PC’. This happens because Windows recognizes the installer as coming from an unverified publisher. Since Open Shell is safe to use, click on the ‘More info’ link.
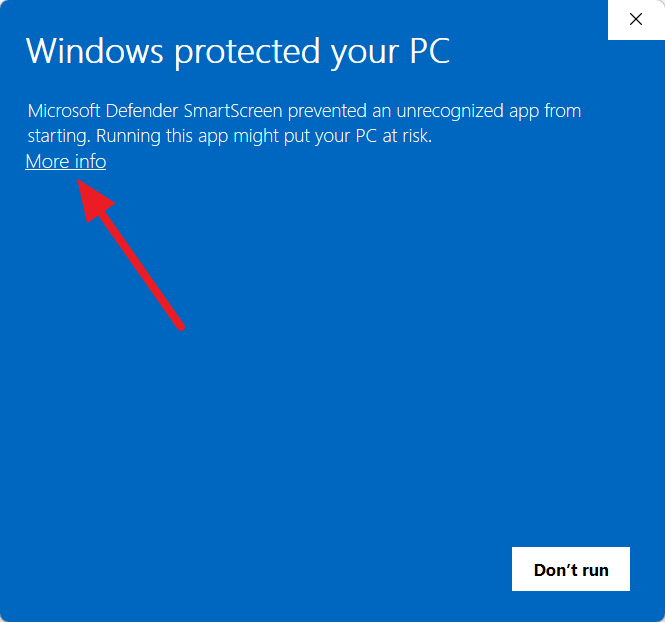
After clicking ‘More info’, select ‘Run anyway’ to proceed with the installation.

The Open Shell Setup wizard will launch. Click ‘Next’ on the welcome screen to begin.

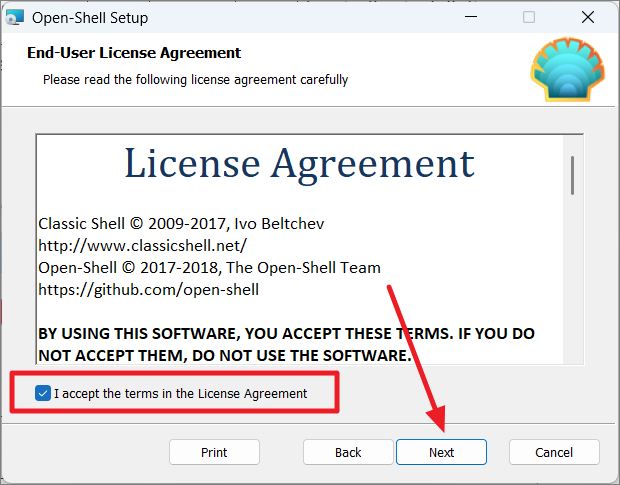
Read through the License Agreement, select ‘I accept the terms in the License Agreement’, and then click ‘Next’ to continue.
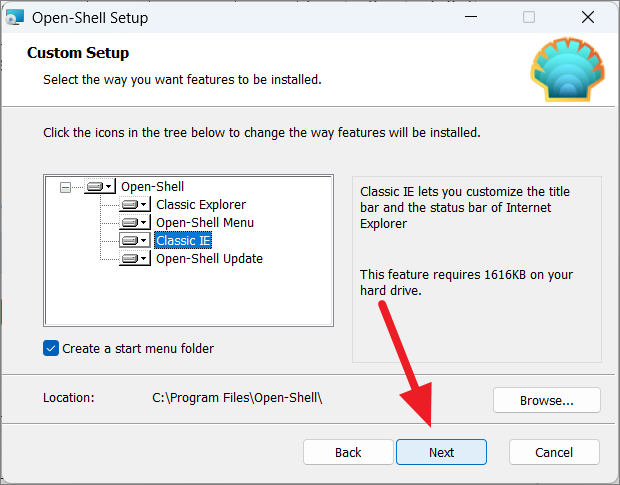
Choose whether to create a Start menu folder by checking the ‘Create a start menu folder’ option. You can also change the installation directory using the ‘Browse…’ button if desired. Click ‘Next’ when you’re ready to proceed.
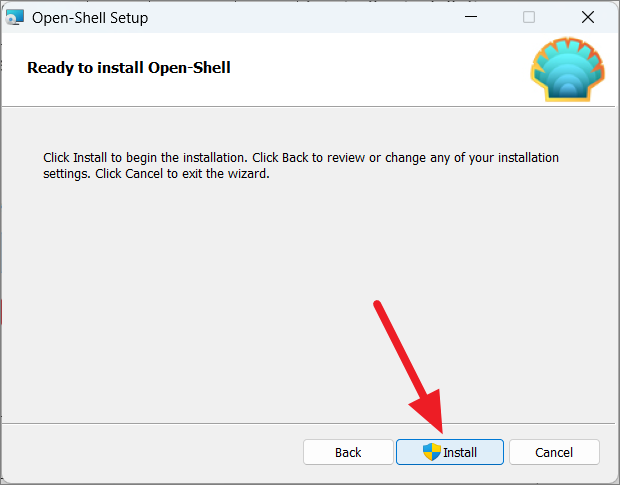
Click ‘Install’ to begin the installation process.
If prompted by the User Account Control, click ‘Yes’ to allow the installation. Once the installation is complete, click ‘Finish’ to exit the setup wizard.

Customizing Windows 11 with Open Shell
With Open Shell installed, you can now personalize the Start menu, taskbar, and other UI elements to match your preferences. If you favor the classic Windows appearance, Open Shell makes it possible to bring back that familiar look.
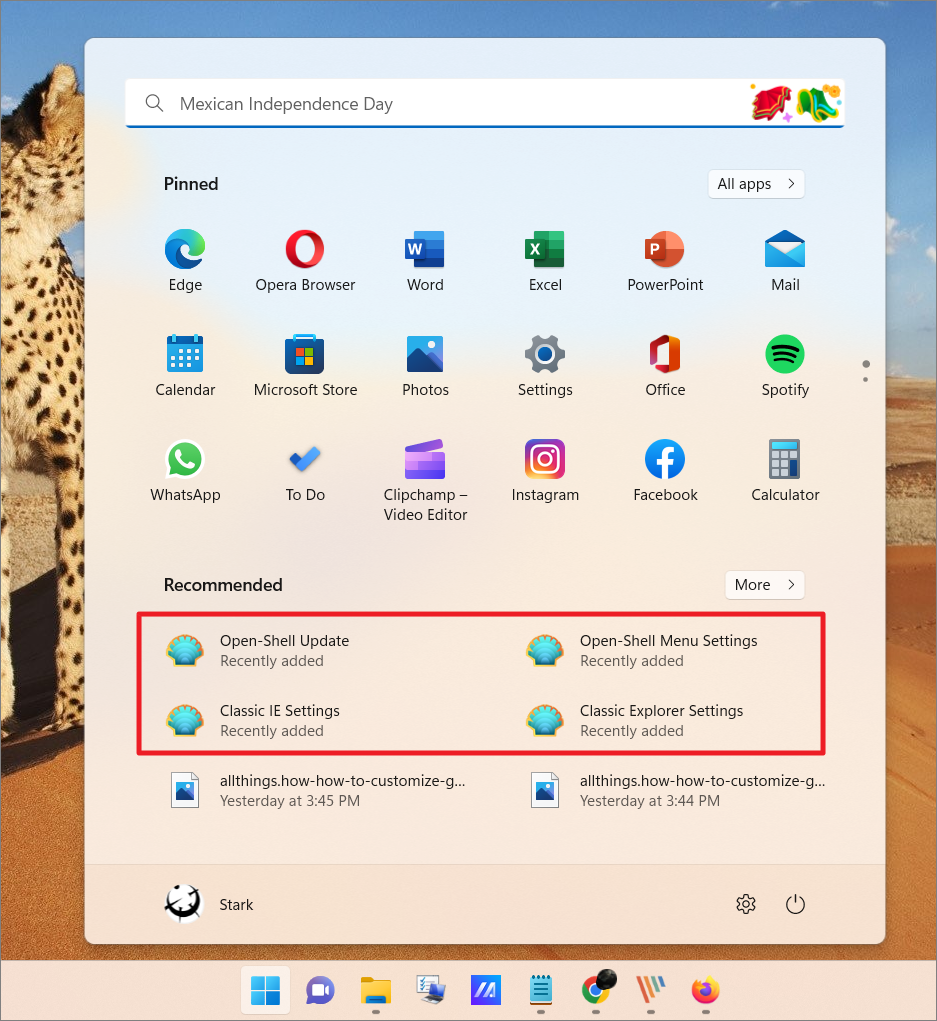
After installation, you’ll notice new entries in your Start menu: Open-Shell Menu Settings, Classic Explorer Settings, and Open-Shell Update.
Customizing the Start Menu
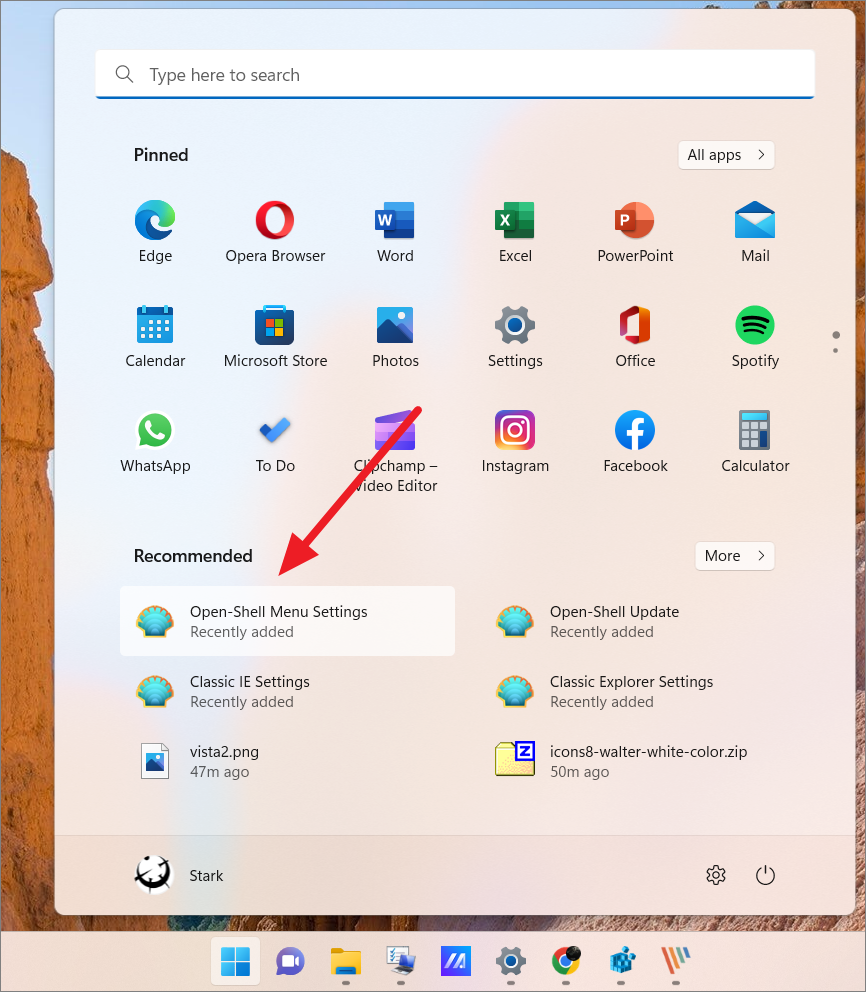
To begin customizing your Start menu, open the Start menu and click on ‘Open-Shell Menu Settings’. Alternatively, you can search for ‘Open-Shell Menu Settings’ in the Windows search bar and select it from the results.
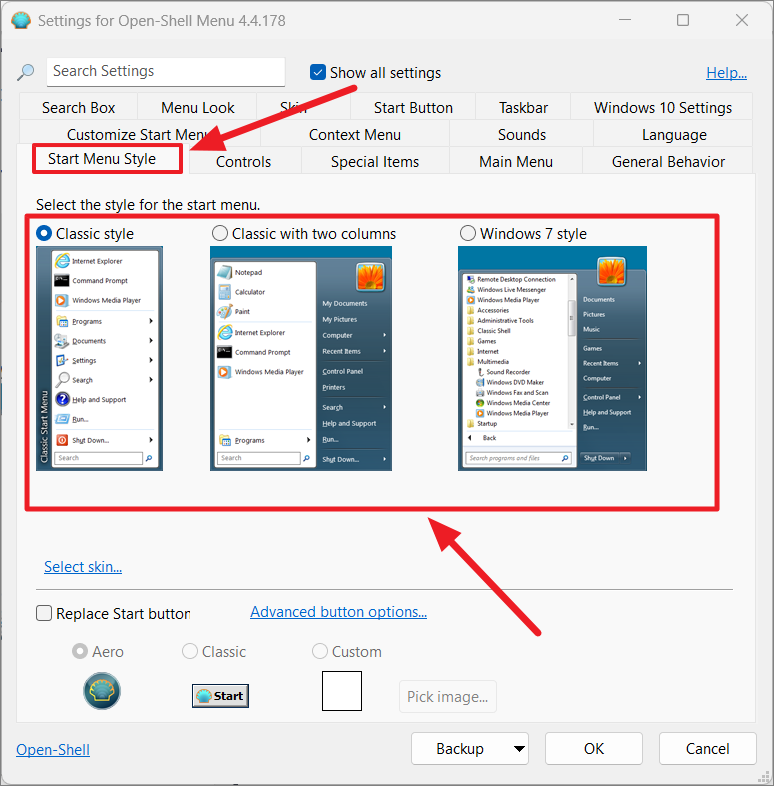
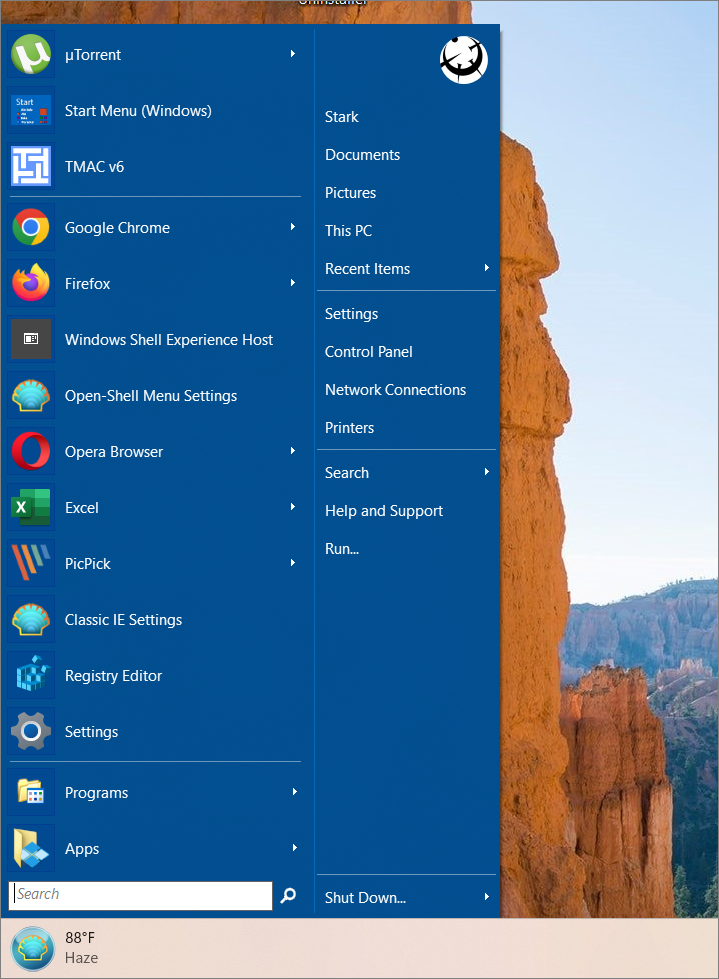
In the Open-Shell Menu Settings window, navigate to the ‘Start Menu Style’ tab. Here, you can choose from three classic Start menu styles: Classic style, Classic with two columns, or Windows 7 style. Each offers a different layout and set of customization options.
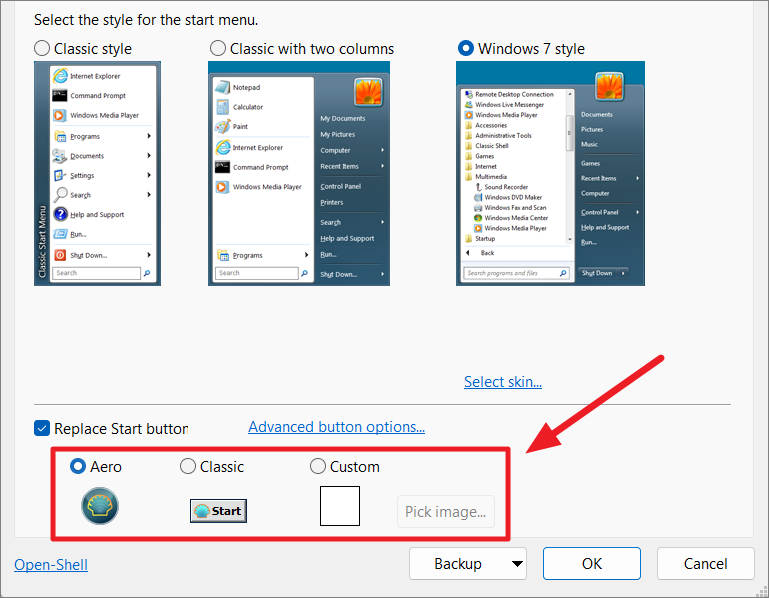
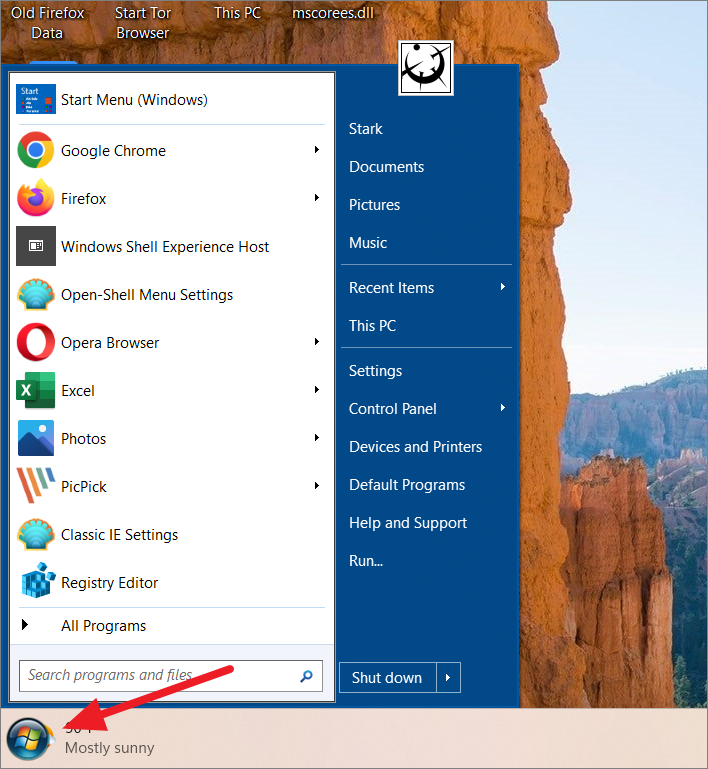
After selecting your preferred style, check the ‘Replace Start button’ box. You can choose from preset button images, such as ‘Aero’, or use a custom image. Click ‘OK’ to apply the changes.
Once applied, the new Start menu will appear at the left corner of your taskbar, providing a classic interface.
Classic Style:

Classic with Two Columns:
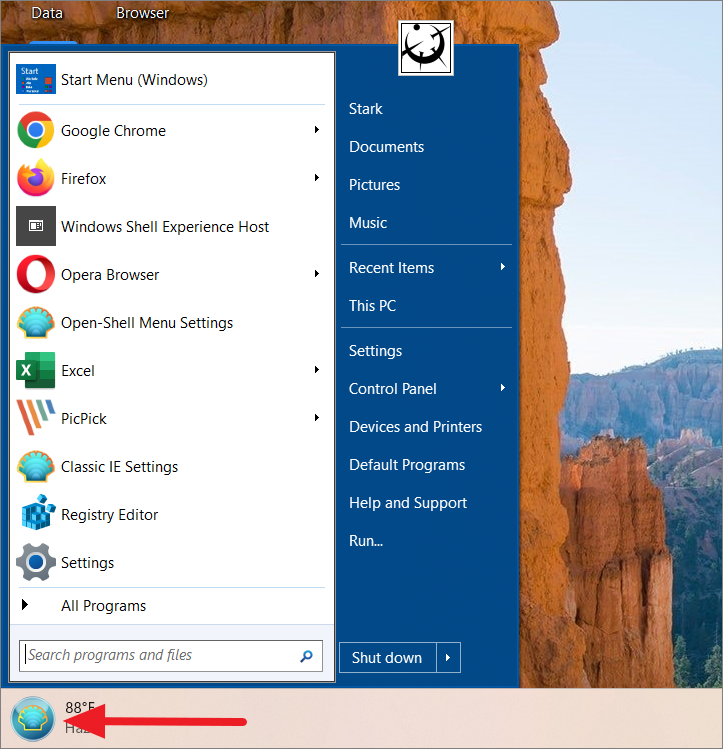
Windows 7 Style:
To use a custom Start button image, select ‘Custom’ under the ‘Replace Start button’ section, then click ‘Pick image’.

Select an image file (preferably a small-sized .PNG or .BMP) to use as your Start button. You can download custom Start button images from the Classic Shell website.

After selecting your custom image, click ‘OK’ to apply it. Your new Start button will now appear on the taskbar.
To further customize how the Start menu responds to interactions, go to the ‘Controls’ tab or ‘Basic settings’. Here, you can modify behaviors for left-click, right-click, middle-click, and keyboard shortcuts, as well as adjust which items appear in the Start menu.

Changing Start Menu Skins
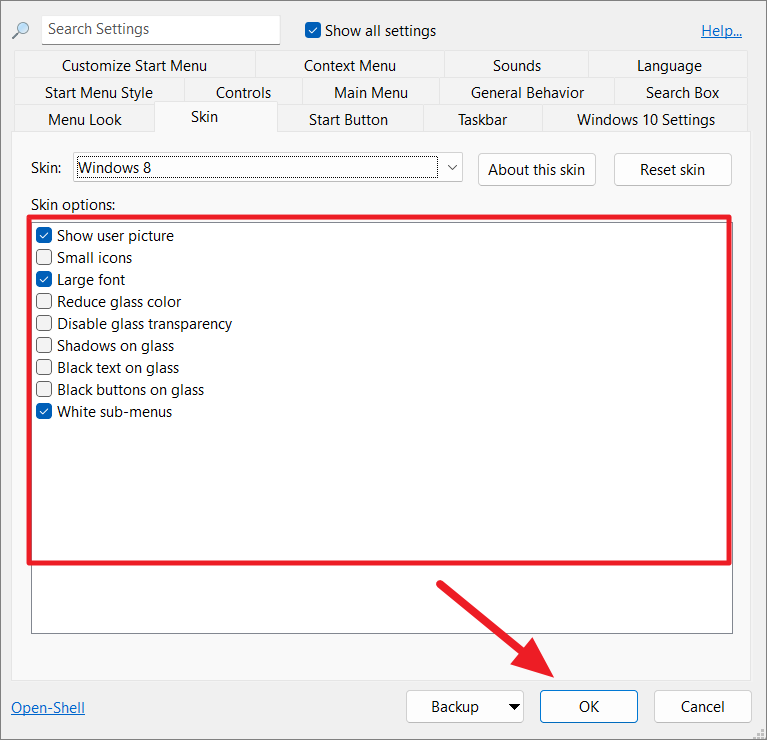
To alter the visual theme of the Start menu, switch to the ‘Skin’ tab. Select a skin from the drop-down menu to change the appearance. Each skin offers options to customize further, such as displaying the user picture, enabling small icons, adjusting colors, and modifying opacity.

After making your selections, click ‘OK’ to apply the new skin and settings.
Customizing Start Menu Items
You can personalize the Start menu by adding, removing, or editing menu items. Navigate to the ‘Customize Start Menu’ tab to see a list of current menu items and available commands.
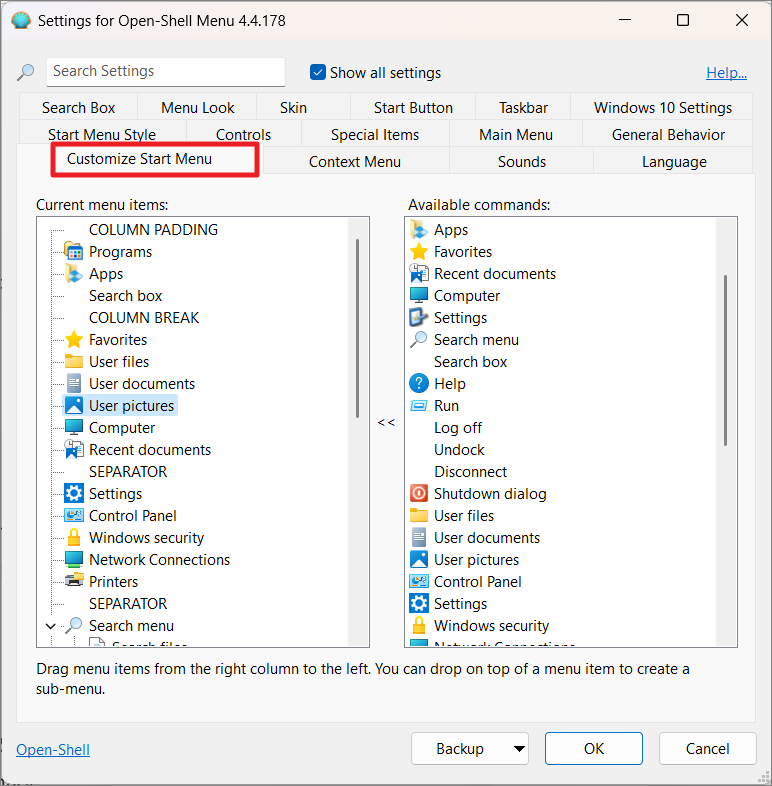
To add a new item, select where you want it to appear in the left column. Then, in the right column, double-click the desired command or drag it to the position in the left column.
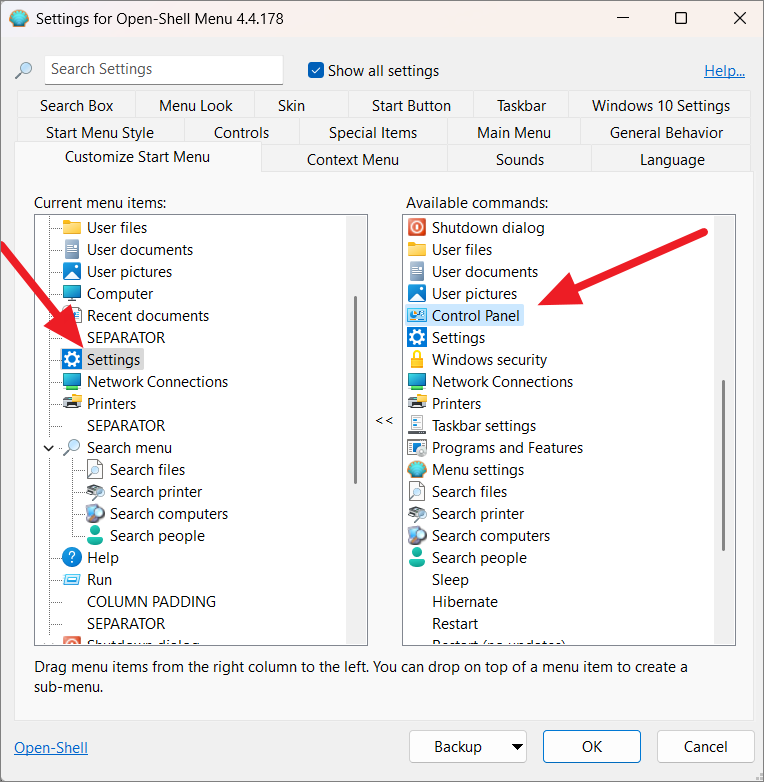
For example, to add ‘Control Panel’ below ‘Settings’, select ‘Settings’ in the left column, find ‘Control Panel’ in the right column, and double-click it.
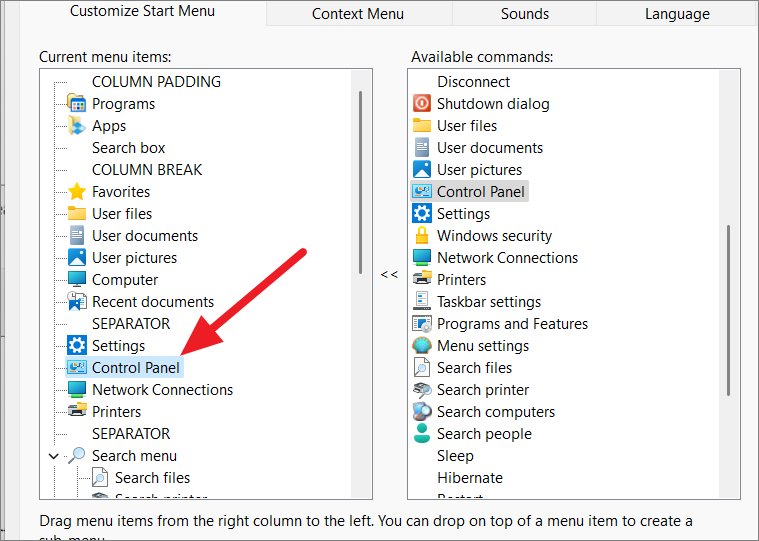
The ‘Control Panel’ item will now appear in your Start menu.
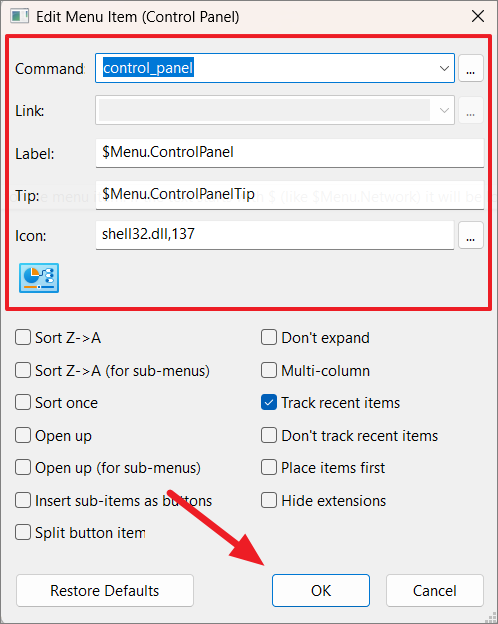
To edit or remove an item, right-click it in the left column and choose ‘Edit Item’ or ‘Delete Item’ from the context menu.
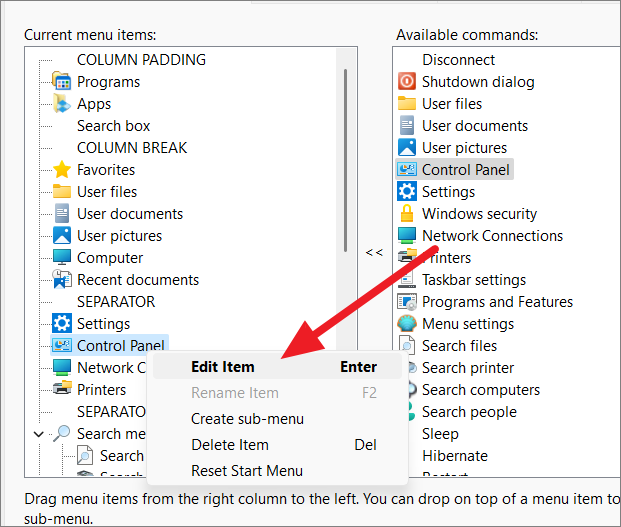
In the Edit Menu Item dialog, you can modify various properties such as the command, label, icon, and tooltip. Click ‘OK’ to save your changes.
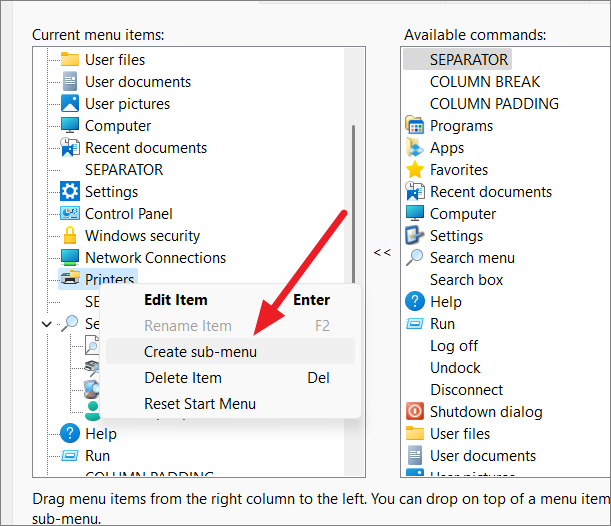
To create a submenu, right-click an item and select ‘Create Submenu’. Drag commands from the right column into the new submenu to populate it.
Adjusting Start Menu Sections
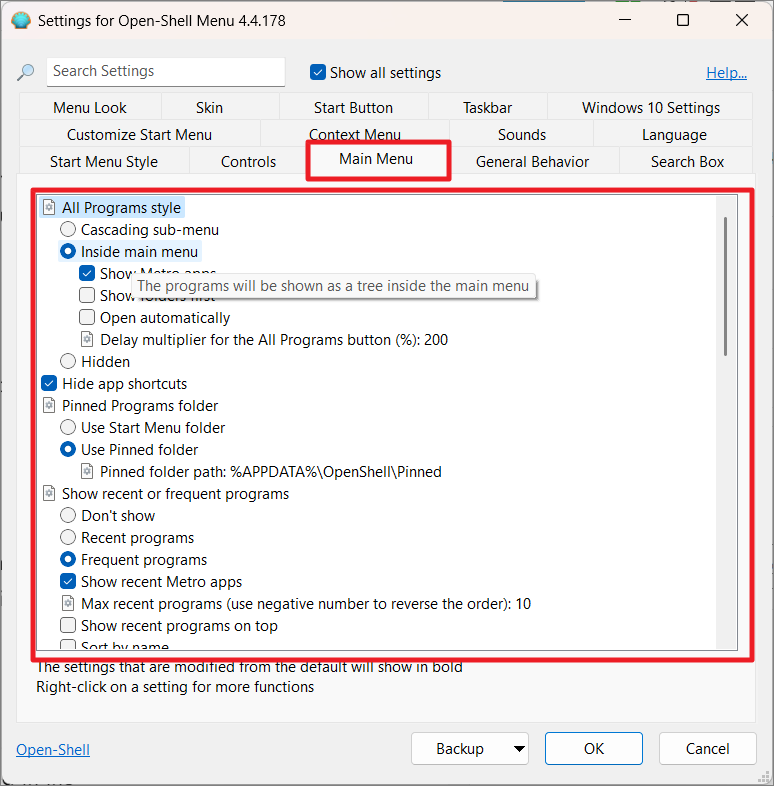
In the ‘Main Menu’ tab, you can fine-tune how different sections of the Start menu function. Options include changing the All Programs style, toggling app shortcuts, configuring pinned programs, enabling jump lists, adjusting pane sizes, sorting items, and setting up shutdown commands.
Modifying Start Menu Behavior
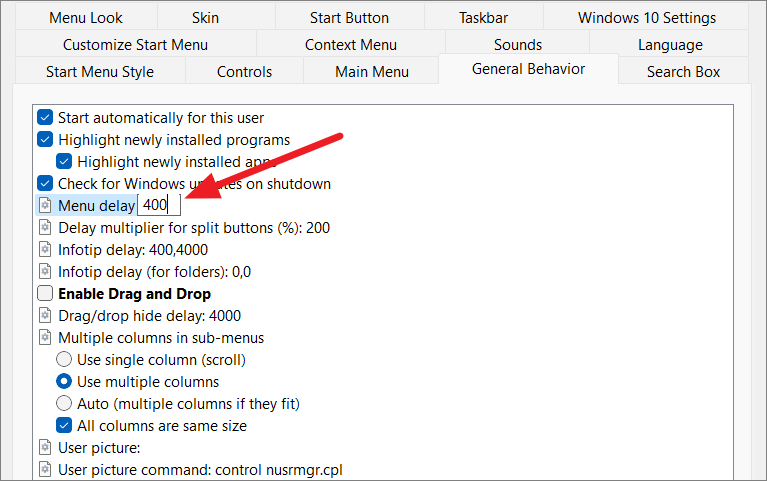
Under the ‘General Behavior’ or ‘Menu Look’ tab, you can customize how the Start menu operates. This includes setting Open Shell to start with Windows, adjusting menu animations, enabling drag-and-drop functionality, and more.
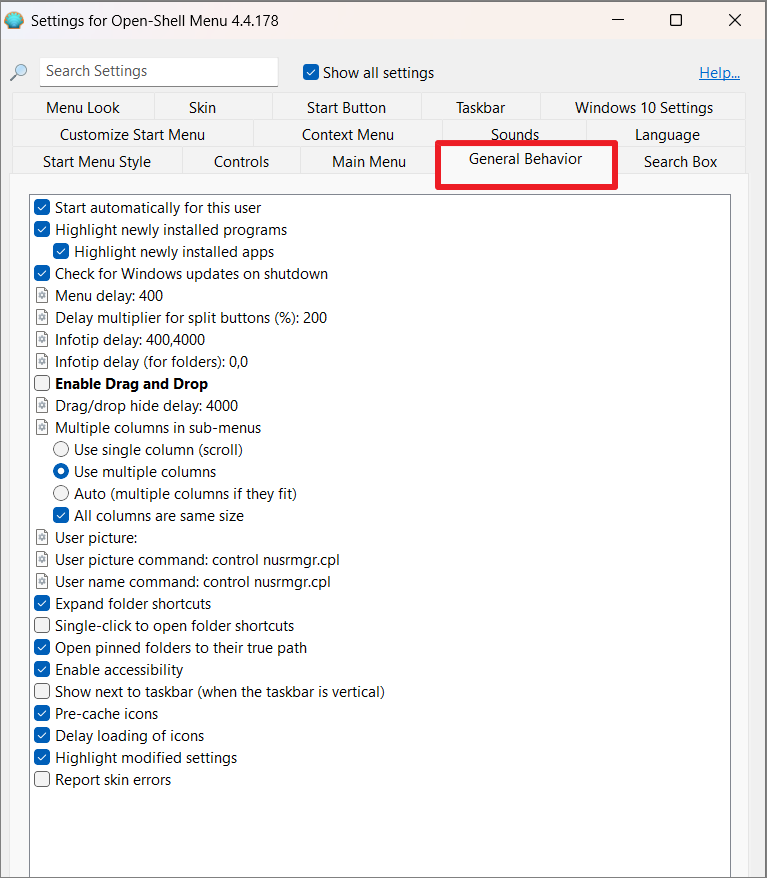
You can also configure time delays for menu appearances, tooltip displays, and split button options. Adjusting these settings allows for a more responsive and personalized experience.
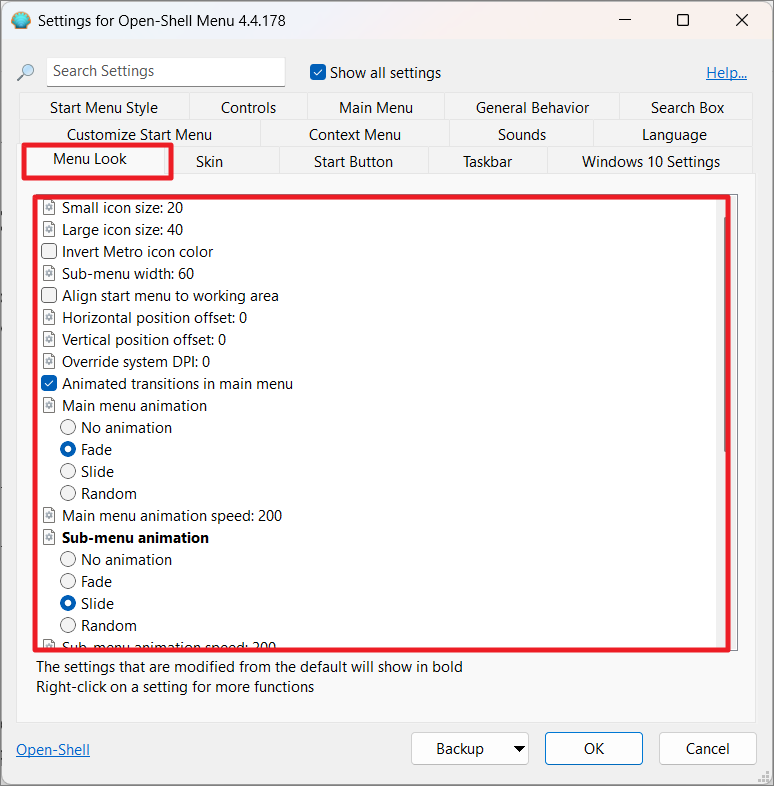
Customizing Start Menu Appearance
The ‘Menu Look’ tab offers additional options to tailor the Start menu’s appearance. You can adjust icon sizes, menu widths, animations, font smoothing, DPI settings, and more to create a Start menu that fits your style.
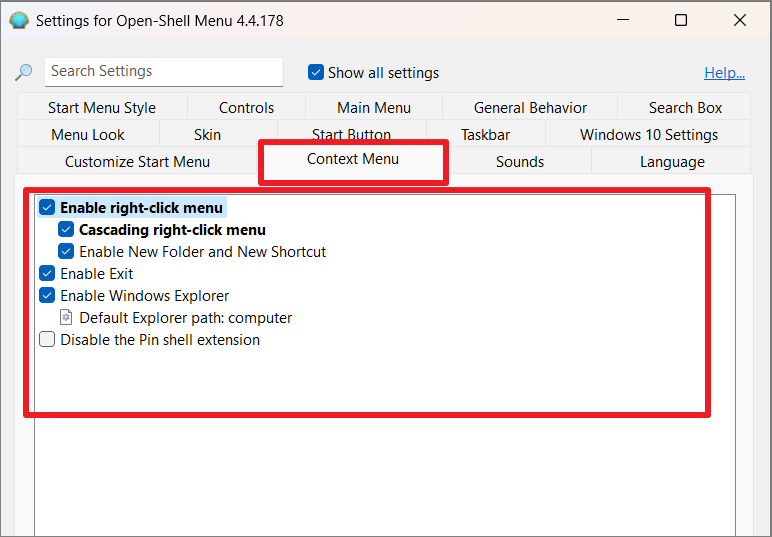
Tweaking the Context Menu
In the ‘Context Menu’ tab, you can modify the Start menu’s right-click functionality. Options include enabling or disabling the context menu, adding ‘New Folder’ and ‘New Shortcut’ options, and configuring behavior for pinned items.
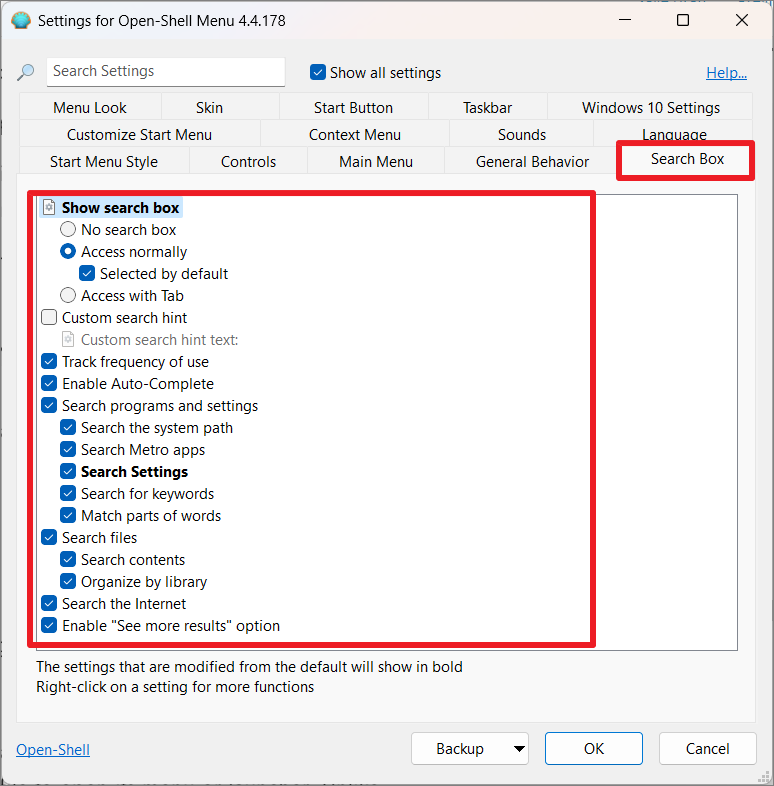
Optimizing the Search Box
The ‘Search Box’ tab allows you to customize how the Start menu’s search function works. You can enable or disable the search box, set custom hints, adjust search scopes, enable autocomplete, and decide whether to include internet search results.
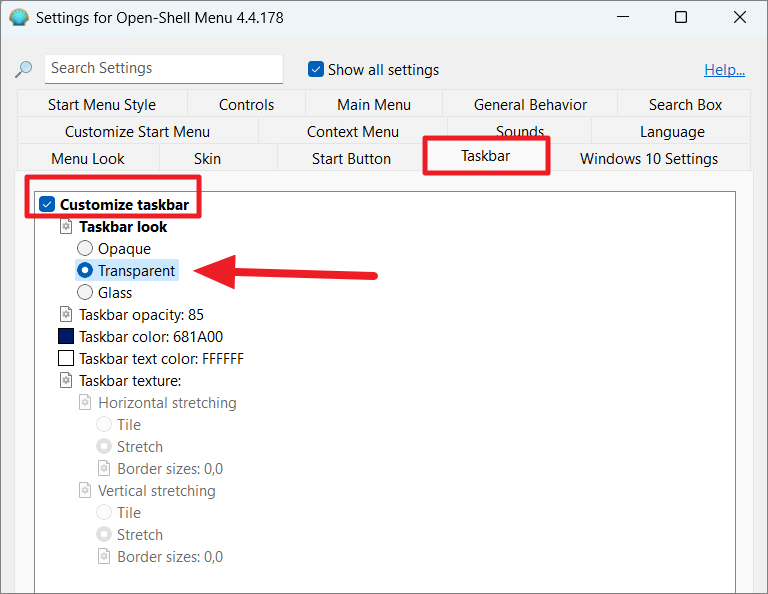
Personalizing the Taskbar
While Open Shell’s taskbar customization is limited, you can still adjust its appearance. In the ‘Taskbar’ tab, check the ‘Customize taskbar’ option. Choose a taskbar look: ‘Opaque’, ‘Transparent’, or ‘Glass’.
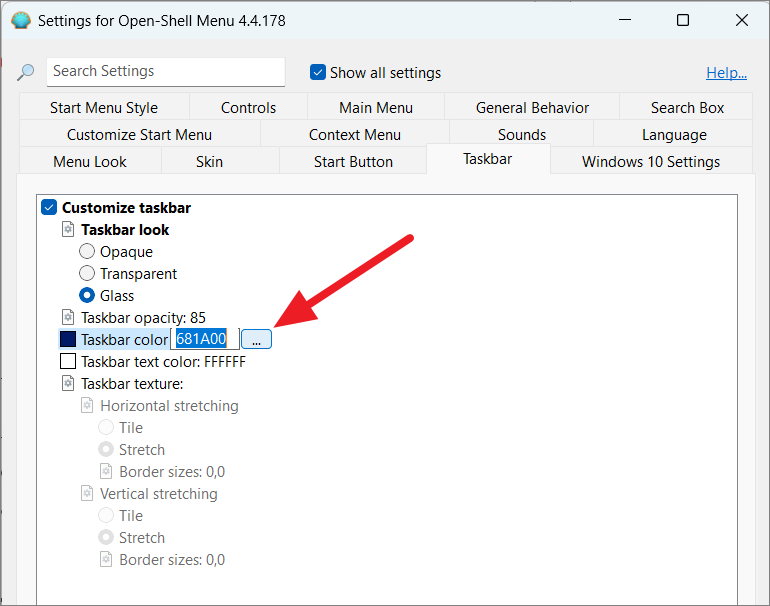
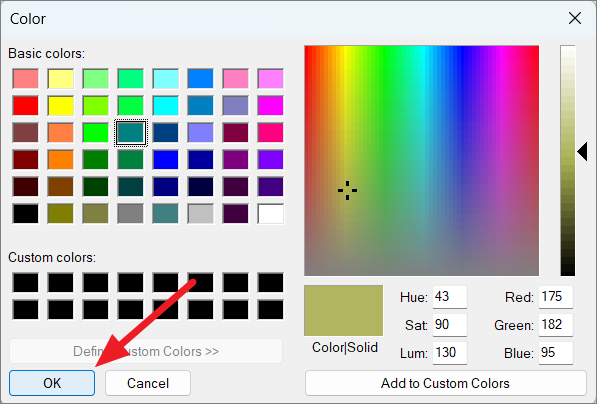
To change the taskbar color or text color, select the corresponding option and click the color box to open the color picker. Choose your desired color and click ‘OK’ to apply.
Enhancing File Explorer
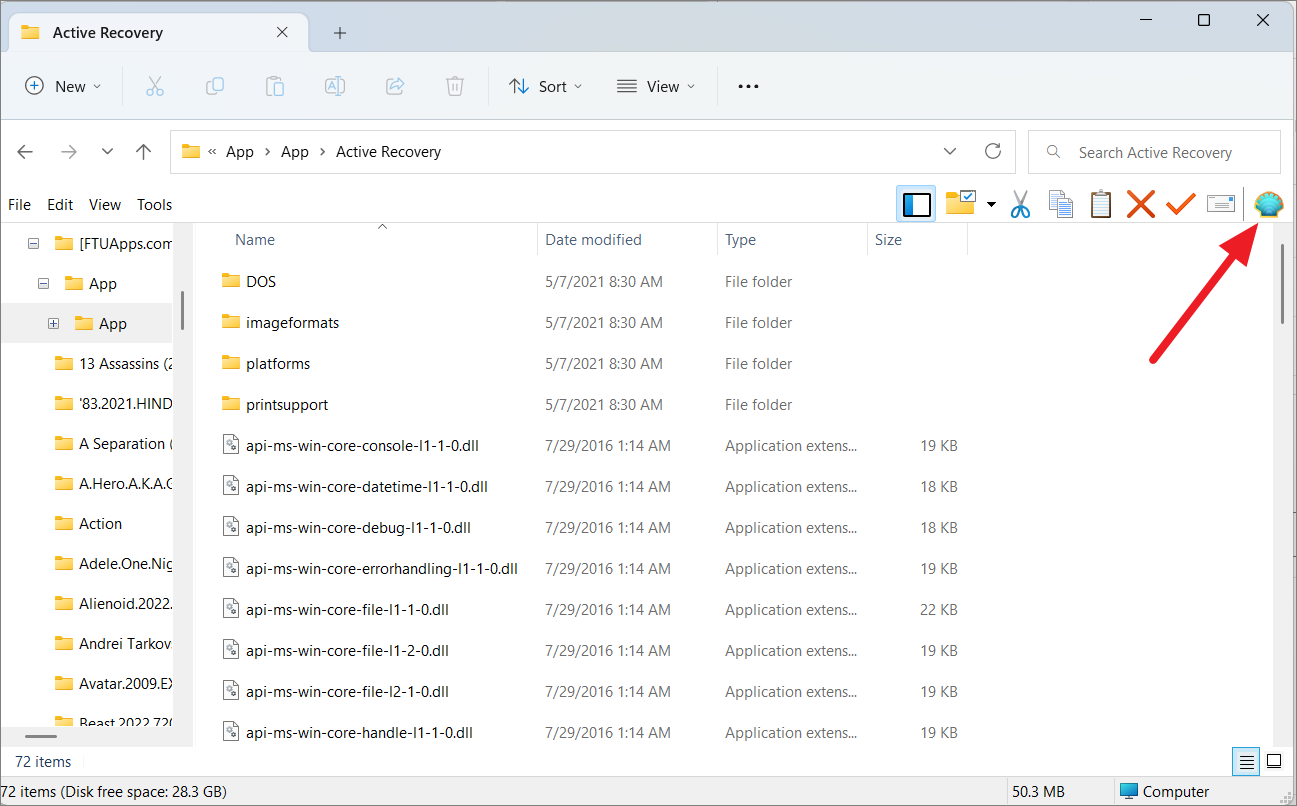
Open Shell also provides customization options for File Explorer. After installation, you’ll notice an additional toolbar in File Explorer with new tools.
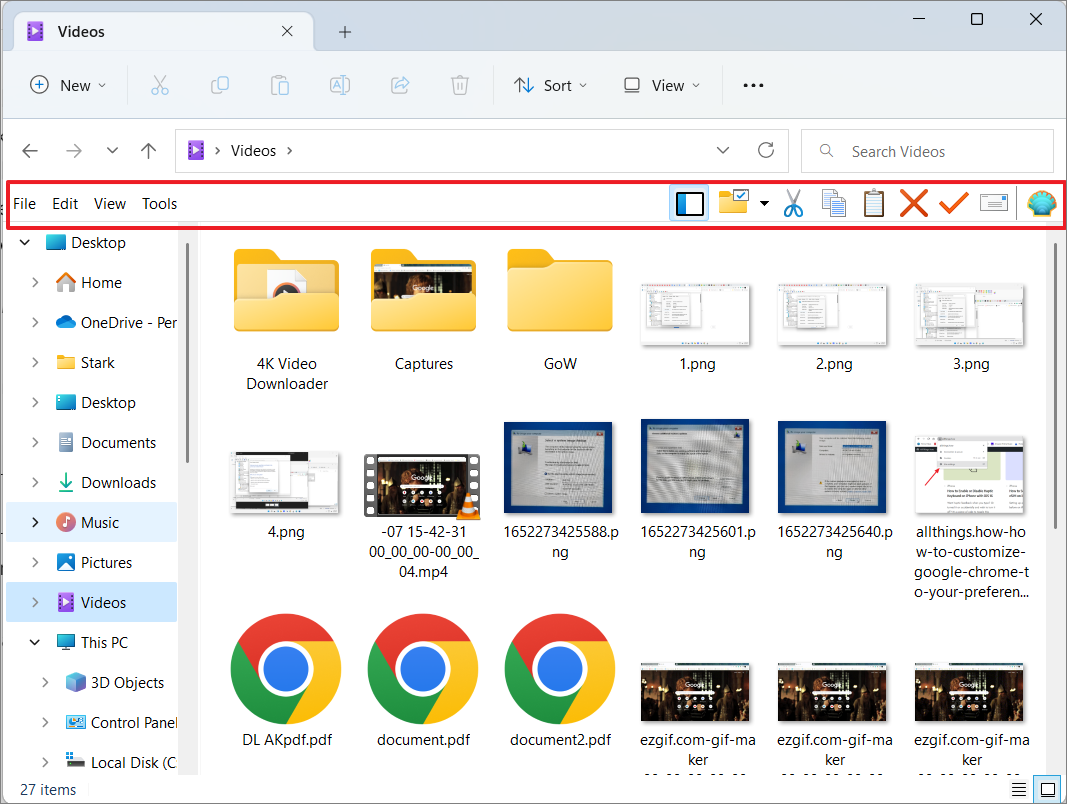
Click the Shell icon on the toolbar to access the Classic Explorer settings.
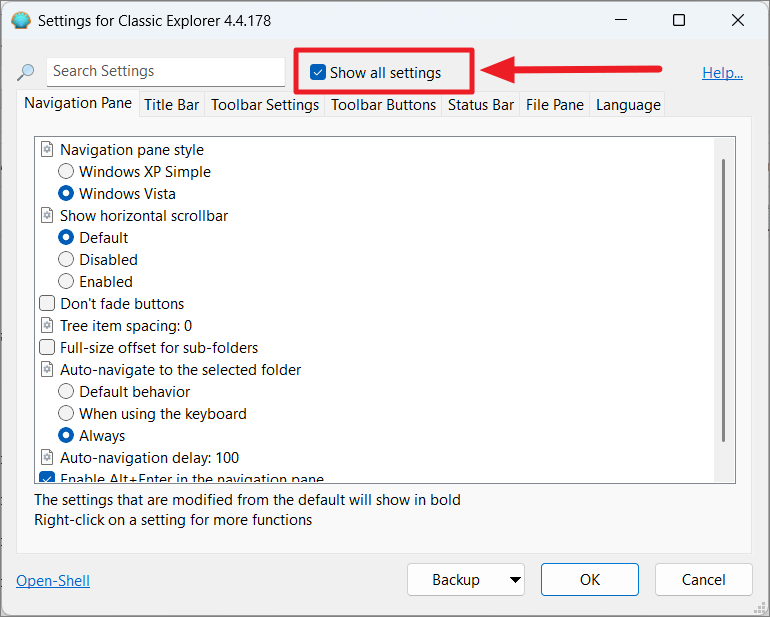
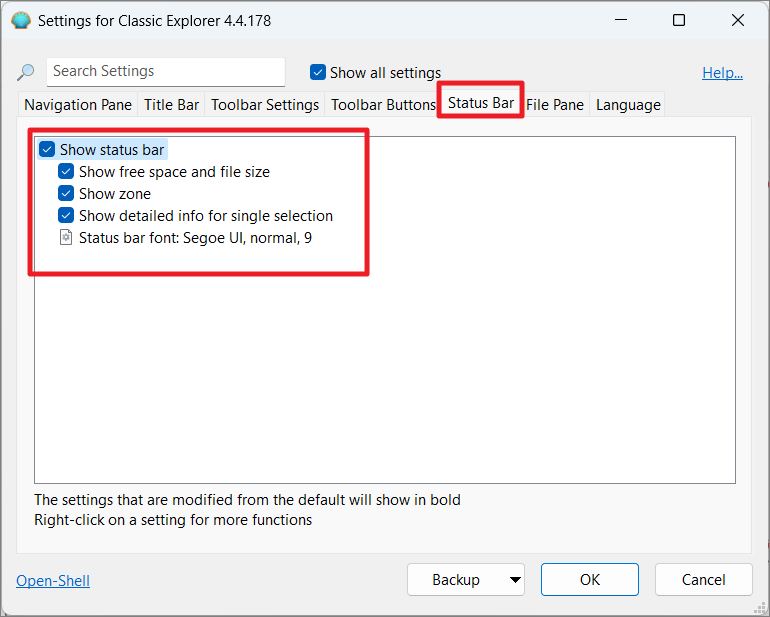
Check the ‘Show all settings’ option to reveal all available settings. You can customize the navigation pane, toolbar buttons, status bar, file pane, and more.
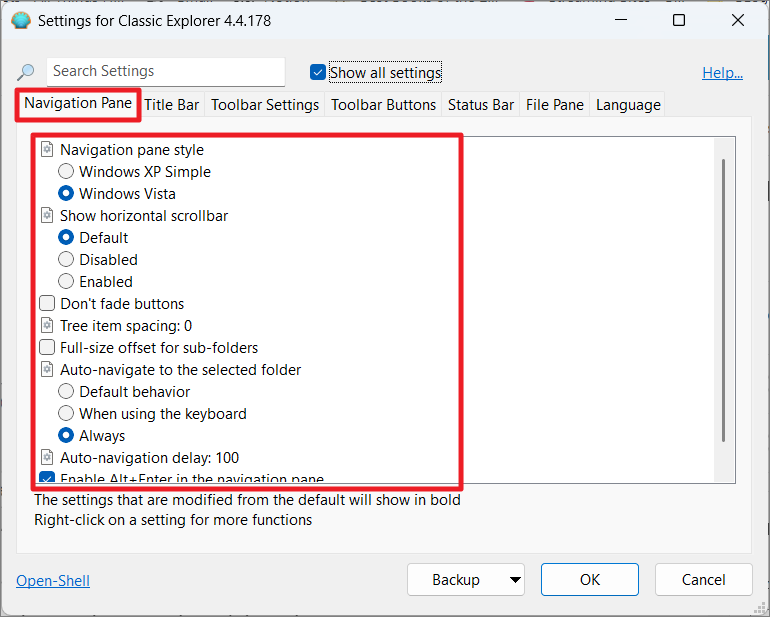
In the ‘Navigation Pane’ tab, adjust styles, spacing, and behavior to your liking.
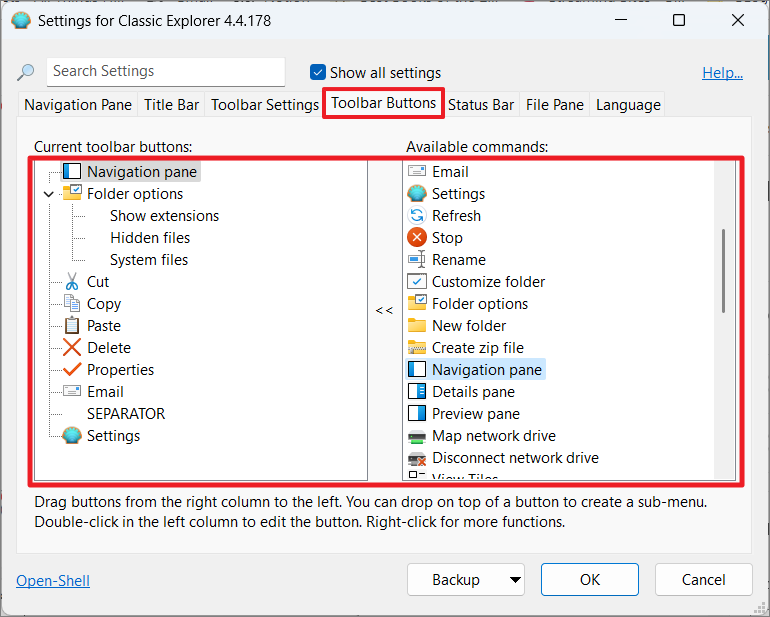
Use the ‘Toolbar Buttons’ tab to add, remove, or edit buttons on the toolbar, enhancing usability.
In the ‘Status Bar’ tab, customize what information is displayed and adjust the font style and size.
Enabling the Classic Taskbar in Windows 11
While Open Shell allows taskbar appearance adjustments, it doesn’t fully restore the classic taskbar. If you prefer the Windows 10 taskbar, you can modify system registries to bring back the classic look and functionality.
Windows + R to open the Run dialog. Type regedit and click ‘OK’ to open the Registry Editor. Confirm any prompts from User Account Control.
HKEY_LOCAL_MACHINE\SOFTWARE\Microsoft\Windows\CurrentVersion\Shell\Update\Packages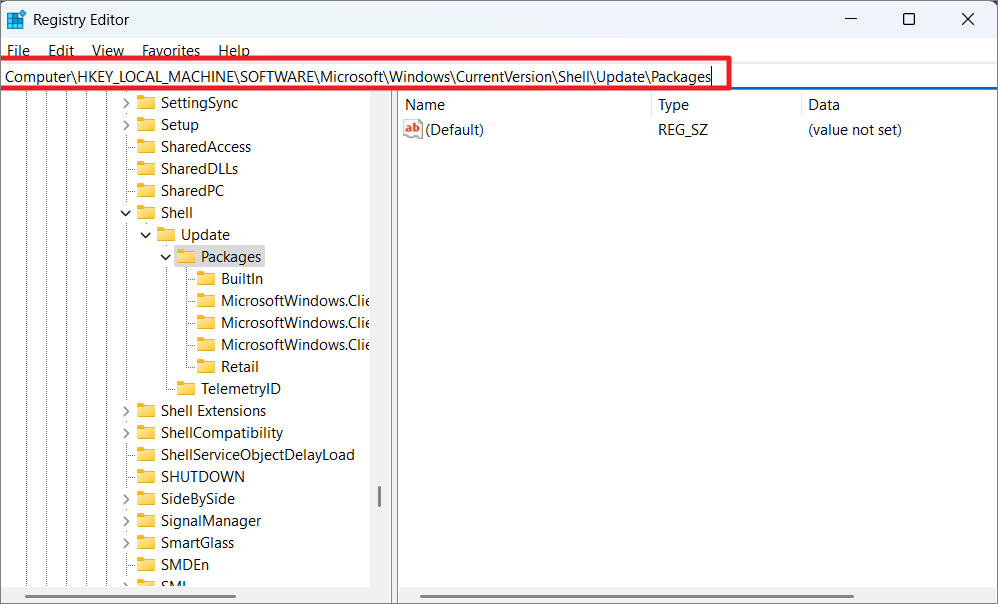
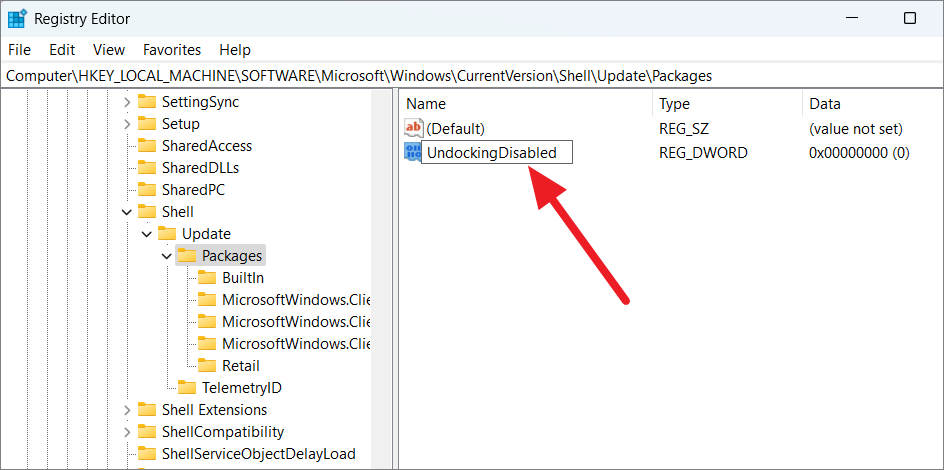
After restarting, the taskbar will revert to a style more akin to Windows 10, and the classic context menus will return.
If system icons like volume, network, battery, and the notification center are missing, you can restore them:


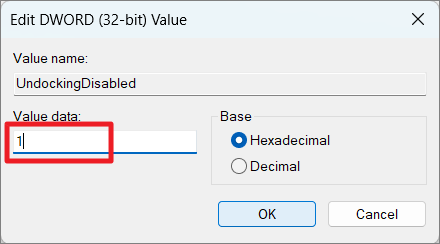
If the Search icon remains on the taskbar and doesn’t function, you can hide it:
HKEY_CURRENT_USER\Software\Microsoft\Windows\CurrentVersion\Search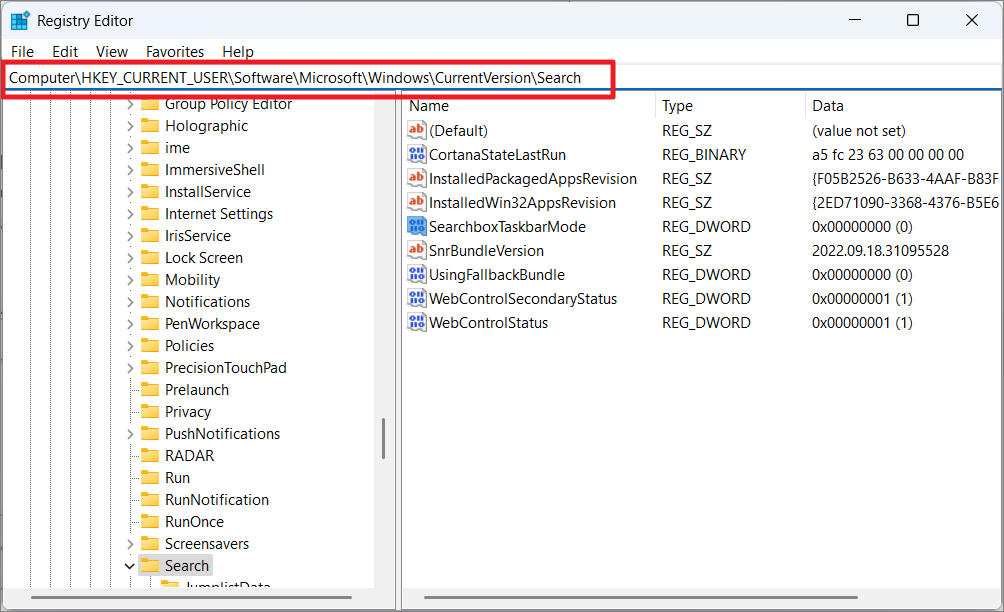
0, and click ‘OK’.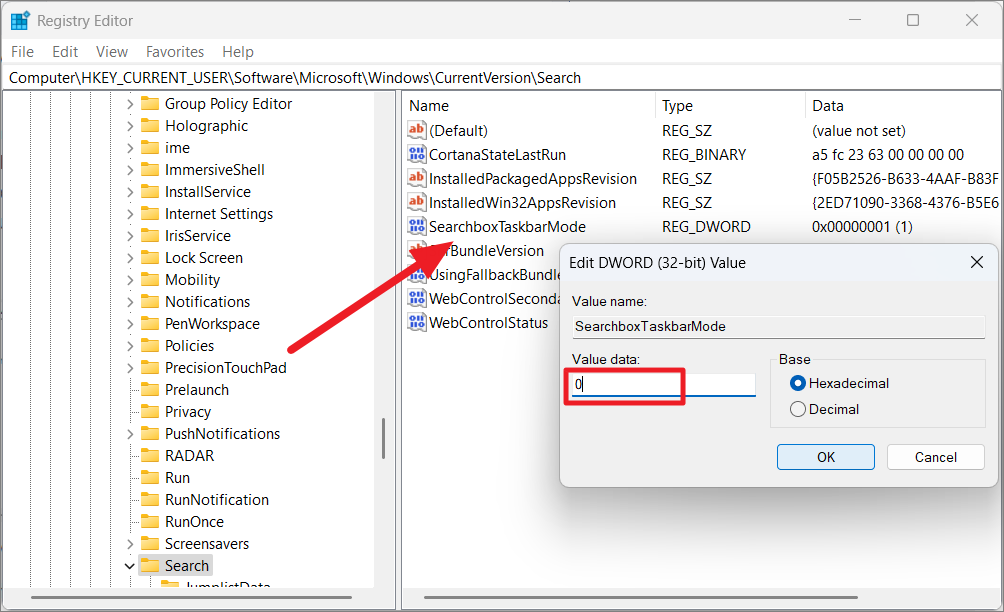
Your taskbar should now resemble the classic Windows 10 version with fully functional features.
Troubleshooting Open Shell Issues on Windows 11
If Open Shell isn’t functioning correctly, try the following solutions.
Restart Your Computer
A simple restart can fix minor issues. Save your work and reboot your system.
Restart Windows Explorer
Restarting Windows Explorer can resolve interface problems. Press Ctrl + Shift + Esc to open Task Manager. In the ‘Processes’ tab, find ‘Windows Explorer’, right-click it, and select ‘Restart’.

Update Open Shell
Ensure you’re using the latest version. Search for ‘Open Shell Update’ in the Start menu, run it, and click ‘Check now’ to look for updates. Install any available updates and restart your PC.

Re-register the Shell Experience
Re-registering the shell experience can fix integration issues. Open PowerShell as an administrator, then run the following command:
Get-AppxPackage -AllUsers Microsoft.Windows.ShellExperienceHost | Foreach {Add-AppxPackage -DisableDevelopmentMode -Register "$($_.InstallLocation)\AppXManifest.xml"}After the command executes, restart your computer.
Rebuild the Windows Search Index
If search isn’t working properly, rebuilding the index may help. Go to Settings > Privacy & security > Searching Windows. Scroll down and select ‘Advanced indexing options’. In the window that appears, click ‘Advanced’, then ‘Rebuild’ under the ‘Index Settings’ tab.
Modify Start Menu Registry Settings
Altering registry settings can resolve Start menu issues. Navigate to:
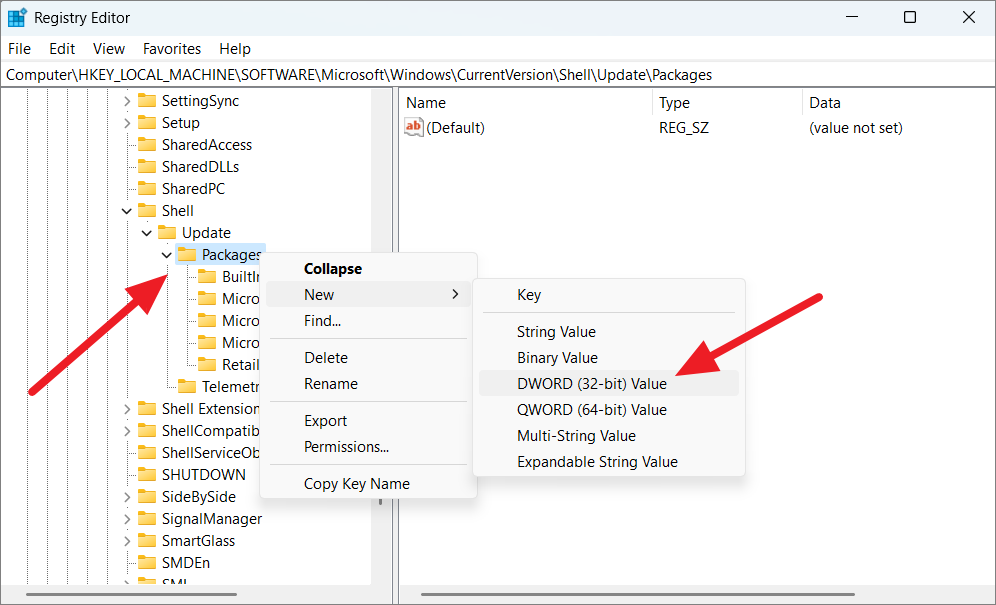
HKEY_CURRENT_USER\Software\Microsoft\Windows\CurrentVersion\Explorer\AdvancedCreate a new DWORD (32-bit) Value named EnableXamlStartMenu with a value of 0. Restart your PC.
Check for Windows Updates
Update Windows to ensure compatibility. Go to Settings > Windows Update, and click ‘Check for updates’. Install any available updates.
Reinstall Open Shell
If problems persist, uninstall Open Shell and reinstall the latest version from the official GitHub repository.
With Open Shell, you can tailor Windows 11 to your liking, bringing back the classic elements you prefer. Enjoy a personalized and familiar interface that enhances your computing experience.


