
Cortana, a voice-activated digital assistant, is one of the standout features in Windows 10. It’s similar to Siri on Apple devices or Alexa on Amazon Echo or Google Assistant on Android devices. With Cortana, you can open and share files over mail, set reminders, search the web, and a lot more using your voice.
Microsoft has invested a lot in this digital assistant feature and wants the users to get used to it, therefore, it removed the feature to disable Cortana with a Windows feature update. Now, you cannot disable Cortana simply from settings. However, if you want to disable it, you can use the registry method.
Other than the registry method to disable permanently, you can revoke most of its permissions to ensure that it doesn’t listen to you anymore. This was one of the major concerns users had in mind that made them disable Cortana.
Disabling Cortana in Windows 10
Revoking Permissions
If you want to temporarily disable the assistant or simply do not want it to hear your conversations, you can revoke the permissions. This method is fairly simple and a good option for most users.
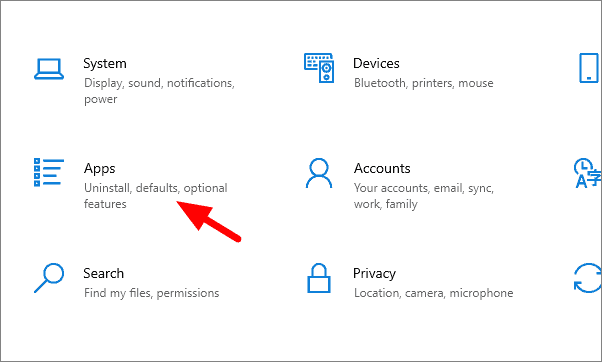
To revoke the permissions, press WINDOWS + I to open Settings and then select ‘Apps’. You can also access Settings from the Quick Access Menu or the Start Menu.
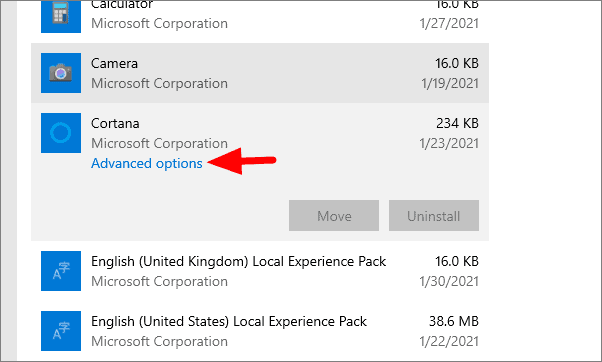
Now, scroll down and search for Cortana under the list of apps. After you find Cortana, click on it, and then select ‘Advanced options’.
Click on the toggles to revoke the permission you intend to, and then close the Settings window.
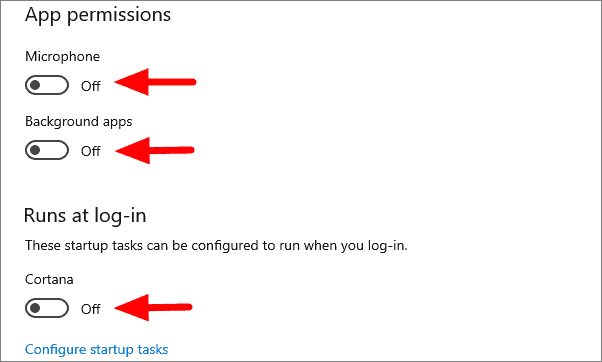
You have now temporarily disabled Cortana and can enable it whenever you want by simply granting the permissions.
Permanently Disabling Cortana
Although this method is not permanent and you can still enable the digital assistant, it will, however, not be as simple as was the case above.
To permanently disable Cortana, you will have to make changes to the Windows Registry. It is recommended to back up your data and create a restore point before proceeding with this method. Furthermore, follow the instructions as is without fail, since any lapse on your part can render your system unusable.
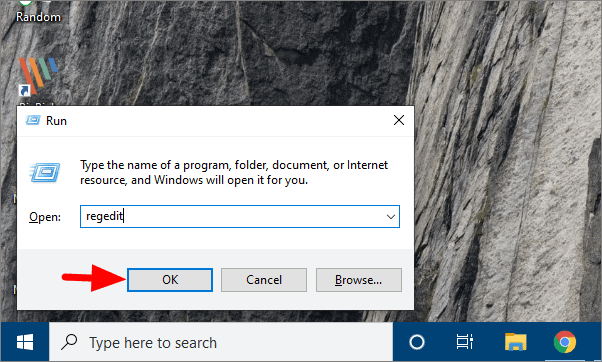
Search for Run in the Start Menu or press WINDOWS + R to open it. Type ‘regedit’ in the text box and press ENTER or click on ‘OK’ at the bottom.
The Registry Editor will open. Now, enter the following address in the address bar at the top and press ENTER.
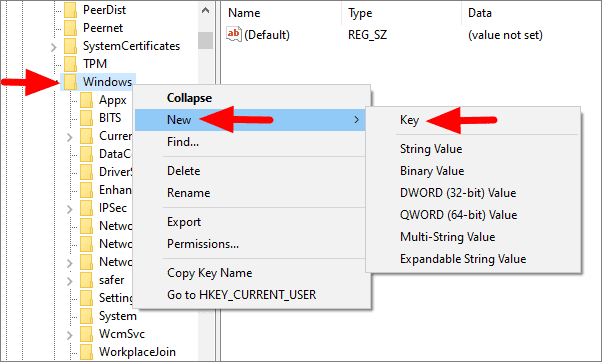
Computer\HKEY_LOCAL_MACHINE\SOFTWARE\Policies\Microsoft\WindowsLook for ‘Windows Search’ in the sidebar on the left. If you can’t find it, right-click on Windows, select ‘New’, and then click on ‘Key’ from the menu.
Enter ‘Windows Search’ as the key name, once it is visible in the sidebar.
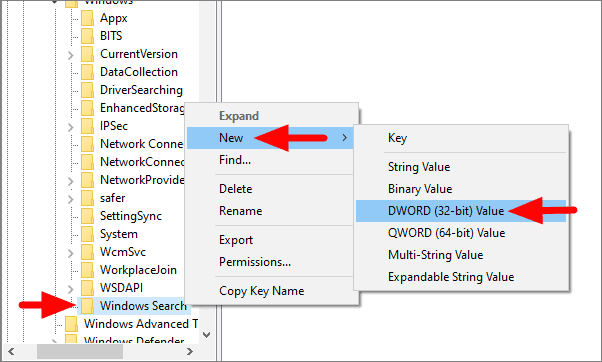
Right-click on the ‘Windows Search’ key, select ‘New’ from the menu, and then click on ‘DWORD (32-bit) Value’. Use the name ‘AllowCortana’ for the value.
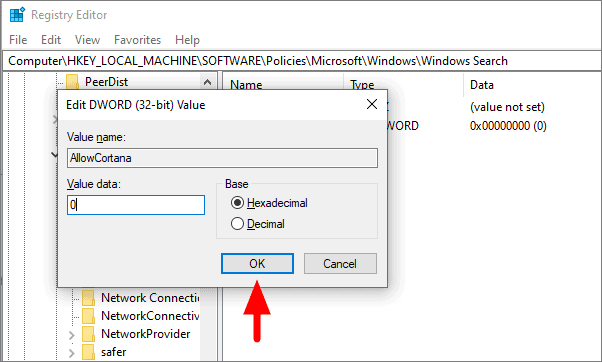
You will now see the ‘AllowCortana’ value. Double-click on it to open the edit box.

Enter ‘0’ in the space provided under ‘Value Data’, and click on ‘OK’ at the bottom.
Now, close the Registry Editor and restart your computer to apply the changes.
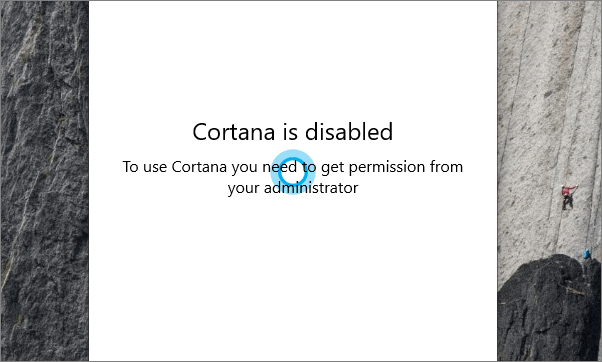
After you restart the system, click on Cortana to see if it is disabled. You will see the ‘Cortana is disabled’ message on the screen.
If Cortana isn’t disabled yet, check if you have followed the steps carefully, and ensure value data is set to 0.
As mentioned at the start that disabling Cortana with this method is still not permanent and you can enable it at a later point in time. To enable Cortana, change the value data to ‘1’ instead of ‘0’ for ‘AllowCortana’.
You can now easily disable Cortana on Windows 10 with the simple methods discussed above.


