
The Snipping Tool in Windows 11 allows for quick and easy screenshots, but there may be reasons you want to disable it—perhaps you prefer a different tool or need to restrict its use. Below are several methods to disable the Snipping Tool on your Windows 11 system.
Disable the Snipping Tool using the Group Policy Editor
The Group Policy Editor provides administrative controls over various Windows components, including the Snipping Tool.
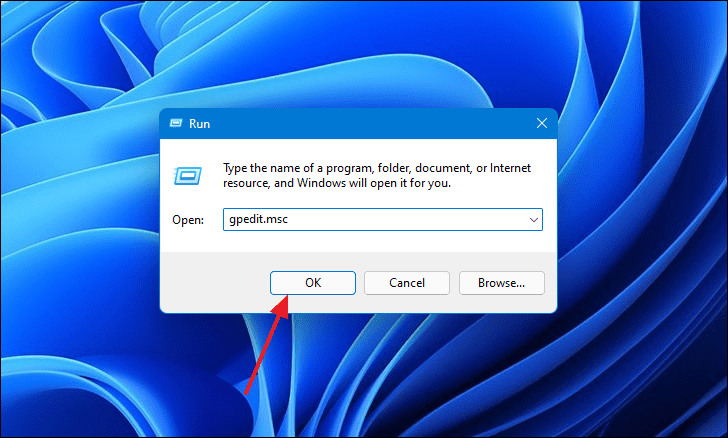
- Press
Windows+Ron your keyboard to open the Run dialog. - Type
gpedit.mscinto the Run dialog and click OK.
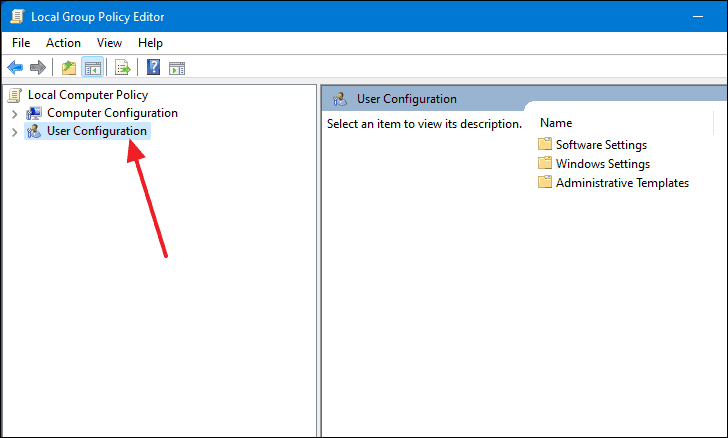
- In the Group Policy Editor window, navigate to the following path in the left pane:
- User Configuration
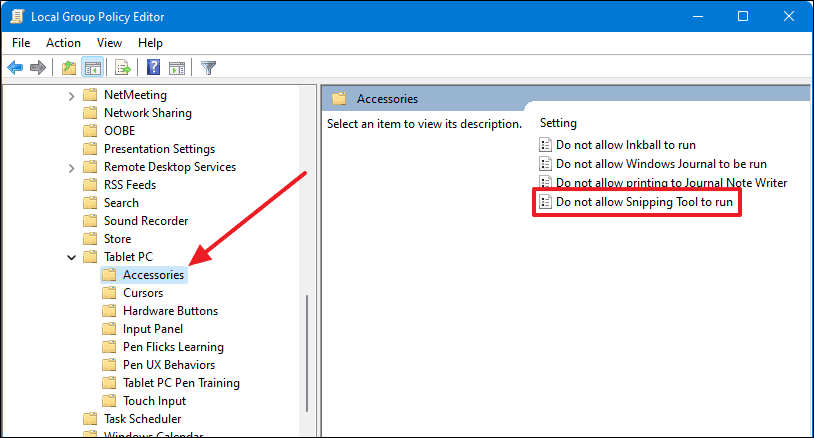
- Administrative Templates
- Windows Components
- Tablet PC
- Accessories
- In the right pane, double-click on the policy named Do not allow Snipping Tool to run.
- In the policy window that opens, select the Enabled option, then click OK to save the changes.
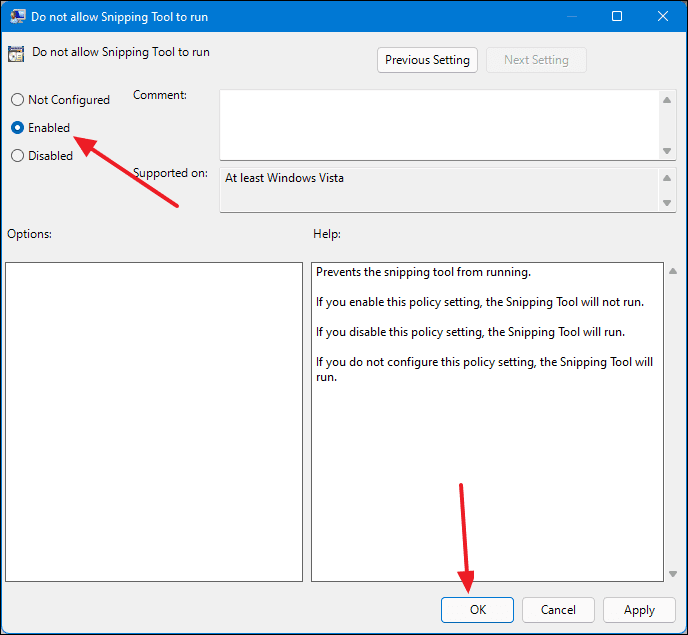
Restart your computer for the changes to take effect. The Snipping Tool should now be disabled on your system.
Disable the Snipping Tool via the Registry Editor
If you don’t have access to the Group Policy Editor (available only on Pro and Enterprise editions), you can use the Registry Editor to disable the Snipping Tool.
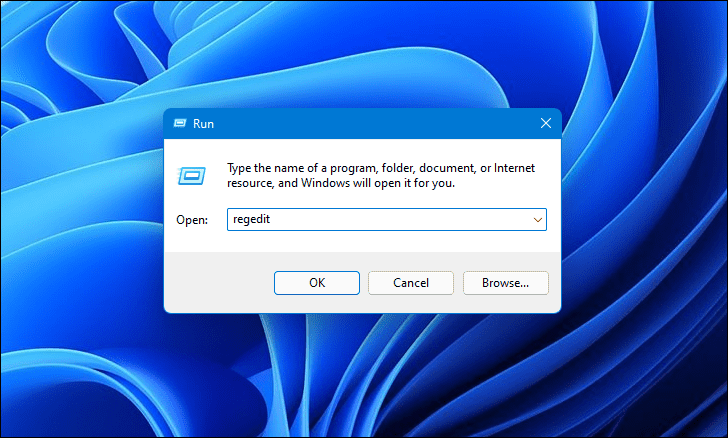
- Press
Windows+Rto open the Run dialog. - Type
regeditand pressEnterto launch the Registry Editor.
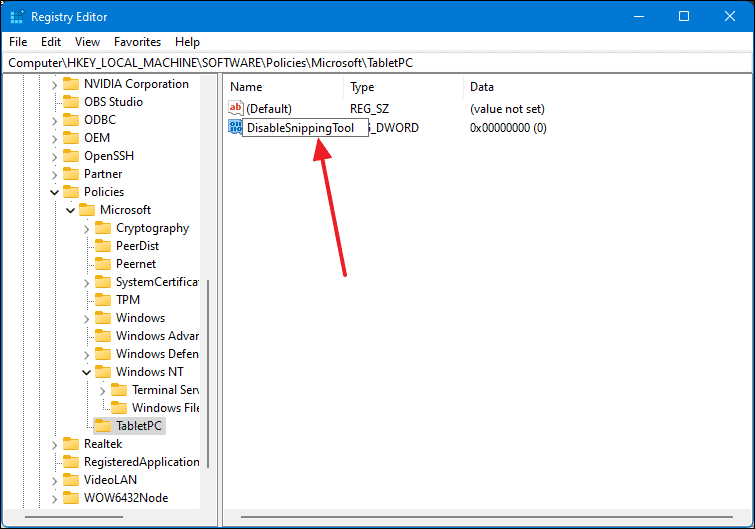
In the Registry Editor, navigate to the following path:
HKEY_LOCAL_MACHINE\SOFTWARE\Policies\Microsoft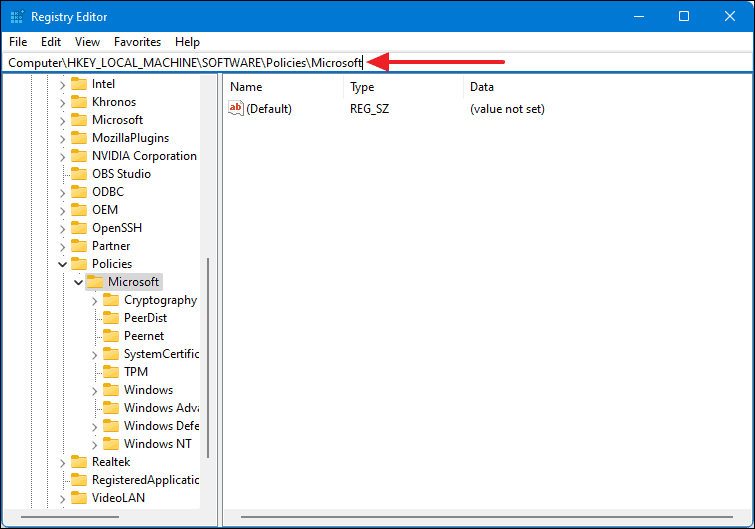
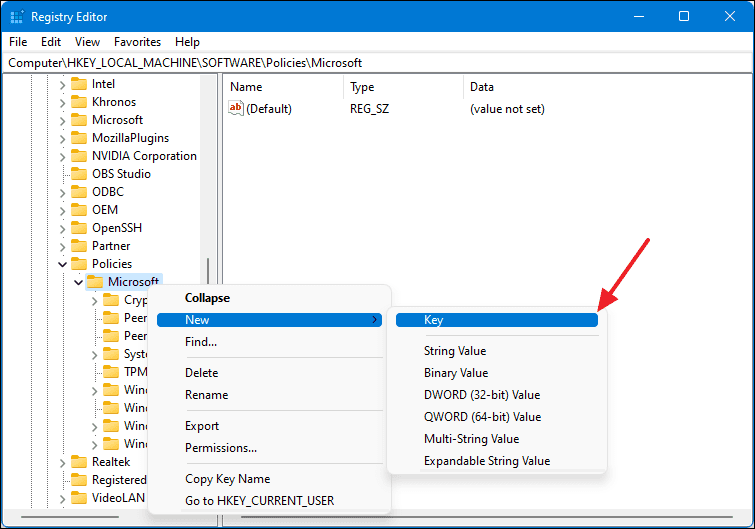
- In the left pane, check if there’s a key named TabletPC under Microsoft. If not, right-click on Microsoft, select New, then click on Key and name it TabletPC.
- Select the TabletPC key. In the right pane, right-click on an empty space, choose New, then select DWORD (32-bit) Value.
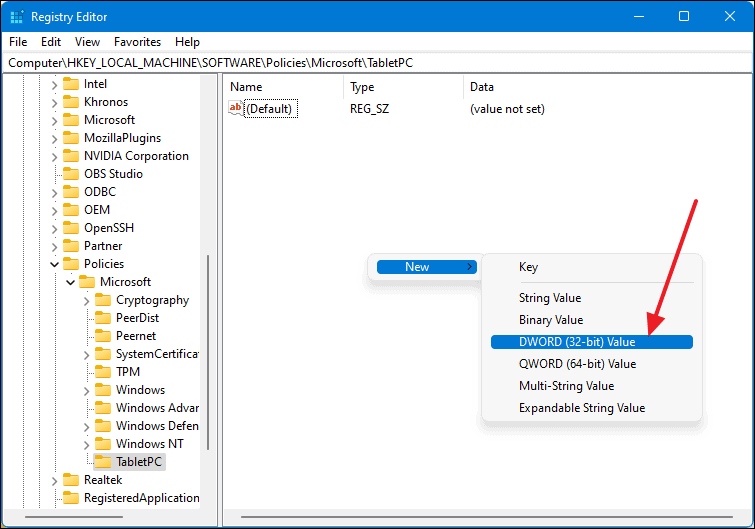
- Name the new value DisableSnippingTool and press
Enter.
- Double-click on DisableSnippingTool. In the dialog box that appears, set the Value data to
1and click OK.
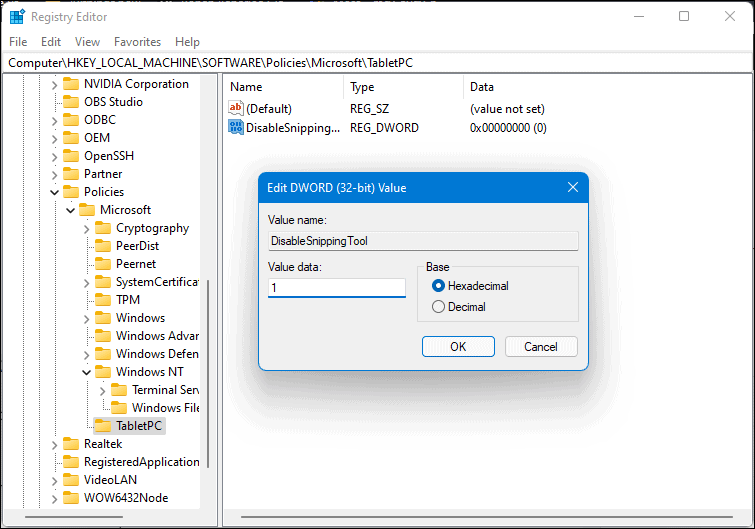
Restart your computer to apply the changes. The Snipping Tool should now be disabled. To re-enable it, you can delete the DisableSnippingTool value or set its value data to 0 and restart your computer again.
Uninstall the Snipping Tool
If you prefer to remove the Snipping Tool entirely from your system, you can uninstall it.
- Click on the Start button and type
Snipping Toolin the search bar. - Right-click on the Snipping Tool app from the search results and select Uninstall.
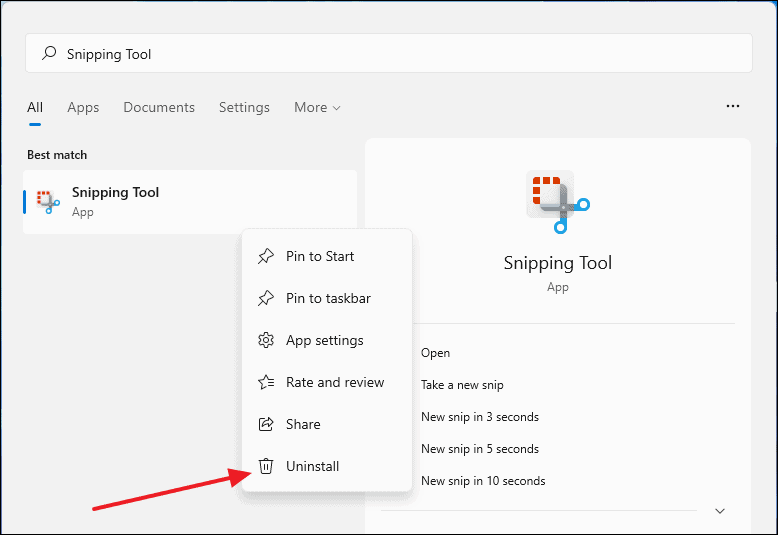
- In the confirmation dialog that appears, click on Uninstall to proceed.

The Snipping Tool will be removed from your computer. If you decide to reinstall it later, you can download it from the Microsoft Store.
These methods allow you to disable or remove the Snipping Tool from your Windows 11 PC, depending on your preferences and needs.


