When you search for something using the Start Menu in Windows 11, the system not only searches your local files and folders but also displays web search results powered by Bing. While this feature might seem useful in theory, it often falls short in practice. The web results are frequently irrelevant, and there can be privacy concerns if file names from your system are inadvertently sent online. Additionally, the inclusion of web results can clutter the search interface, making it harder to find what you are looking for locally.
For these reasons, many users prefer to disable the web search results feature. This guide will walk you through the steps to turn off web search results in the Start Menu on Windows 11 using two different methods.
Disable web search results using the registry editor
One of the most effective ways to stop web search results from appearing in the Start Menu is by modifying the Windows Registry. Follow these steps to disable the feature:
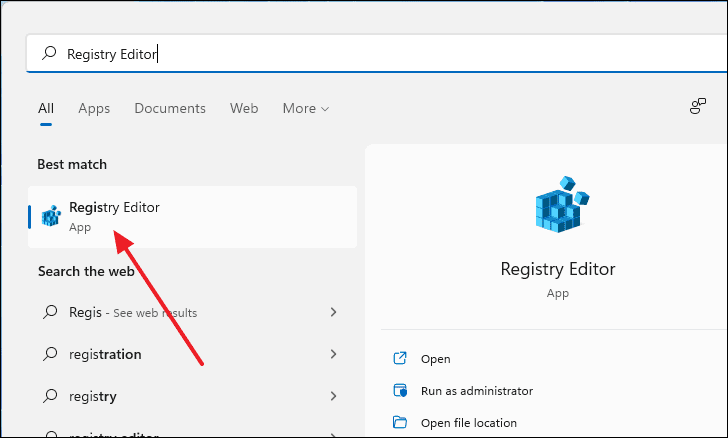
- Open the Registry Editor by typing
Registry Editorinto the Start Menu search bar and selecting it from the results.
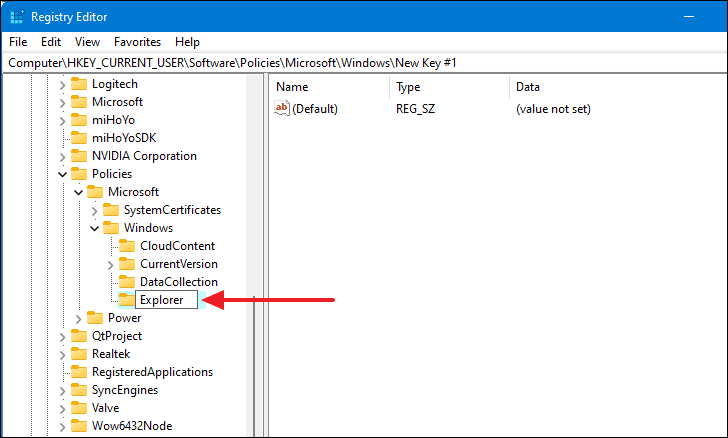
- Once the Registry Editor is open, navigate to the following path by copying and pasting it into the address bar:
Computer\HKEY_CURRENT_USER\Software\Policies\Microsoft\Windows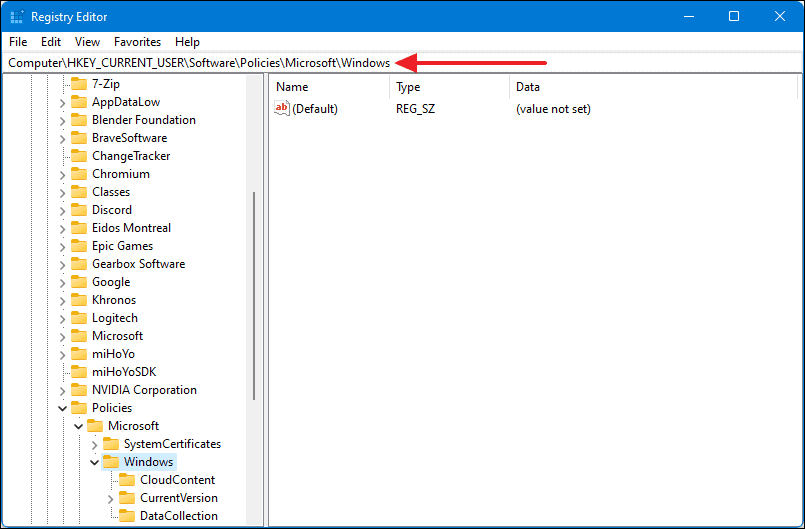
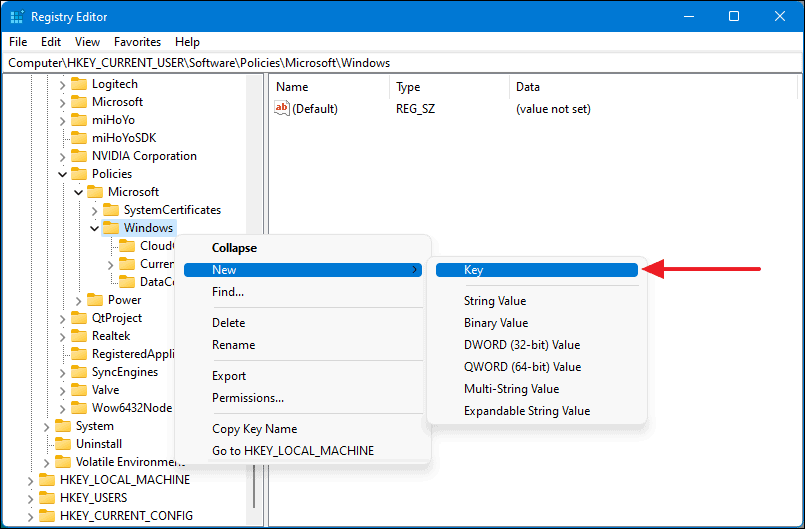
- In the left panel, right-click on the
Windowsfolder, selectNew, and then chooseKey.
- Rename the newly created key to
Explorerand pressEnterto save the changes.
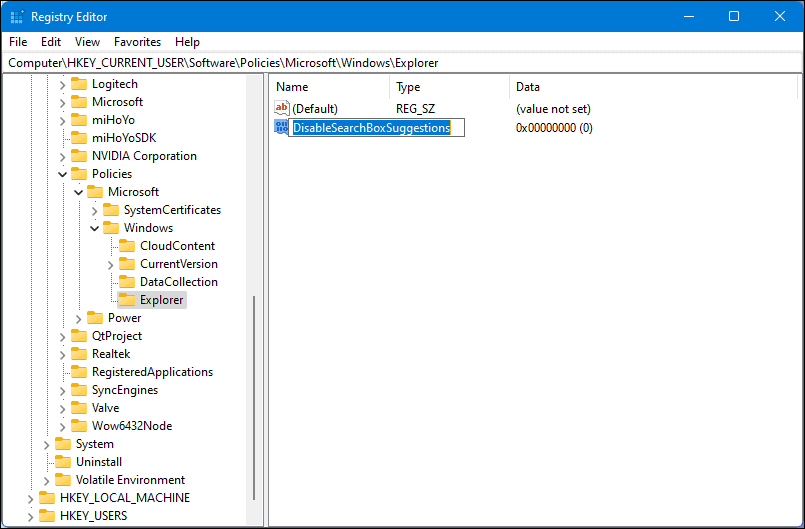
- Next, right-click on the
Explorerkey, chooseNew, and selectDWORD (32-bit) Value.

- Rename the new DWORD entry to
DisableSearchBoxSuggestionsand pressEnter.
- Double-click on
DisableSearchBoxSuggestions, set theValue datato1, and clickOK.
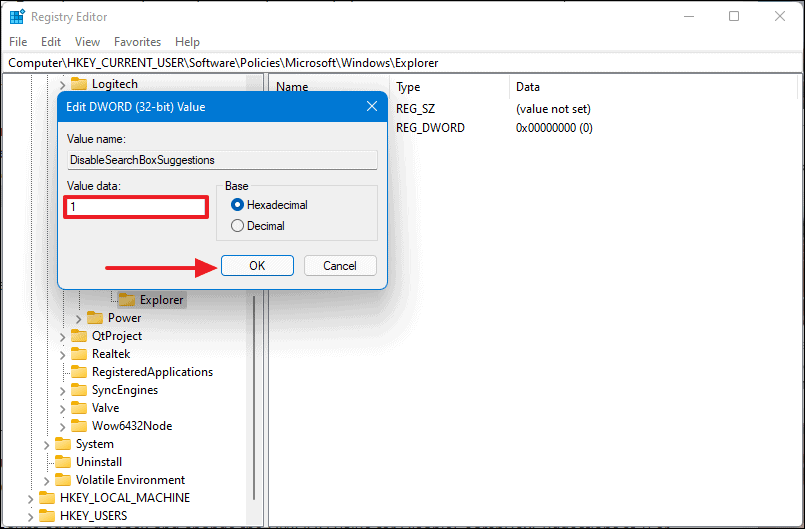
- Restart your computer for the changes to take effect. Once your system restarts, the Start Menu will no longer display web search results, and you’ll see a message like
No results found for...if the searched item is not on your computer.

Disable web search results via group policy editor
If you prefer to use the Group Policy Editor to disable web search results, follow these steps:
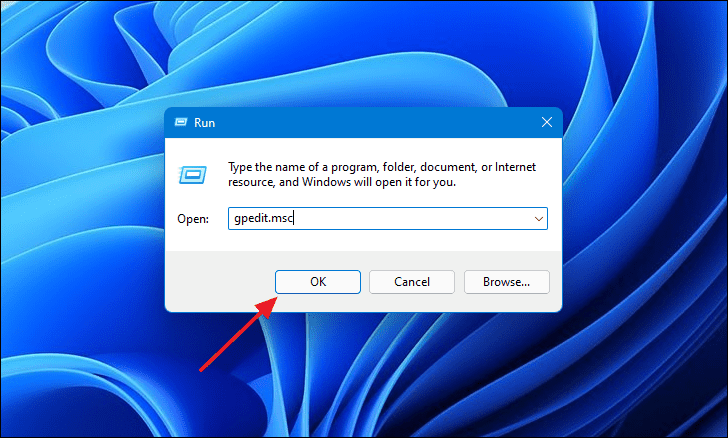
- Press
Windows+rto open the Run dialog box. Alternatively, you can right-click the Start Menu and selectRun.
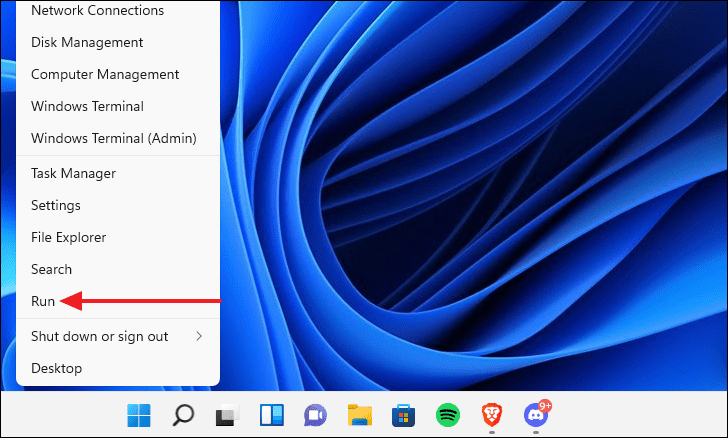
- In the Run window, type
gpedit.mscand clickOKto launch the Group Policy Editor.
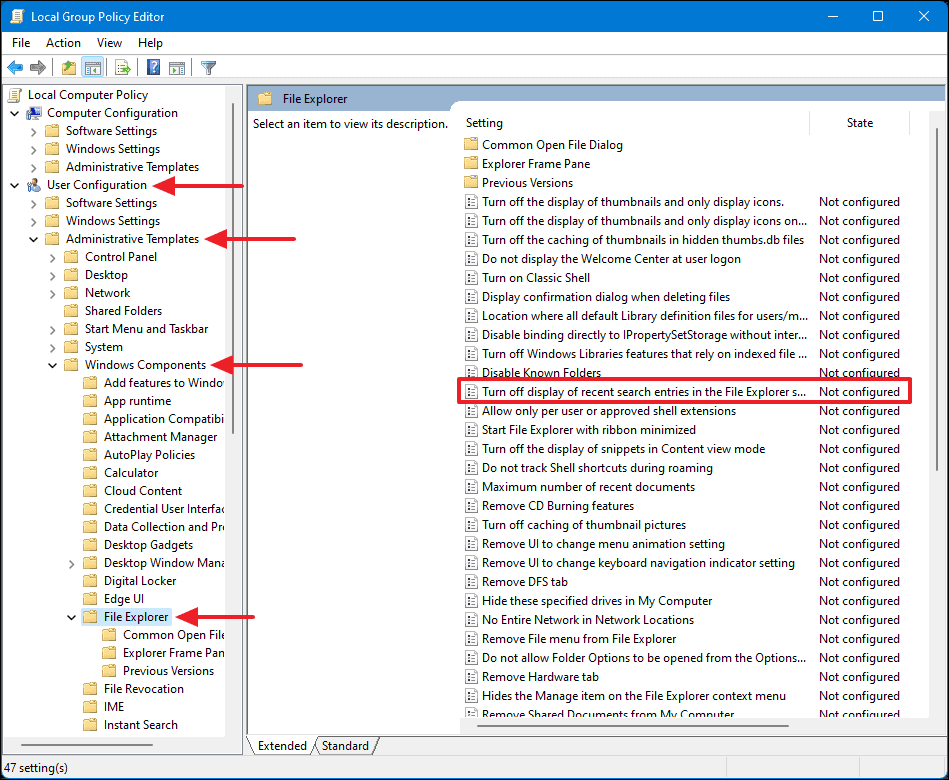
- In the Group Policy Editor, navigate to
User Configuration→Administrative Templates→Windows Components→File Explorer. - On the right side, locate the setting named
Turn off display of recent search entries in File Explorer.
- Double-click on this setting, select the
Enabledoption, and clickOK.
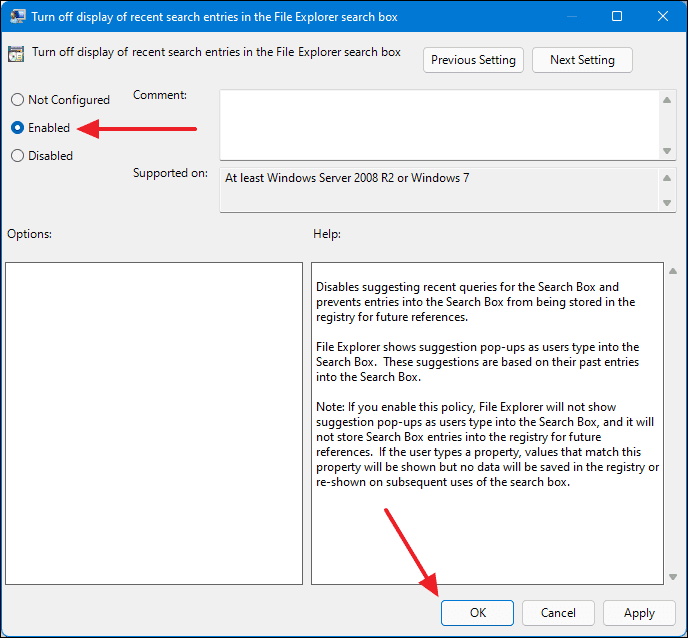
- Restart your computer to apply the changes.
By following either of these methods, you can easily disable the web search results in the Start Menu on your Windows 11 PC.