Windows 11 offers a range of features, some of which are hidden or experimental and not available through standard settings. ViVeTool is a utility that allows users to enable or disable these hidden features. While the original ViVeTool requires the use of command-line interfaces, there’s now a graphical version called ViVeTool GUI that simplifies this process. This guide will show you how to use both the ViVeTool GUI and the command-line tool to unlock hidden features on your Windows 11 PC.
Enable or disable hidden features using ViVeTool GUI (graphical version)
To get started with ViVeTool GUI, you’ll need to download the latest release from GitHub. Visit the ViVeTool GUI releases page, scroll down, and choose between the portable version (‘ViVeTool.GUI.X.X.X.Portable.zip’) or the installer (‘ViVeTool.GUI.Setup.exe’) to download the app.

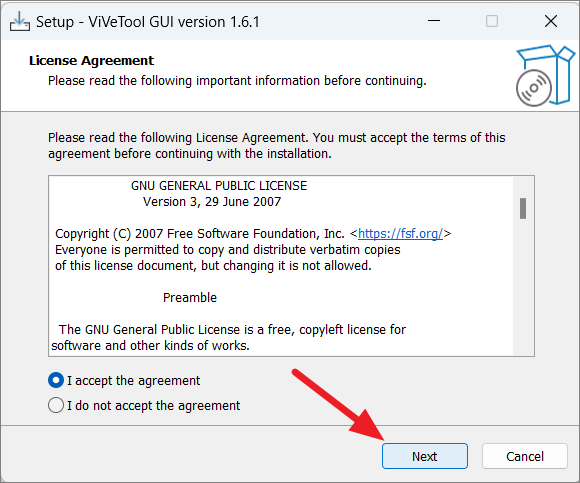
After downloading, if you’ve chosen the portable version, extract the ZIP file and run the executable to launch the application. If you selected the installer, double-click the setup file and proceed with the installation.
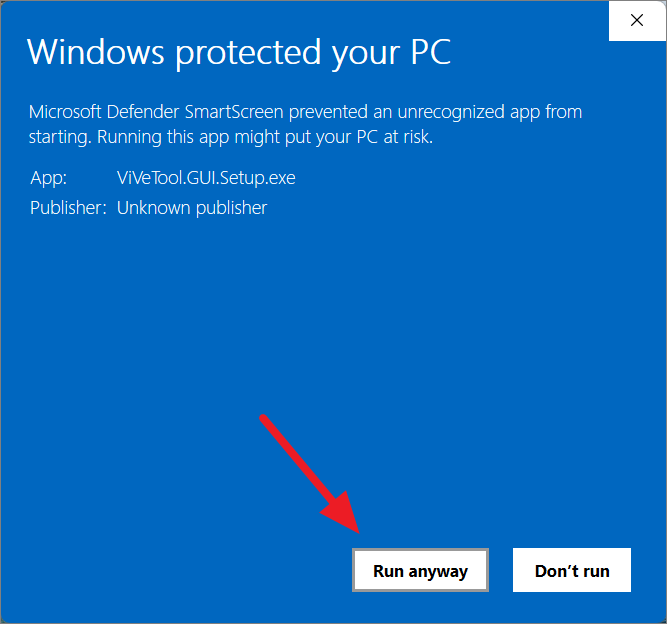
During installation or when launching the app, you might encounter a ‘Windows protected your PC’ warning due to the app being from a third-party source. Click on the ‘More info’ link, then select ‘Run anyway’ to continue.
If prompted by the User Account Control (UAC) dialog, click ‘Yes’ to allow the app to make changes to your device. Follow the on-screen instructions to complete the installation and launch ViVeTool GUI.
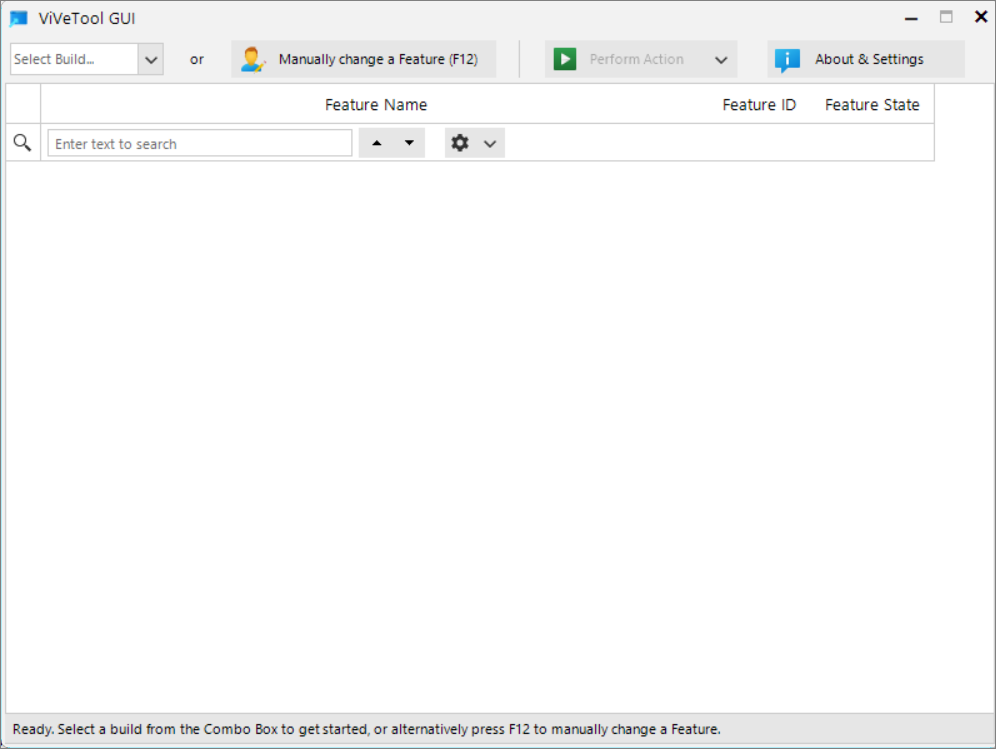
When you first open ViVeTool GUI, you’ll see an empty window. Since Microsoft releases new Windows builds regularly, each with different hidden features, you’ll need to select the build corresponding to your Windows 11 installation.
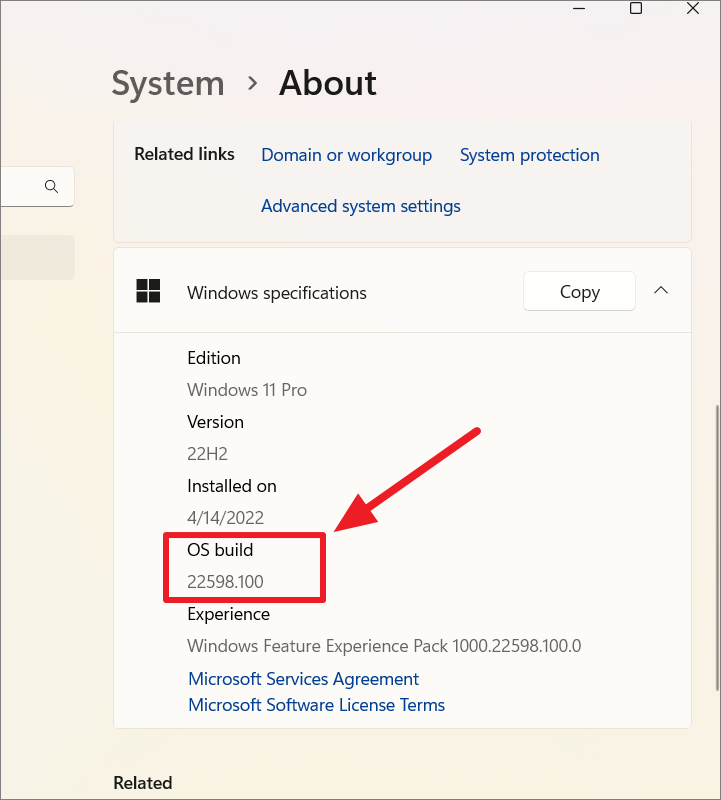
To identify your current Windows build, open Settings by pressing Windows+I. In the Settings window, select the ‘System’ tab on the left sidebar. Scroll down and click on ‘About’ at the bottom.

On the About page, scroll down to the ‘Windows specifications’ section and note the build number listed next to ‘OS build’.
Return to ViVeTool GUI and select your Windows build number from the dropdown menu located at the top left corner of the window.
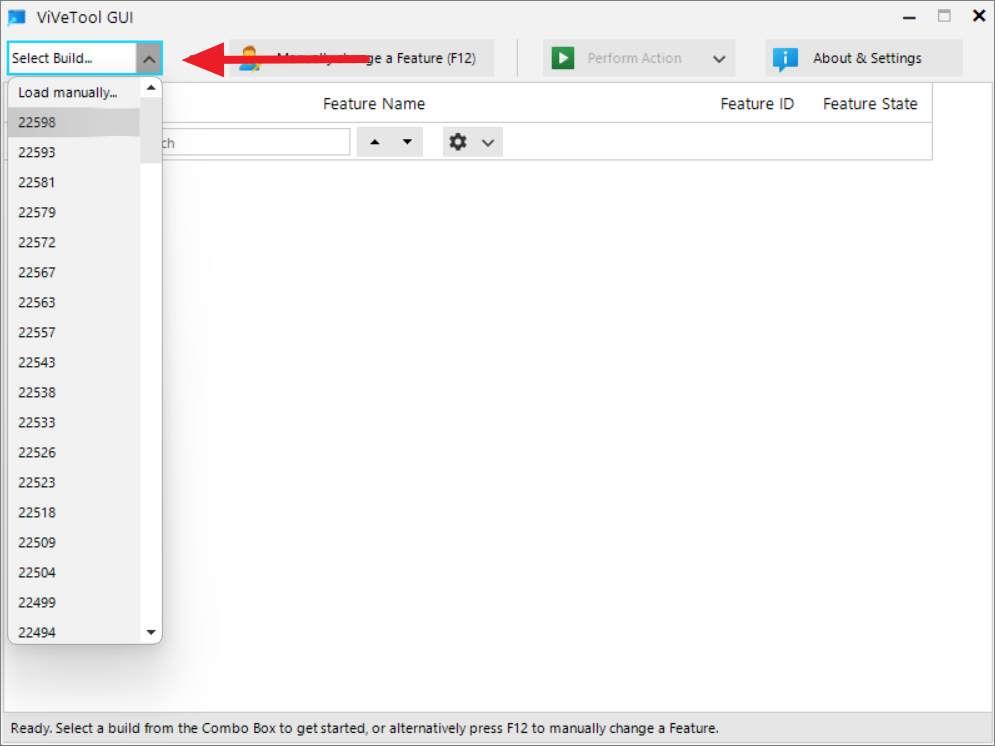
The tool will now scan for all available hidden features that you can enable or disable on your system.
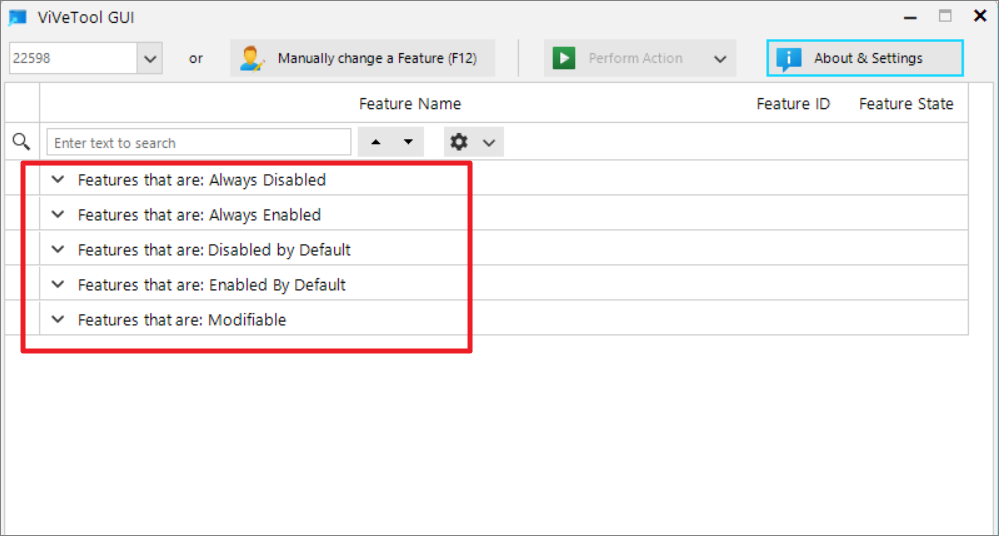
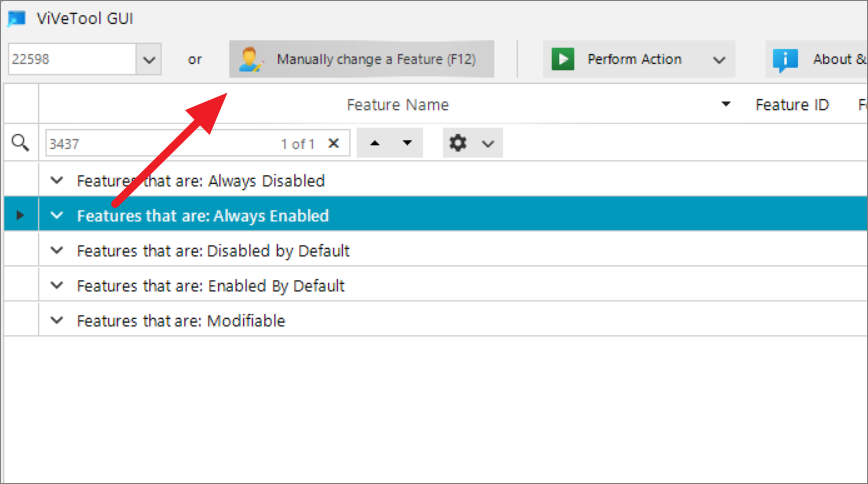
Once the scan is complete, ViVeTool GUI will categorize the hidden features into several groups:
- Features that are always disabled
- Features that are always enabled
- Features that are disabled by default
- Features that are enabled by default
- Features that are modifiable
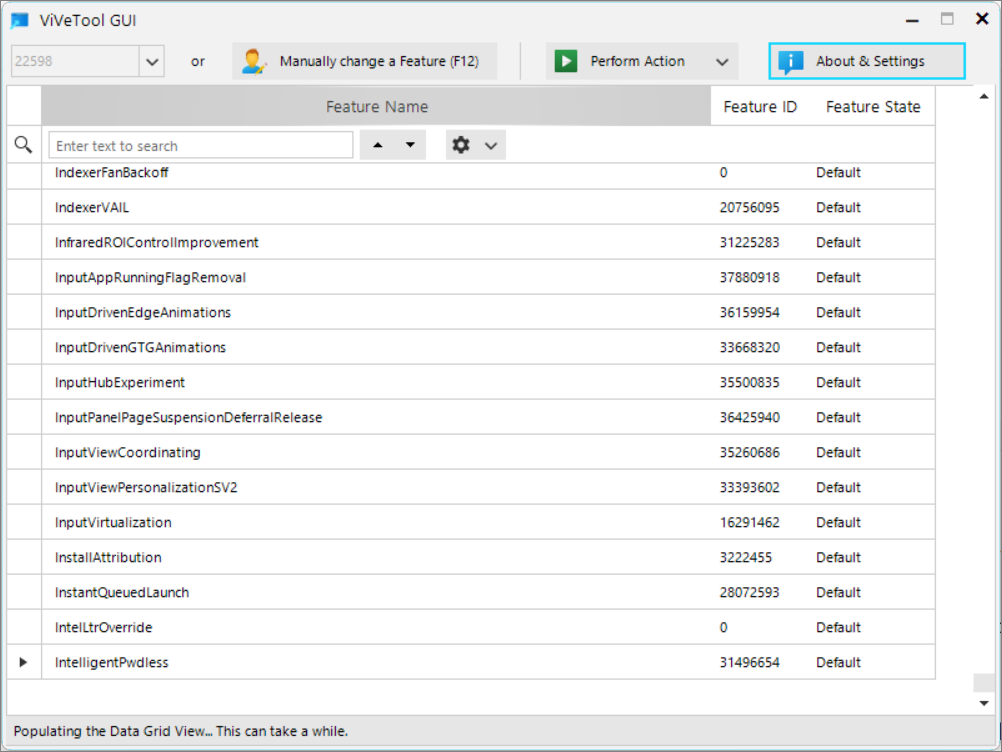
Expand each category to view the features listed under it. While detailed descriptions may not be available, you can see the feature name, ID, and current status. To find a specific feature, use the search bar at the top by entering the feature name or ID.

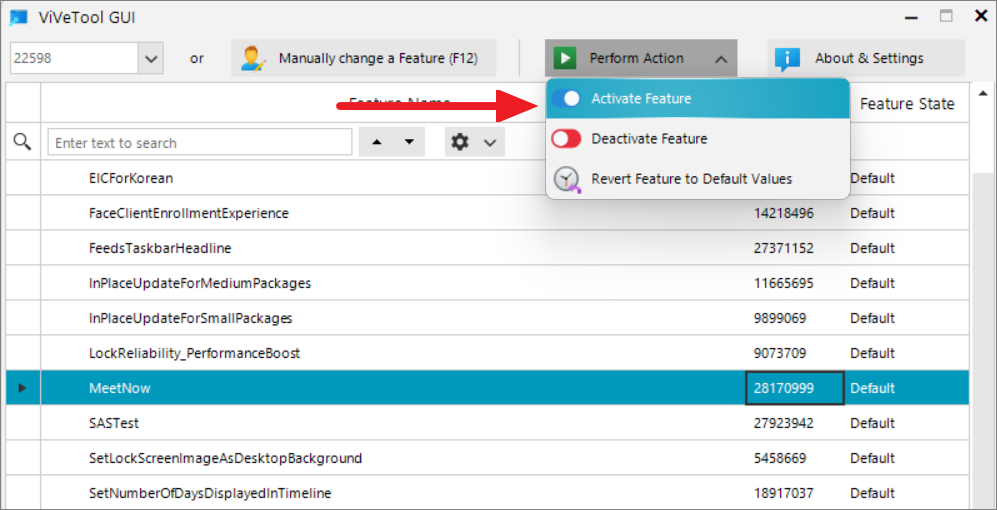
Select the feature you wish to enable or disable by clicking on it. Then, click on the ‘Perform Action’ dropdown menu located in the toolbar above.
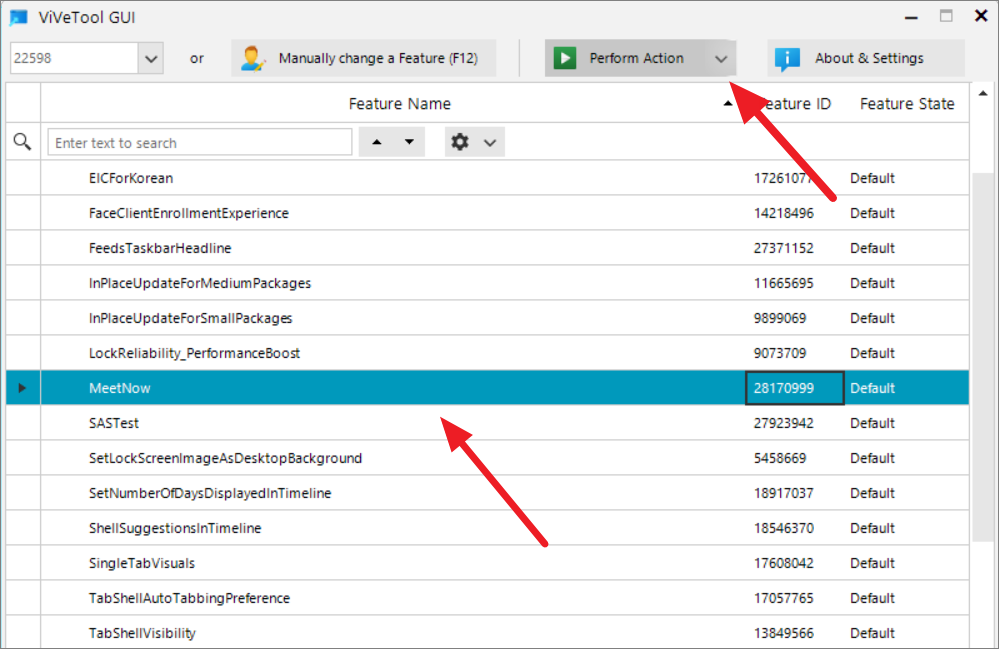
From the dropdown, choose ‘Activate Feature’ to enable the selected feature or ‘Deactivate Feature’ to disable it.
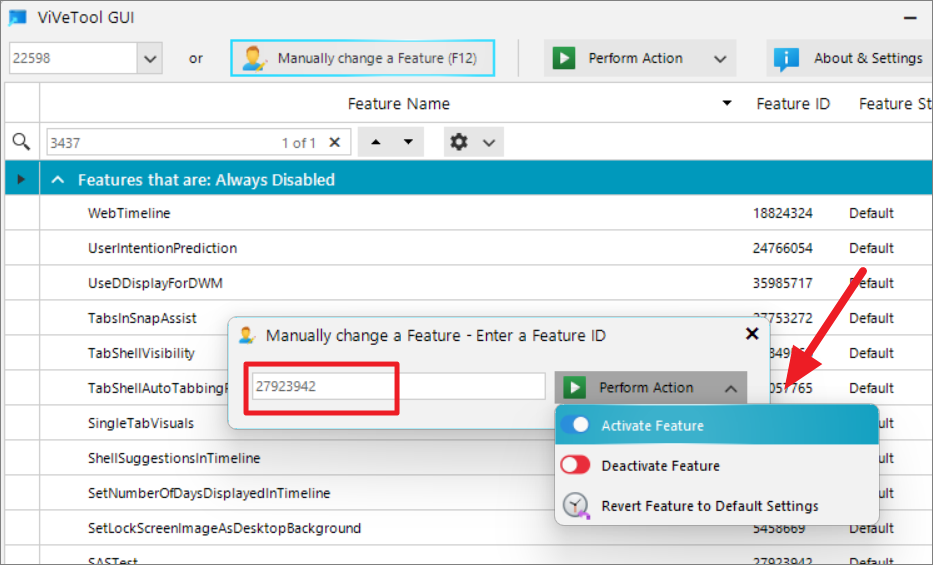
If you already know the Feature ID of the hidden feature you want to modify, you can click on the ‘Manually change a Feature (F12)’ button or simply press F12 on your keyboard.
In the dialog that appears, enter the Feature ID in the text field, and select ‘Activate Feature’ or ‘Deactivate Feature’ from the dropdown menu to enable or disable the feature, respectively.
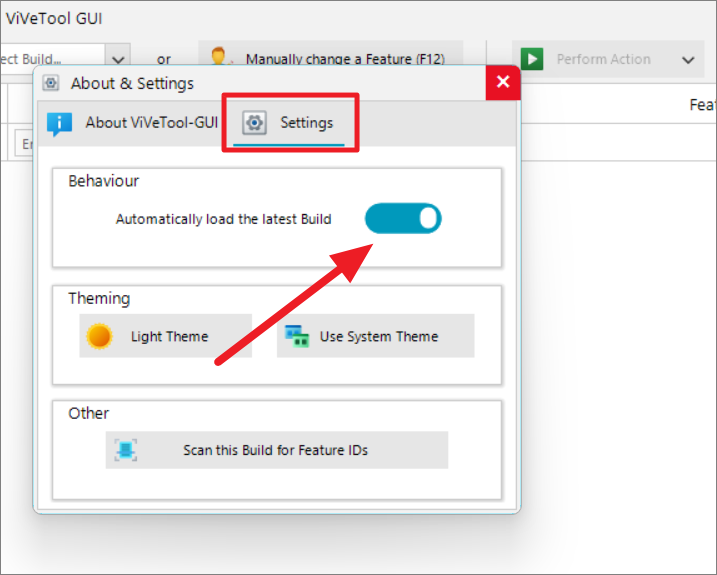
To ensure that ViVeTool GUI always loads the features for the latest Windows build upon startup, click on ‘About & Settings’ in the top-right corner of the window.
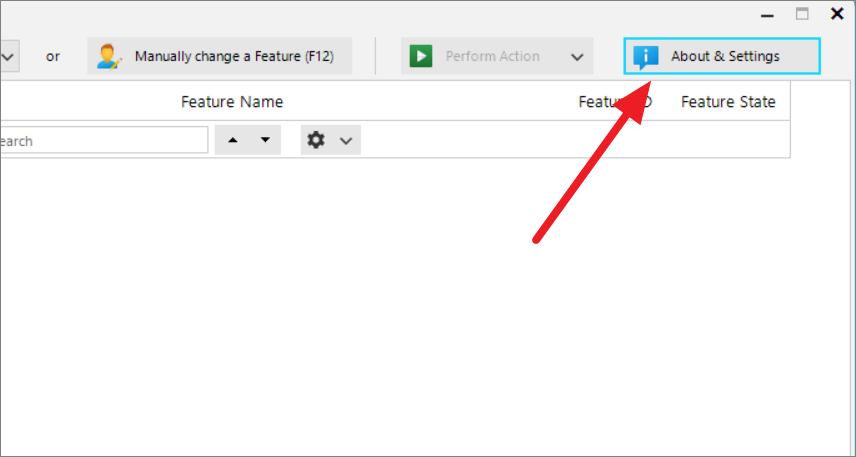
In the dialog box that opens, navigate to the ‘Settings’ tab and enable the ‘Automatically load the latest Build’ option.
By enabling hidden features, you can access upcoming functionalities that are not yet officially released to the public.
Use ViVeTool command-line tool to enable or disable hidden features
If you prefer using the command-line version of ViVeTool, you can enable or disable hidden features through Command Prompt or PowerShell. Follow these steps to do so:
First, download the ViVeTool command-line tool from the official GitHub repository.
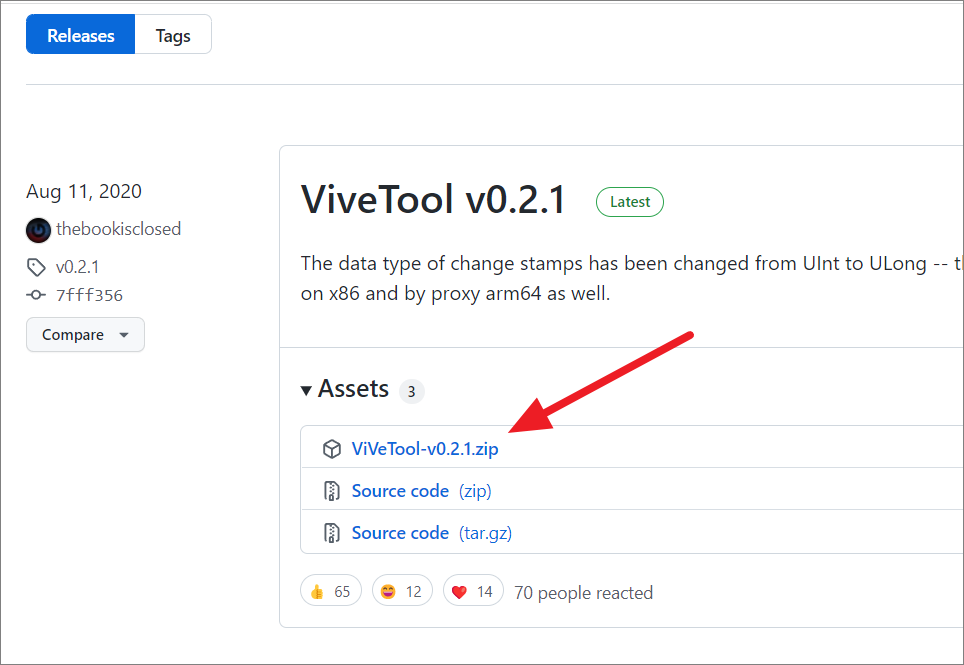
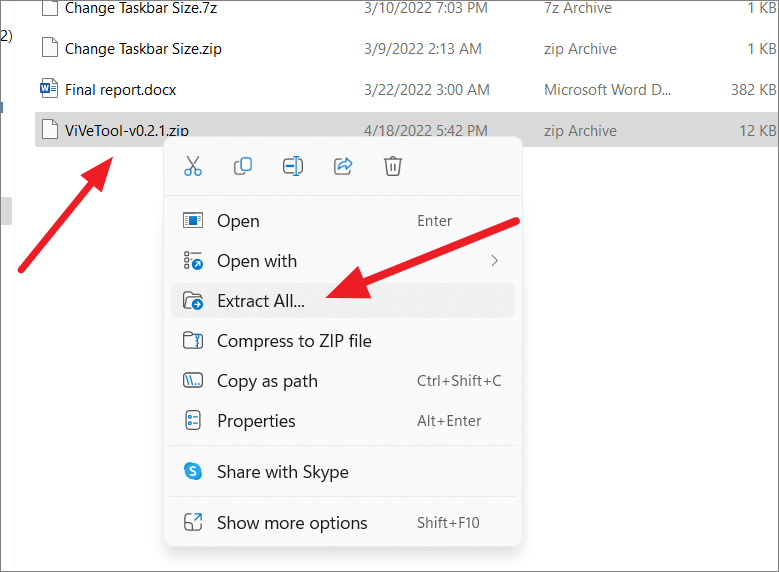
After downloading the ‘ViveTool-vx.x.x.zip’ file, right-click on it and select ‘Extract All’ to unzip the contents.
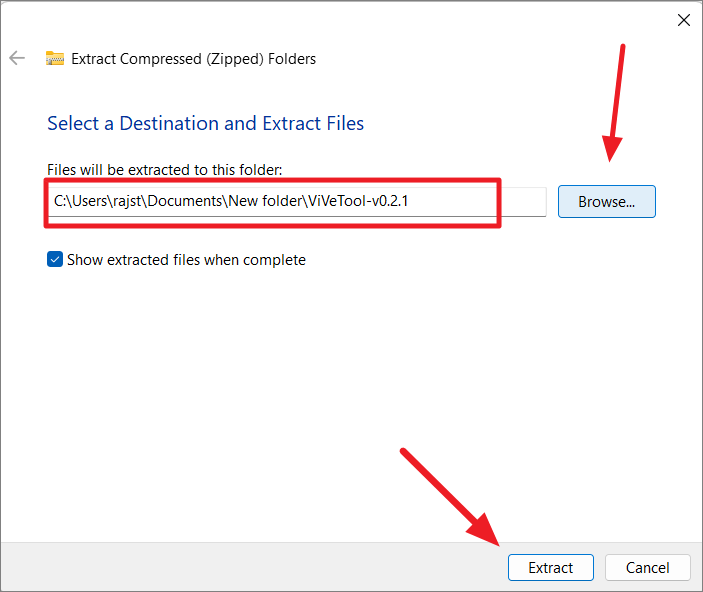
Choose a destination for the extracted files by clicking ‘Browse’, then click ‘Extract’ to complete the process.
To use ViVeTool, you’ll need to know the Feature ID of the hidden feature you want to modify. You can find a list of available features and their IDs for each Windows build on this GitHub page.
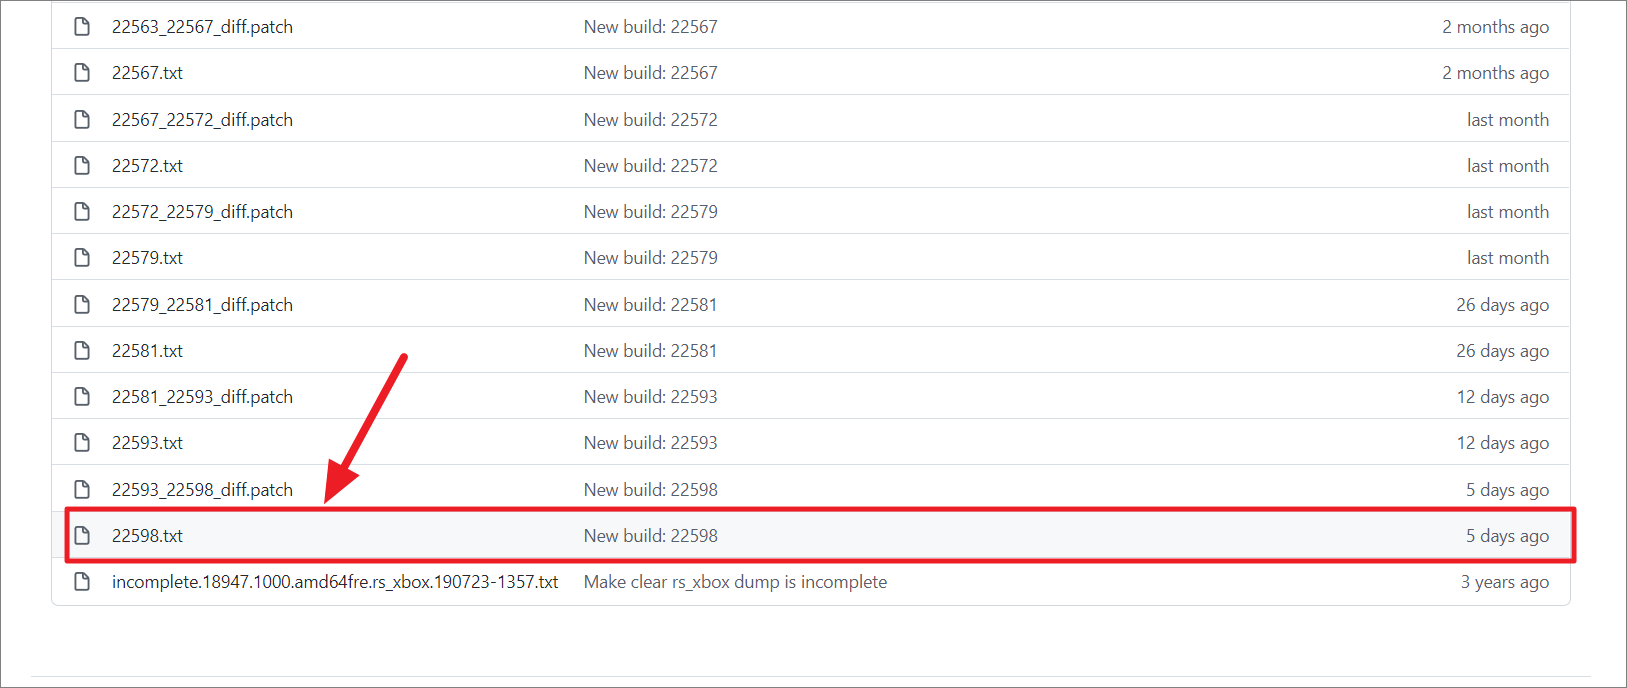
On the page, scroll down and click on the link corresponding to your Windows build. The most recent builds are listed at the bottom.
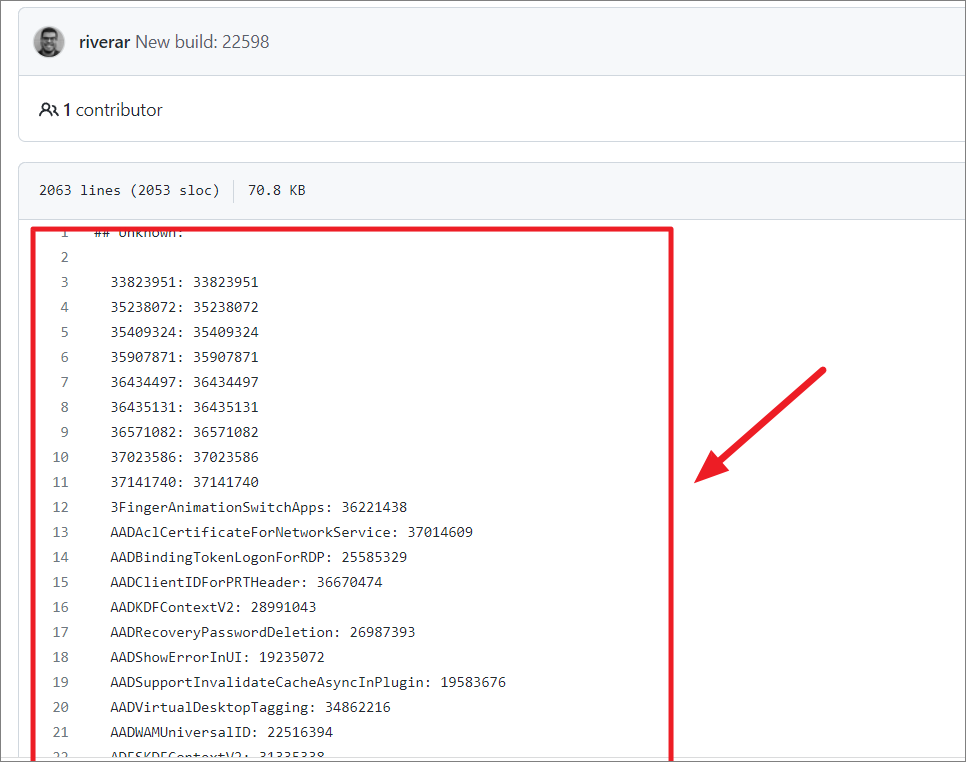
You’ll be presented with a list of features and their IDs. Note down the ID of the feature you wish to enable or disable.
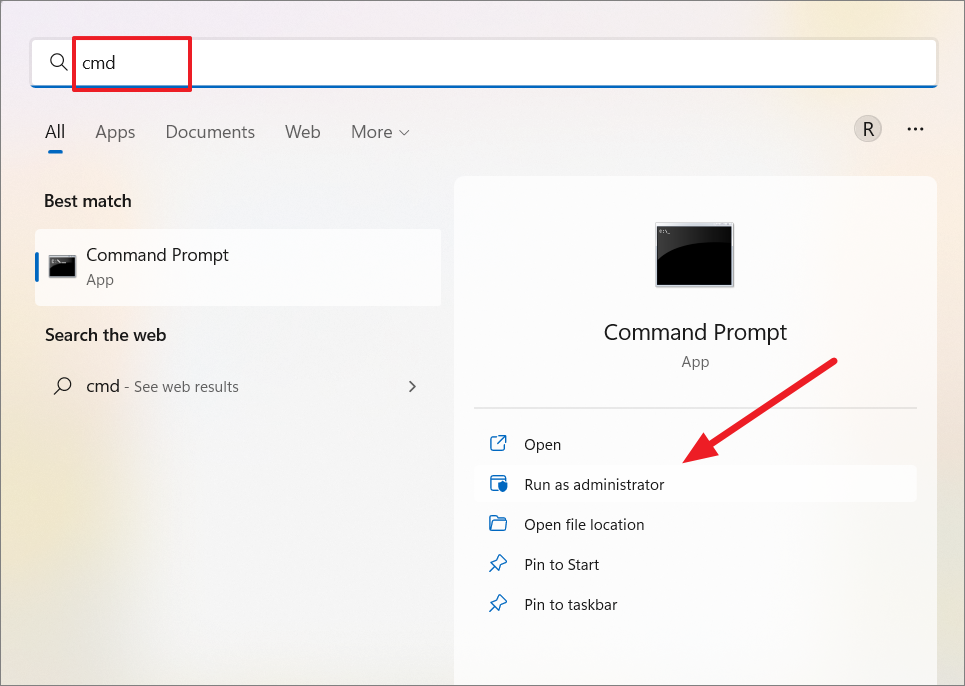
Next, open Command Prompt or PowerShell with administrator privileges. To do this, press the Windows key, type ‘cmd’ or ‘PowerShell’ in the search bar, and then click ‘Run as administrator’ on the right panel.
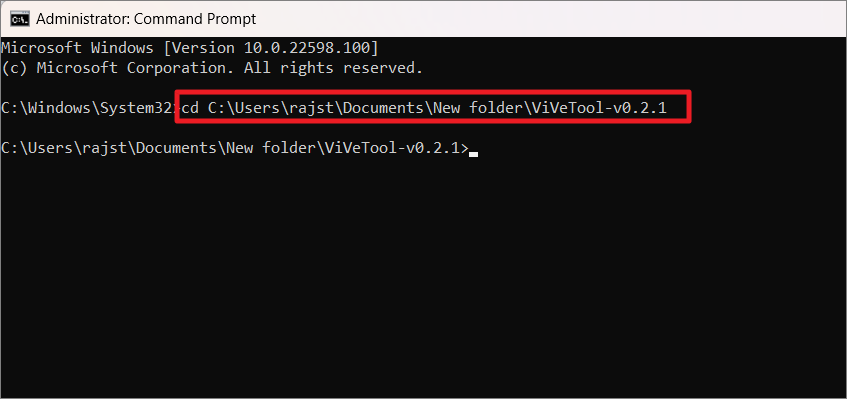
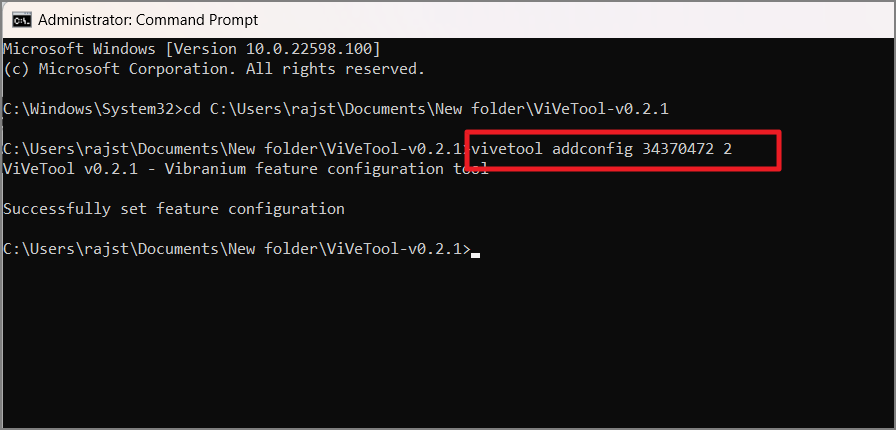
In the command-line window, navigate to the directory where you extracted ViVeTool by typing the following command:
cd C:\path\to\ViVeTool-vx.x.xReplace C:\path\to\ViVeTool-vx.x.x with the actual path to your extracted ViVeTool folder.
To enable a hidden feature, use the following command:
ViVeTool addconfig <Feature_ID> 2Replace <Feature_ID> with the ID of the feature you want to enable. For example, to enable the File Explorer tabs feature, you would run:
ViVeTool addconfig 34370472 2Here, 34370472 is the Feature ID for the File Explorer tabs. After executing the command, restart your computer to apply the changes.
To disable a feature you’ve previously enabled, run the following command and then restart your PC:
ViVeTool delconfig <Feature_ID> 2Replace <Feature_ID> with the ID of the feature you wish to disable.
By using ViVeTool GUI or the command-line version, you can access and experiment with hidden features in Windows 11, getting a glimpse of what’s coming in future updates.


