With privacy being a top concern for many users, controlling camera access on your Windows 11 PC is crucial. Whether you want to disable the camera entirely, restrict it for specific apps, or manage individual camera devices, Windows 11 offers straightforward methods to suit your needs.
Enable or disable a camera device in Windows 11
If you have multiple cameras connected or wish to control access to a specific camera device, you can easily disable or enable it through the device settings.
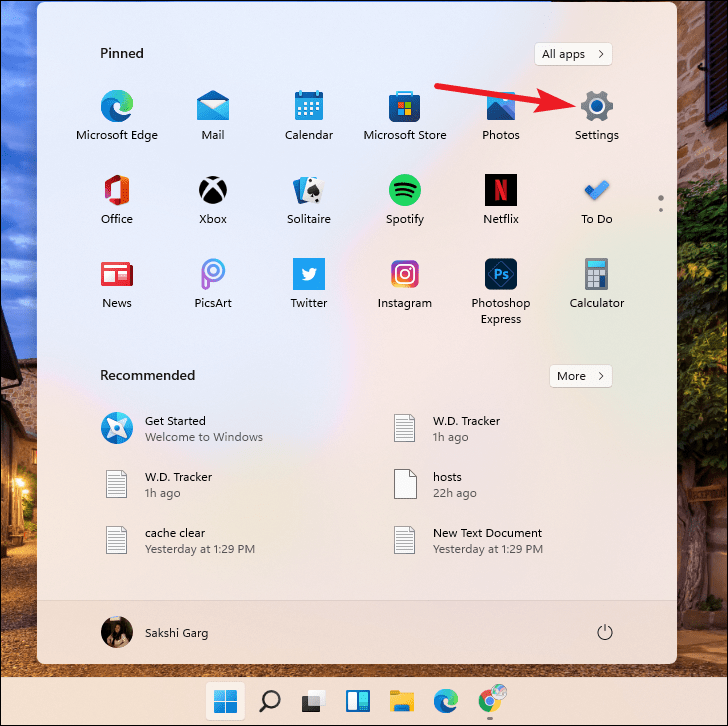
- Open the Settings app by clicking the settings icon in the Start Menu or pressing Windows + i.
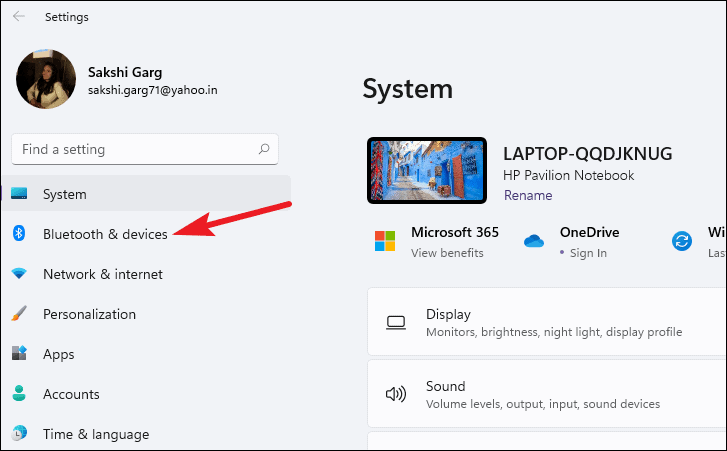
- Select Bluetooth & devices from the left-hand menu.
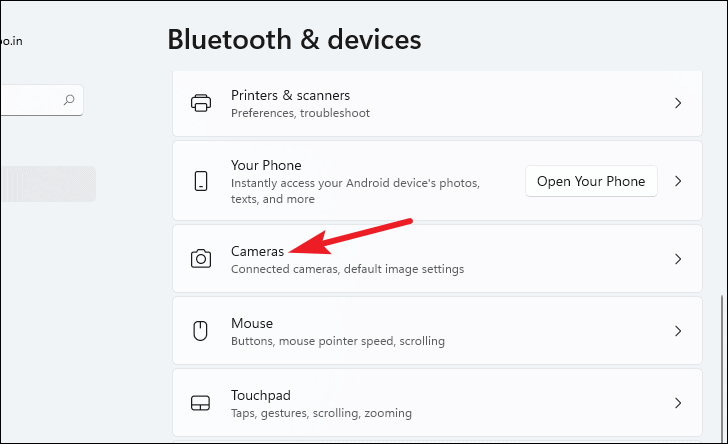
- Scroll down and click on Cameras in the list of devices.
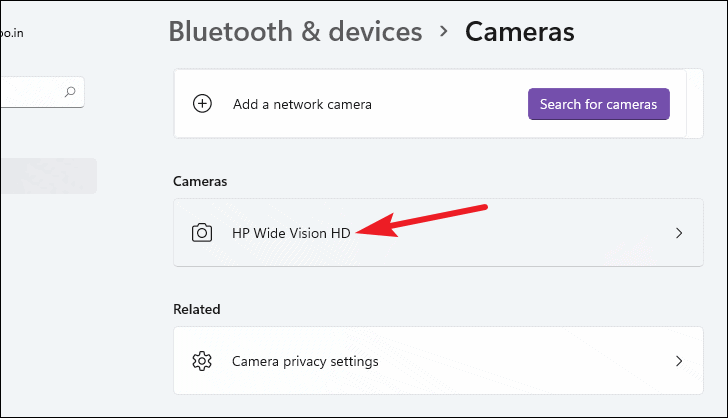
- Under Connected cameras, select the camera device you want to disable.
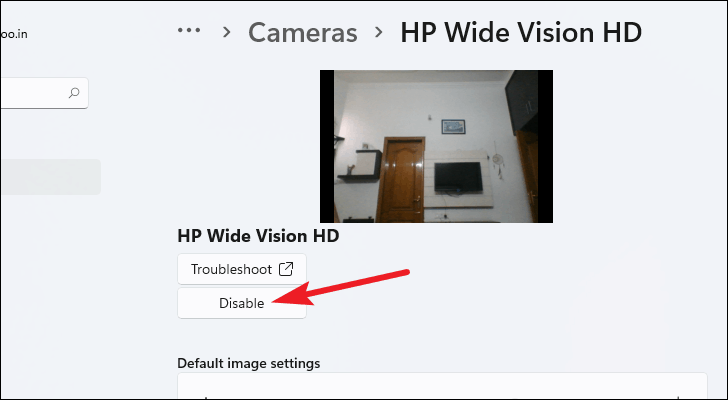
- Click the Disable button.
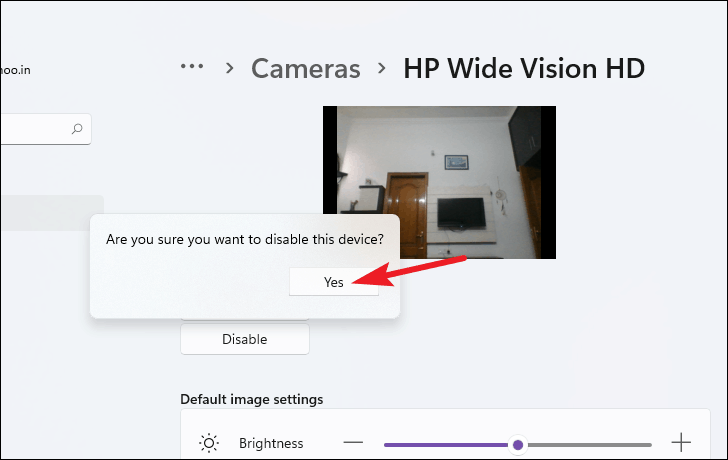
- When prompted for confirmation, click Yes. The camera device will now be disabled and unavailable for use.
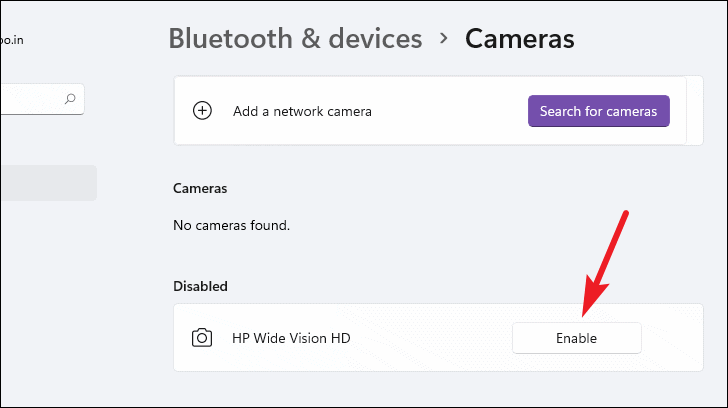
To re-enable the camera device, navigate back to the Cameras settings and click Enable next to the device name.
Completely enable or disable your camera
If you want to prevent all apps and services from accessing your camera, you can disable it entirely through the privacy settings.
- Open the Settings app by pressing Windows + i or selecting the settings icon from the Start Menu.
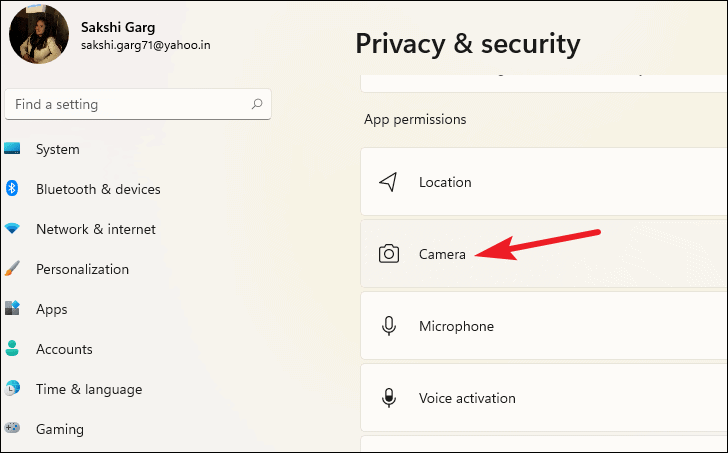
- Click on Privacy & security from the left-hand navigation menu.

- Under the App permissions section, select Camera.
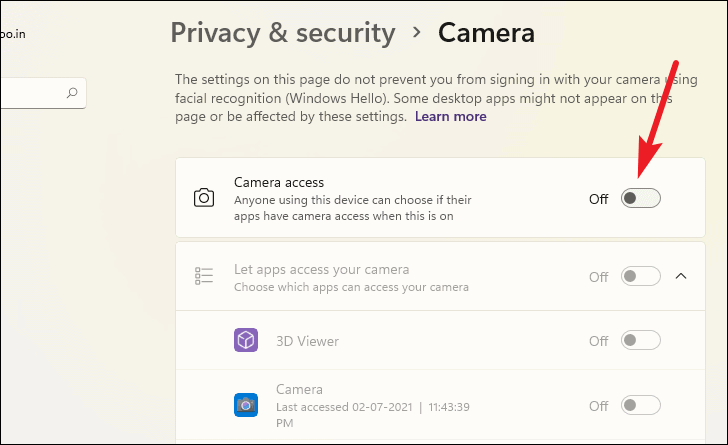
- Toggle off the switch for Camera access. This will disable the camera entirely, preventing any app from accessing it.
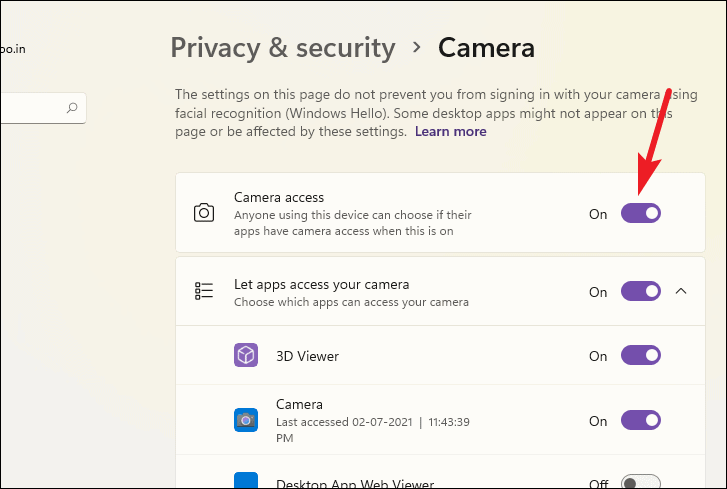
To enable the camera again, return to the Camera privacy settings and toggle the Camera access switch back on.
Restrict camera access for specific apps
If you prefer to control camera permissions on a per-app basis, Windows 11 allows you to manage which apps can access your camera.
- Open the Settings app by pressing Windows + i or clicking the settings icon from the Start Menu.
- Navigate to Privacy & security from the left-hand menu.
- Under App permissions, select Camera.
- Ensure that Camera access is toggled on. This allows you to manage camera permissions for individual apps.
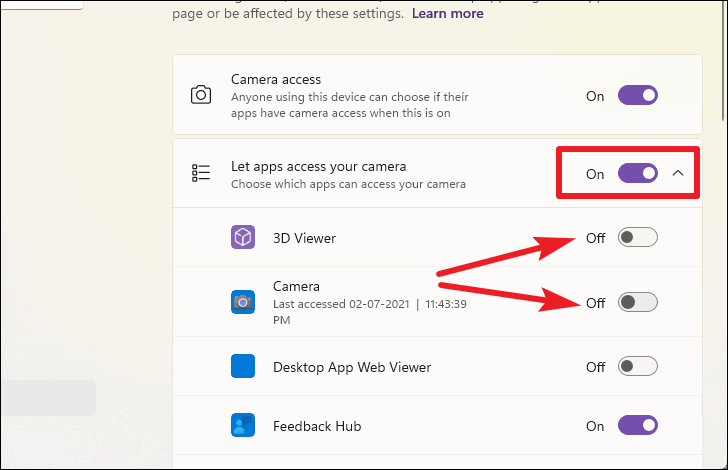
- Under Allow apps to access your camera, toggle on or off the switch next to each app to grant or deny camera access.
For desktop apps (traditional Windows applications that are not from the Microsoft Store), the control is slightly different.
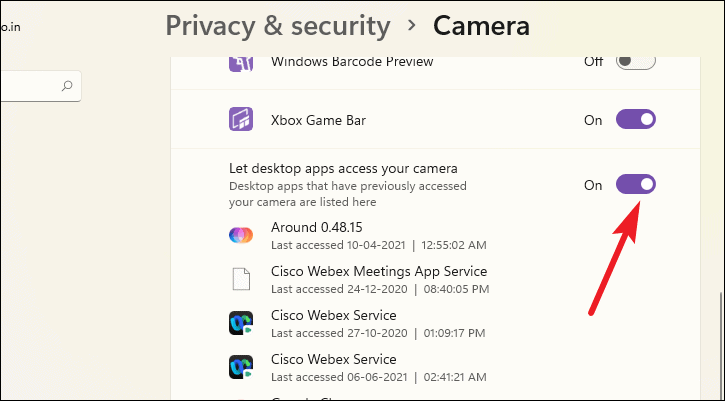
- Scroll down to the Let desktop apps access your camera section.
- Toggle off the switch to prevent all desktop apps from accessing your camera.
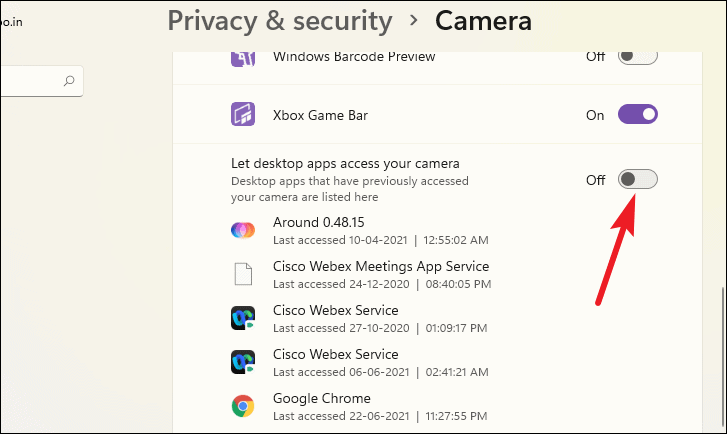
Note that you cannot manage desktop apps individually in this settings page; it’s an all-or-nothing switch for desktop applications. To re-enable camera access for desktop apps, toggle the switch back on.
By adjusting your camera settings in Windows 11, you can enhance your privacy and control over your device. Whether it’s disabling the camera entirely, restricting access for certain apps, or managing individual camera devices, these settings provide flexibility to suit your preferences.


