
Customizing default applications in Windows 11 allows you to control which apps open your files, enhancing your overall user experience. Whether you prefer a specific browser, media player, or any other application, setting default apps is straightforward. This guide will walk you through the most effective methods to set and configure default apps in Windows 11.
Set Default Apps by File Type through Windows Settings
Windows 11 provides the flexibility to assign default apps for individual file types, giving you precise control over how each file is opened. For instance, you can set one media player for .MP4 files and another for .AVI files.
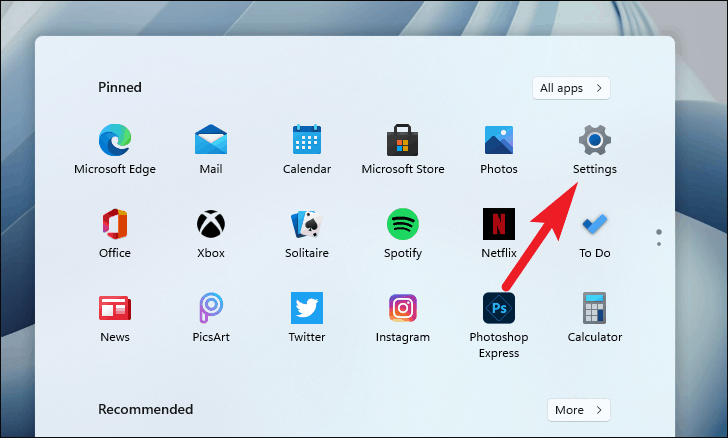
- Press Windows+I to open the Settings app.
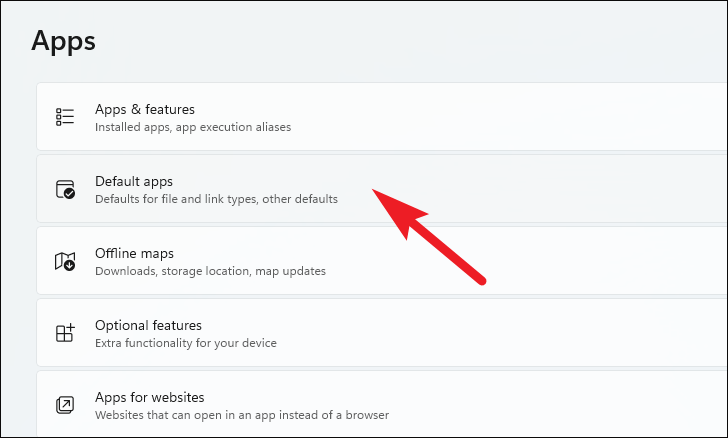
- From the left sidebar, select Apps.
- Click on Default apps in the main pane.
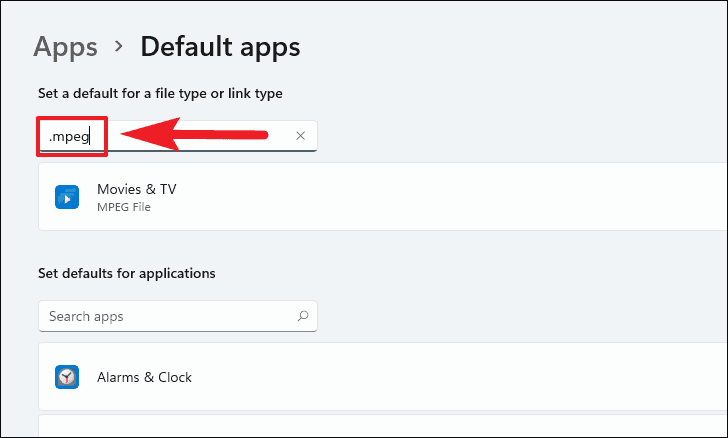
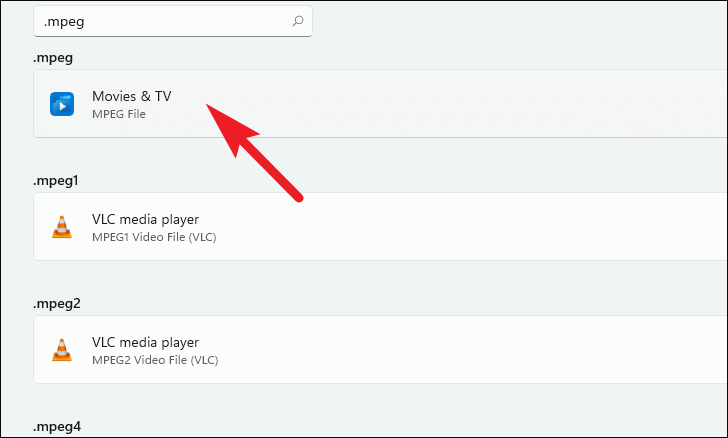
- In the search bar under “Set defaults for file types or link types,” type the file extension (e.g.,
.mp4) you want to change. - Select the file type from the search results.
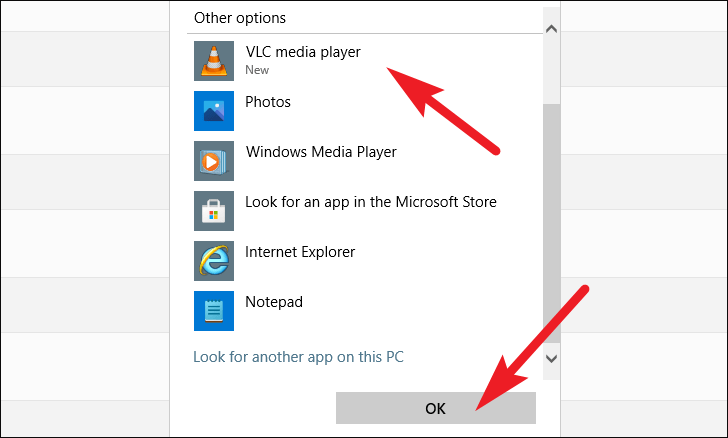
- Click on the app currently associated with the file type.
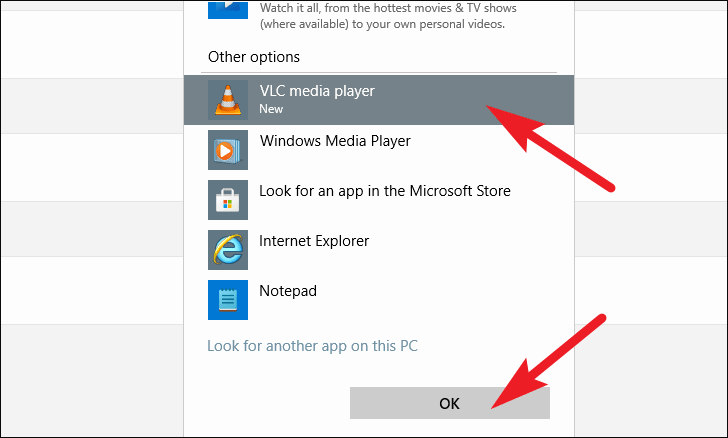
- Choose your preferred app from the list that appears.
- Click OK to confirm your choice.
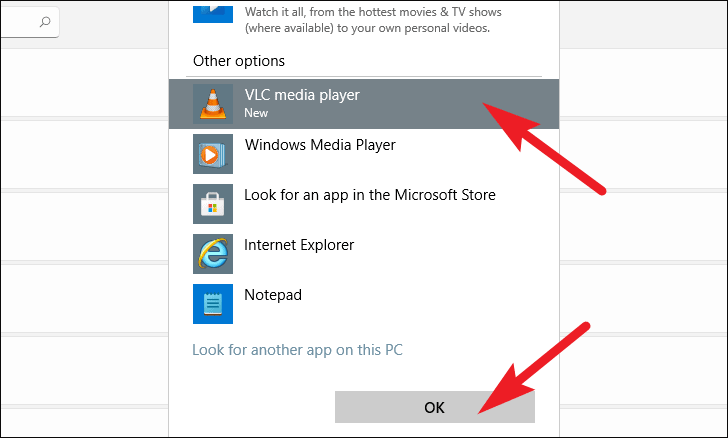
If your desired app isn’t listed, select Look for another app on this PC to locate it manually.
Set Default Apps by File Extension Version
For more detailed control, you can assign default apps based on different versions of a file extension.
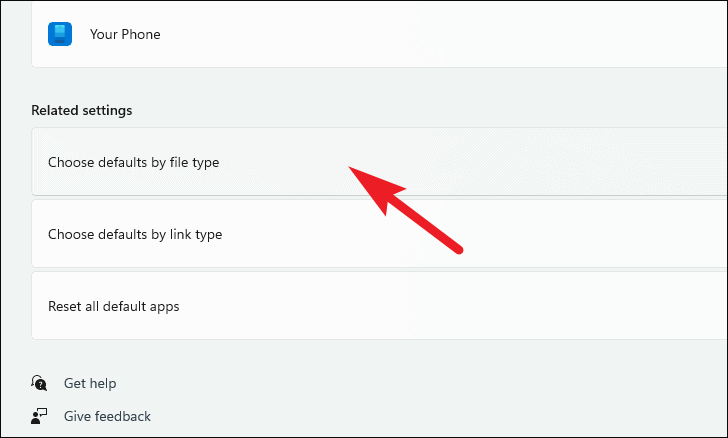
- In the Default apps settings, scroll down and click on Choose defaults by file type.
- You’ll see a comprehensive list of file extensions. Use the search bar to find the specific version you’re interested in.
- Click on the current default app next to the file extension you wish to change.
- Select your preferred application from the list.
- Click OK to save the changes.
If the app isn’t listed, choose Look for another app on this PC to find it manually.
Change Default Apps via File Explorer
You can also set default apps directly from File Explorer without navigating through Settings.
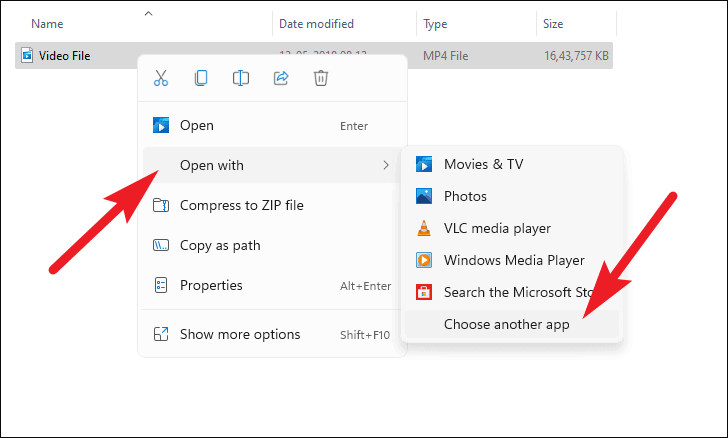
- Open File Explorer and locate a file with the extension you want to change.
- Right-click the file, hover over Open with, and select Choose another app.
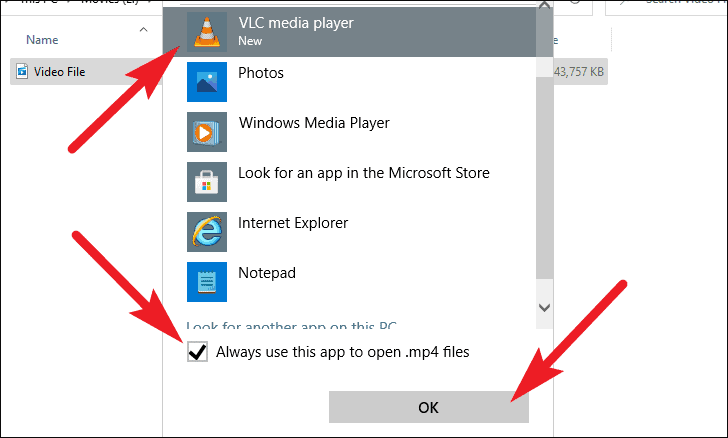
- In the pop-up window, select your preferred app.
- Check the box that says Always use this app to open .[extension] files.
- Click OK to apply the changes.
Note: The file extension will vary based on the file you select (e.g., .mp4, .docx).
If you don’t see your app, scroll down and click on Look for another app on this PC to locate it, or select Look for an app in the Microsoft Store to find a new one.
Configure Default Apps for Specific Applications
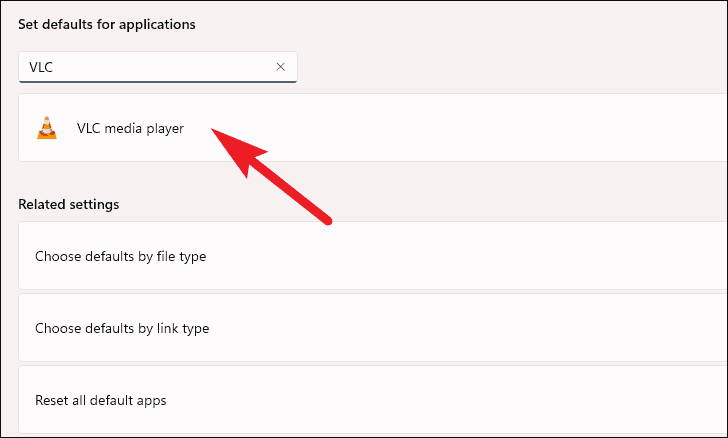
You can set an application as the default for all file types it supports directly through Settings.
- Press Windows+I to open Settings.
- Navigate to Apps in the sidebar.
- Select Default apps.
- Use the search bar to find the app you want to set as default, or scroll through the list.
- Click on the app to view all the file types it can open.
- For each file type listed, click on the current default app.
- Select your preferred app from the pop-up list.
- Click OK to confirm.
- Repeat this process for all file types you want the app to handle by default.
By adjusting your default apps, you can tailor Windows 11 to better suit your workflow and preferences.


