Wake on LAN (WoL) is a handy feature in Windows 11 that allows you to power on your PC remotely while it's in Sleep mode. By enabling WoL, you can wake your computer using another device, such as your smartphone, provided both devices are connected to the same local network. This can be particularly useful when you need to access your PC without being physically present at your desk.
The WoL feature primarily works when the computer is in Sleep mode. In some cases, depending on hardware support, it might also work from Hibernate or even when the PC is shut down. However, this isn't guaranteed for all systems. You can experiment with different power states to see which ones are compatible with your setup.
How does Wake on LAN work?
Wake on LAN operates by sending a "Magic Packet" over the local network. This packet is a broadcast message that contains the MAC address of the target computer. When the sleeping computer receives this packet and recognizes its MAC address, it wakes up. This method ensures that only the intended device responds to the wake-up call, even if multiple devices are connected to the same network.
Enabling Wake on LAN in Windows 11
To use WoL, you need to enable it both in your PC's BIOS settings and within Windows 11. Here's how to set it up:
Enable Wake on LAN in BIOS
- Restart your computer. Click the Start button, select the Power icon, and choose Restart.
As your computer boots up, repeatedly press the BIOS key (usually DEL, F2, or F10) to enter the BIOS setup.
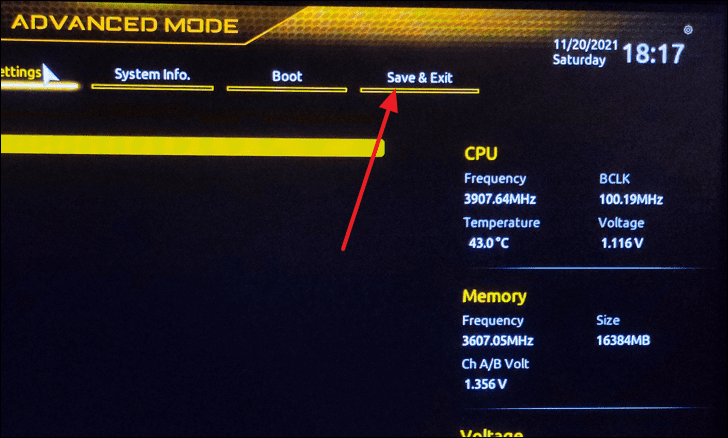
- Once inside the BIOS, switch to Advanced Mode by pressing
F2if necessary.
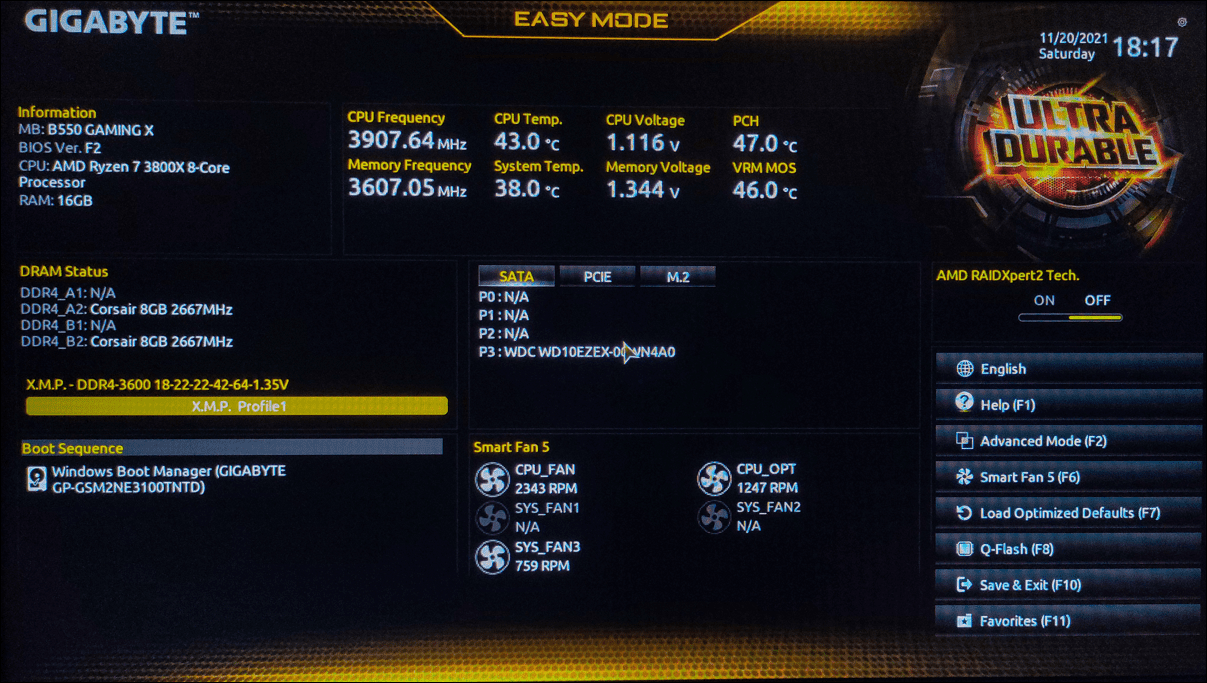
- Navigate to the Settings tab.
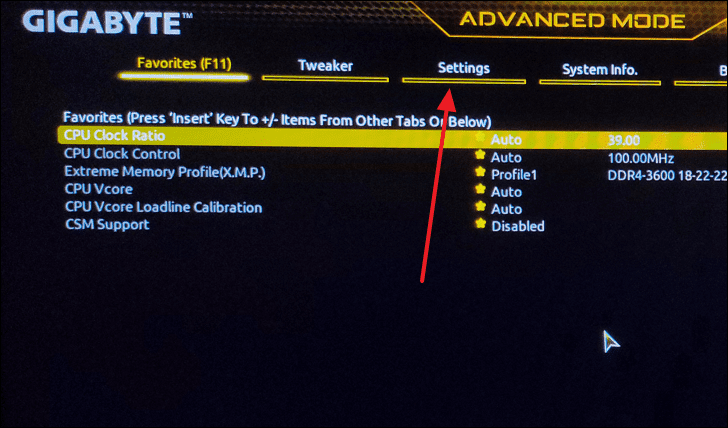
- Select Platform Power.
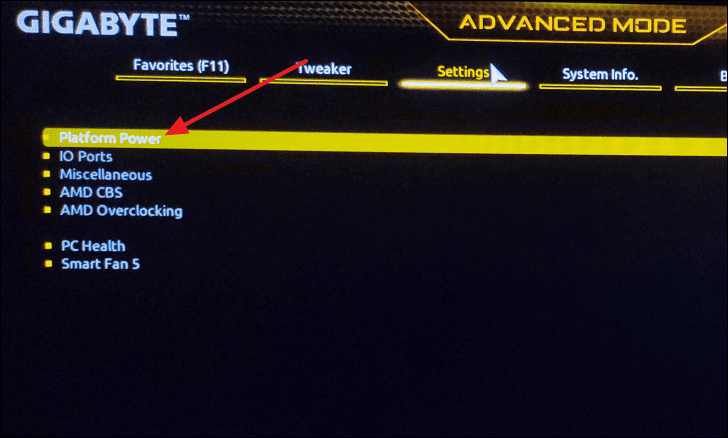
- Find the Wake on LAN option and set it to Enabled.
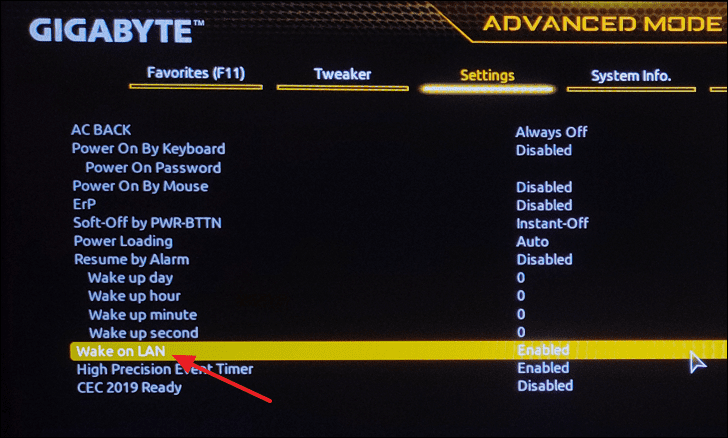
- Save your changes and exit the BIOS setup to boot back into Windows.
Enable Wake on LAN in Windows Settings
- Press
Windows + ito open the Settings app.
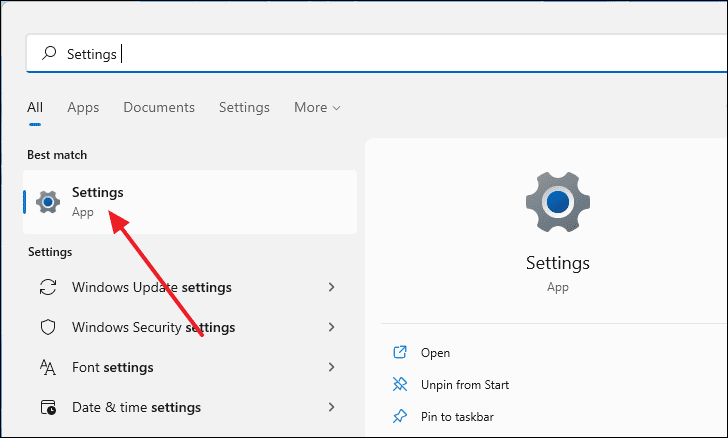
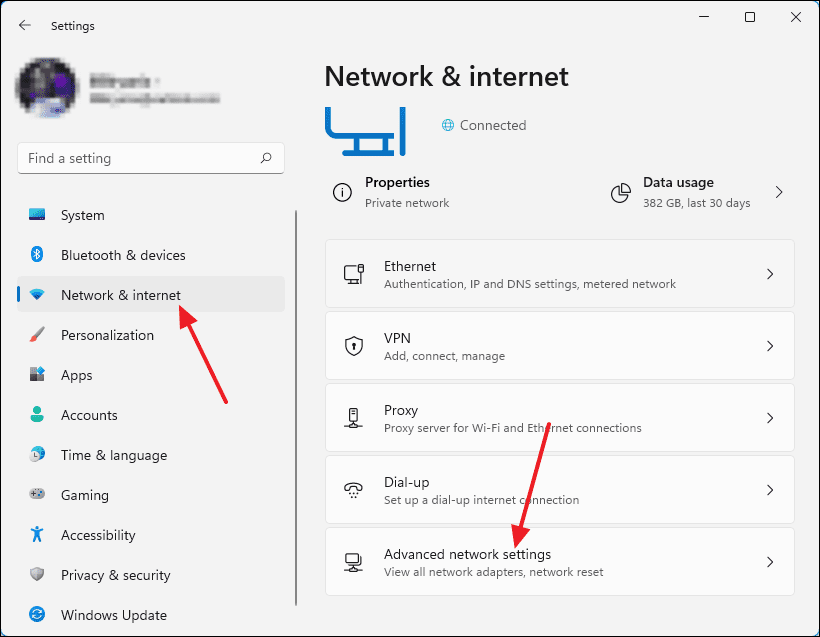
- In the left sidebar, click on Network & internet, then select Advanced network settings.
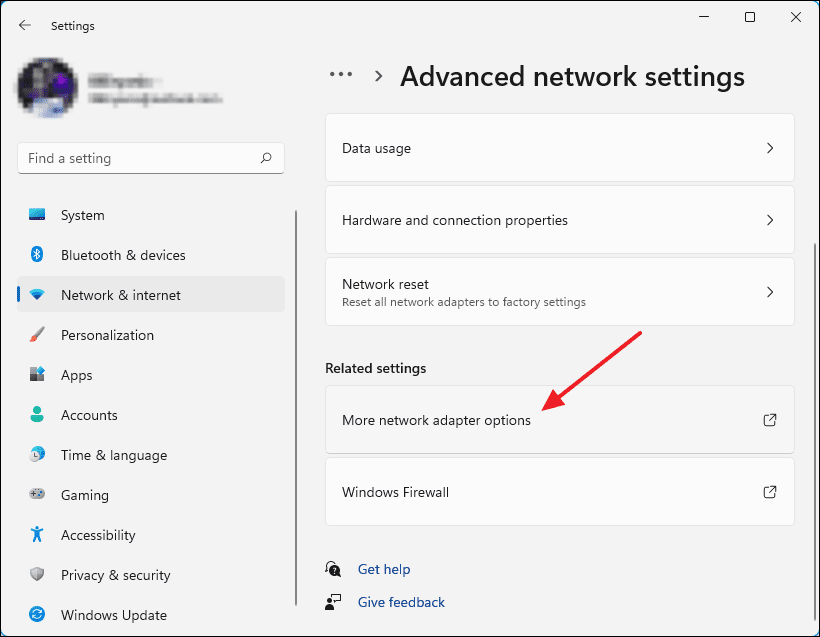
- Scroll down and click on More network adapter options.
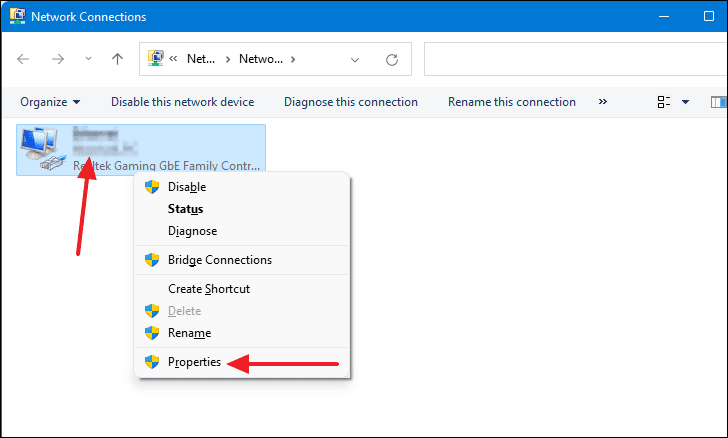
- In the Network Connections window, right-click on your network adapter and select Properties.
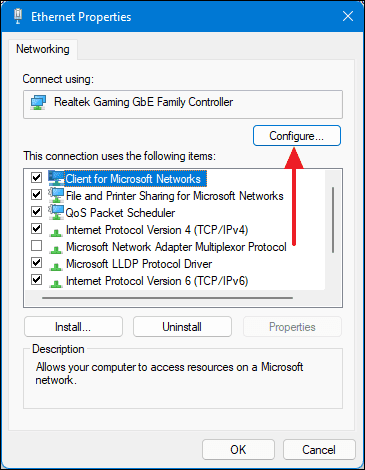
- In the Ethernet Properties dialog, click on Configure...
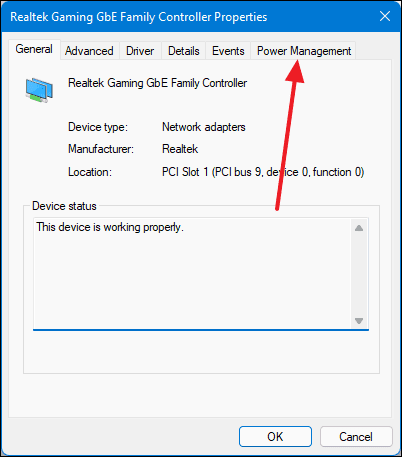
- Switch to the Power Management tab.
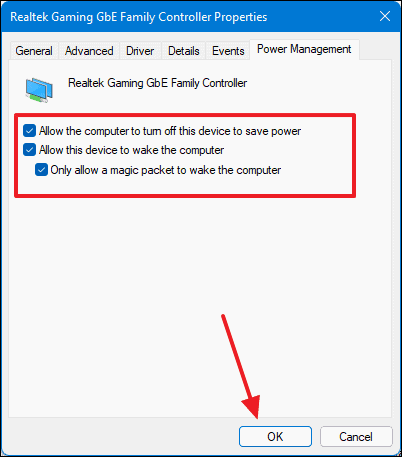
- Ensure the following options are checked:
- Allow the computer to turn off this device to save power
- Allow this device to wake the computer
- Only allow a magic packet to wake the computer
- Go to the Advanced tab.
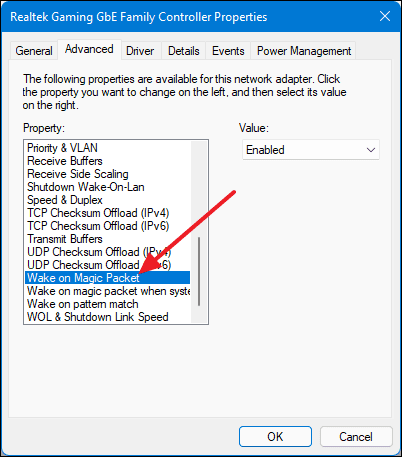
- In the Property list, find and select Wake on Magic Packet, then set its value to Enabled.

With these settings configured, Wake on LAN is now enabled on your Windows 11 PC.
Using Wake on LAN to Wake Your Computer
Now that WoL is enabled, you can wake your PC remotely using another device connected to the same local network. This device can be another computer, a smartphone, or even a router. Below, we'll demonstrate how to use an Android smartphone to wake your PC.
This example assumes your PC is connected to the router via an Ethernet cable and your smartphone is connected to the same router via Wi-Fi. If you're using an iPhone, the steps are similar, and the app used here is also available on iOS.
- On your Android device, open the Google Play Store.
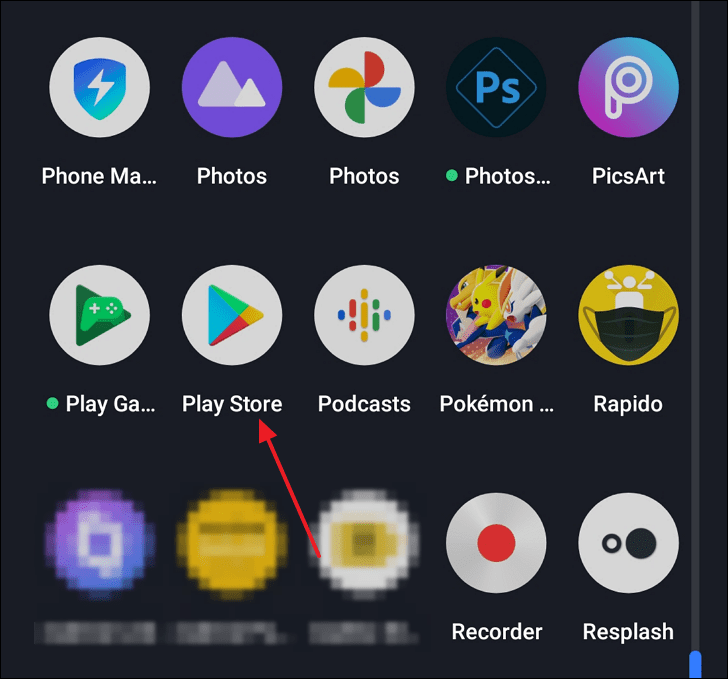
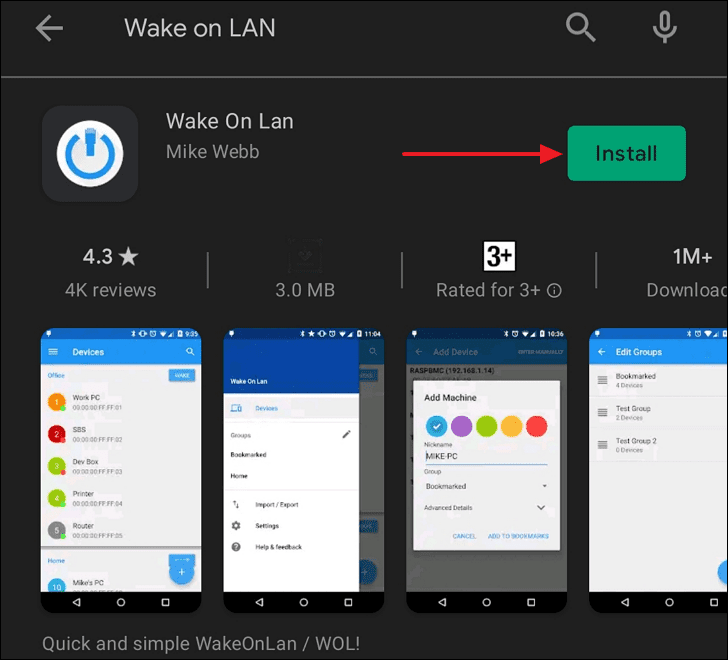
- Search for Wake on LAN. Locate the app developed by Mike Webb and tap Install.
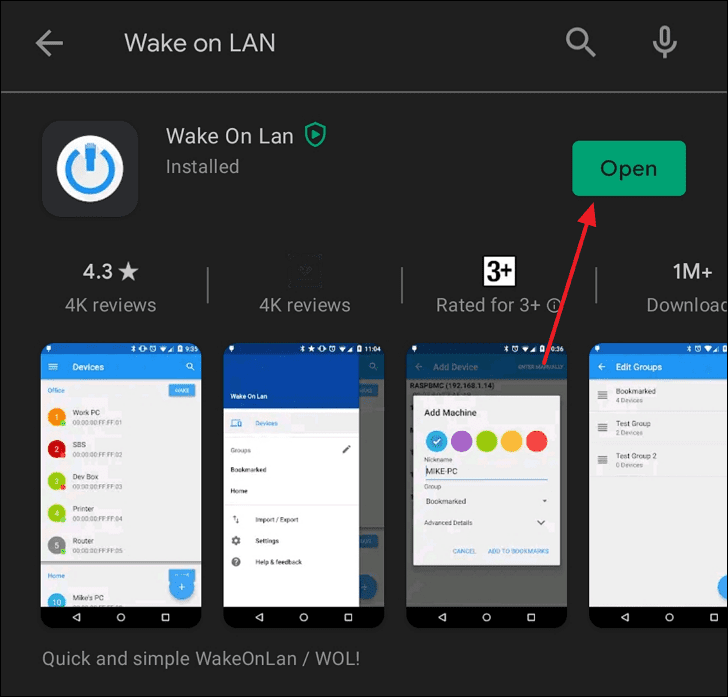
- Once installed, tap Open to launch the app.
- In the app, tap the + icon at the bottom right to add a new device.
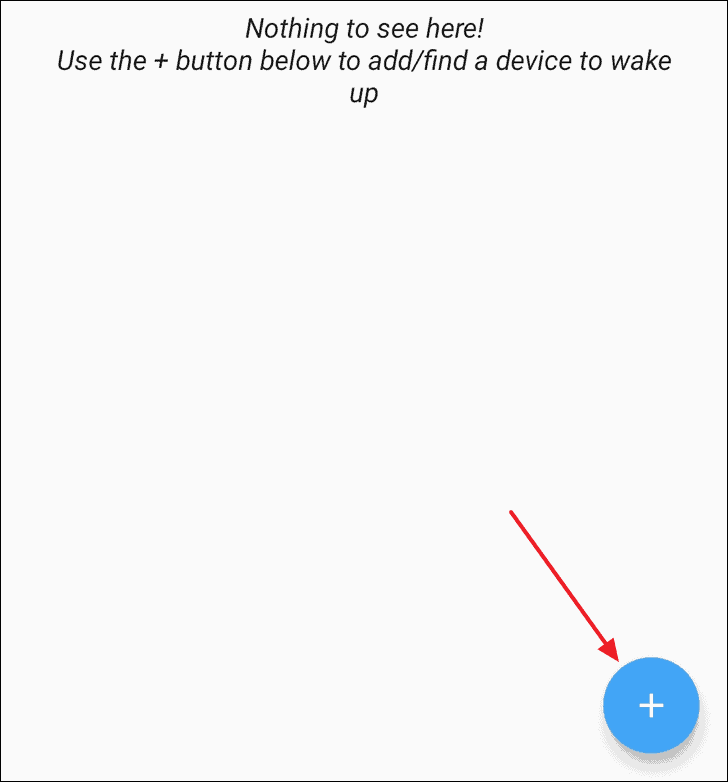
- Your PC should appear in the list since it's on the same network. Tap on your PC to select it.
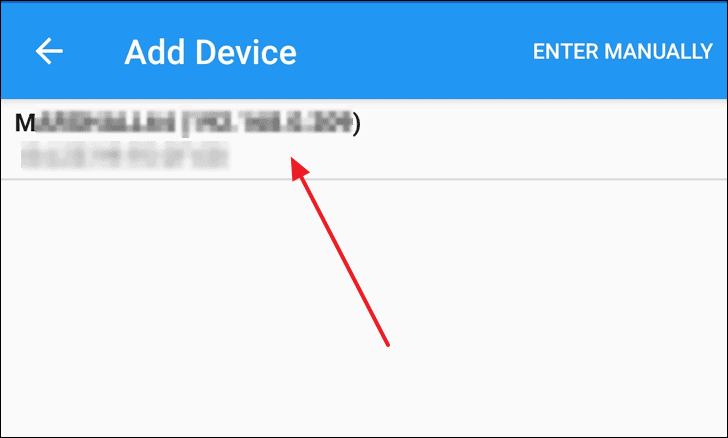
- Assign a nickname to your PC and tap ADD DEVICE.
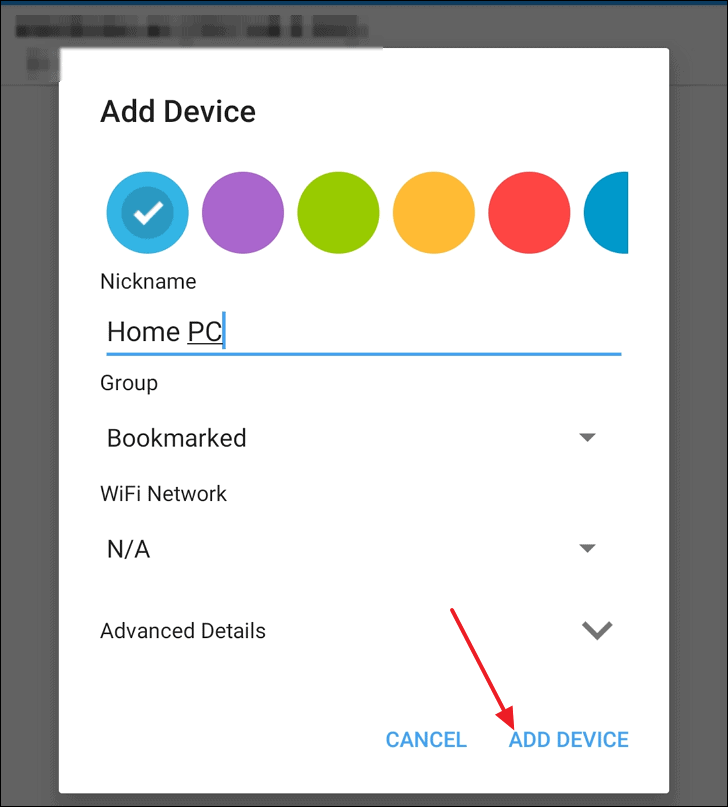
Your PC will now be listed in the app.
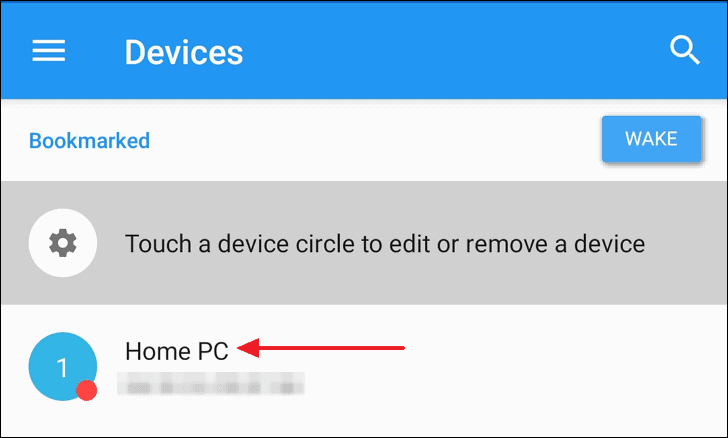
- On your PC, click the Start button, select the Power icon, and choose Sleep to put your computer to sleep.
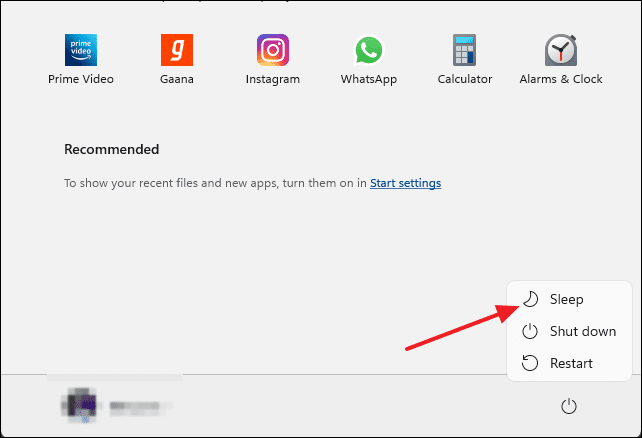
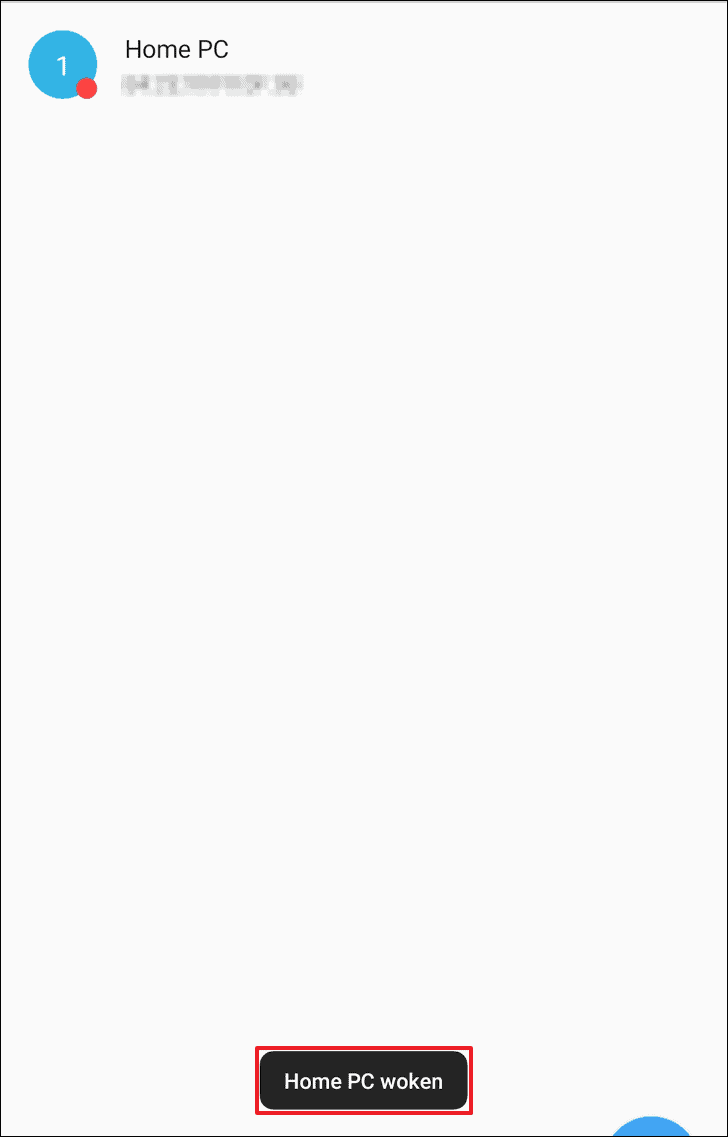
- Back in the Wake on LAN app, tap on your PC from the list of devices.
The app will send the Magic Packet, and you should see a message confirming that your PC has been woken. Your computer will power on from Sleep mode.
You can also wake your PC using another computer with similar apps available from the Microsoft Store.
By enabling Wake on LAN, you can conveniently access your Windows 11 PC remotely whenever you need it, making your workflow more efficient.

