
The error code 0x80004005: Unspecified Error is a common issue on Windows 11 that can arise during various operations, such as installing updates, accessing shared resources, or extracting compressed files. This vague error message can be frustrating, but there are several effective methods to resolve it. Below, we’ll walk through detailed steps to fix this error and get your system running smoothly again.
1. Reset Windows Update Components and Policies
When encountering the error during Windows Update processes, resetting the Windows Update components and policies can often resolve the issue. This method involves stopping services, renaming problematic folders, resetting network configurations, and restarting services.
cmd in the Windows search bar, right-click on Command Prompt, and select Run as administrator.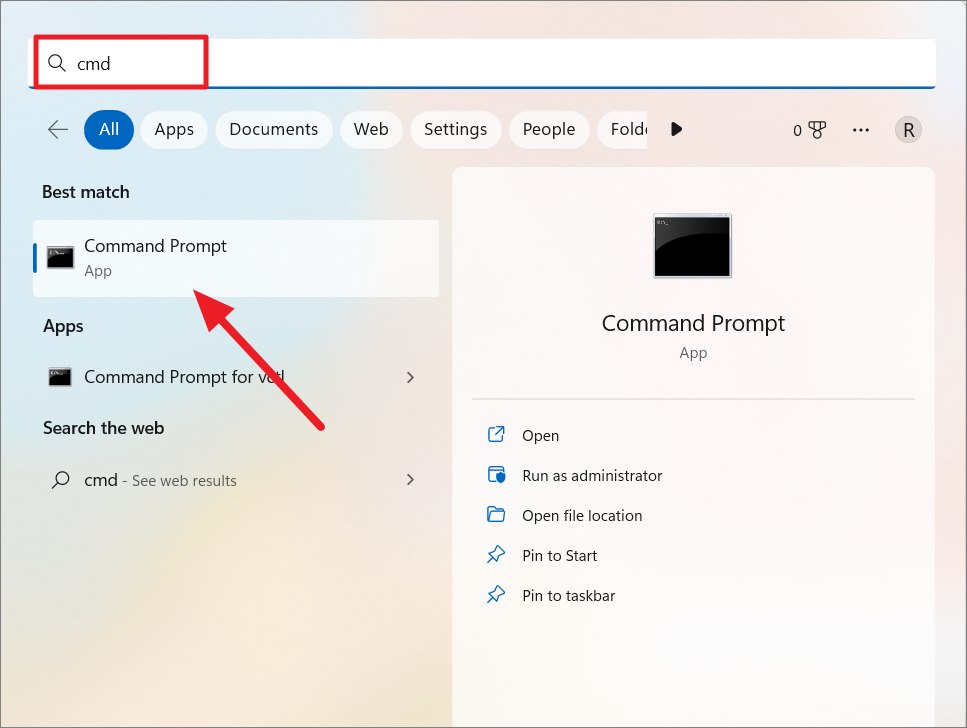
net stop bits
net stop wuauserv
net stop appidsvc
net stop cryptsvc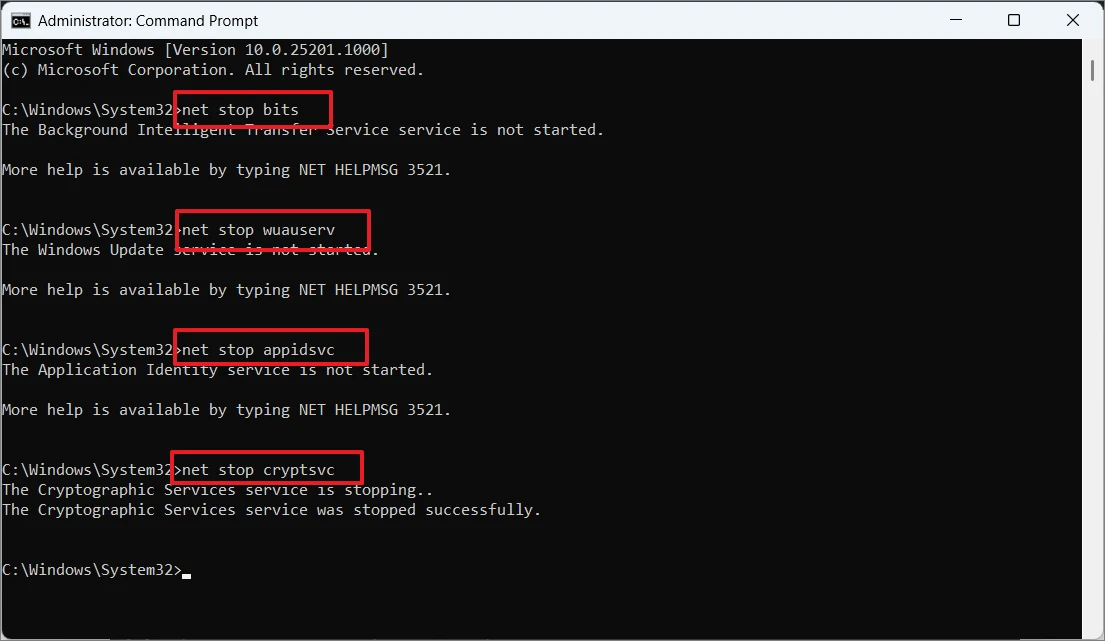
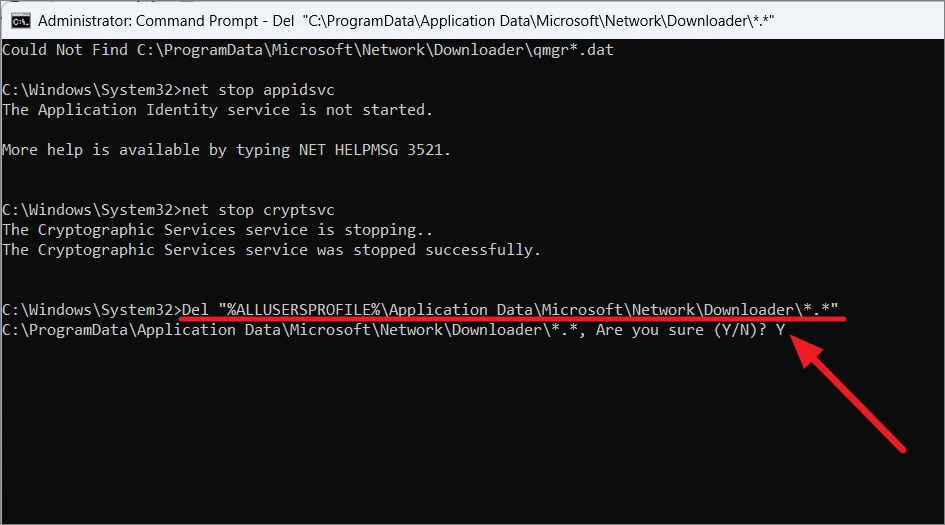
Del "%ALLUSERSPROFILE%\Application Data\Microsoft\Network\Downloader\*.*"If prompted, type Y and press Enter to confirm.
Ren %Systemroot%\SoftwareDistribution\DataStore DataStore.bak
Ren %Systemroot%\SoftwareDistribution\Download Download.bak
Ren %systemroot%\system32\catroot2 catroot2.bak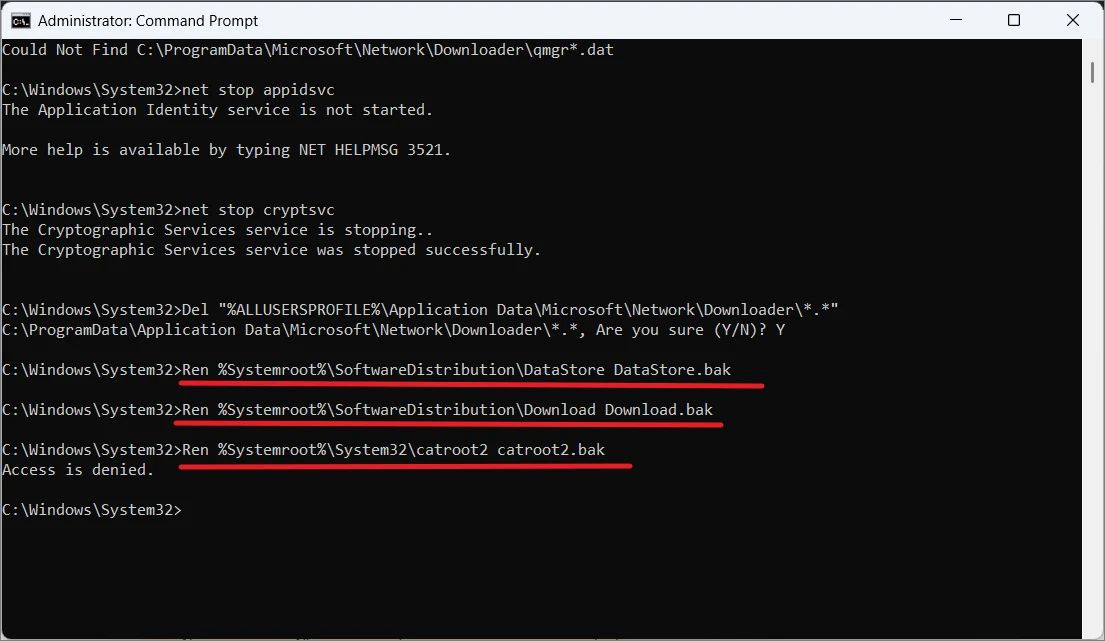
sc.exe sdset bits D:(A;;CCLCSWRPWPDTLOCRRC;;;SY)(A;;CCDCLCSWRPWPDTLOCRSDRCWDWO;;;BA)(A;;CCLCSWLOCRRC;;;AU)(A;;CCLCSWRPWPDTLOCRRC;;;PU)
sc.exe sdset wuauserv D:(A;;CCLCSWRPWPDTLOCRRC;;;SY)(A;;CCDCLCSWRPWPDTLOCRSDRCWDWO;;;BA)(A;;CCLCSWLOCRRC;;;AU)(A;;CCLCSWRPWPDTLOCRRC;;;PU)
sc.exe sdset cryptsvc D:(A;;CCLCSWLOCRRC;;;AU)(A;;CCDCLCSWRPWPDTLOCRSDRCWDWO;;;BA)(A;;CCDCLCSWRPWPDTLCRSDRCWDWO;;;SO)(A;;CCLCSWRPWPDTLOCRRC;;;SY)
sc.exe sdset trustedinstaller D:(A;;CCLCSWLOCRRC;;;AU)(A;;CCDCLCSWRPWPDTLOCRSDRCWDWO;;;BA)(A;;CCDCLCSWRPWPDTLCRSDRCWDWO;;;SO)(A;;CCLCSWRPWPDTLOCRRC;;;SY)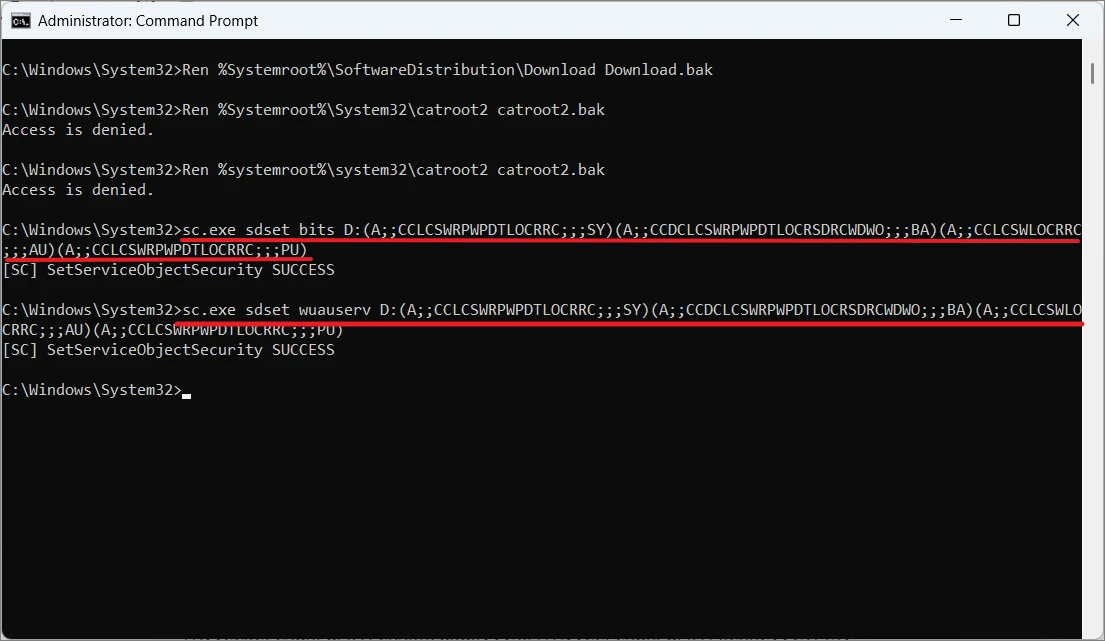
cd /d %windir%\system32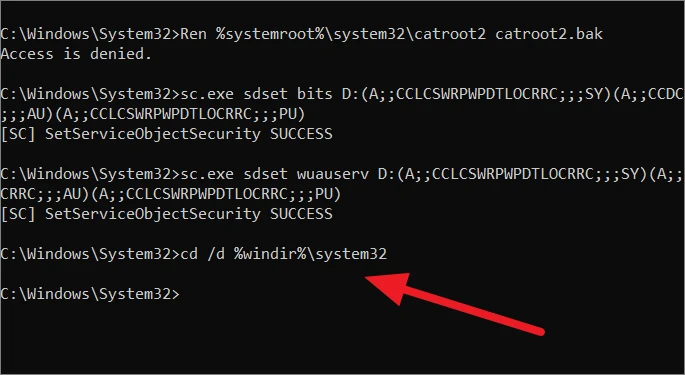
regsvr32.exe /s atl.dll
regsvr32.exe /s urlmon.dll
regsvr32.exe /s mshtml.dll
regsvr32.exe /s shdocvw.dll
regsvr32.exe /s browseui.dll
regsvr32.exe /s jscript.dll
regsvr32.exe /s vbscript.dll
regsvr32.exe /s scrrun.dll
regsvr32.exe /s msxml.dll
regsvr32.exe /s msxml3.dll
regsvr32.exe /s msxml6.dll
regsvr32.exe /s actxprxy.dll
regsvr32.exe /s softpub.dll
regsvr32.exe /s wintrust.dll
regsvr32.exe /s dssenh.dll
regsvr32.exe /s rsaenh.dll
regsvr32.exe /s gpkcsp.dll
regsvr32.exe /s sccbase.dll
regsvr32.exe /s slbcsp.dll
regsvr32.exe /s cryptdlg.dll
regsvr32.exe /s oleaut32.dll
regsvr32.exe /s ole32.dll
regsvr32.exe /s shell32.dll
regsvr32.exe /s wuapi.dll
regsvr32.exe /s wuaueng.dll
regsvr32.exe /s wuaueng1.dll
regsvr32.exe /s wucltui.dll
regsvr32.exe /s wups.dll
regsvr32.exe /s wups2.dll
regsvr32.exe /s wuweb.dll
regsvr32.exe /s qmgr.dll
regsvr32.exe /s qmgrprxy.dll
regsvr32.exe /s wucltux.dll
regsvr32.exe /s muweb.dll
regsvr32.exe /s wuwebv.dll
regsvr32.exe wudriver.dll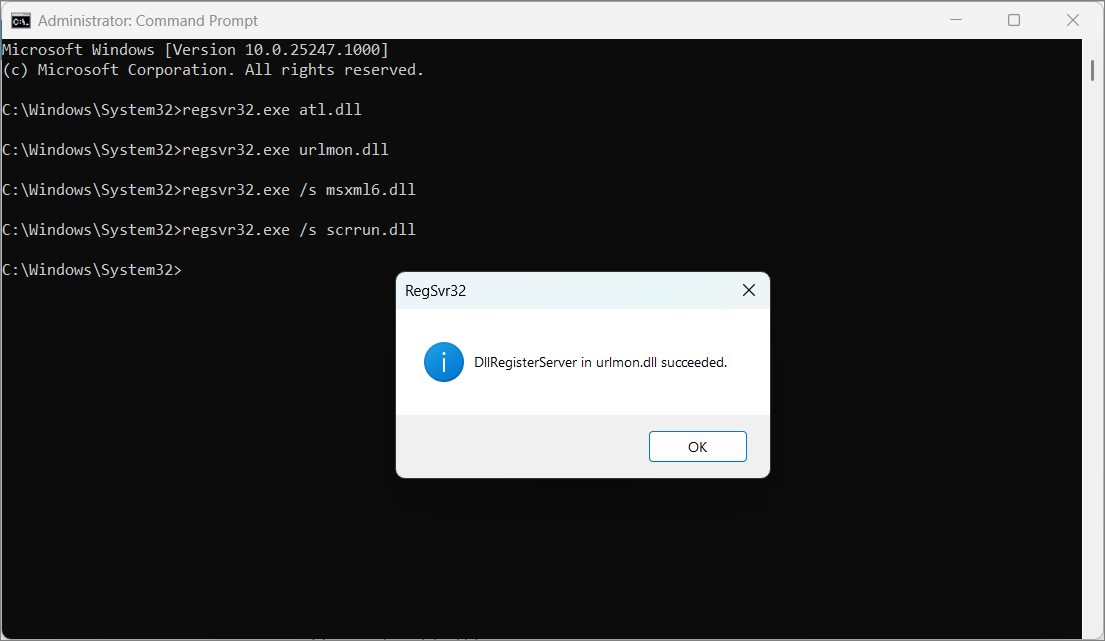
netsh winsock reset
netsh winsock reset proxy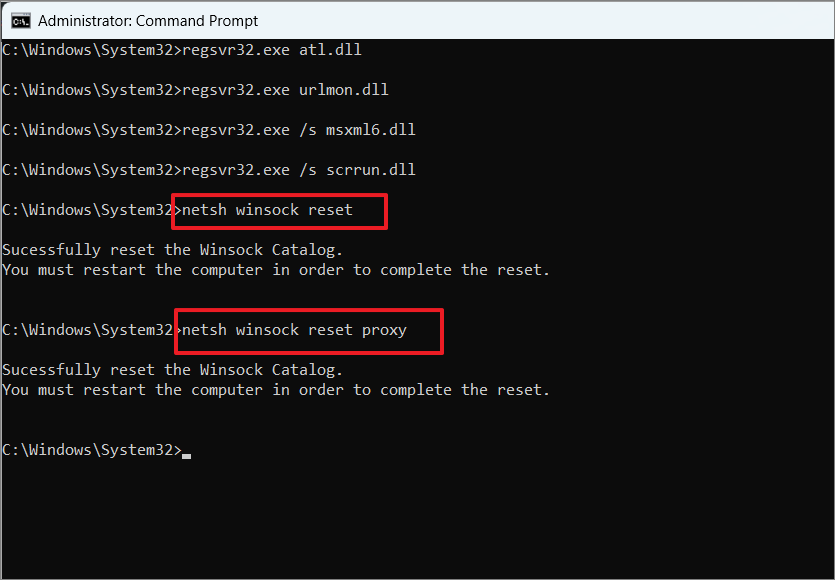
net start bits
net start wuauserv
net start appidsvc
net start cryptsvc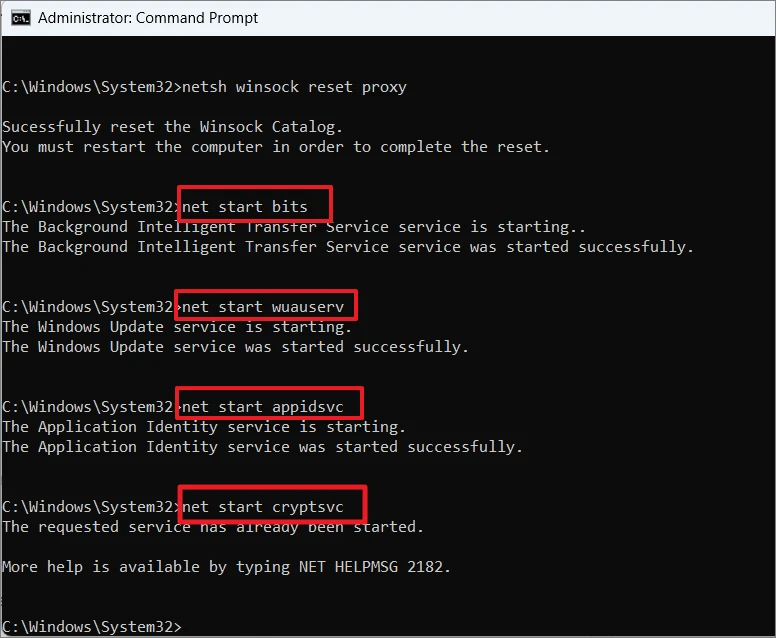
2. Run the System File Checker and DISM Scans
Corrupted or missing system files can trigger the 0x80004005 error. Running the System File Checker (SFC) and Deployment Image Servicing and Management (DISM) tools can repair these files.
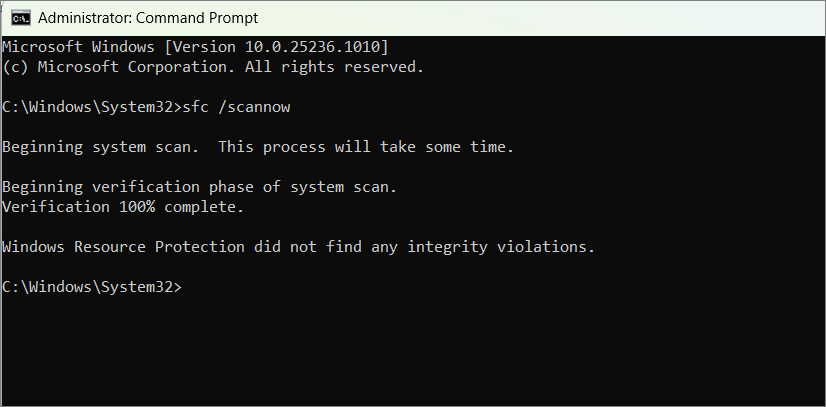
sfc /scannowThis process may take some time. Once completed, you will see a message indicating if any corrupt files were found and repaired.
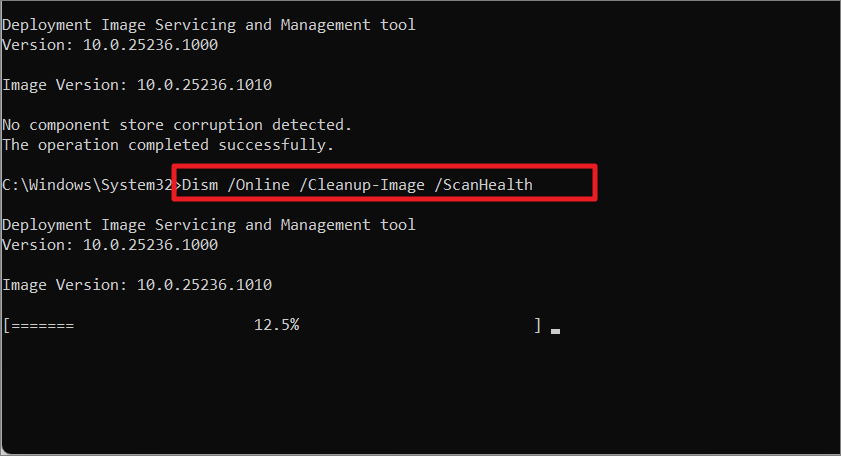
Dism /Online /Cleanup-Image /CheckHealthDism /Online /Cleanup-Image /ScanHealthThis may take several minutes.
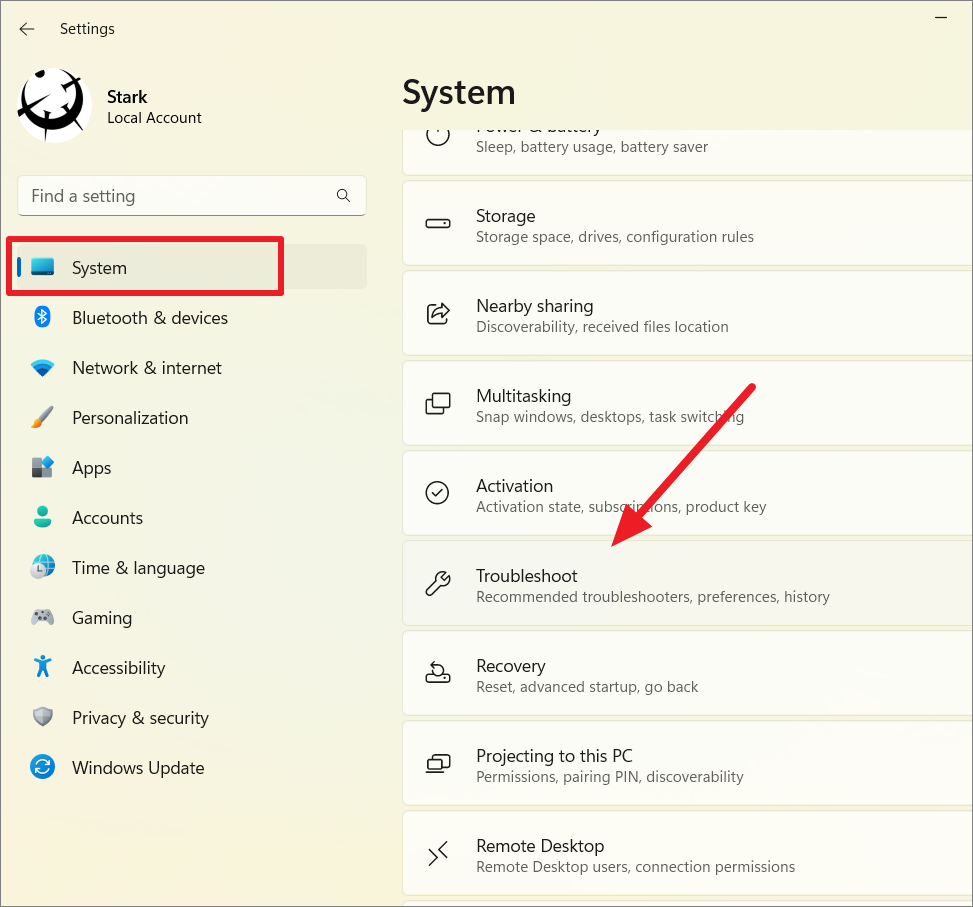
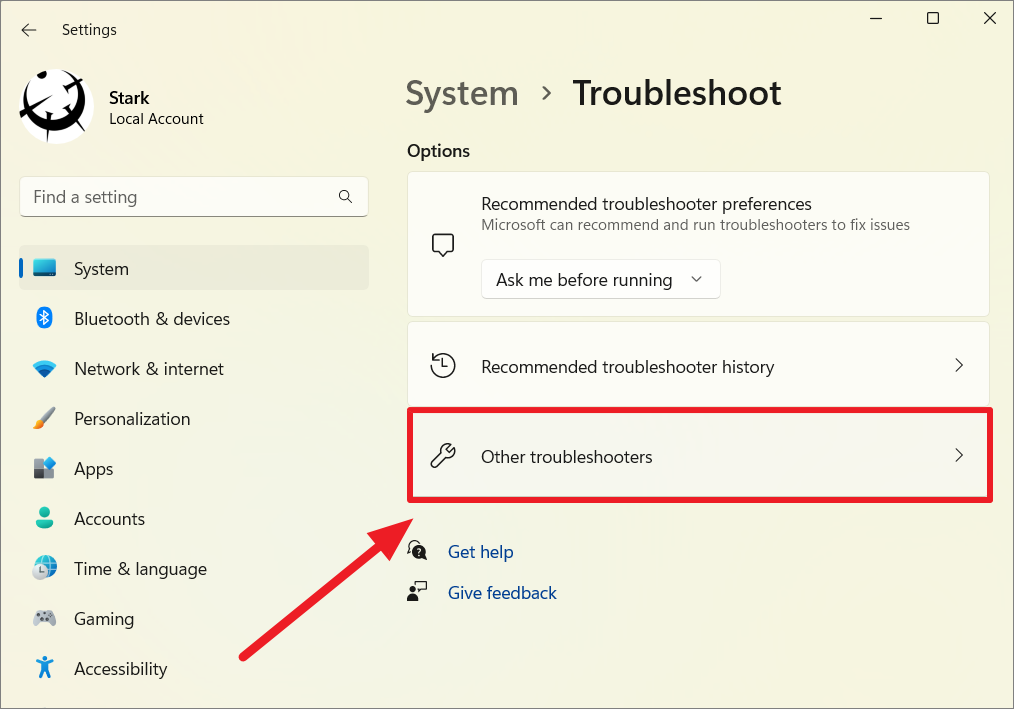
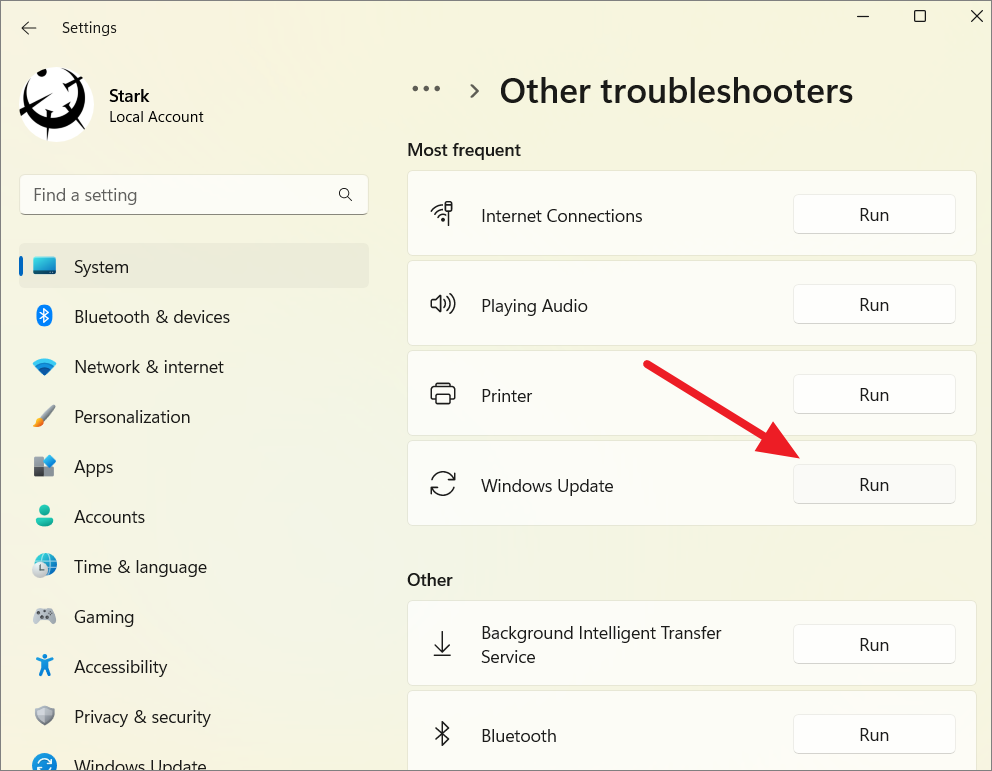
Dism /Online /Cleanup-Image /RestoreHealth3. Run the Windows Update Troubleshooter
If the error occurs during Windows updates, the built-in troubleshooter can help identify and fix problems.
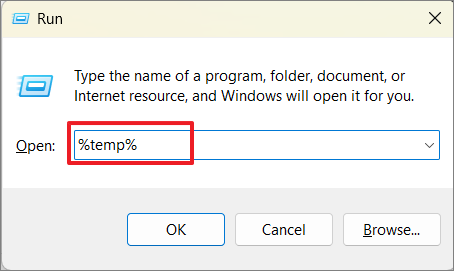
4. Delete Temporary Files
Corrupted temporary files can cause various errors, including 0x80004005. Deleting these files can resolve the problem.
Ctrl+A to select all files, then press Shift+Delete to permanently delete them. Confirm any prompts that appear.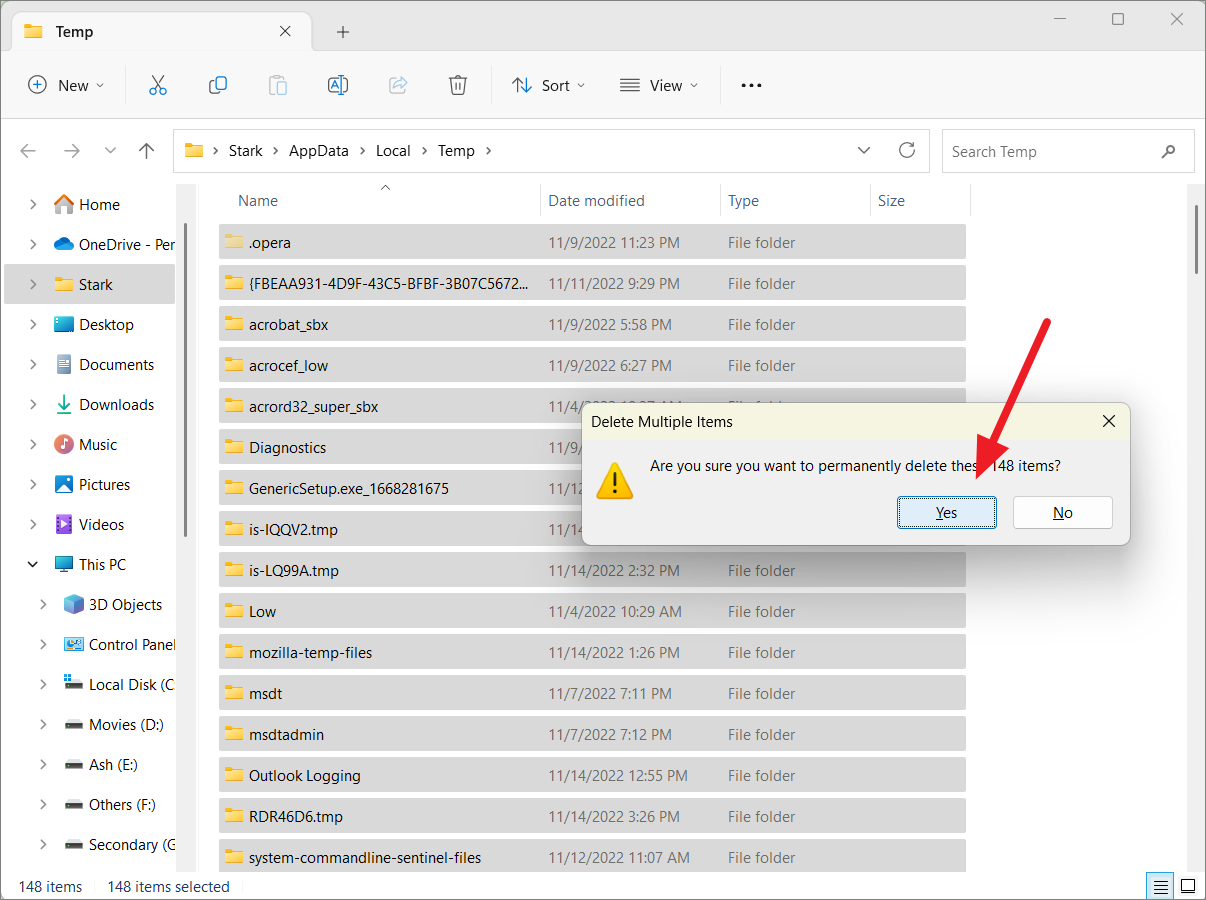
5. Edit the Windows Registry
If the error occurs while accessing shared resources or moving files, modifying the registry can help.
Warning: Editing the registry can be risky. It’s recommended to back up the registry before proceeding.
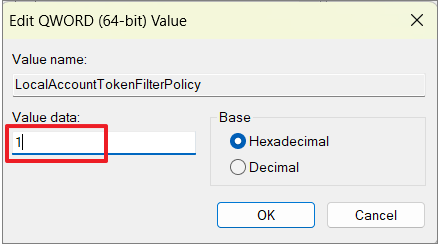
HKEY_LOCAL_MACHINE\SOFTWARE\Microsoft\Windows\CurrentVersion\Policies\System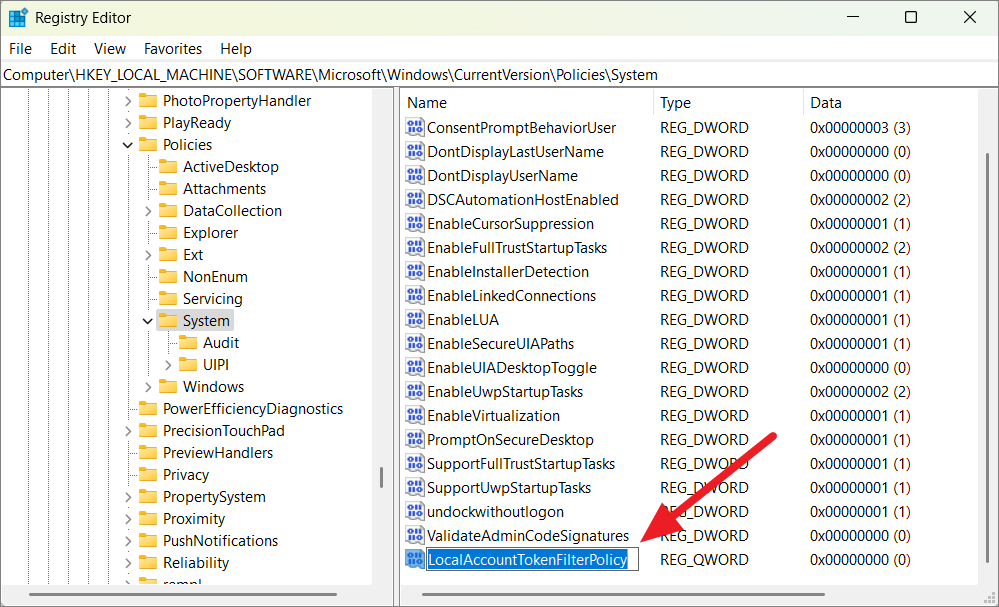
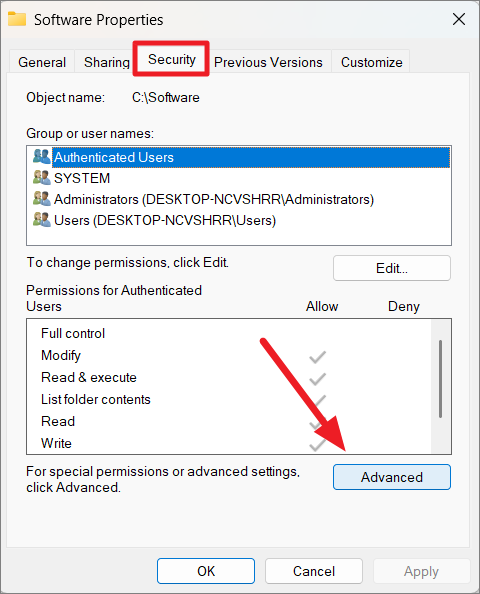
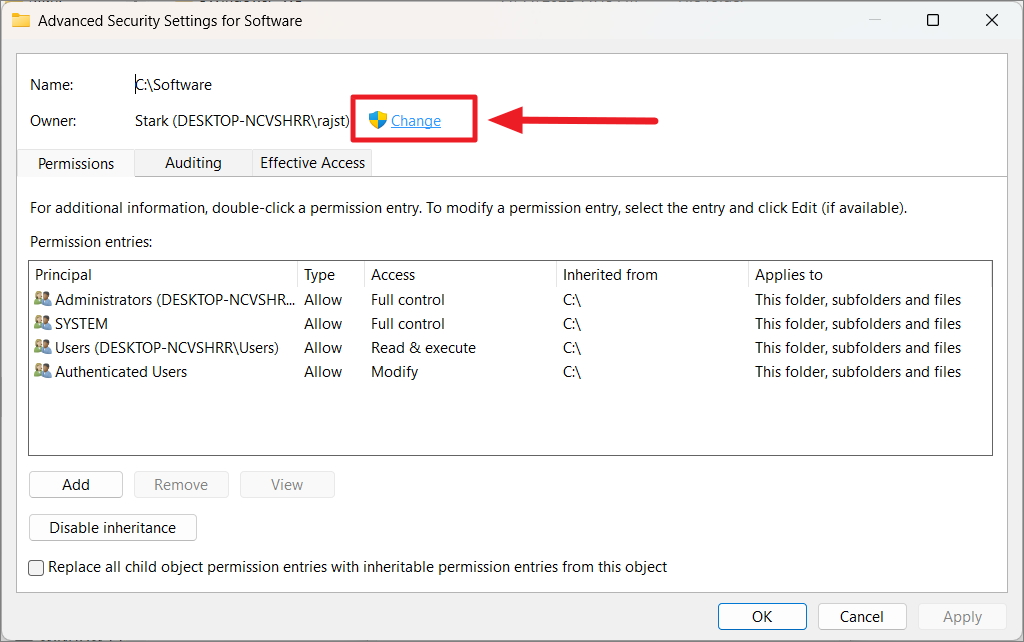
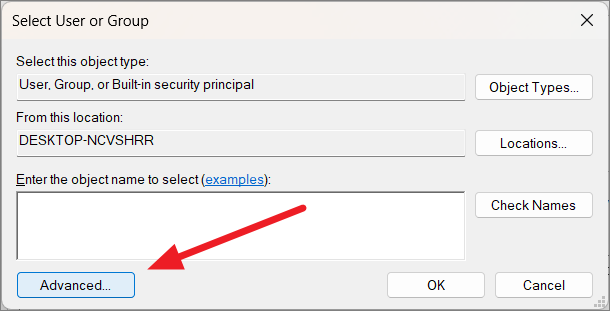
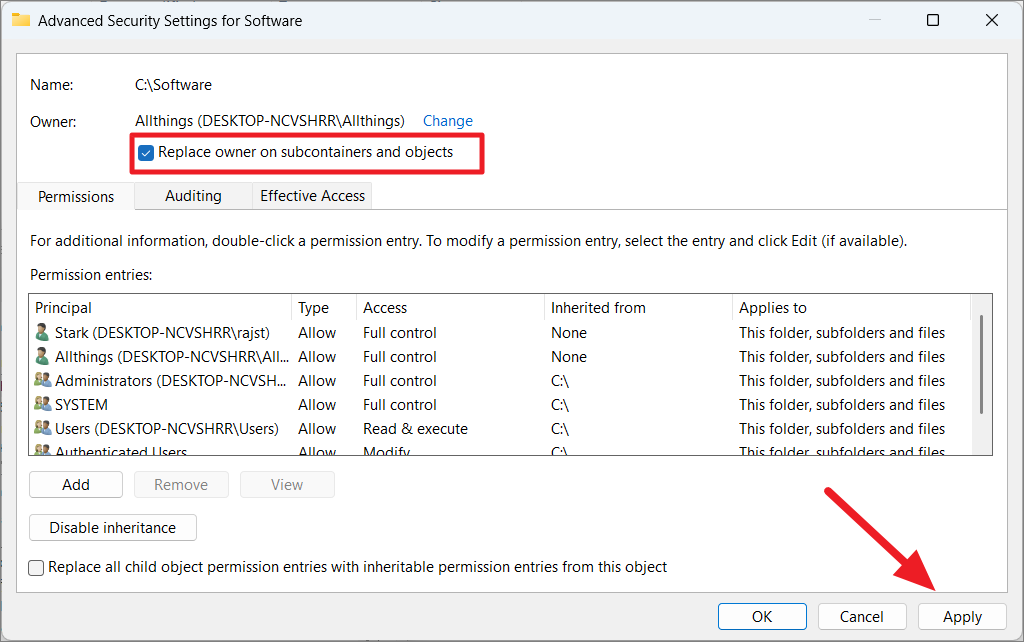
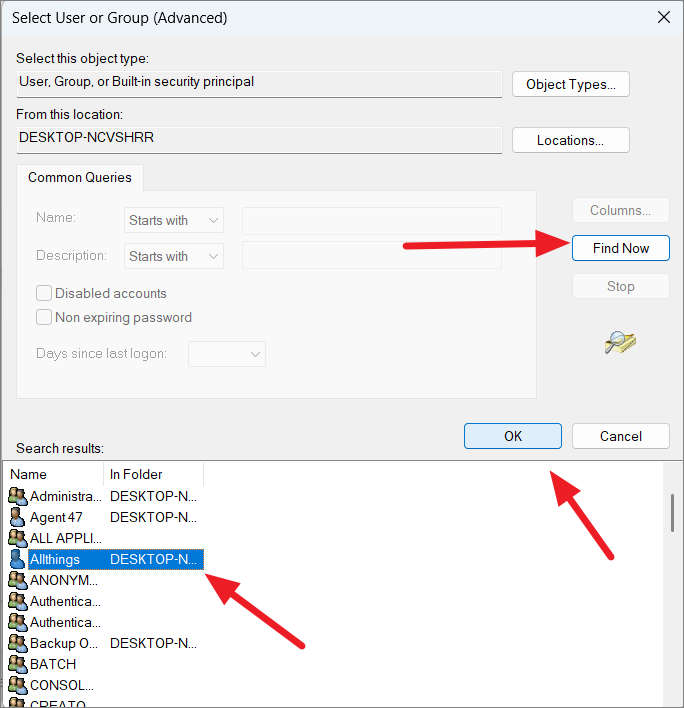
6. Take Ownership of the File or Folder
Lack of proper permissions can lead to the error when accessing certain files or folders.
7. Disable IPv6 Protocol
Disabling IPv6 can resolve network-related instances of the error.
8. Re-register jdscript.dll and vbscript.dll
If the error occurs while extracting compressed files, re-registering these DLL files might help.
regsvr32 jscript.dll
regsvr32 vbscript.dll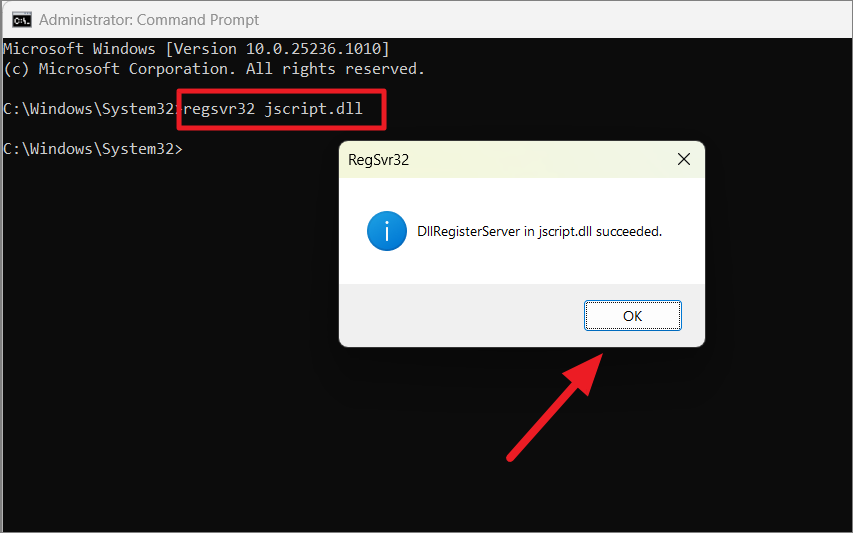
9. Run the Windows File and Folder Troubleshooter
For errors related to file operations like renaming or moving, this troubleshooter can help.
10. Use a Third-Party Archiving Tool
If you’re encountering the error while extracting files, switching to a dedicated archiving tool like WinRAR or 7-Zip can help. These tools handle various archive formats more efficiently than the built-in Windows extractor.
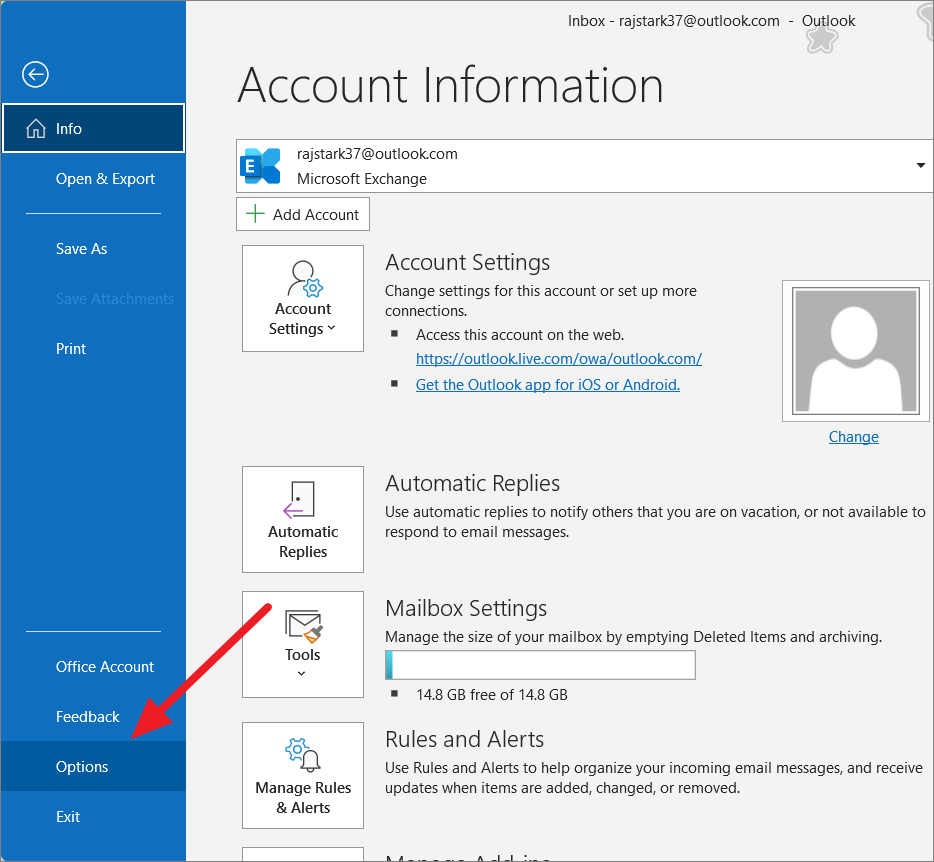
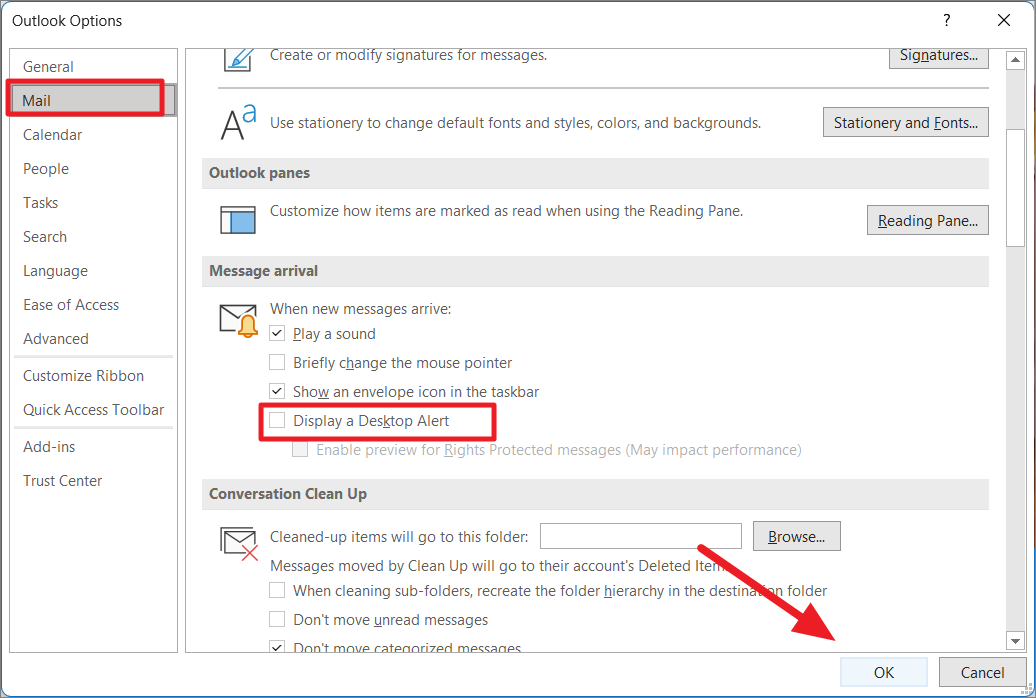
11. Disable Notifications in Outlook
Error 0x80004005 can occur due to Outlook’s notification settings.
By following these methods, you should be able to resolve the 0x80004005 error on your Windows 11 PC. If the problem persists, consider reaching out to Microsoft Support or seeking professional assistance.


