Windows 11 frequently releases updates to enhance system performance, introduce new features, and fix known issues. However, sometimes these updates may get stuck during the download or installation process. If your update seems frozen at a specific percentage for an extended time, there are several methods you can try to resolve the issue.
What causes Windows updates to freeze or get stuck
Several factors can cause a Windows update to hang or freeze:
- Internet connectivity problems.
- Memory issues.
- Disabled or malfunctioning Windows Update service.
- Conflicts with running processes or applications.
- Incomplete download of update files.
Below are methods you can use to fix a stuck Windows 11 update.
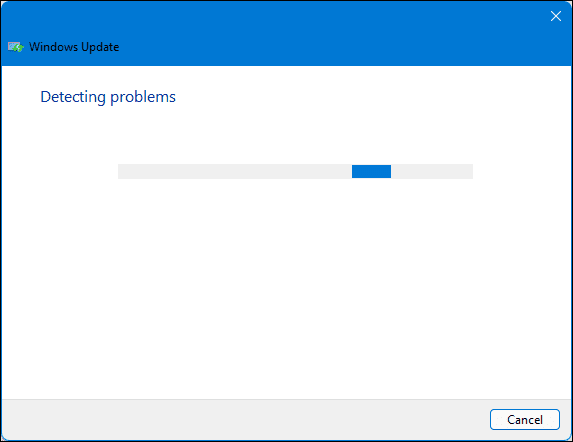
Use the Windows Update troubleshooter
Windows 11 provides a built-in troubleshooter that can automatically detect and fix issues with Windows Update. To use it:
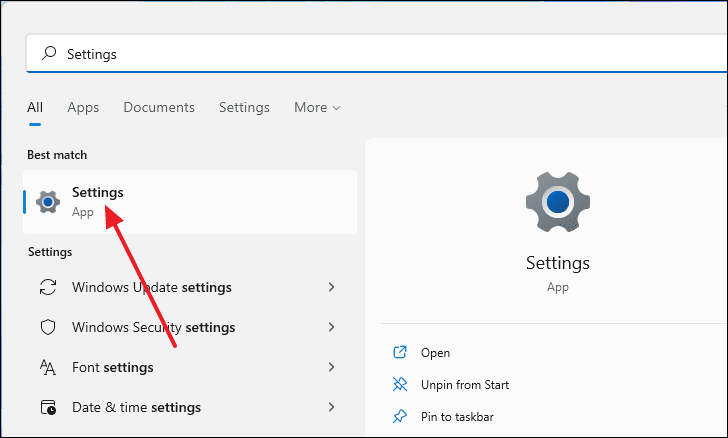
- Open the Settings app by pressing
Windows+ion your keyboard or by searching for it in the Start menu.
- In the Settings window, scroll down on the right pane and select Troubleshoot.
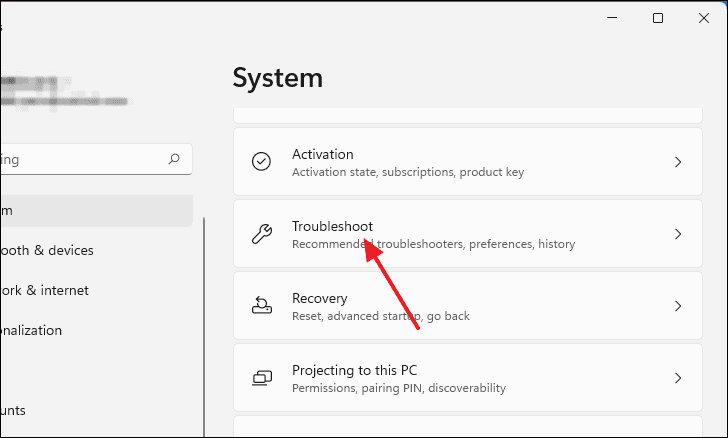
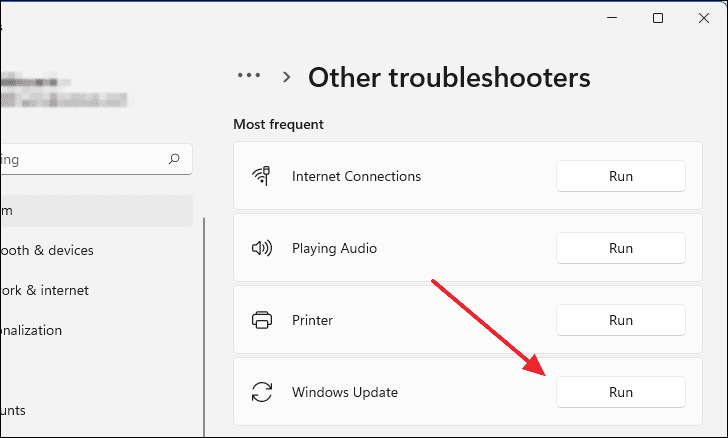
- Click on Other troubleshooters.

- Under the “Most frequent” section, find Windows Update and click the Run button next to it.
- The troubleshooter will open and begin scanning for issues that might be causing the update to get stuck.
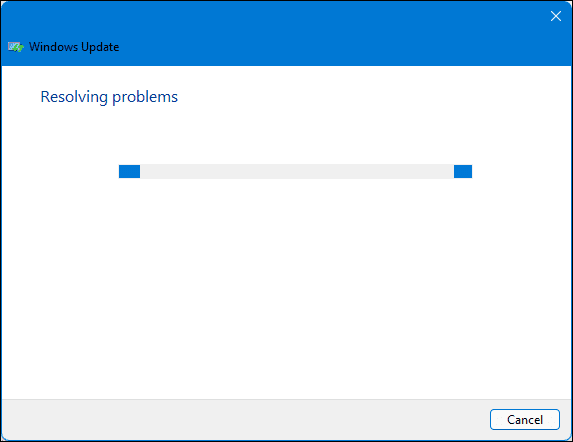
- If any problems are found, the troubleshooter will attempt to fix them automatically.
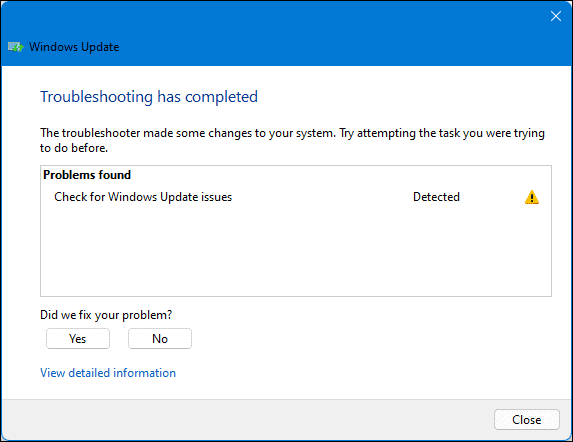
- Once the process is complete, it will display the results. You can then try running Windows Update again.
Make sure Windows Update service is running
If the Windows Update service is disabled or not running properly, it can cause updates to get stuck. Here’s how to check and enable it:
- Press
Windowsand type Services. Click on the Services app from the search results.

- In the Services window, scroll down and find Windows Update. Double-click on it to open its properties.
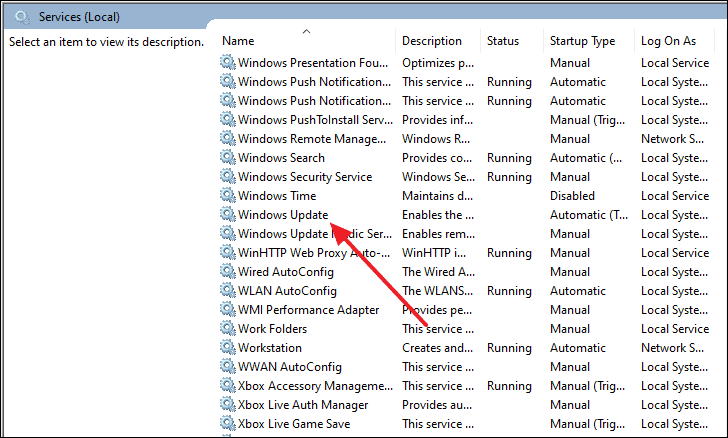
- In the Properties window, set the Startup type to Automatic. If the Service status is Stopped, click on the Start button.
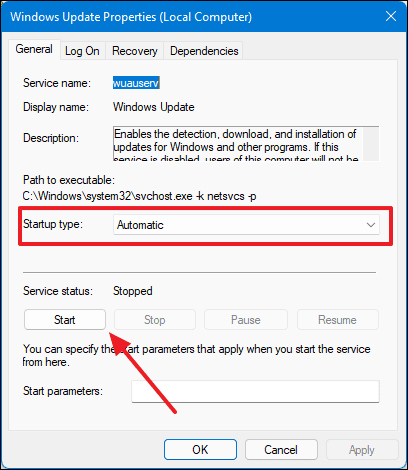
- Click OK to apply the changes and close the window.
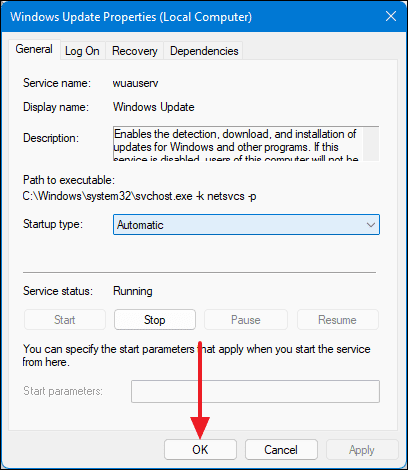
Restart your computer and try to run Windows Update again.
Manually delete the Windows Update files
Corrupted or incomplete update files can prevent new updates from installing. Deleting these files forces Windows to download fresh copies. Follow these steps:
- First, you need to stop the Windows Update service. Open the Services app by typing Services in the Start menu and selecting it.
- In the Services window, locate and double-click on Windows Update.
- Set the Startup type to Disabled and click on the Stop button to halt the service. Then, click OK.
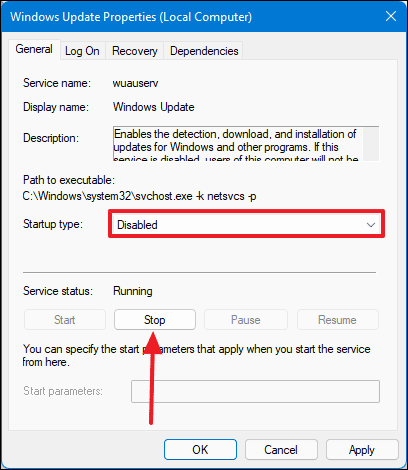
- Restart your computer to ensure the service is stopped.
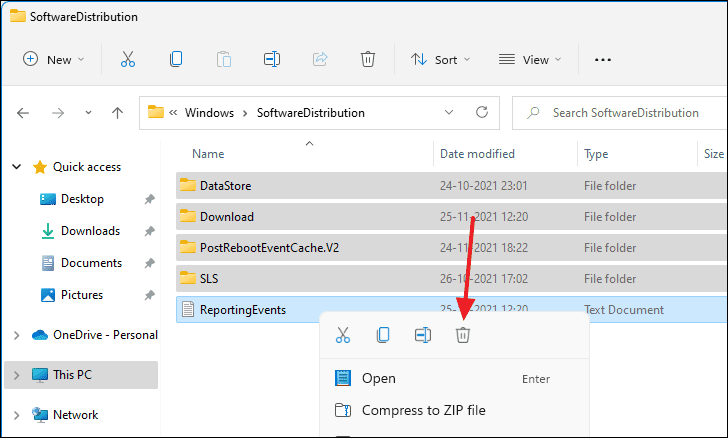
- After restarting, open File Explorer by pressing
Windows+E. - Navigate to the following folder by copying and pasting the path into the address bar and pressing
Enter:
C:\Windows\SoftwareDistribution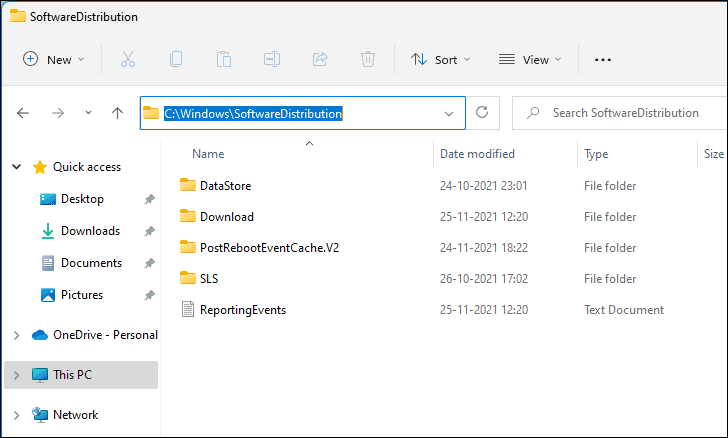
- Select all files and folders by pressing
Ctrl+A, then pressDeleteto remove them.
- Once the files are deleted, go back to the Services app.
- Find and double-click on Windows Update again.
- Set the Startup type to Automatic and click on the Start button to re-enable the service. Click OK.
You can now attempt to download and install the updates again.
Boot into Safe Mode
Sometimes, third-party applications or background processes can interfere with Windows Update. Booting into Safe Mode ensures that Windows runs with minimal drivers and startup programs, reducing the chance of interference. Here’s how to boot into Safe Mode:
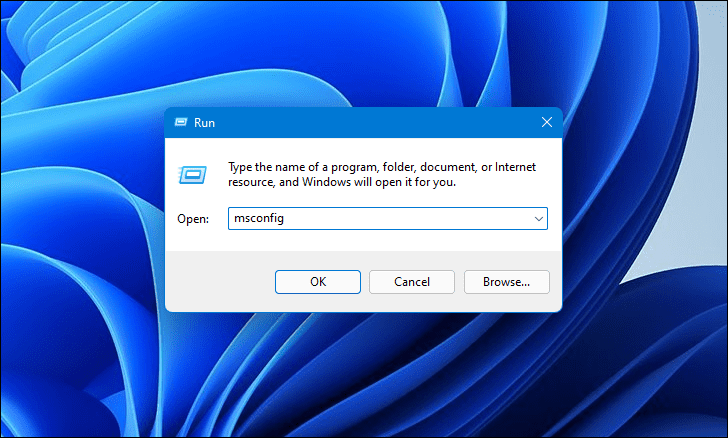
- Press
Windows+Rto open the Run dialog box. Typemsconfigand pressEnter.
- In the System Configuration window, go to the Boot tab.
- Under Boot options, check the box for Safe boot and select Minimal. Click OK.
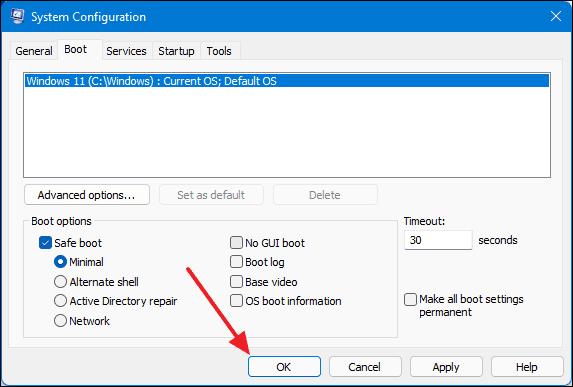
- Restart your computer. It will boot into Safe Mode.
- Once in Safe Mode, try running Windows Update again.
After completing the update, repeat the steps above to uncheck Safe boot and restart your computer to return to normal mode.
Reset your Windows 11 computer
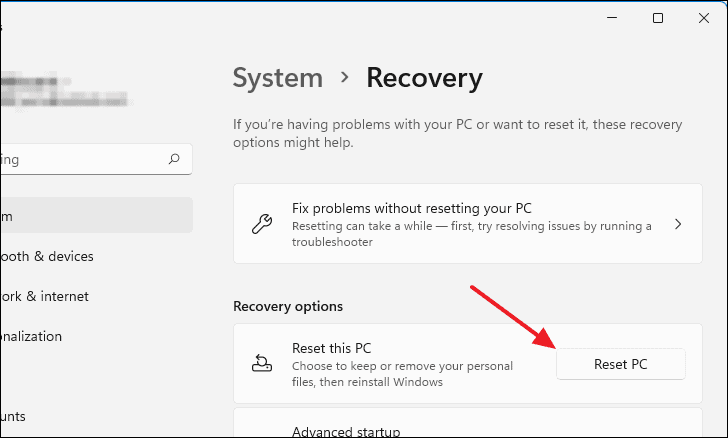
If all else fails, resetting your PC can resolve deep-rooted issues that prevent updates from installing. This process allows you to keep your personal files while reinstalling Windows. Here’s how to reset your PC:
- Open the Settings app by pressing
Windows+i. - On the right pane, scroll down and select Recovery.
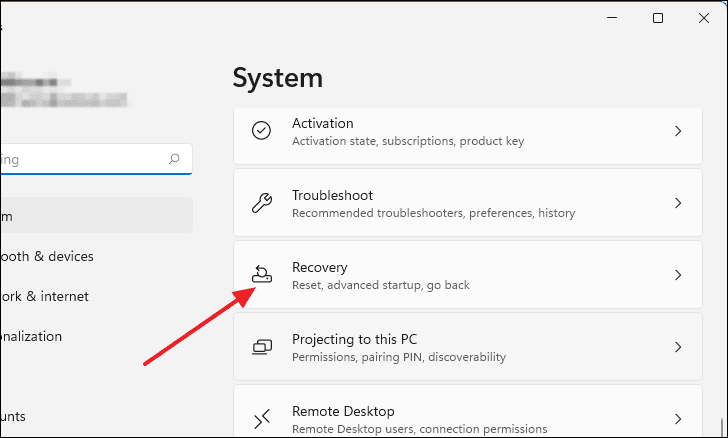
- Under the Recovery options section, click on Reset PC.
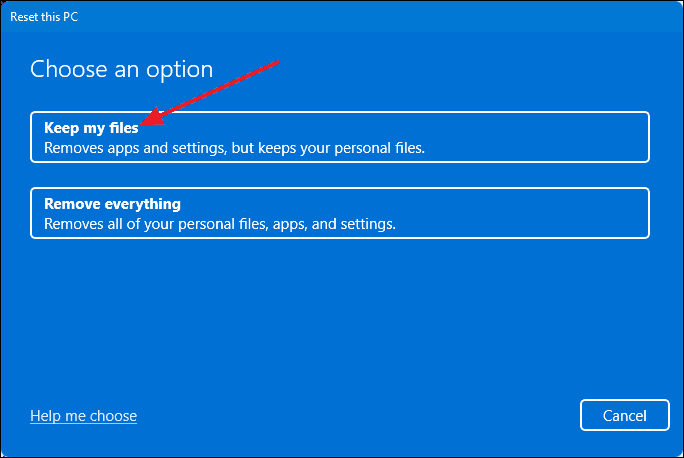
- In the Reset this PC window, choose Keep my files.
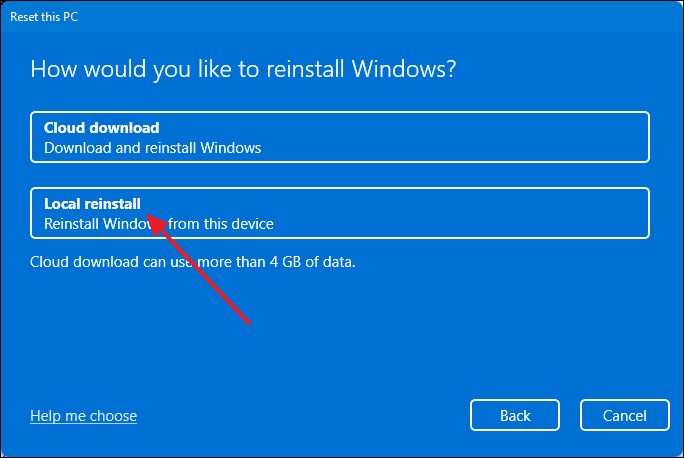
- Select Local reinstall.
- Review the changes that will be made, then click Reset to begin the process.
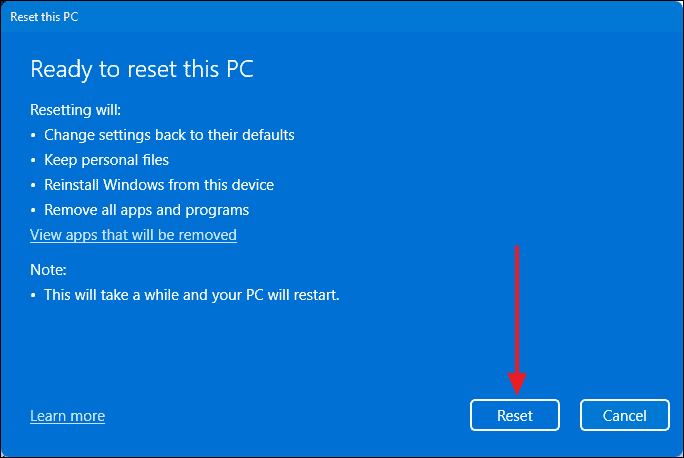
After the reset is complete, your PC will restart, and you can attempt to run Windows Update again.
By following these methods, you should be able to resolve issues with a stuck Windows 11 update and keep your system up to date.


