
If you’re happy with Windows 10 and prefer not to upgrade to Windows 11 just yet, there are several ways to prevent your computer from automatically updating. Whether you’re concerned about system requirements, potential stability issues, or simply enjoy the familiarity of Windows 10, this guide will show you how to block the Windows 11 update on your Windows 10 PC.
Why you might want to stop Windows 11 updates
There are a few reasons why you might want to delay or prevent the Windows 11 update:
Firstly, Windows 11 has higher system requirements, and older PCs might not meet these specifications. Upgrading could result in performance issues or incompatibility with your current hardware. Secondly, as a newer operating system, Windows 11 may have bugs or stability concerns that haven’t been fully addressed yet. Lastly, you might simply prefer the interface and features of Windows 10 and see no immediate need to switch to Windows 11.
Block Windows 11 update using Registry Editor
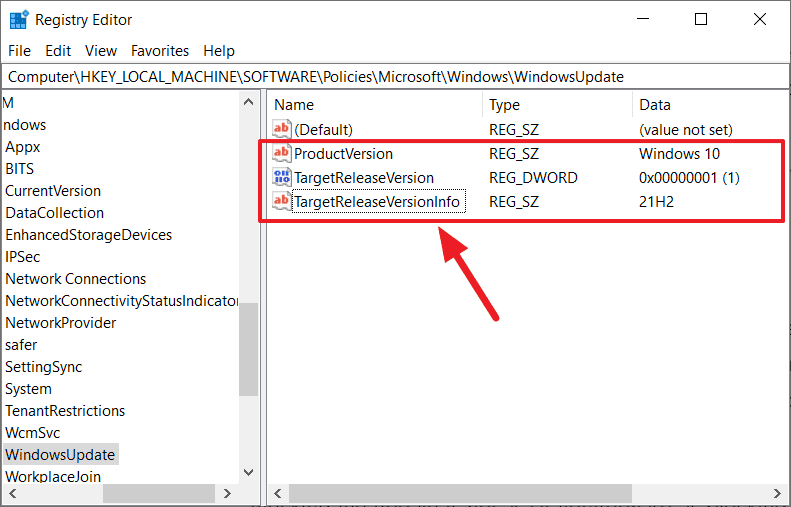
To permanently prevent your PC from upgrading to Windows 11, you can use the Registry Editor to specify the exact version of Windows 10 you wish to remain on. This method ensures that your system only receives updates for the specified Windows 10 version and ignores any prompts to upgrade to Windows 11.
Windows + R, type regedit, and press Enter to launch the Registry Editor.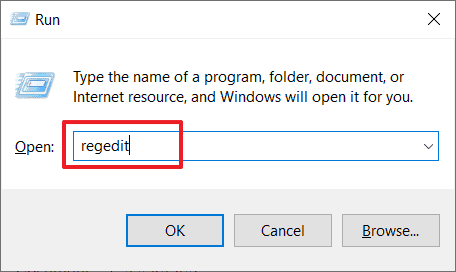
HKEY_LOCAL_MACHINE\SOFTWARE\Policies\Microsoft\Windows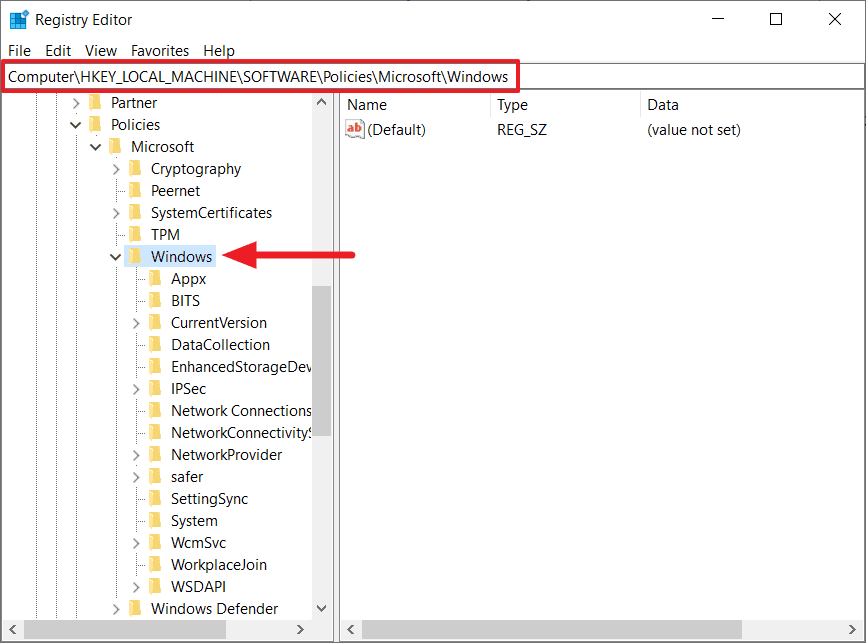
WindowsUpdate under the Windows folder. If it doesn’t exist, right-click the Windows folder, select New, then click on Key to create it.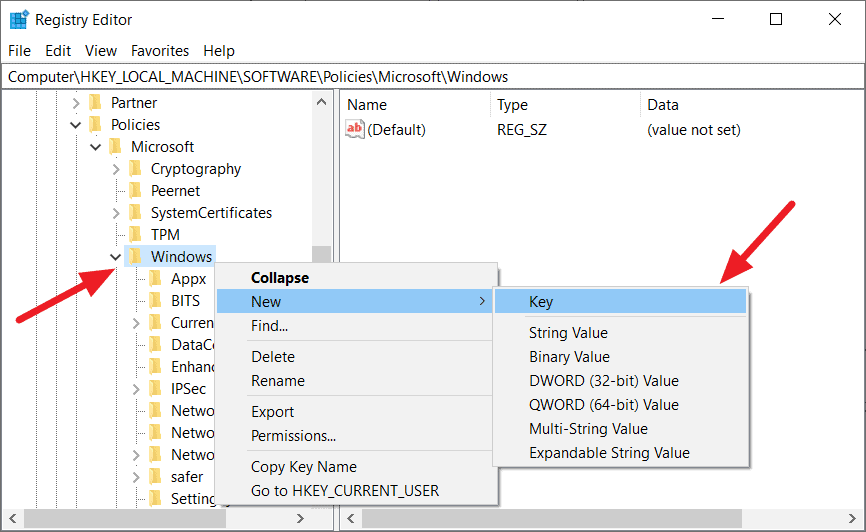

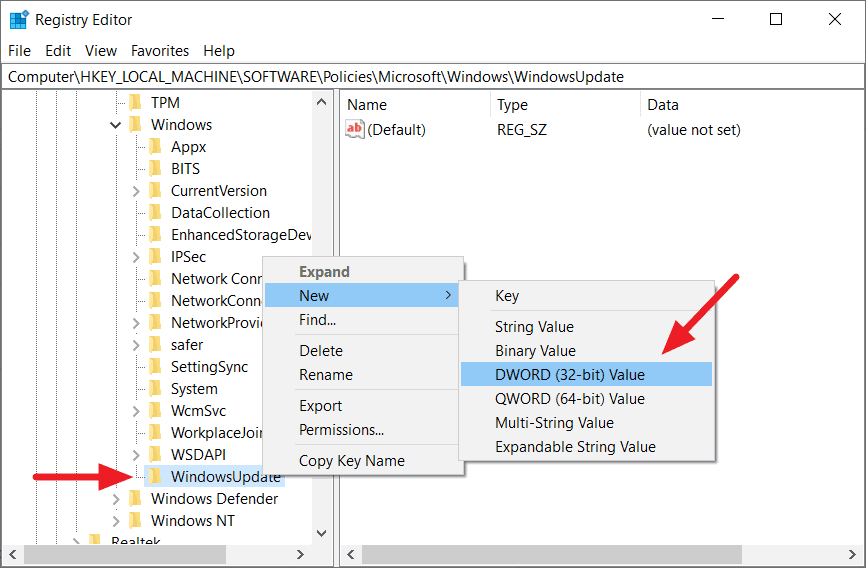
TargetReleaseVersion. Double-click on it, set the value data to 1, and click OK.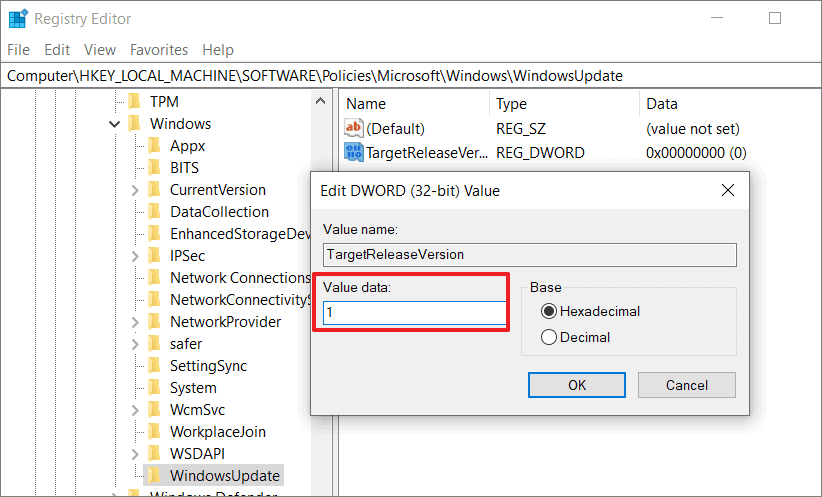
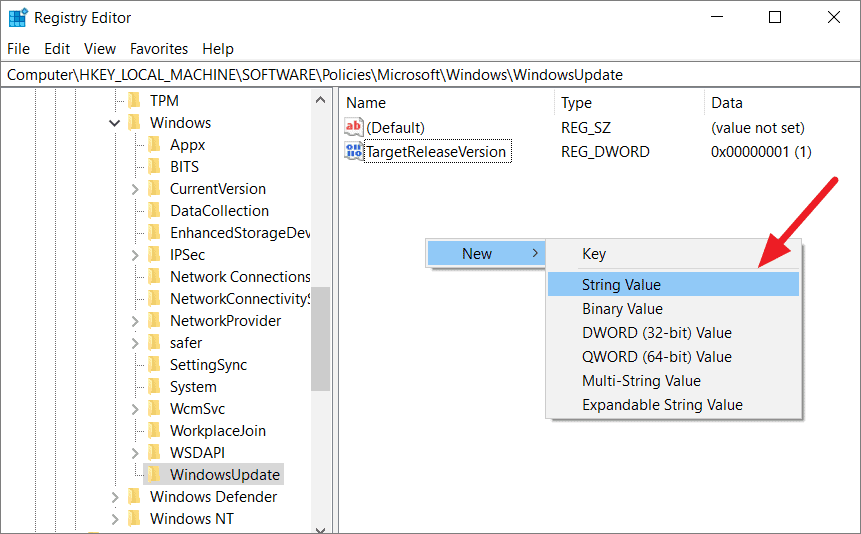
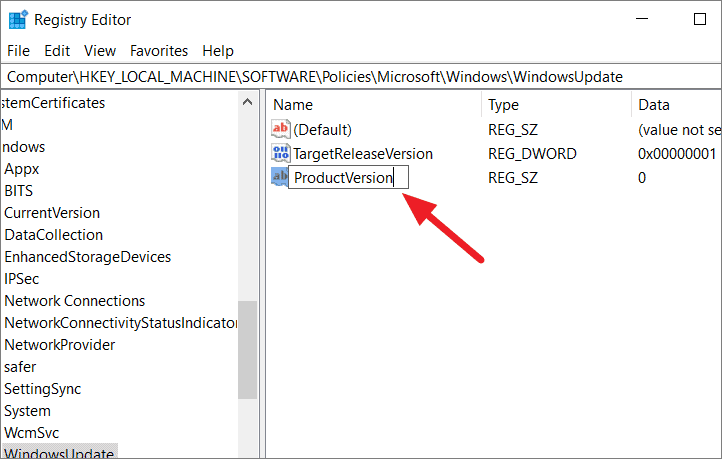
TargetReleaseVersionInfo.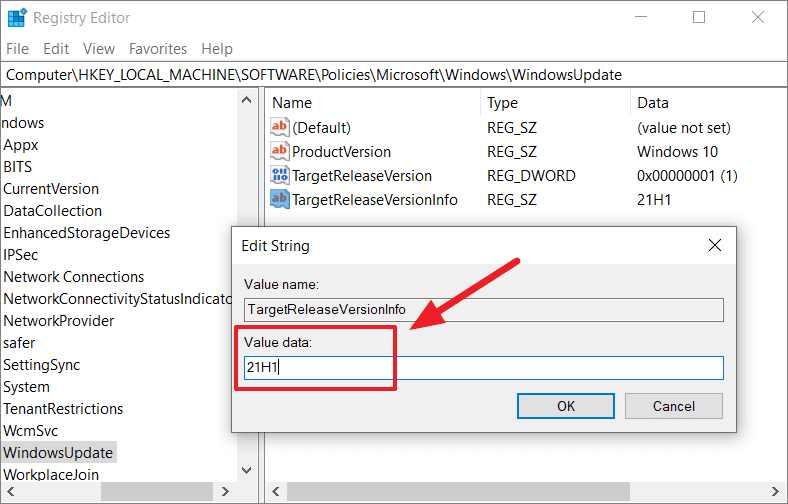
TargetReleaseVersionInfo and set its value data to the Windows 10 version you want to stay on, such as 21H1 or 21H2. Click OK.
You can find the list of Windows 10 versions currently supported by Microsoft in this link.
Block Windows 11 update using Group Policy Editor
If you’re using Windows 10 Pro, Enterprise, or Education edition, you can use the Local Group Policy Editor to block the Windows 11 update. This method allows you to specify the Windows version you want to receive feature updates for, ensuring that your system doesn’t upgrade beyond that version.
Windows + R, type gpedit.msc, and press Enter to launch the Local Group Policy Editor. Alternatively, search for Edit Group Policy in the Start menu.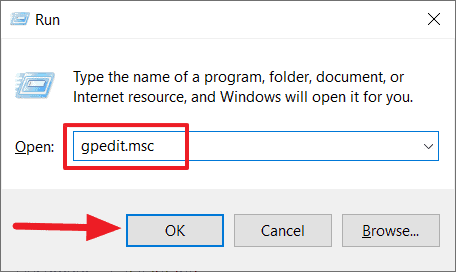
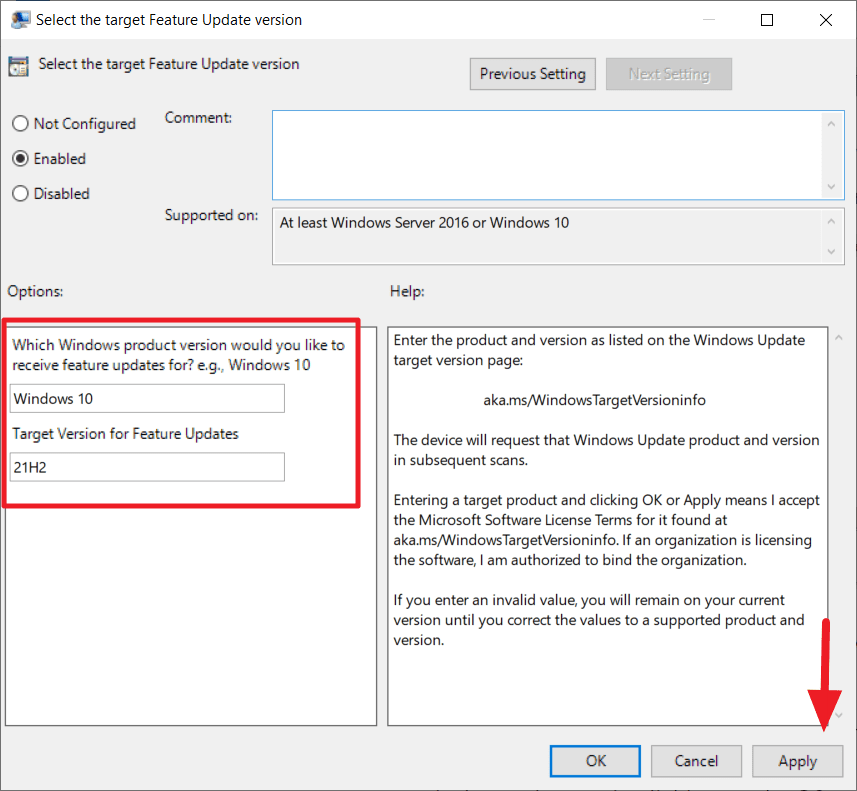
Computer Configuration > Administrative Templates > Windows Components > Windows Update > Windows Update for Business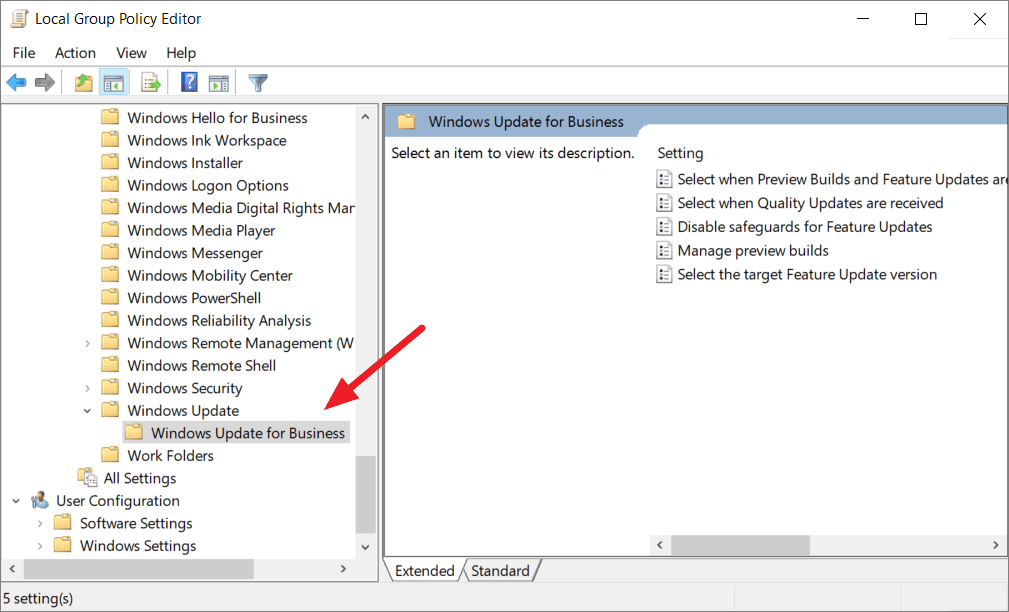
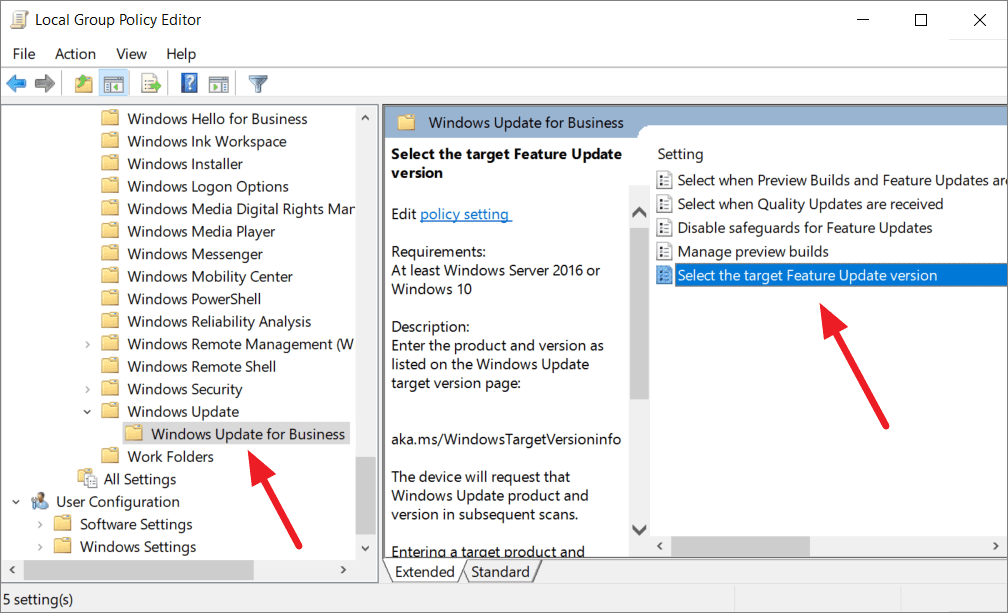
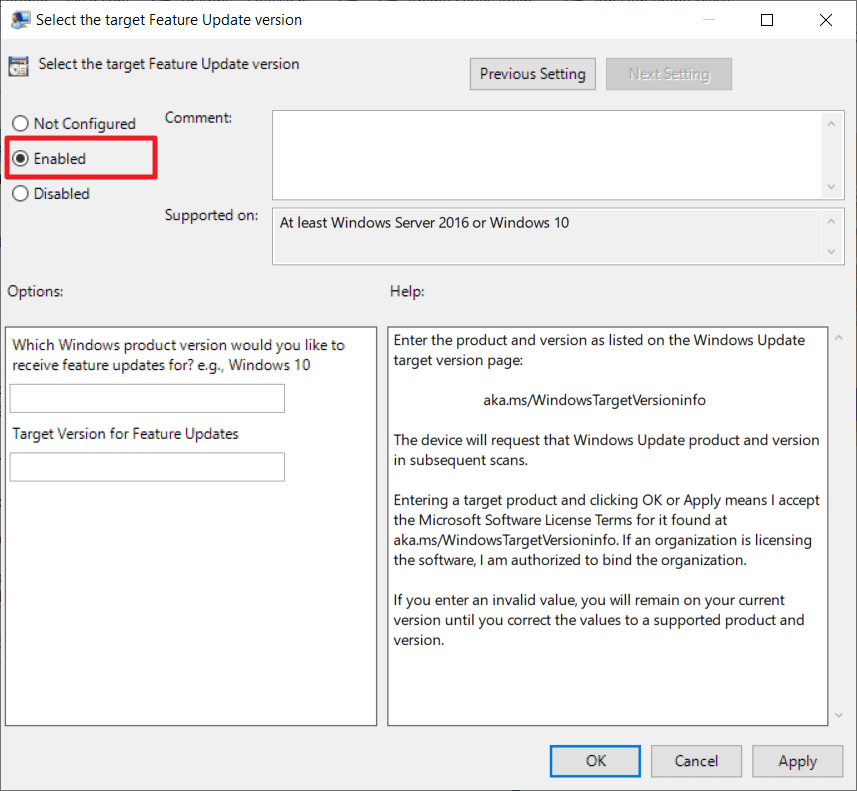
- For Which Windows product version would you like to receive feature updates for?, type
Windows 10. - For Target Version for Feature Updates, enter the desired version, such as
21H1or21H2.
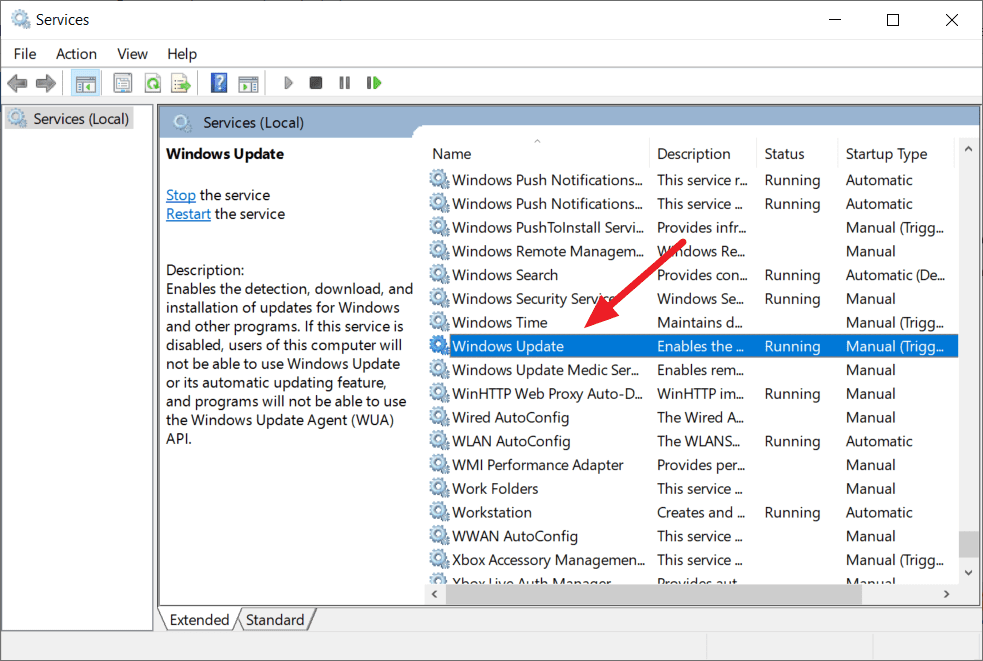
Turn off the Windows Update service
Disabling the Windows Update service will stop all updates from being installed on your computer, including feature and security updates. While this method effectively blocks the Windows 11 upgrade, it also prevents your system from receiving important updates. Use this method if you want to completely halt updates on your PC.
Services in the search bar, and select the Services app from the results.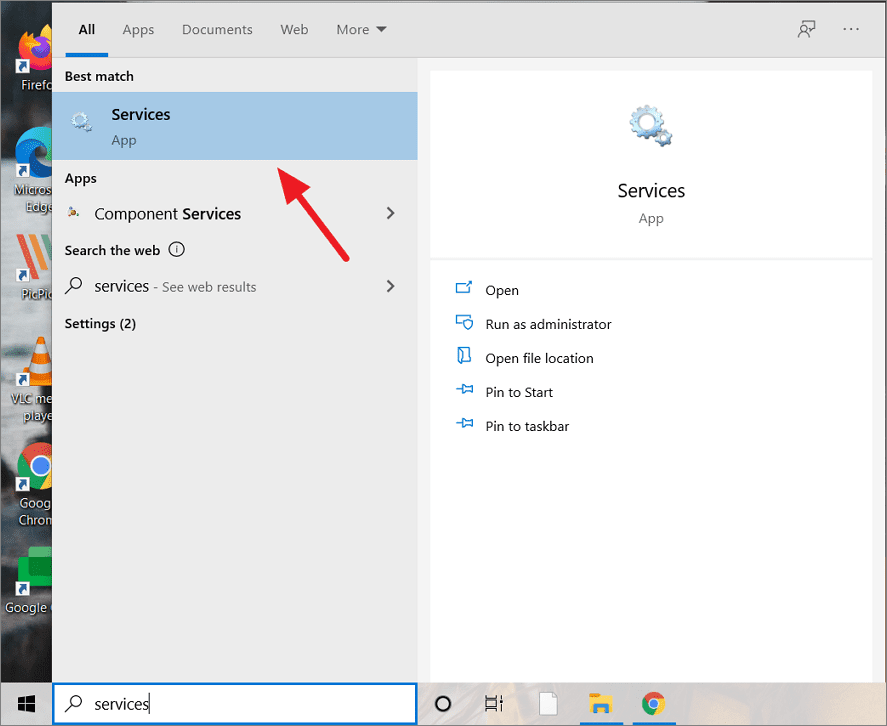
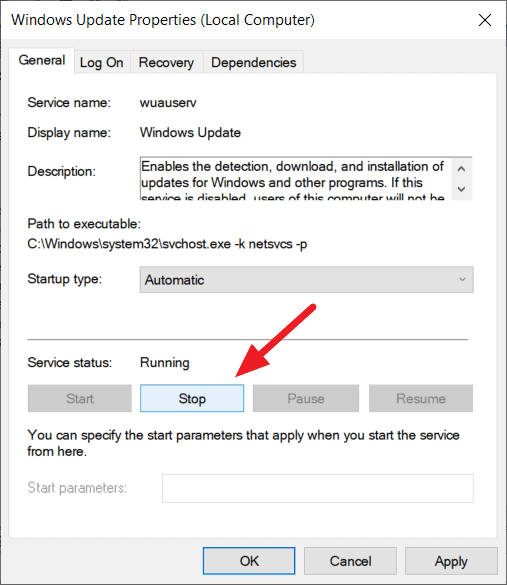
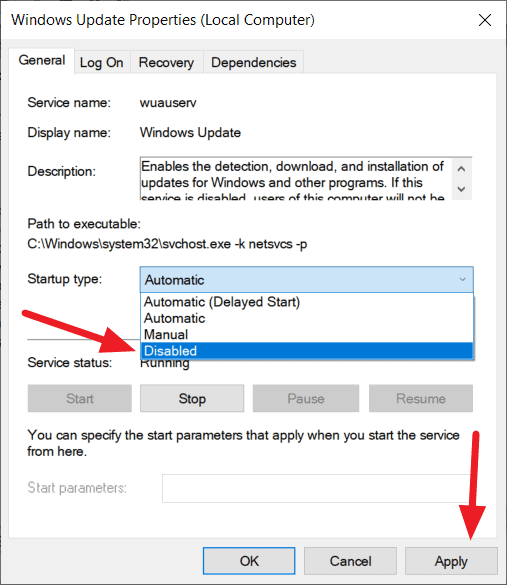
By disabling the Windows Update service, your computer will no longer receive any updates. If you decide to re-enable updates in the future, repeat these steps and set the Startup type to Automatic or Manual, then start the service.
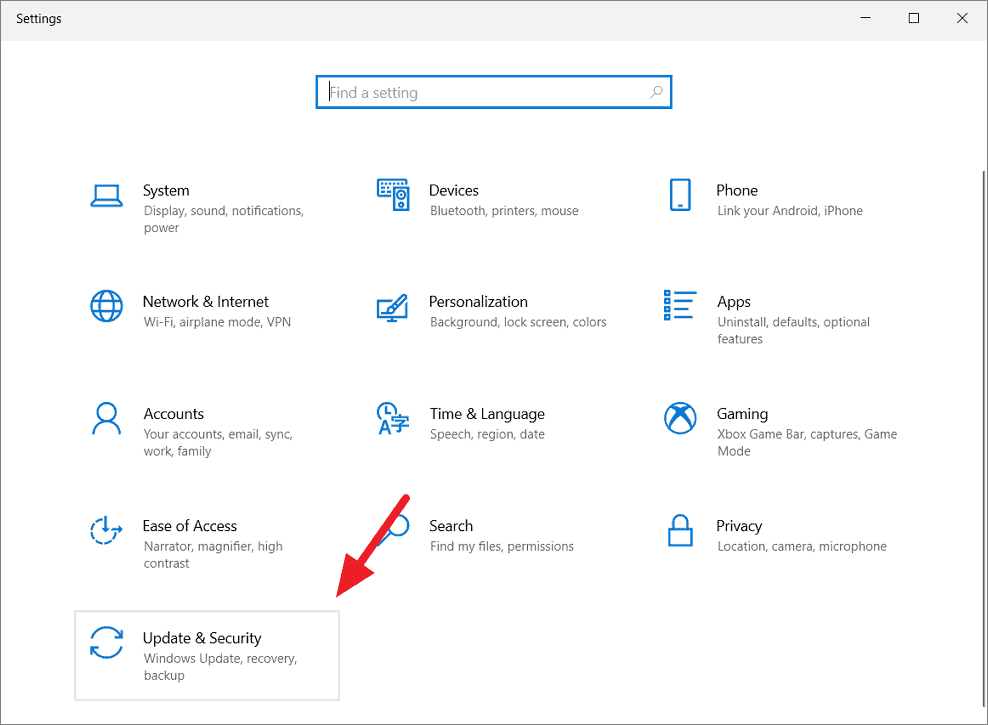
Stop Windows 11 upgrade from Windows Settings
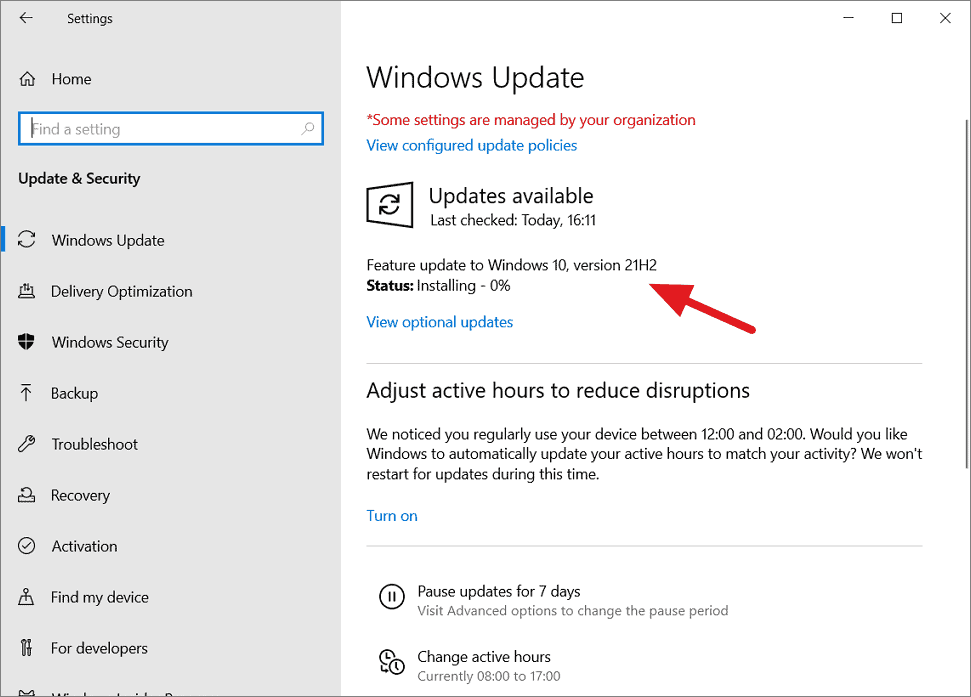
The simplest way to delay the Windows 11 upgrade is through the Windows Update settings. This method allows you to temporarily pause updates or decline the upgrade for a short period.
Windows + I.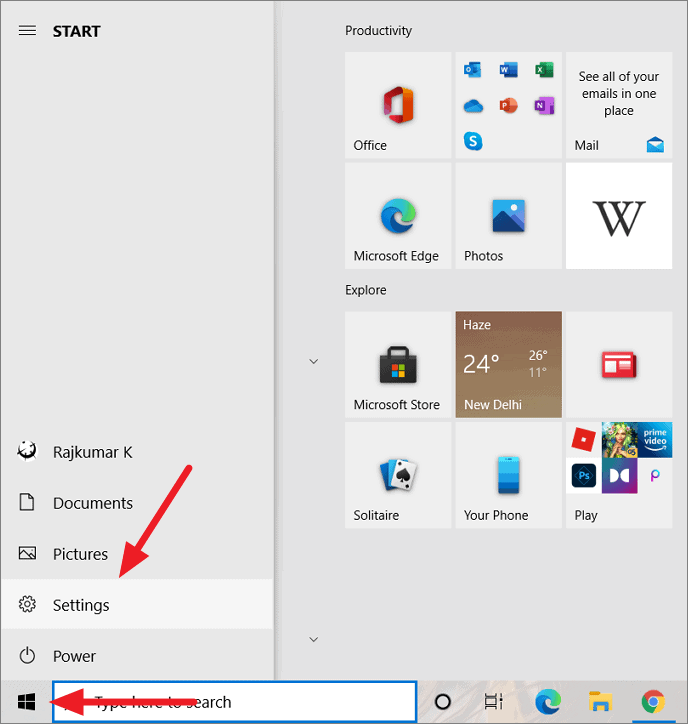

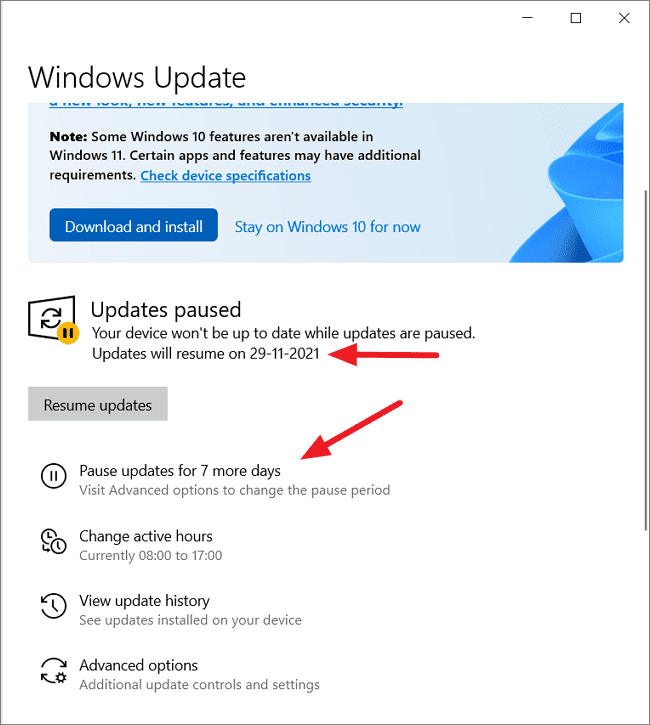
This will temporarily prevent the upgrade prompt from appearing again. However, the option to upgrade may reappear after some time.

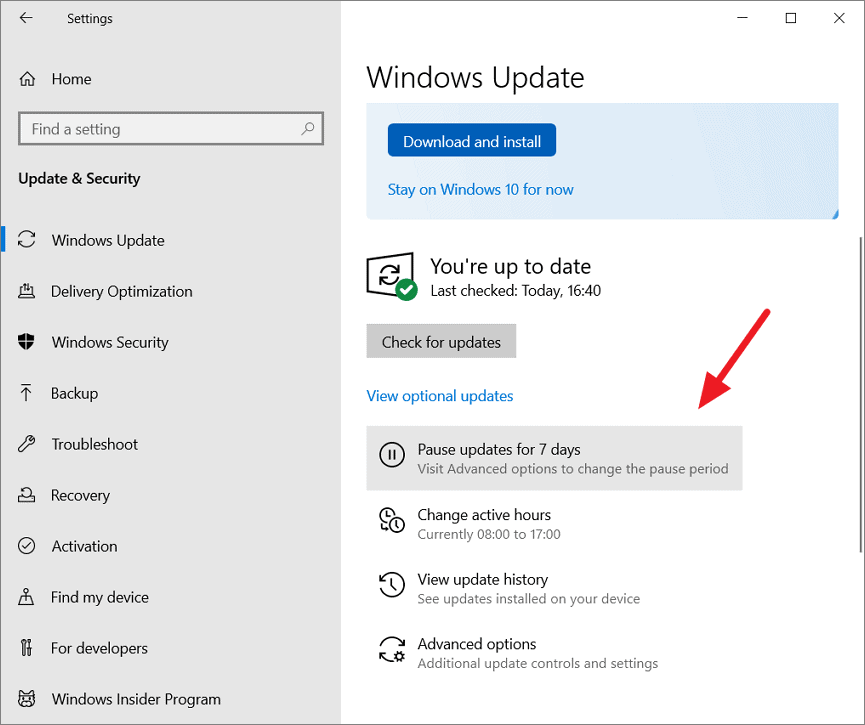
This will pause all updates for a week. You can extend the pause period by clicking Pause updates for 7 more days, up to a maximum of 35 days. After that, you’ll need to install new updates before you can pause again.
Under Pause updates, use the dropdown menu to select a specific date until which you want to pause updates.
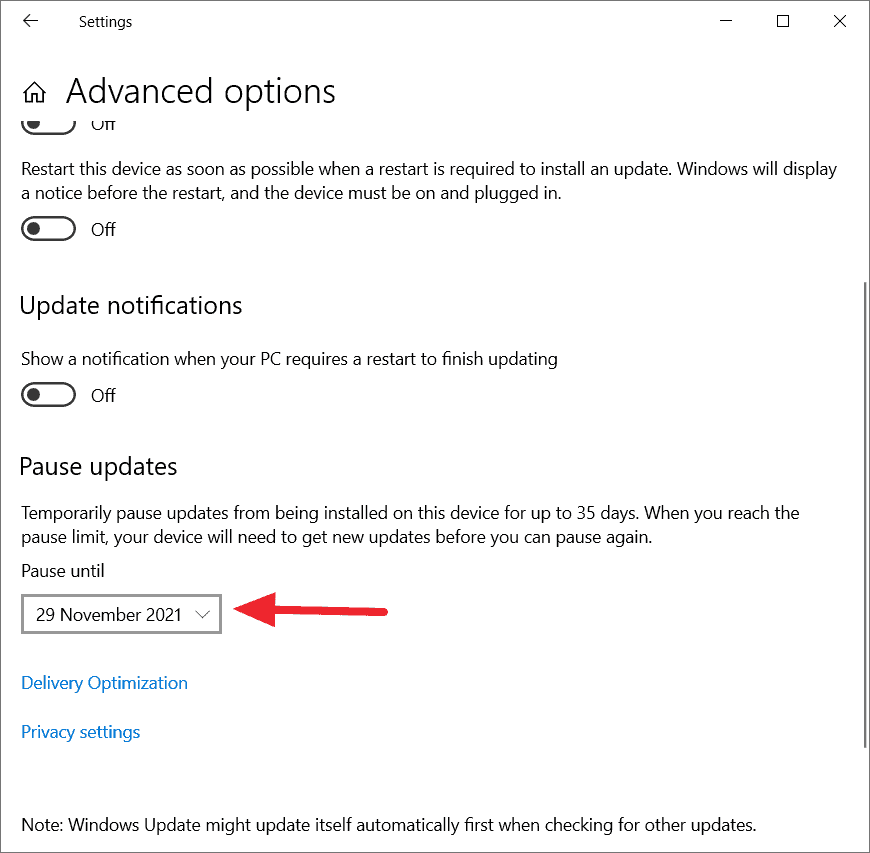
Keep in mind that this method only delays updates temporarily, and Windows will eventually prompt you to install updates again.
By following these methods, you can control when and if your Windows 10 PC upgrades to Windows 11, allowing you to continue using your preferred operating system without interruptions.


