Encountering the 'Access Denied' error when trying to end a process in Task Manager can be quite frustrating. While Task Manager is usually effective for terminating unresponsive or misbehaving applications, sometimes it doesn't have sufficient permissions or encounters processes that are difficult to kill. Here are some methods to forcefully end such stubborn processes on your Windows 11 PC.
1. Run Task Manager as Administrator
If insufficient permissions are preventing you from ending a process, launching Task Manager with administrative privileges can resolve the issue.
Step 1: Click on the search icon in the taskbar.
Step 2: Type Task Manager in the search bar.
Step 3: In the search results, on the right pane, select 'Run as administrator' for Task Manager.
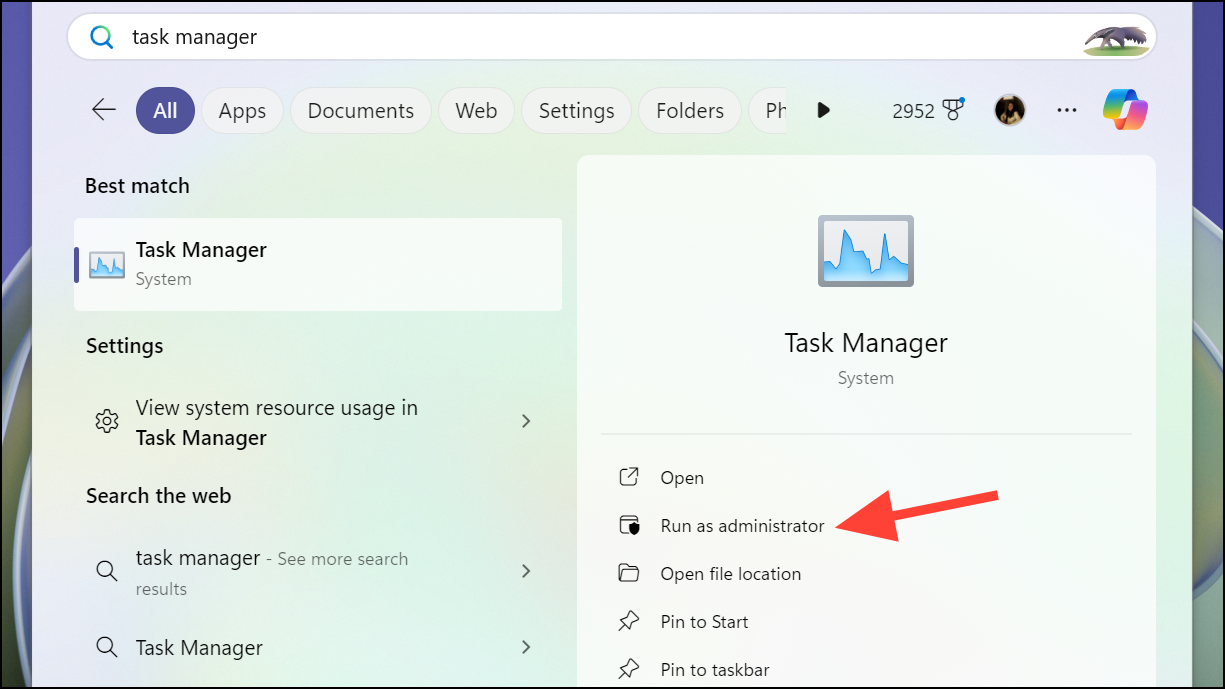
The Task Manager will now open with administrative rights. Attempt to terminate the problematic process again.
2. Use the Taskkill Command to Terminate the Process
If running Task Manager as administrator doesn't resolve the issue, you can use the Taskkill command in Command Prompt to forcefully terminate the process.
Step 1: Open Command Prompt with administrative privileges. Type cmd in the search bar, right-click on Command Prompt, and select Run as administrator.
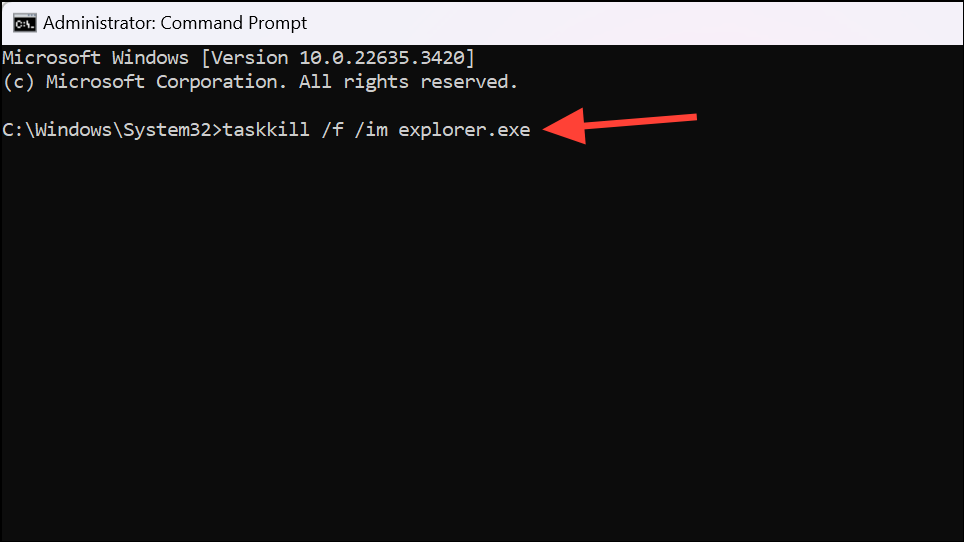
Step 2: If prompted by the User Account Control, click Yes to proceed.
Step 3: In the Command Prompt window, type the following command and press Enter: taskkill /f /im processname.exe
Replace processname.exe with the actual name of the process you want to terminate. For example, to terminate File Explorer, you would type: taskkill /f /im explorer.exe

Step 4: If you receive an error indicating that the process could not be terminated because of a child process, use the following command instead: taskkill /f /t /im processname.exe
The /f flag forcefully terminates the process, and the /t flag ensures that any child processes are also terminated.
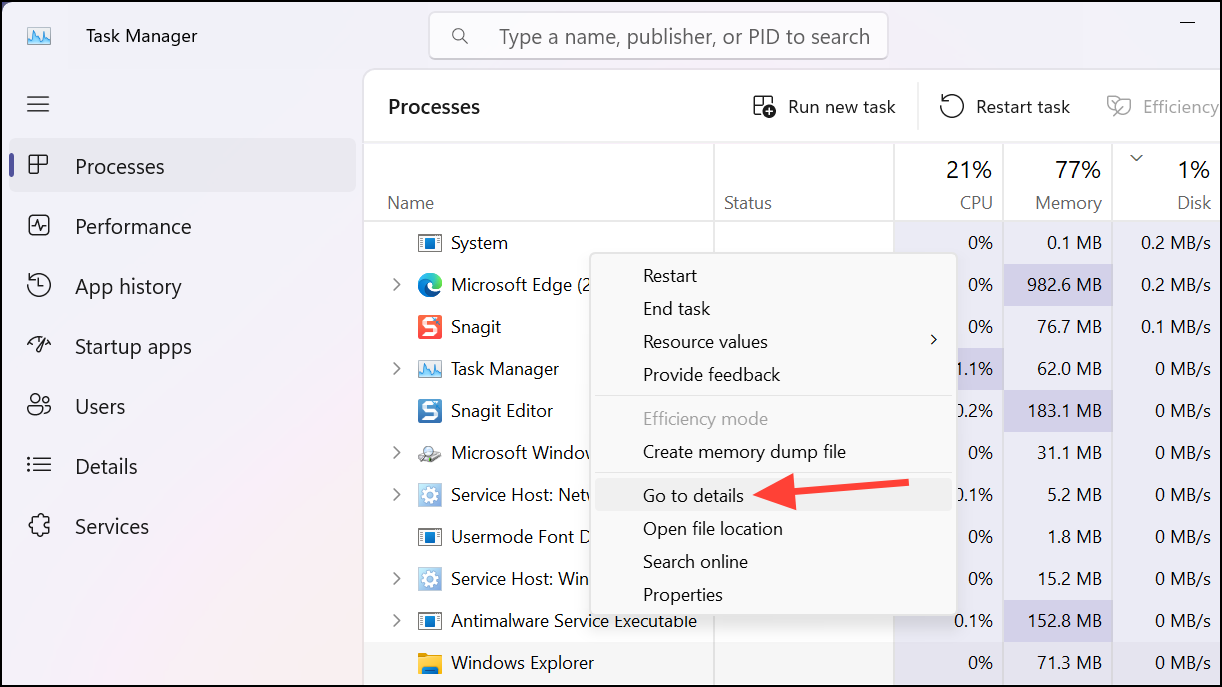
Note: If you're unsure of the process name, you can find it in Task Manager. Right-click on the process and select Go to details to see the exact name.
3. Use the WMIC Command to Terminate the Process
If the Taskkill command wasn't successful, you can try using the Windows Management Instrumentation Command-line (WMIC) to terminate the process.
Step 1: Open Command Prompt as an administrator. Type cmd in the search bar, right-click on Command Prompt, and choose Run as administrator.
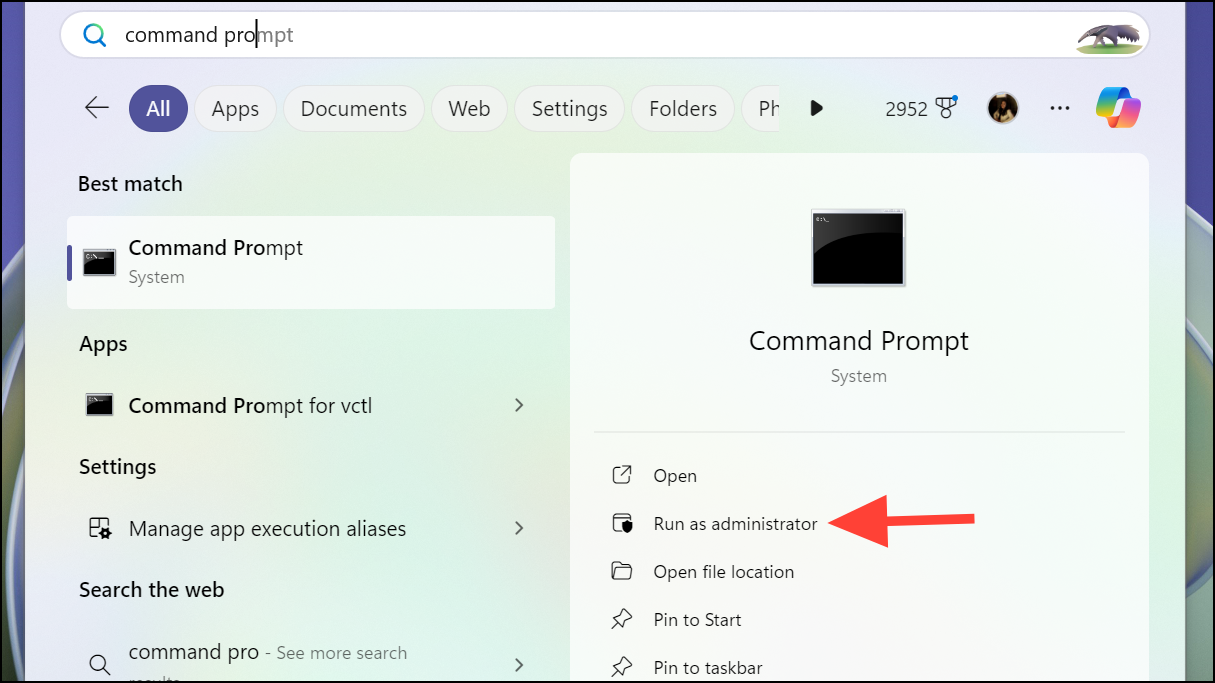
Step 2: Confirm any prompts from User Account Control by clicking Yes.
Step 3: In the Command Prompt window, enter the following command and press Enter: wmic process where name='processname.exe' call terminate
Replace 'processname.exe' with the actual name of the process (including the single quotes). For example, to terminate File Explorer, use: wmic process where name='explorer.exe' call terminate
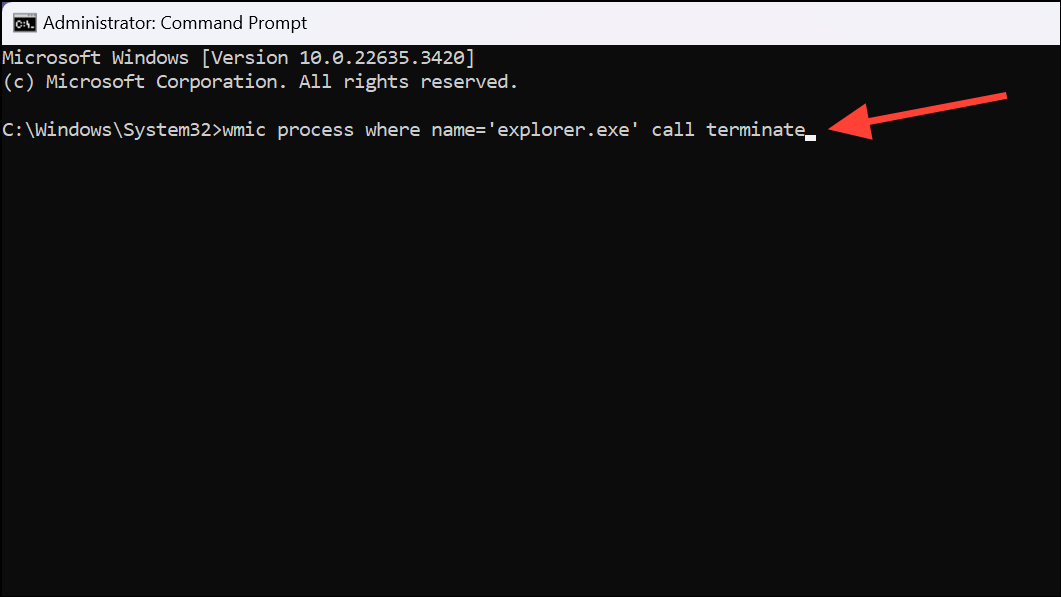
Step 4: If you're unsure of the process name, open Task Manager, right-click on the problematic process, and select Go to details.
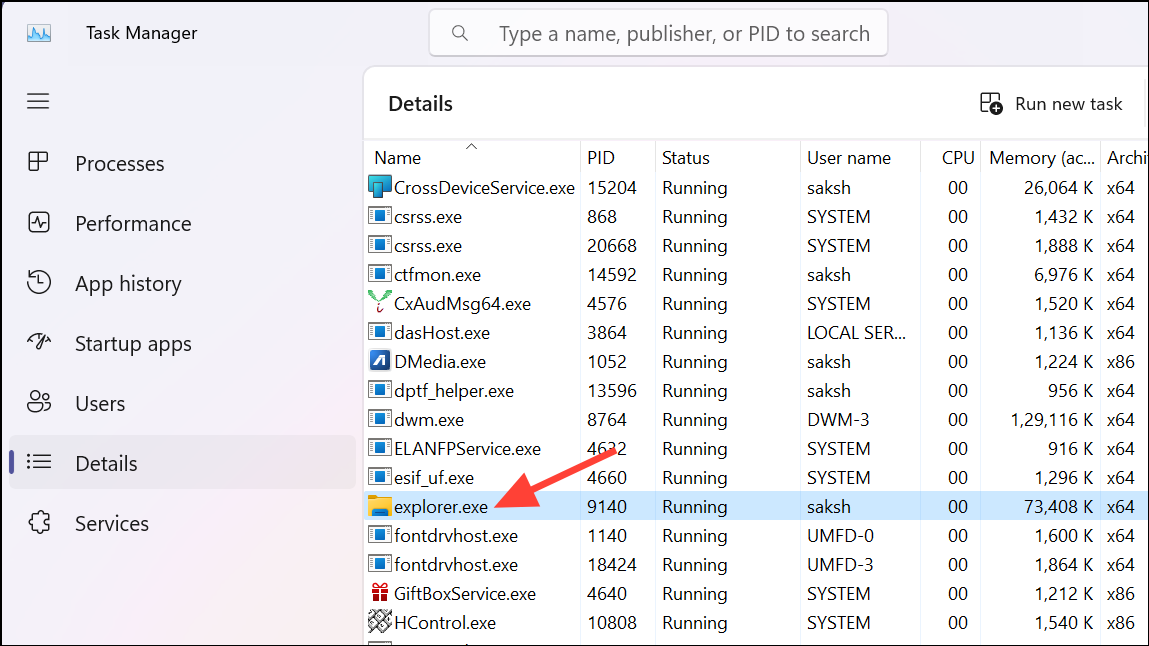
Step 5: The Details tab will display the exact name of the process.
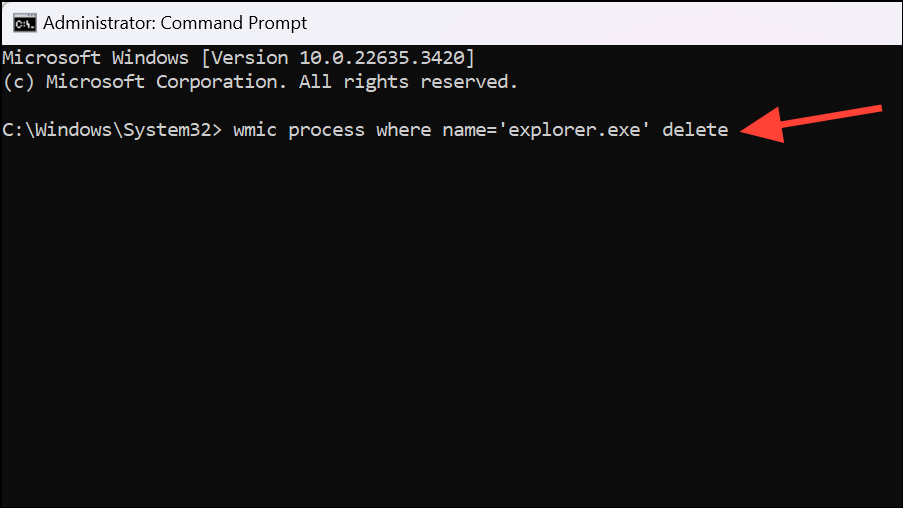
Step 6: If the process is still running after executing the command, use this more forceful command: wmic process where name='processname.exe' delete
This command forcefully terminates the process without allowing it to close gracefully. Check Task Manager to confirm if the process has ended.
4. Reboot Your PC
If none of the above methods work, restarting your computer may be the only way to terminate the stubborn process. This can resolve issues where a process is locked or waiting for a kernel resource.
While rebooting may be inconvenient, especially if you have unsaved work, it can help reset system resources and eliminate the problematic process.
By following these methods, you should be able to terminate any unresponsive or stubborn processes that are causing issues on your Windows 11 PC. If the problem persists, consider checking your system for malware, as malicious programs can resist termination and impact system performance.

