Updating your Windows 11 system is essential for optimal performance and security enhancements. Regular updates fix bugs and vulnerabilities, ensuring your system runs smoothly. But what happens when you encounter the dreaded "Error Encountered" message while trying to update?
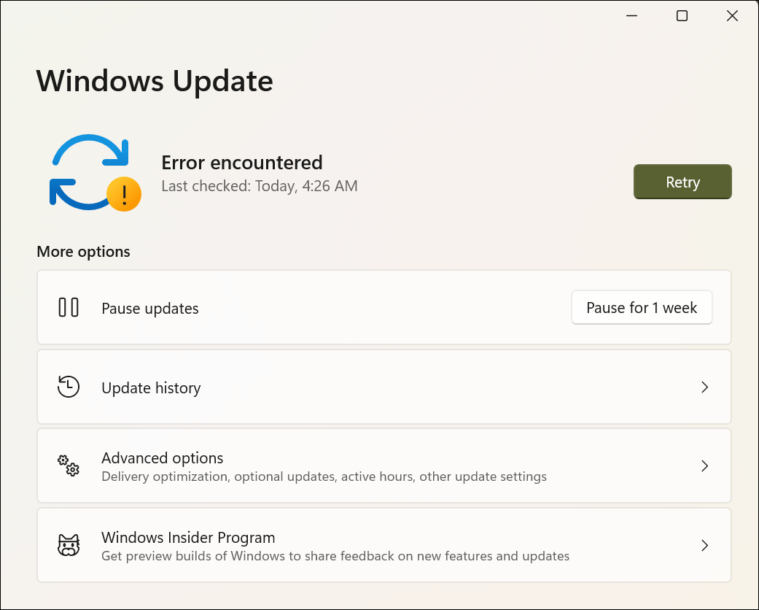
Many users face this issue, preventing them from installing the latest updates and security patches. Fortunately, there are several methods to resolve this error.
1. Reset Windows Update Components
If you're experiencing issues with Windows Update, resetting the Windows Update Components can often resolve the problem. This process will reset the services and components responsible for Windows updates.
To reset the Windows Update Components, follow these steps:
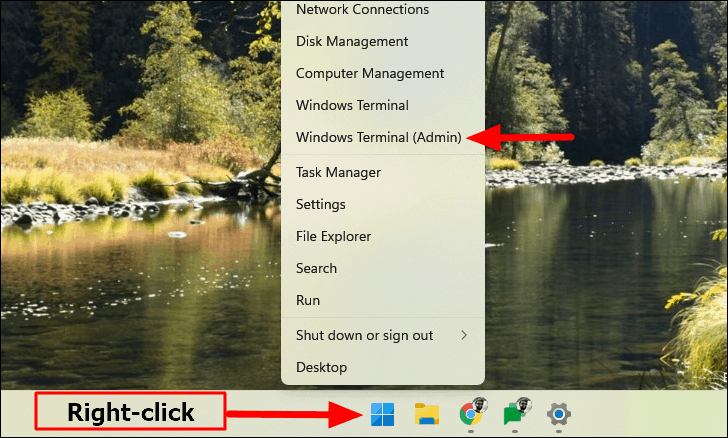
- Open an elevated Command Prompt. Right-click the
Starticon on the taskbar and selectWindows Terminal (Admin). ClickYesif prompted by the User Account Control (UAC).
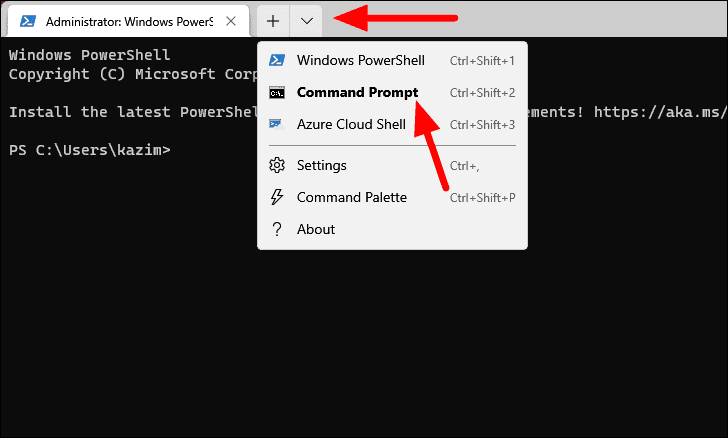
- In Windows Terminal, open the Command Prompt tab by clicking the downward arrow at the top and selecting
Command Prompt, or pressCtrl+Shift+2.
- Stop the BITS, Windows Update, and Cryptographic services by executing the following commands one by one:
net stop bitsnet stop wuauservnet stop cryptsvc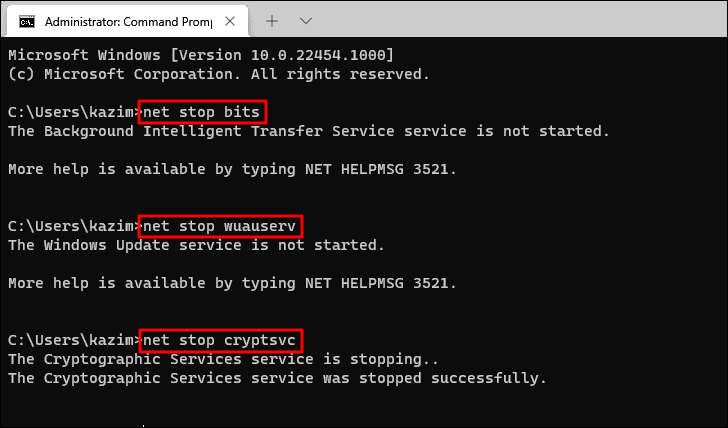
- Delete the
qmgr*.datfiles by running:
Del "%ALLUSERSPROFILE%\Application Data\Microsoft\Network\Downloader\qmgr*.dat"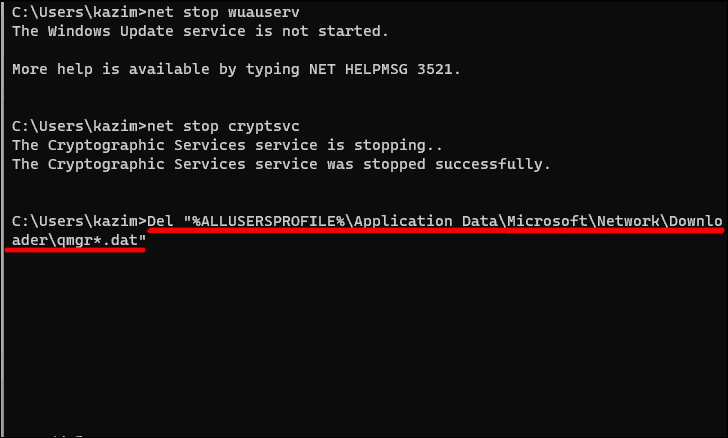
Note: If you continue to experience the error after following these steps, proceed with the next commands.
- Rename the
SoftwareDistributionandcatroot2folders by executing:
Ren %Systemroot%\SoftwareDistribution\DataStore DataStore.bakRen %Systemroot%\SoftwareDistribution\Download Download.bakRen %Systemroot%\System32\catroot2 catroot2.bak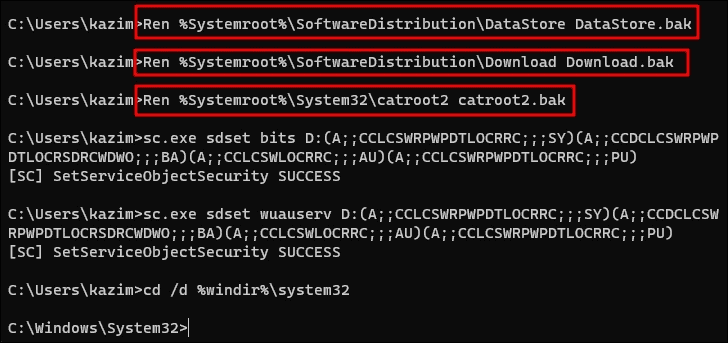
- Reset the BITS and Windows Update services to their default security descriptor:
sc.exe sdset bits D:(A;;CCLCSWRPWPDTLOCRRC;;;SY)
(A;;CCDCLCSWRPWPDTLOCRSDRCWDWO;;;BA)
(A;;CCLCSWLOCRRC;;;AU)
(A;;CCLCSWRPWPDTLOCRRC;;;PU)
sc.exe sdset wuauserv D:(A;;CCLCSWRPWPDTLOCRRC;;;SY)
(A;;CCDCLCSWRPWPDTLOCRSDRCWDWO;;;BA)
(A;;CCLCSWLOCRRC;;;AU)
(A;;CCLCSWRPWPDTLOCRRC;;;PU)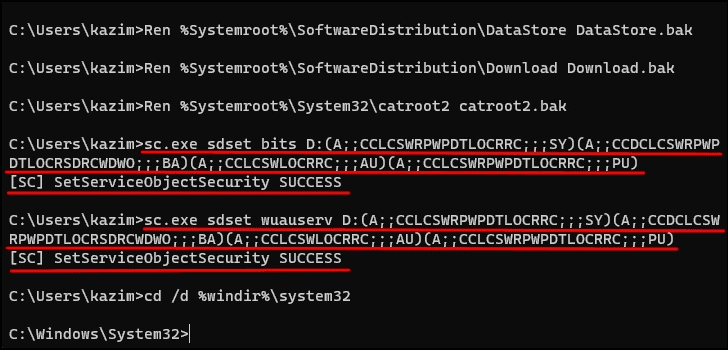
- Re-register the BITS and Windows Update files by running the following commands. Execute them one by one:
regsvr32.exe atl.dll
regsvr32.exe urlmon.dll
regsvr32.exe mshtml.dll
regsvr32.exe shdocvw.dll
regsvr32.exe browseui.dll
regsvr32.exe jscript.dll
regsvr32.exe vbscript.dll
regsvr32.exe scrrun.dll
regsvr32.exe msxml.dll
regsvr32.exe msxml3.dll
regsvr32.exe msxml6.dll
regsvr32.exe actxprxy.dll
regsvr32.exe softpub.dll
regsvr32.exe wintrust.dll
regsvr32.exe dssenh.dll
regsvr32.exe rsaenh.dll
regsvr32.exe gpkcsp.dll
regsvr32.exe sccbase.dll
regsvr32.exe slbcsp.dll
regsvr32.exe cryptdlg.dll
regsvr32.exe oleaut32.dll
regsvr32.exe ole32.dll
regsvr32.exe shell32.dll
regsvr32.exe initpki.dll
regsvr32.exe wuapi.dll
regsvr32.exe wuaueng.dll
regsvr32.exe wuaueng1.dll
regsvr32.exe wucltui.dll
regsvr32.exe wups.dll
regsvr32.exe wups2.dll
regsvr32.exe wuweb.dll
regsvr32.exe qmgr.dll
regsvr32.exe qmgrprxy.dll
regsvr32.exe wucltux.dll
regsvr32.exe muweb.dll
regsvr32.exe wuwebv.dll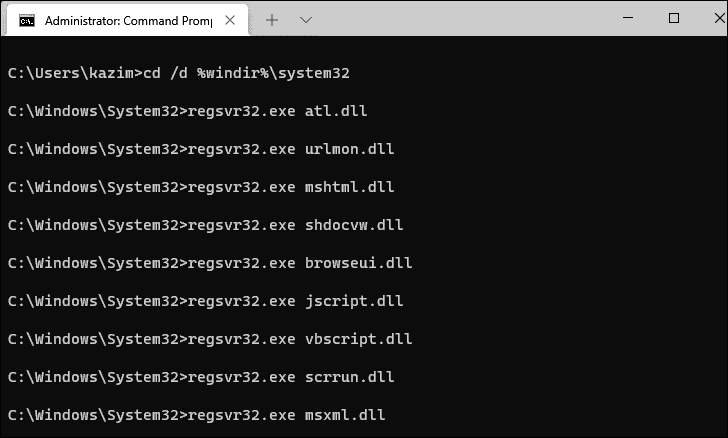
- Reset the network configuration by typing:
netsh winsock reset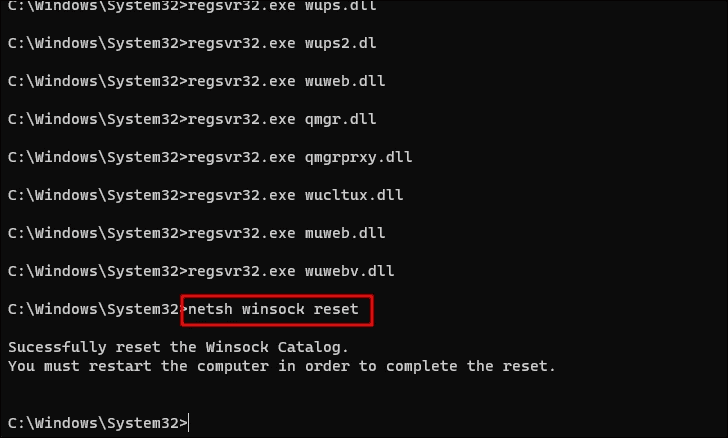
- Restart the services you stopped earlier by running:
net start bitsnet start wuauservnet start cryptsvc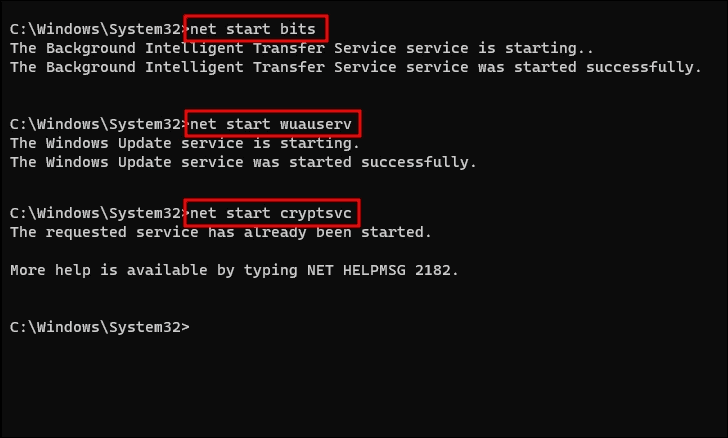
- Restart your computer to apply the changes.
After completing these steps, try running Windows Update again to see if the issue is resolved.
2. Run the Windows Update Troubleshooter
Windows includes a built-in troubleshooter that can automatically detect and fix common update issues.
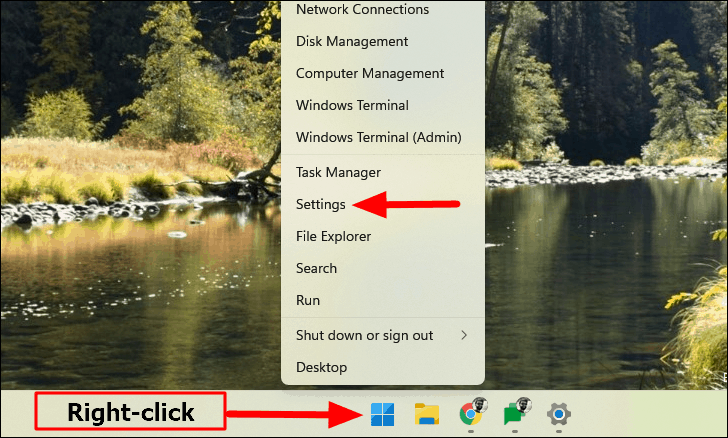
- Open Settings by right-clicking the
Starticon and selectingSettings, or pressWindows+I.
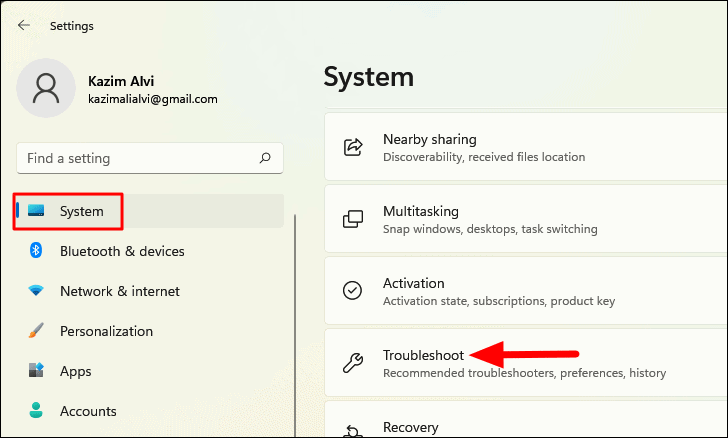
- In the
Systemtab, click onTroubleshoot.
- Select
Other troubleshooters.
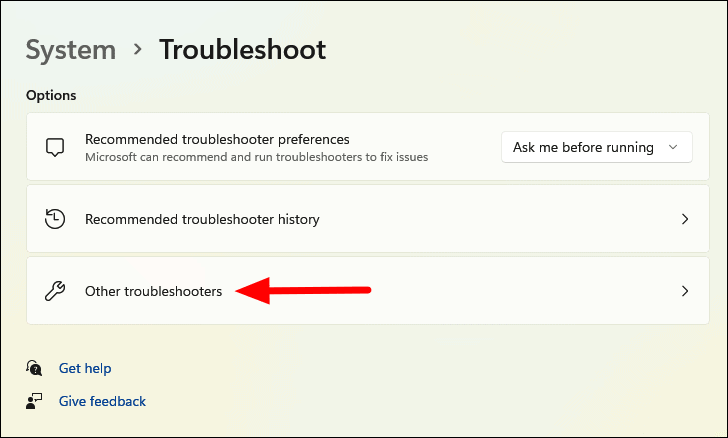
- Find
Windows Updateand clickRunnext to it.
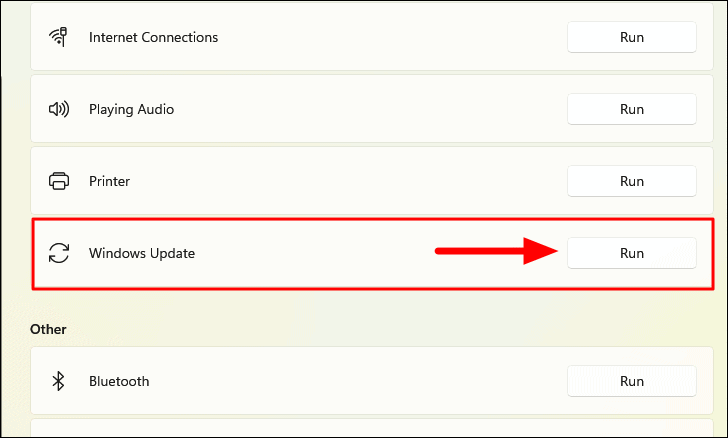
The troubleshooter will scan for issues and attempt to fix them. Follow any on-screen instructions, then restart your computer and try updating again.
3. Automate Windows Update Services with Command Prompt
If certain services required for Windows Update are not running, you might encounter update errors. Automating these services can help resolve the issue.
- Open an elevated Command Prompt as described earlier.
- Execute the following commands one by one:
sc config wuauserv start=autosc config cryptSvc start=autosc config bits start=autosc config trustedinstaller start=auto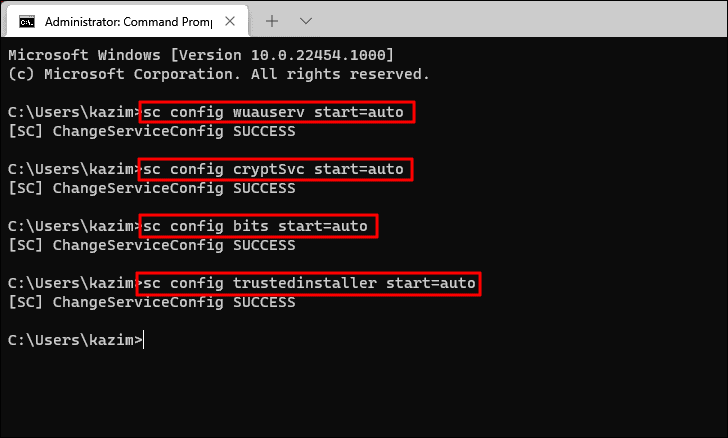
After executing these commands, close the terminal, restart your computer, and try updating Windows again.
4. Download Security Intelligence Update
Sometimes, updating the Security Intelligence definitions can fix Windows Update errors.
- Press
Windows+Sto open the search bar, typeWindows Security, and open it.
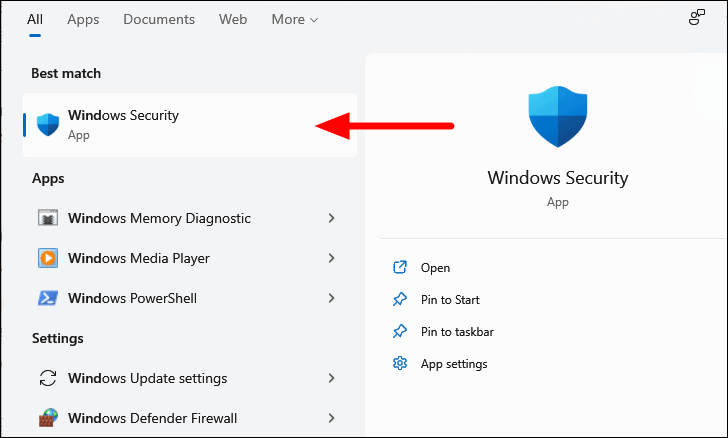
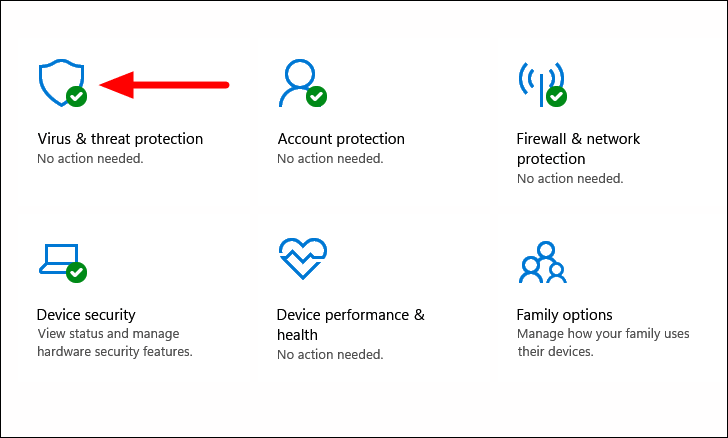
- Click on
Virus & threat protection.
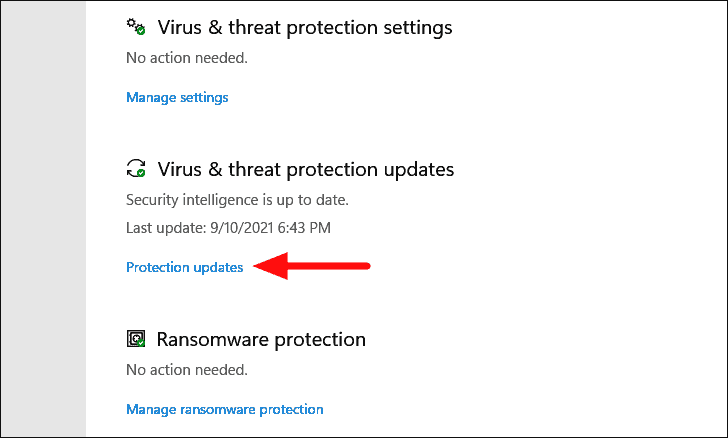
- Under
Virus & threat protection updates, selectProtection updates.
- Click
Check for updatesto download and install any available updates.
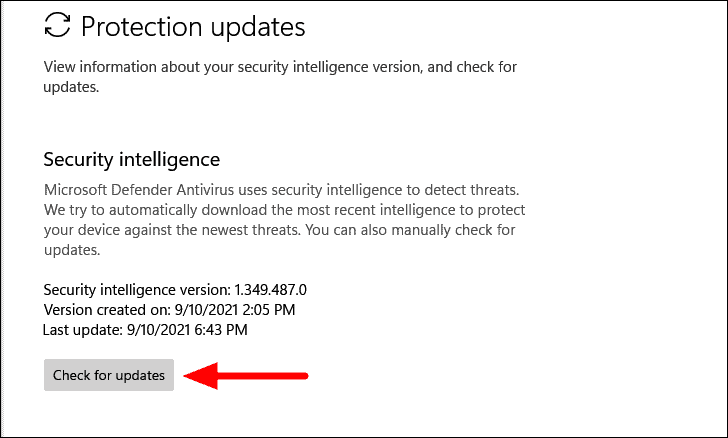
Once the updates are installed, restart your computer and attempt to update Windows again.
5. Reset Your Windows 11 PC
If all else fails, resetting your PC may resolve the issue. This should be considered a last resort, as it reinstalls Windows and can remove apps and settings.
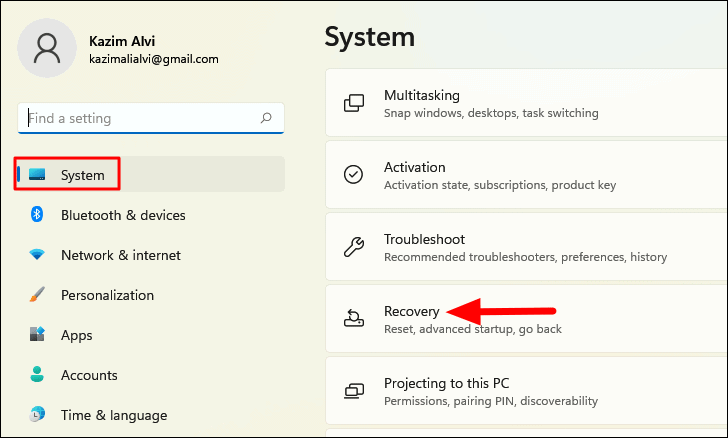
- Open Settings by pressing
Windows+Iand selectSystemfrom the sidebar. - Click on
Recoveryon the right pane.
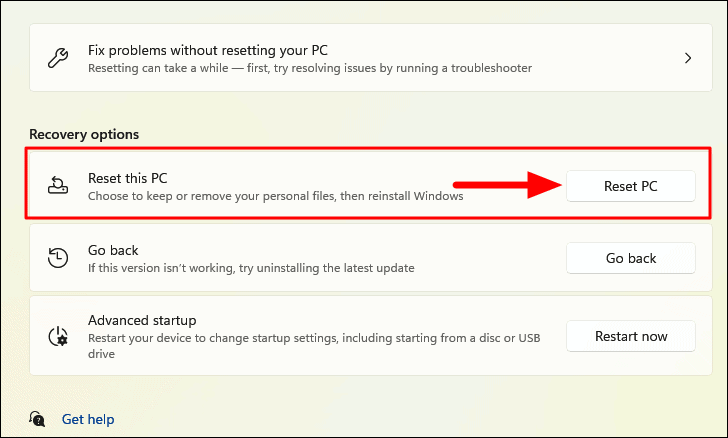
- Under
Recovery options, clickReset PCnext toReset this PC.
- Choose
Remove everything.
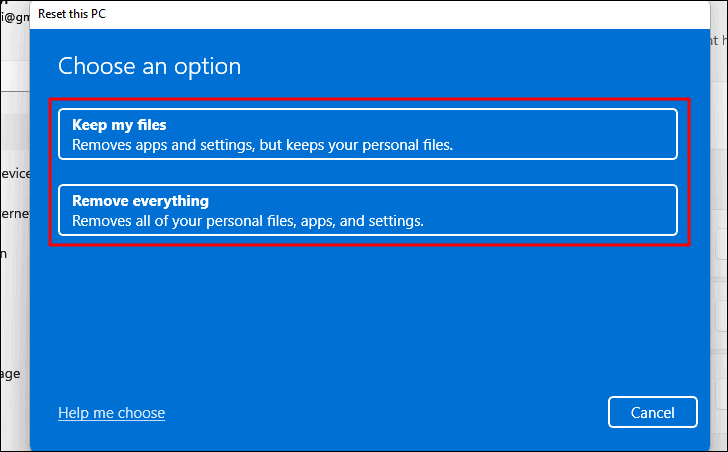
Note: This option will delete all your personal files, apps, and settings. Ensure you have a backup of important data.
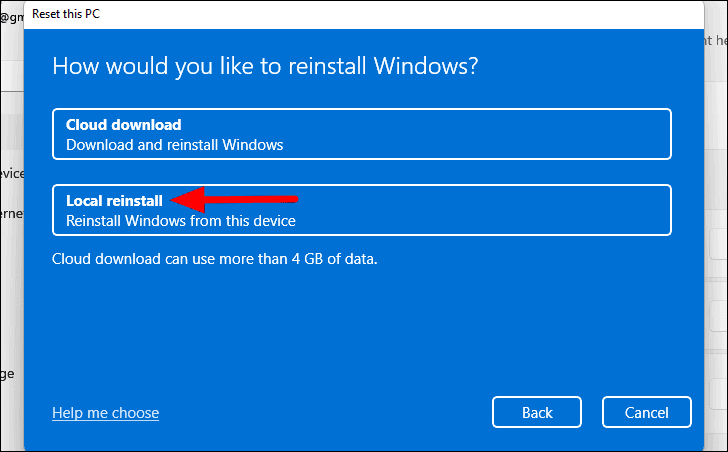
- Select
Local reinstallas the installation method.
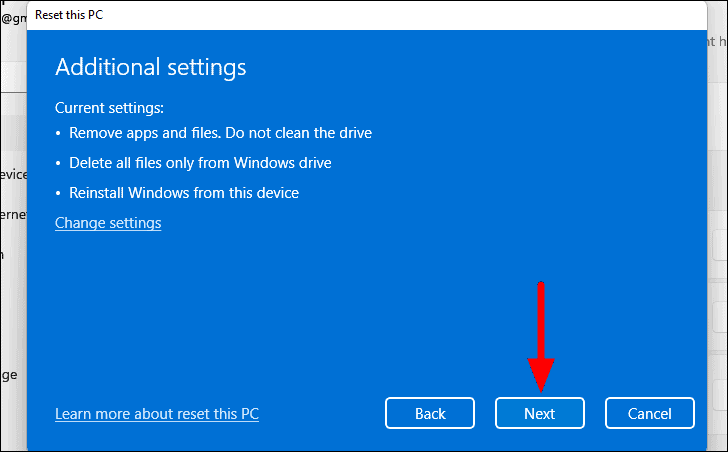
- Review the settings and click
Next.
- Click
Resetto begin the reset process.
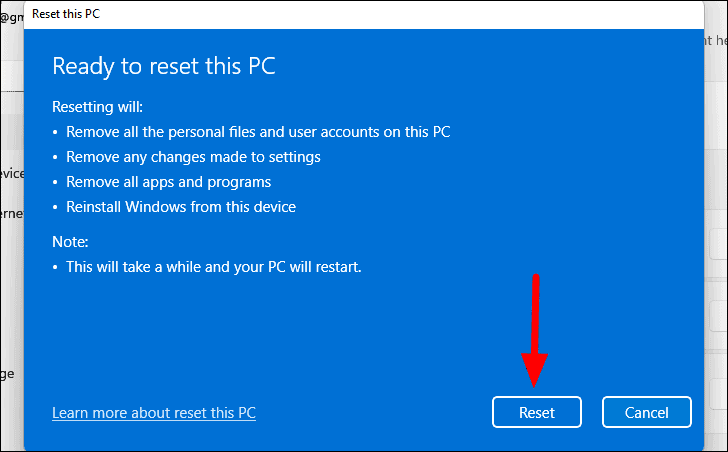
After the reset is complete, your system should no longer encounter the update error.
By following these methods, you should be able to resolve the "Error Encountered" issue and successfully update your Windows 11 system.







Member discussion