If you own an older PC that doesn’t meet the stringent requirements for Windows 11, Tiny11 might be the solution you need. Tiny11 is a lightweight version of Windows 11 that can run smoothly on less capable hardware, allowing you to experience the new operating system without needing to upgrade your computer. In this guide, we’ll show you how to download and install Tiny11 on your older PC.
What is Tiny11?
Tiny11 is a modified, minimalistic version of Windows 11 Pro 22H2, crafted specifically for older computers that can’t officially support Windows 11. Developed by the independent creator NTDev, Tiny11 removes unnecessary components to reduce system requirements significantly.
This streamlined version requires only about 8 GB of disk space, a substantial reduction from the 20 GB needed for a standard Windows 11 installation. You can further decrease the space it occupies by applying system file compression. Tiny11 also operates efficiently with just 2 GB of RAM, and while it has been tested to run on even less, performance may become unstable with frequent slowdowns or potential crashes.
The latest version of Tiny11 eliminates the need for TPM, Secure Boot, and specific CPU requirements, which are common barriers for installing Windows 11 on older systems.
How is Tiny11 Different from Windows 11?
Tiny11 achieves its reduced footprint by stripping away many default applications and services considered unnecessary or “bloatware.” Missing apps include Microsoft Teams, Microsoft Edge, and various sponsored programs. However, essential tools like Notepad, Paint, Calculator, and accessibility features such as Narrator and Magnifier remain intact. You still have access to the Microsoft Store, allowing you to download any additional apps you need, including web browsers, or you can transfer applications via a flash drive from another computer.
Unlike the standard Windows 11 installation, which mandates a Microsoft account, Tiny11 allows you to set up a local account by default. You can choose to log in with a Microsoft account later if you prefer. The reintroduction of the Windows Store Component in the latest update enables you to install new features, languages, and optional components, and simplifies the process of obtaining Windows updates, including drivers and security patches through Windows Update.
Most security features, such as Microsoft Defender Antivirus, Core Isolation, and Data Encryption, are preserved in Tiny11. However, it’s important to note that Tiny11 is not a serviceable update and will not receive direct patches or updates from Microsoft.
Should You Install Tiny11?
Deciding whether to install Tiny11 depends on your specific needs and circumstances. If your system meets the official requirements for Windows 11, it’s generally recommended to stick with the standard version. Even NTDev advises users with compatible systems to avoid Tiny11 due to its reduced feature set and potential limitations.
Tiny11 is designed primarily for users with older hardware that cannot support Windows 11 officially. While it allows these systems to run the latest operating system, it does so by omitting certain features and applications. You may encounter occasional errors or find that some functionalities are missing compared to a full Windows 11 installation. Additionally, as an unofficial build, there are inherent risks involved, so it’s wise to exercise caution and perhaps avoid installing it on your primary machine without thorough consideration.
For users interested in running Windows 11 on a virtual machine, Tiny11 presents a compelling option. Its lightweight nature and reduced resource consumption make it faster and more efficient in virtual environments compared to the full version of Windows 11.
How to Install Tiny11: A Step-by-Step Guide
To install Tiny11, you’ll need to download the ISO file, create a bootable USB drive, adjust your computer’s boot settings, and proceed with the installation. While upgrading from Windows 10 is possible, a clean installation is recommended due to potential errors reported by some users during the upgrade process. Ensure you have a valid Windows 10/11 Pro product key to activate Tiny11 after installation.
First, download the Tiny11 ISO image from the official source provided by NTDev. Visit the Tiny11 page on Internet Archive. Be cautious of unofficial sources or modified versions that may not be safe.
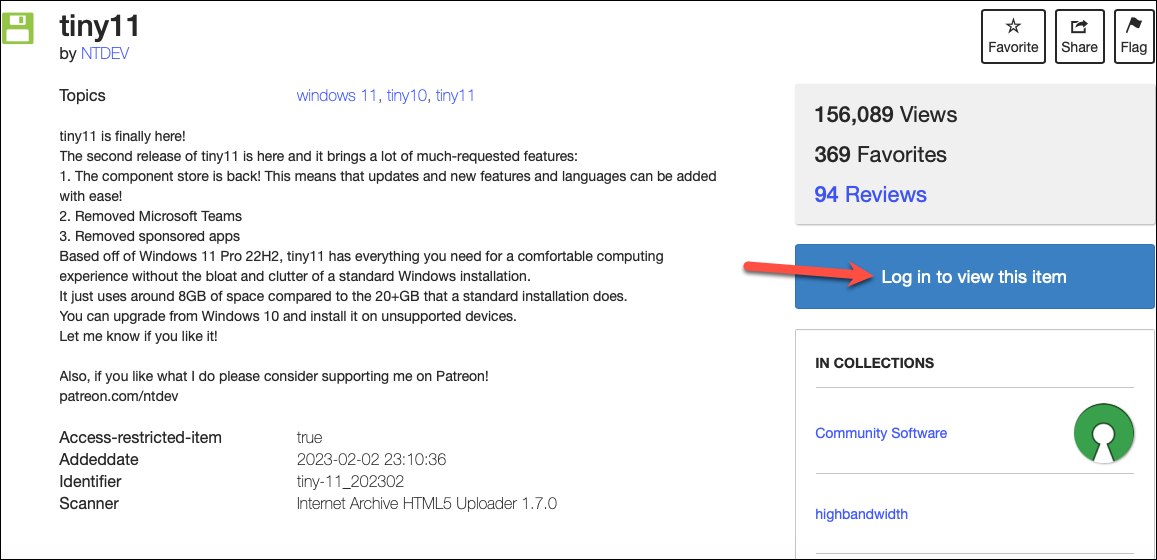
You will need to log in to the Internet Archive to access the download. If you don’t have an account, you can sign up for free. Click the ‘Log in to view this item’ button to proceed to the login page.
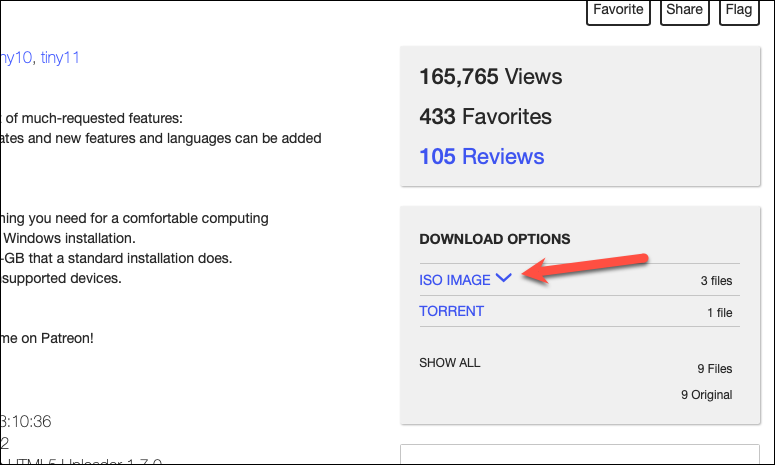
After logging in, click the downward arrow next to the ‘ISO IMAGE’ option to view available downloads.
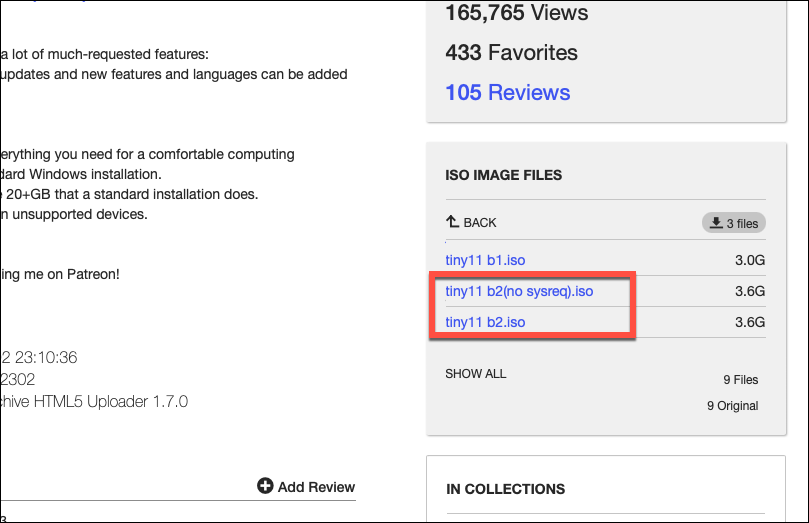
Select the tiny11 b2(nosysreq).iso file to download the version without TPM and Secure Boot requirements. This file is approximately 3.6 GB in size. If your system meets Windows 11’s standard requirements, you may choose the tiny11 b2.iso file instead.
Keep in mind that downloading from the Internet Archive may be slower due to bandwidth limitations, even with a fast internet connection. If available, you can opt to download via torrent for potentially faster speeds.
After downloading the ISO file, you’ll need to create a bootable USB drive. A tool like Rufus can help you accomplish this easily. Follow the steps outlined in this guide for creating a bootable Windows 11 USB drive. Although the guide is for Windows 11, the process is the same for Tiny11.

If you’re installing Tiny11 on a virtual machine, you can mount the ISO file directly without creating bootable media. Ensure that your virtual machine is allocated at least 2 CPU cores, as Tiny11 cannot bypass Windows 11’s CPU core requirements.
To boot from the USB drive, you’ll need to adjust the boot order in your computer’s BIOS or UEFI settings. This procedure varies depending on your computer’s manufacturer.
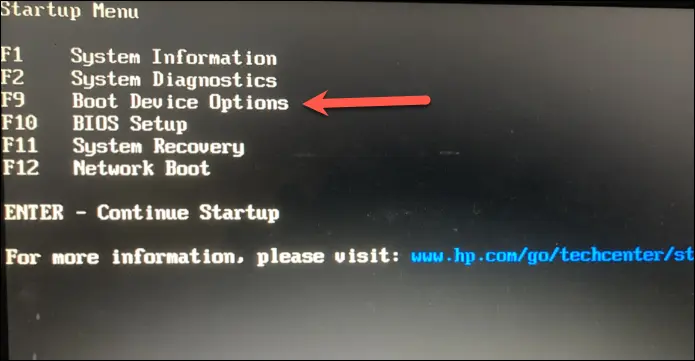
Restart your computer and enter the BIOS settings by pressing the appropriate key during startup (common keys include DEL, ESC, F1, or F2). Consult your system’s manual or manufacturer website for the exact key if necessary. You can also access BIOS settings through Windows; instructions are available for Windows 10 and Windows 11.
With the computer powered off, insert the bootable USB drive. Power on the computer and enter the BIOS settings. Navigate to the Boot options or Boot order menu. The specific steps may vary, so refer to your system’s documentation for guidance.
Set the USB drive as the primary boot device. Use the arrow keys to navigate through the options and press Enter to select or confirm your choices.
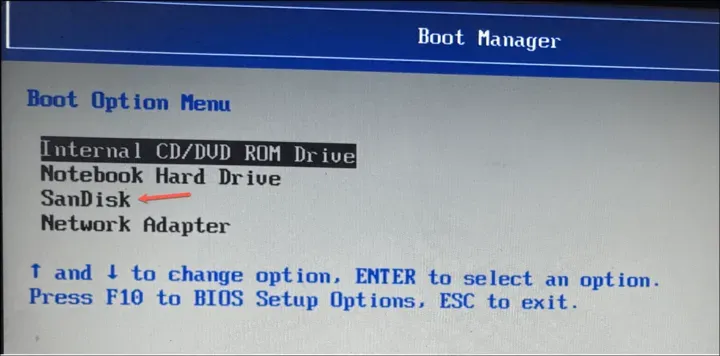
Save your changes and exit the BIOS. The computer will restart and boot from the USB drive. The boot process may take a few moments, so be patient.
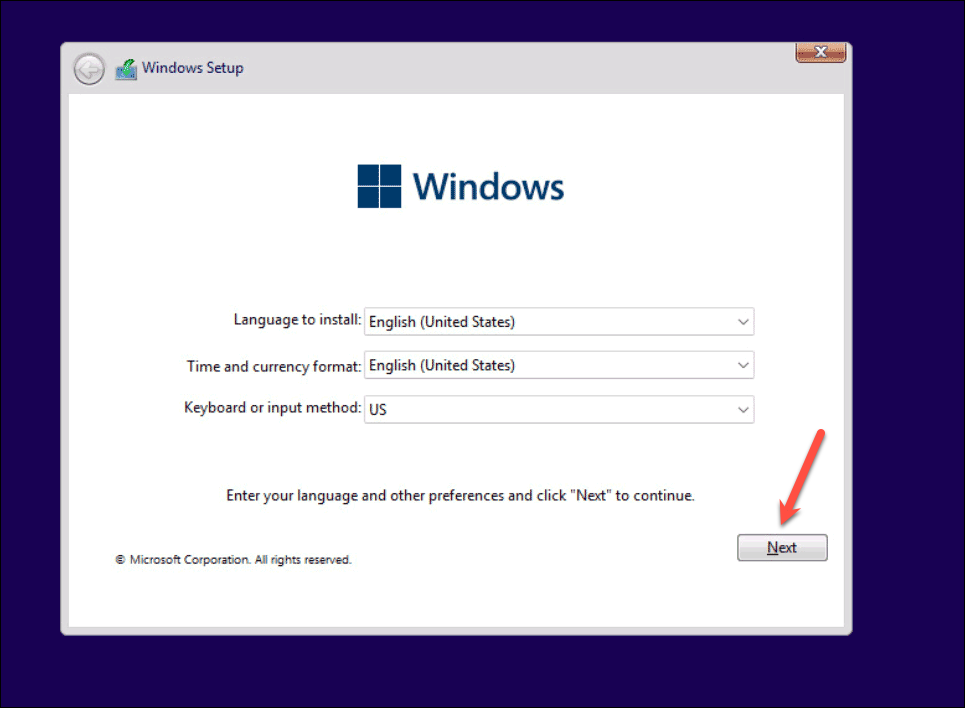
With the installer launched, you’ll see the ‘Windows Setup’ screen. Follow these steps to complete the installation of Tiny11:
Select your preferred language, time and currency format, and keyboard or input method. Click ‘Next’ to proceed.
Accept the Microsoft Software License Terms by checking the ‘I accept the license terms’ box, then click ‘Next’.
Choose the type of installation. For a fresh installation, select ‘Custom: Install Windows only (advanced)’.
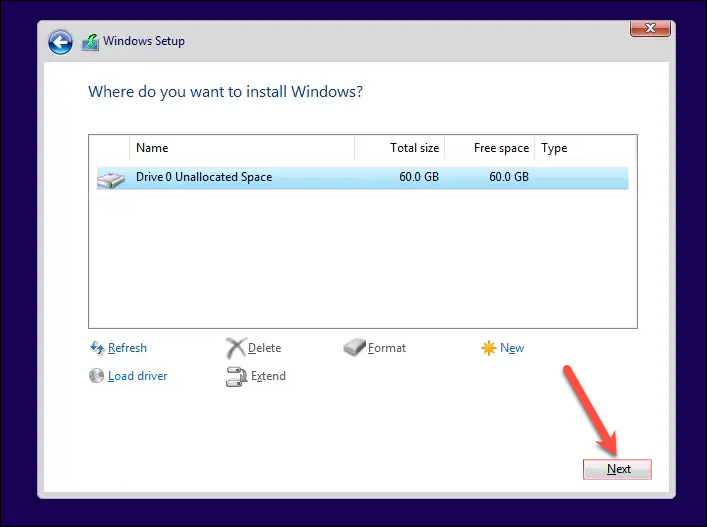
Select the drive or partition where you want to install Tiny11. If necessary, you can format or create new partitions, but be aware that this will erase all data on the selected drive. Proceed carefully and make sure you’ve backed up any important data before continuing. Once selected, click ‘Next’.
The installation process will begin, and your computer may restart several times. Once the installation is complete, you’ll proceed through the setup process.
Follow the on-screen instructions to select your region and keyboard layout.
When prompted to sign in, create a local account by entering a username and password. Tiny11 allows you to use a local account by default, with the option to sign in with a Microsoft account later if you choose.
Configure your privacy settings and other preferences as prompted to finish the setup.
After completing these steps, you’ll arrive at the Tiny11 desktop. You’ve successfully installed Tiny11 on your computer and can now begin using your lightweight Windows 11 operating system.
Tiny11 provides a viable option for users with older hardware or those seeking a streamlined version of Windows 11 for virtual machines. While it may not offer the full suite of features found in the standard version, it allows you to experience Windows 11 on devices that might otherwise be unsupported. Always consider the potential risks of using unofficial software and ensure it aligns with your needs before proceeding.


