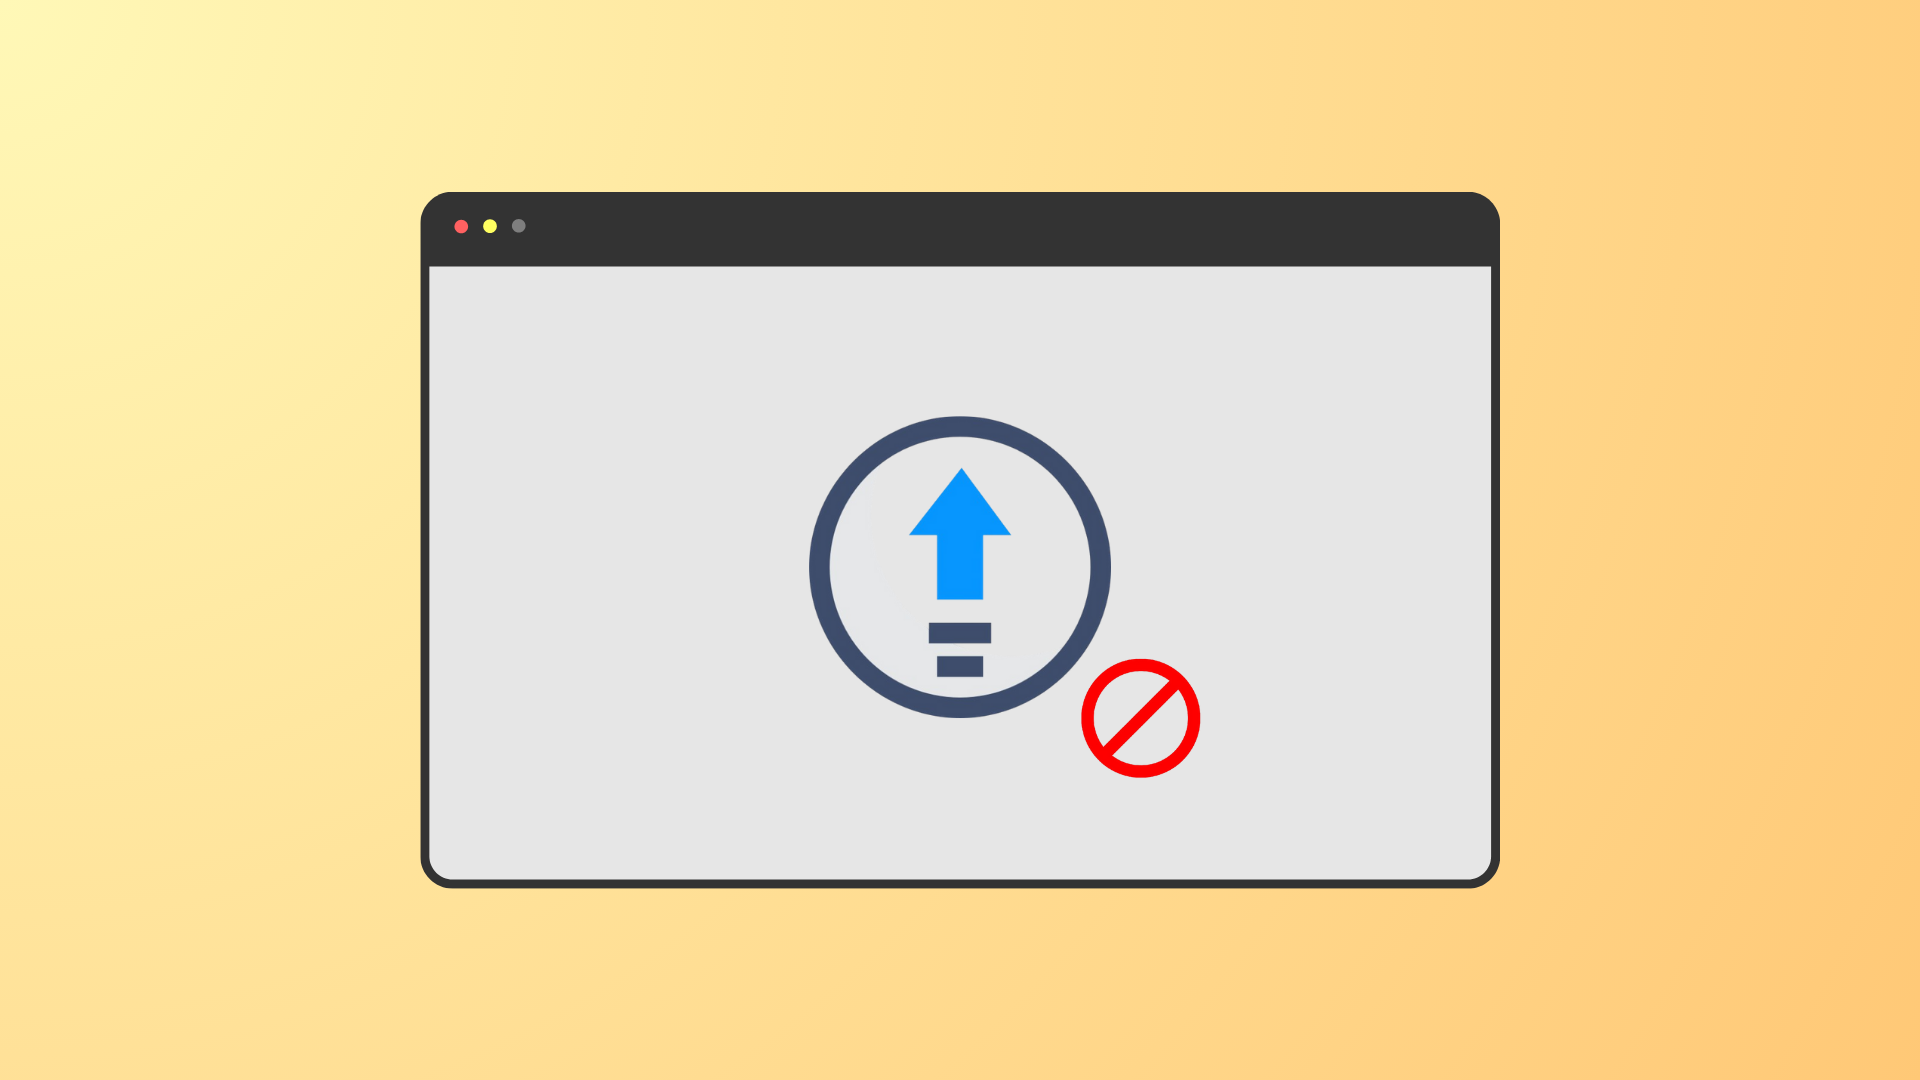
The ‘Auto Sign-in’ feature of Chrome is a boon to the browser’s users. It completely eliminates the use of a third-party password manager along with the need of remembering passwords.
However, many around the world have been facing an issue with Chrome where it is either not saving any new passwords for the users, or not auto-signing them into their accounts using already saved passwords.
Situations like this are not always grim but are definitely very inconvenient; hence, we have some solutions for you that will definitely help your resolve this pesky issue.
Make Sure you have the Latest Version of Chrome
First and foremost, you should make sure you are running the latest version of the Chrome browser on your device.
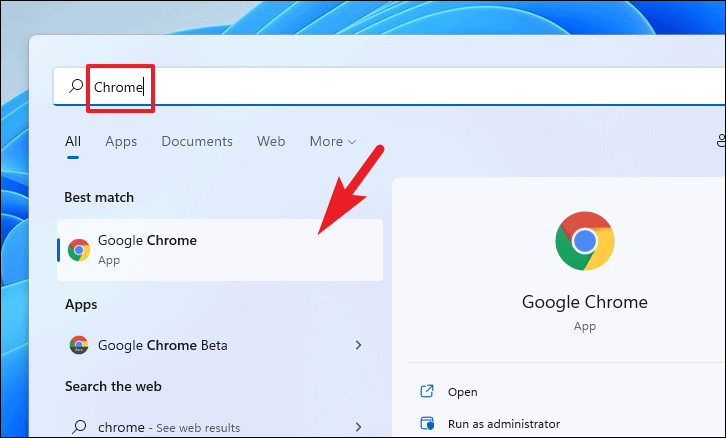
To check if you have an update available, launch the Chrome app either from the pinned app in the taskbar, Start Menu, or search for it from the Start Menu.

Then, click on the kebab menu icon (three vertical dots) present on the top right corner of the screen. After that, hover over the ‘Help’ option and then click to select the ‘About Google Chrome’ option.
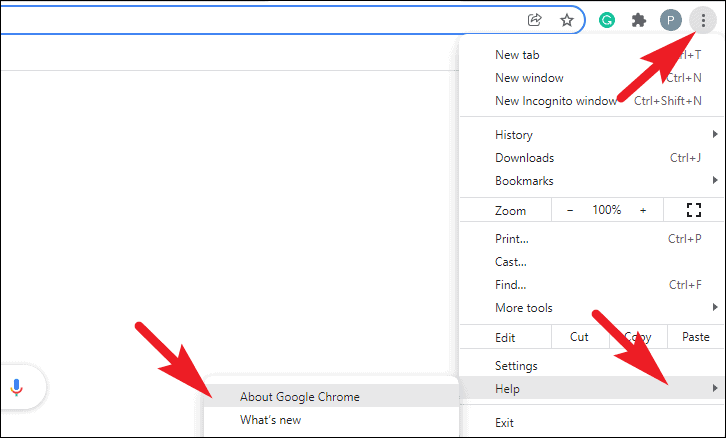
Now, Chrome will check if you have an update available, if there is click on the ‘Update’ button’ to update Chrome. In case, it is already up to date, jump to the next section.
Check your Password Settings
There could be a probability that your password settings have been changed and that is contributing to this problem. If that’s the case, this would resolve the issue for you in no time.
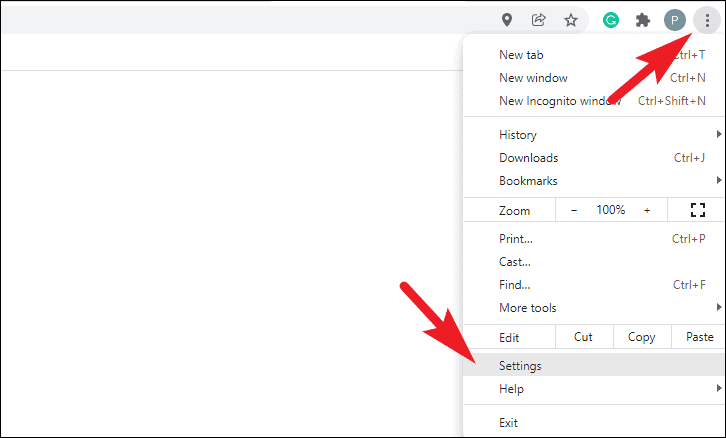
To do so, launch the Chrome app either from the desktop or by searching for it from the Start Menu.

Next, click on the kebab menu icon (three vertical dots) present on the top right corner of the Chrome window. After that, select the ‘Settings’ option from the expanded list to continue.
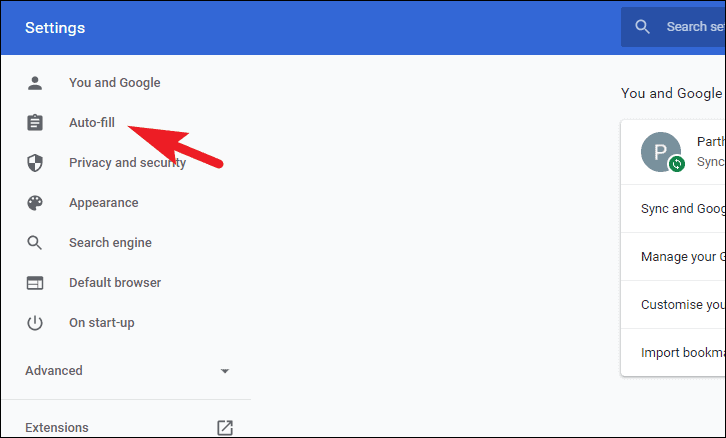
Now, click to select the ‘Auto-fill’ tab from the left sidebar.
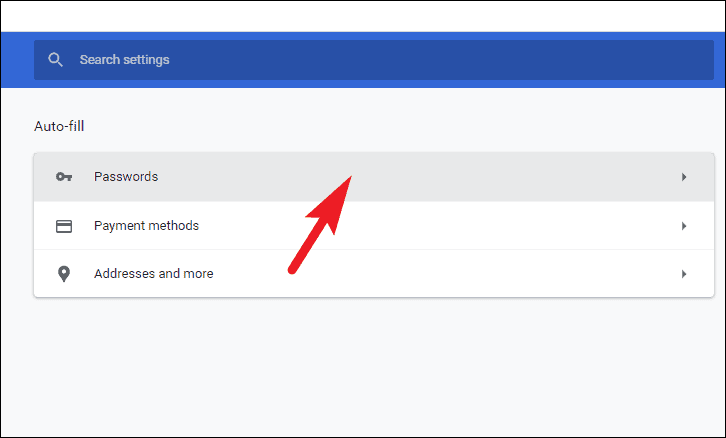
Then, from the right section of the window, click on the ‘Passwords’ option to proceed.
Now, on the next screen, make sure the switch following the ‘Offer to save passwords’ option is in the ‘On’ position.
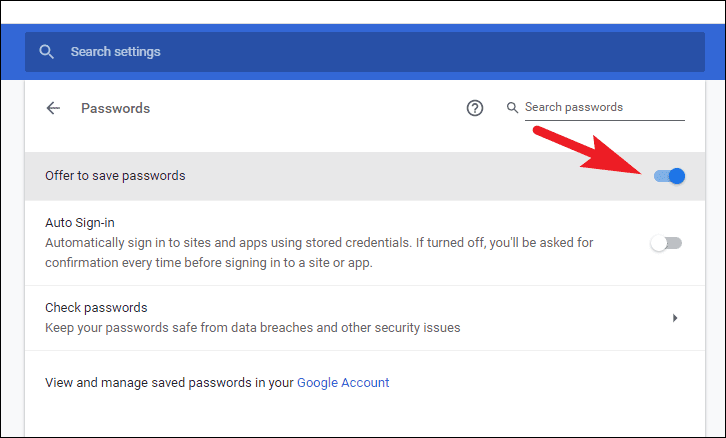
In case the auto sign-in feature is not functioning as it should, make sure the switch following the ‘Auto Sign-in’ option is in the ‘On’ position.
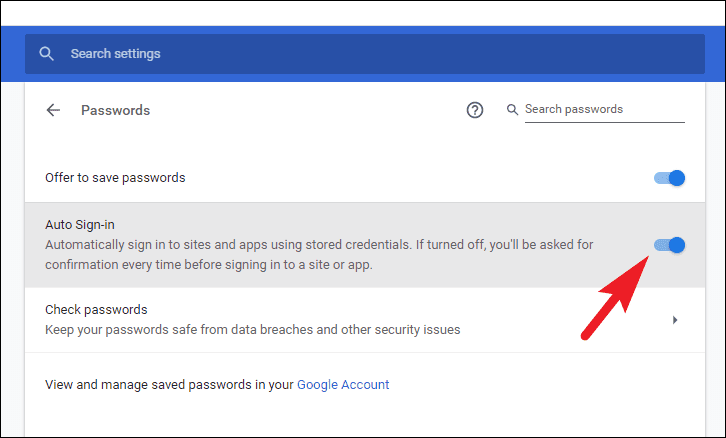
This should fix the issue; if not, hop onto the next section to give another fix a shot.
Log out and Back in From your Google Account
While this fix might feel like an elementary one but is definitely worthy to be included in the list since it can resolve the issue with the least amount of your time and effort spent.
To log out and then back in, first, launch Chrome browser either from the pinned apps in the Start Menu or by searching for it.
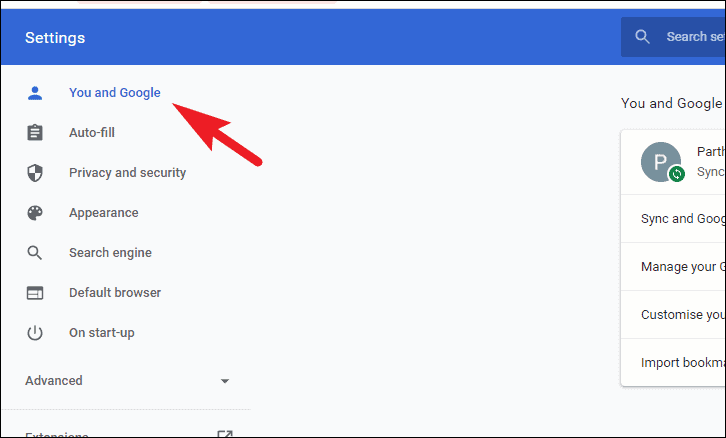
Then, click on the kebab menu (three vertical dots) present on the top right corner of the window. After that, select the ‘Settings’ option from the expanded menu to continue. This will redirect you to the ‘Settings’ page of Chrome.

Next, on the Settings page, make sure the ‘You and Google’ option is selected from the left sidebar.
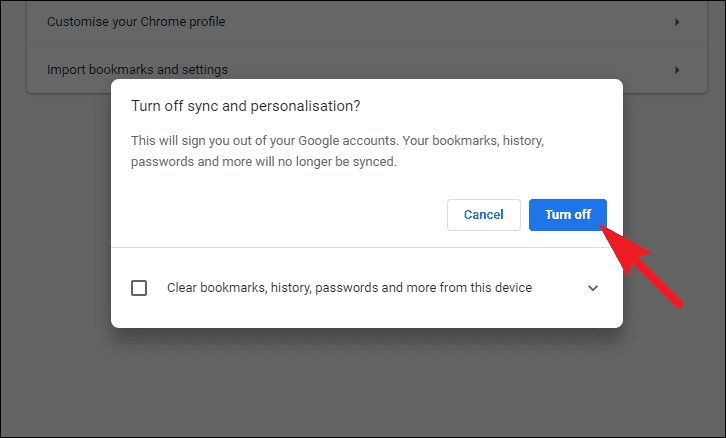
Now, from the right section of the screen, locate and click on the ‘Turn off’ button following your email address. This will sign you out from Chrome along with stopping the sync for your history, bookmarks, and passwords.
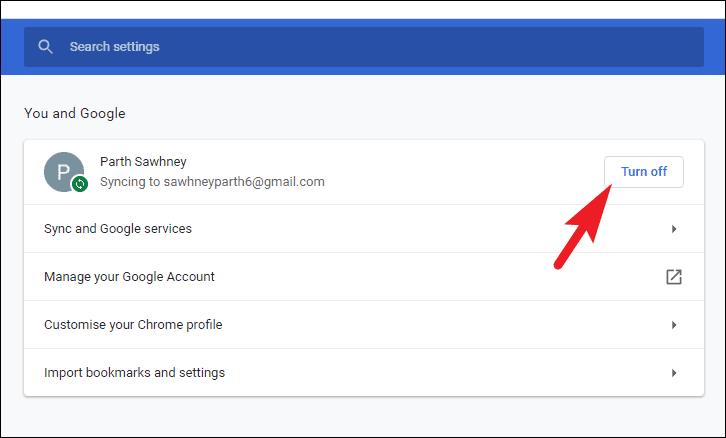
Finally, from the prompt on your screen, click on the checkbox preceding the ‘Clear bookmarks, history, passwords, and more from this device and then click on the ‘Turn off’ button to delete everything temporarily and sign out.
Once you have successfully signed out, restart the Chrome browser and log back in. Then, check if the issue has been resolved.
Disable Problematic Extensions
Many a time an outdated extension can also interfere with the normal functioning of the browser. To rule out this possibility, disable all the extensions and turn them one by one to identify which one is causing the issue.
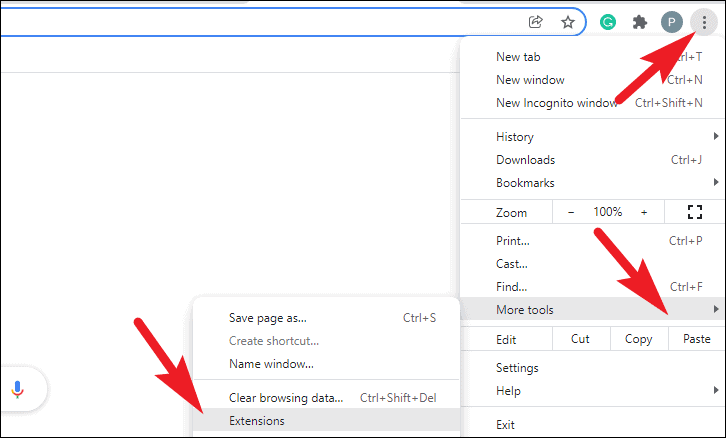
To disable all the extensions, from the Chrome home page, click on the kebab menu icon (three vertical dots). After that, hover over the ‘More tools’ option from the expanded list and select the ‘Extensions’ option.
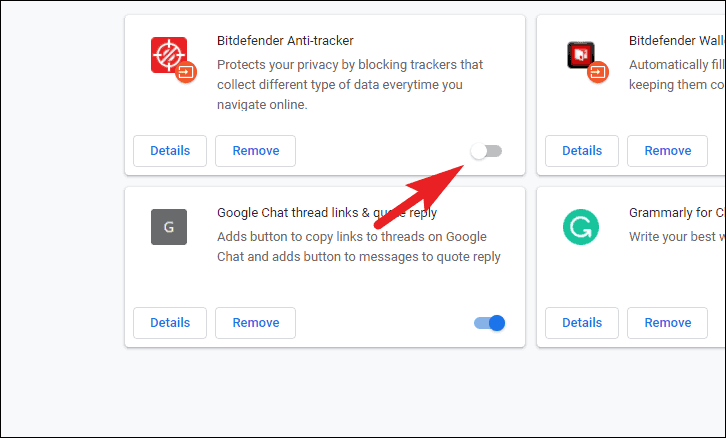
Now, disable all of the extensions by clicking on individual switches present on each extension tile to the ‘Off’ position.
Next, restart Chrome on your device and check if the issue has been resolved. If it did resolve, again head to the extension page using the overflow menu as you did earlier.

Now, turn the extension back on by clicking on the individual switches and check if it’s interfering with the password-saving functionality.
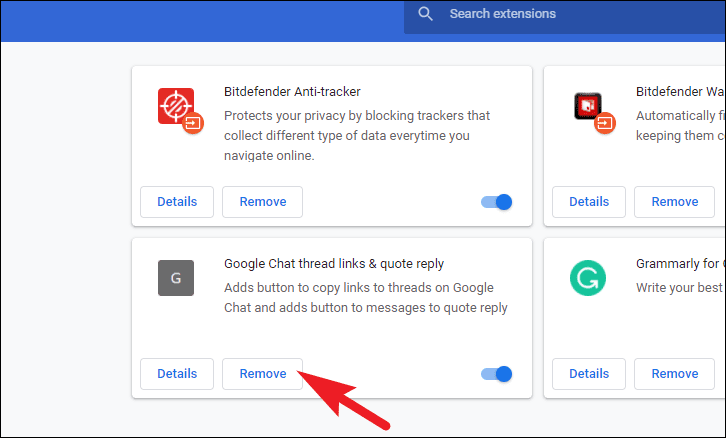
Once you have identified the culprit extension, remove it by clicking on the ‘Remove’ button present on the screen.
You can now find an alternative to the extension or let the developers know about this issue. The Chrome browser should function as expected now.
Reset Google Chrome to Default
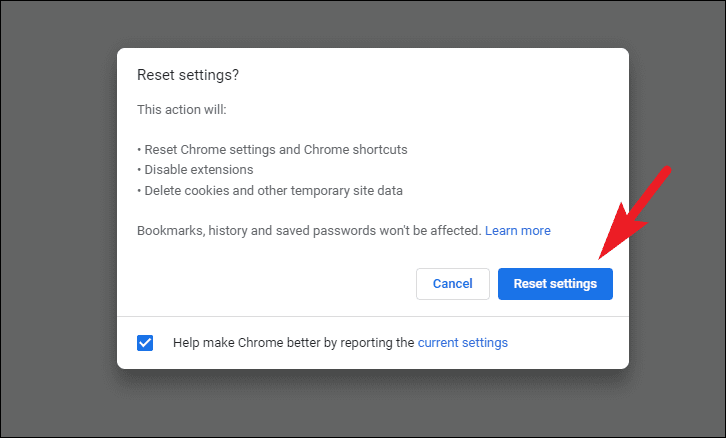
Resetting Google Chrome will uninstall all extensions, clear your cookies, and also reset your home page. However, all your passwords and bookmarks will not be deleted at all. If no one of the fixes until now has worked, this might just do the trick.
To reset Chrome, from the home page, click on the kebab menu icon (three vertical dots) and then click to select the ‘Settings’ option.

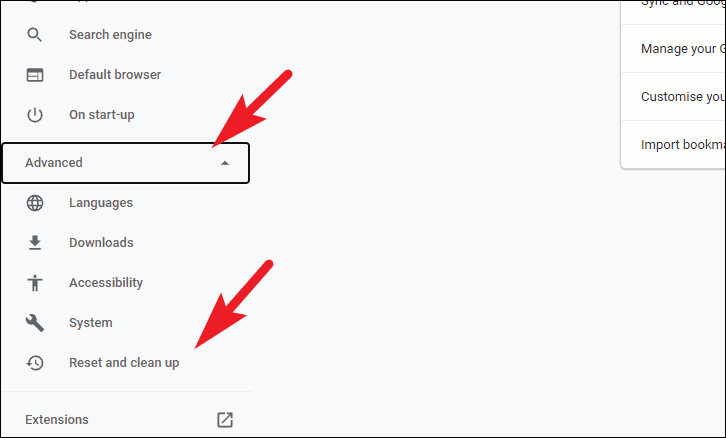
Then, click on the ‘Advanced’ tab from the left sidebar present on the Settings page to expand the list, and next, click on the ‘Reset and cleanup’ option.
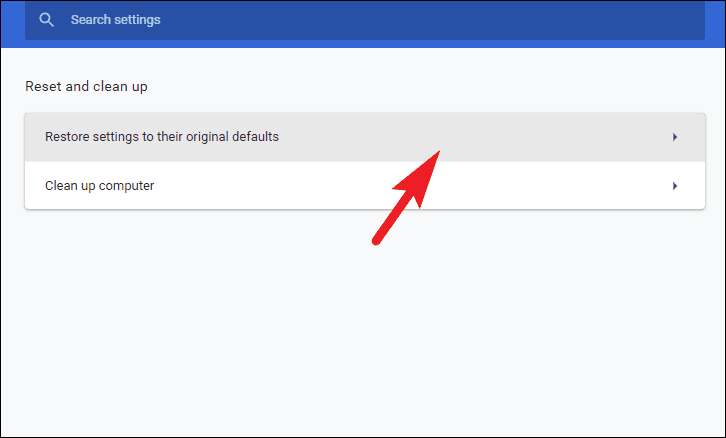
After that, from the right section of the page, click to select the ‘Restore settings to their original defaults’ option. This will open an overlay panel on your screen.
From the overlay pane, click on the ‘Reset Settings’ button to reset Chrome.
Now, check if this has solved the issue.
Uninstall and Reinstall Chrome
If none of the above fixes have worked yet including resetting Chrome, you might want to take the bold call; uninstalling and then installing it back on your computer.
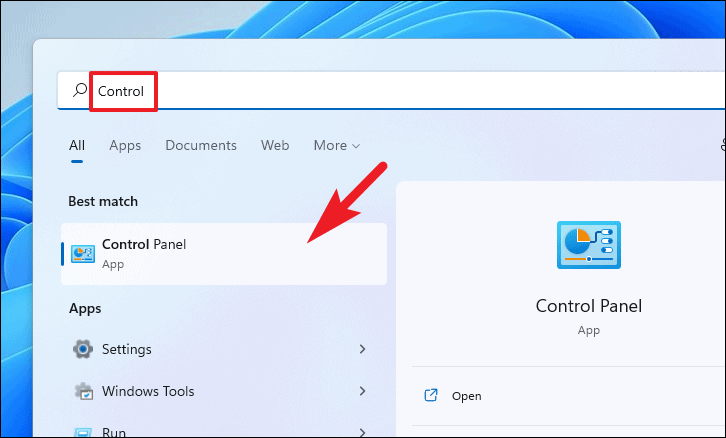
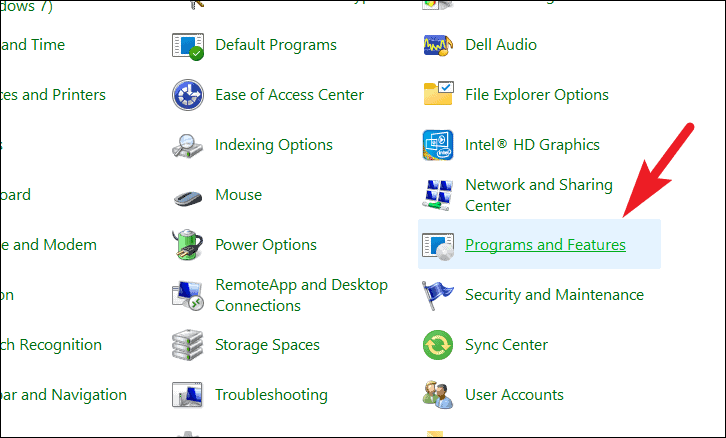
To do so, open the Start Menu and type Control Panel to search for it. Then, from the results, click on the ‘Control Panel’ tile to open it.
Then, from the control panel, locate and click on the ‘Programs and Features’ option to continue.
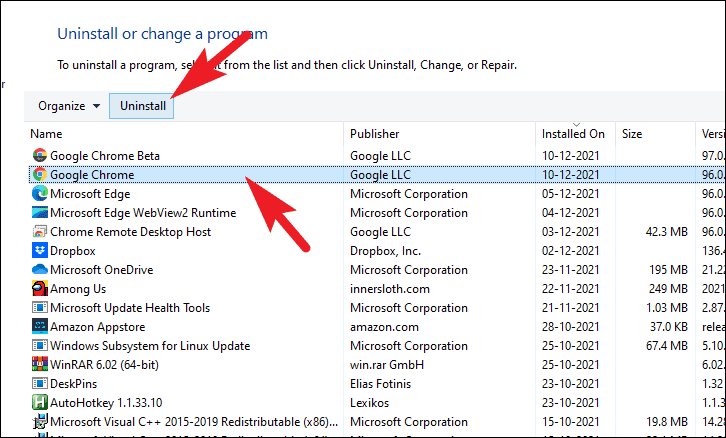
Once the list has been populated, locate and click to select ‘Google Chrome’ and then click on the ‘Uninstall’ button to initiate the uninstall process.
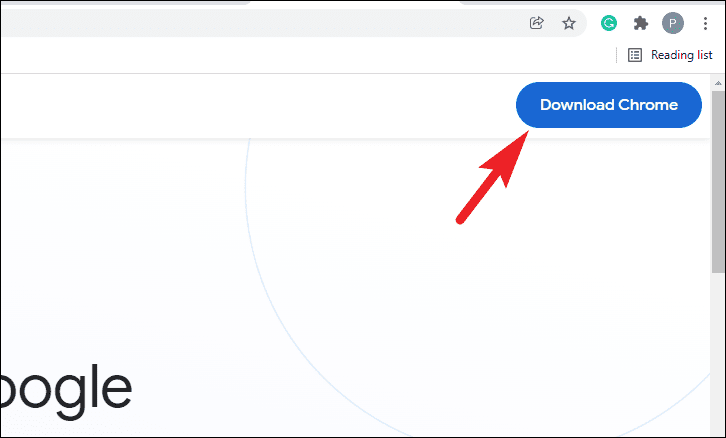
Once uninstalled, head to chrome.google.com using your preferred browser and click on the ‘Download Chrome’ button to download Chrome.
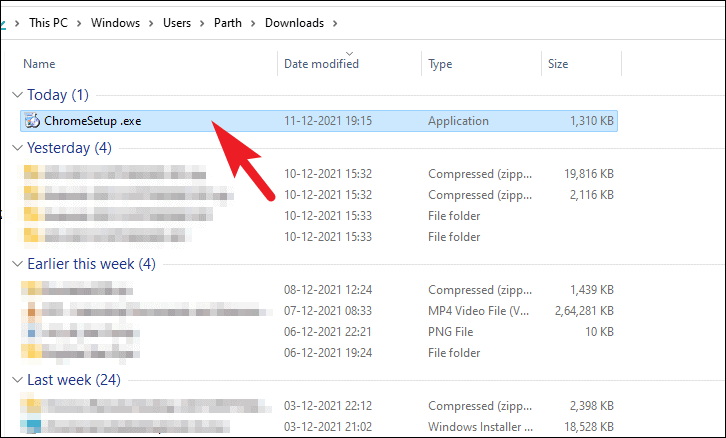
Once downloaded, open your default downloads directory and locate the .EXE file. Then, double-click on the field to run the setup and install Google Chrome on your device.
So, folks, you can use these above-mentioned tips to fix when Chrome is not saving passwords.