
The KERNEL DATA INPAGE ERROR is a critical Blue Screen of Death (BSOD) issue that can disrupt your Windows 11 experience. This error often stems from hardware problems like faulty RAM or hard drive issues, or from software glitches affecting system operations. Fortunately, several solutions can help you resolve this error and get your system back to normal.
Method 1: Run SFC and DISM Scans
Running System File Checker (SFC) and Deployment Image Servicing and Management (DISM) scans can repair corrupted system files that might be causing the error.
Terminal in the search bar. Right-click on the Terminal app and select Run as administrator.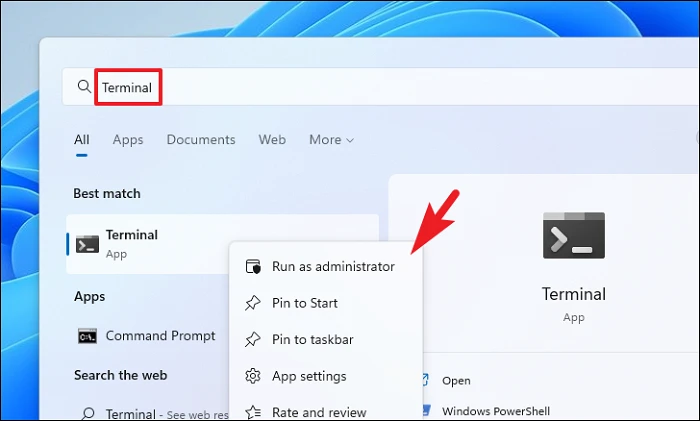

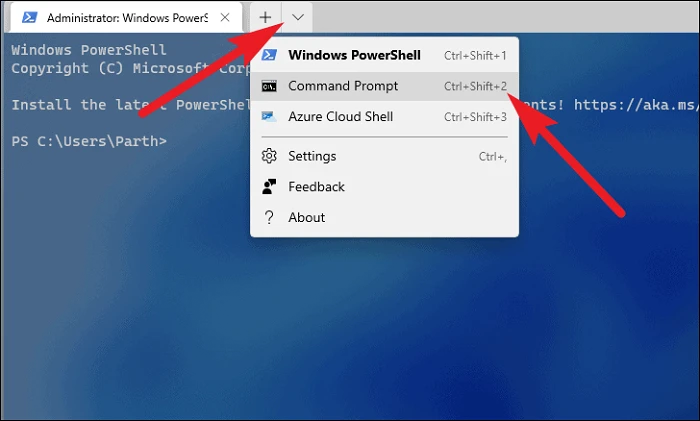
Command Prompt to open it in a new tab.
DISM /Online /Cleanup-Image /RestoreHealth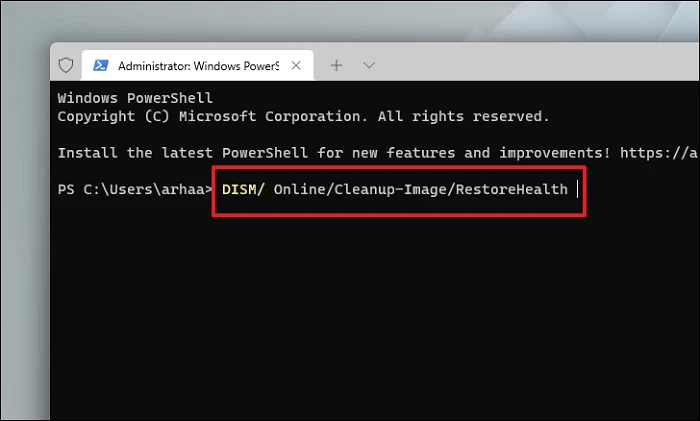
Enter:SFC /scannow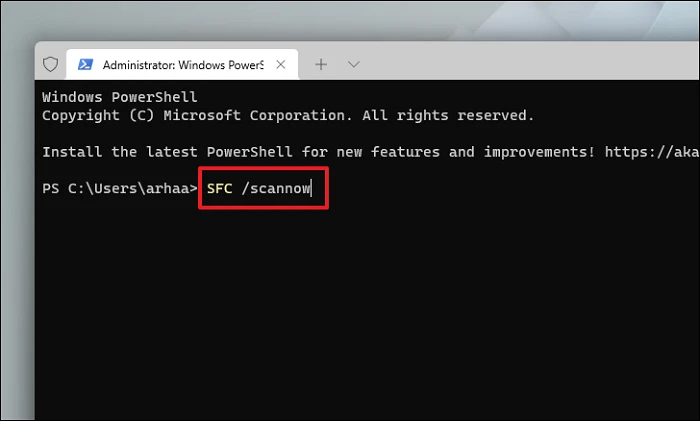
This will scan and repair corrupted system files on your computer.
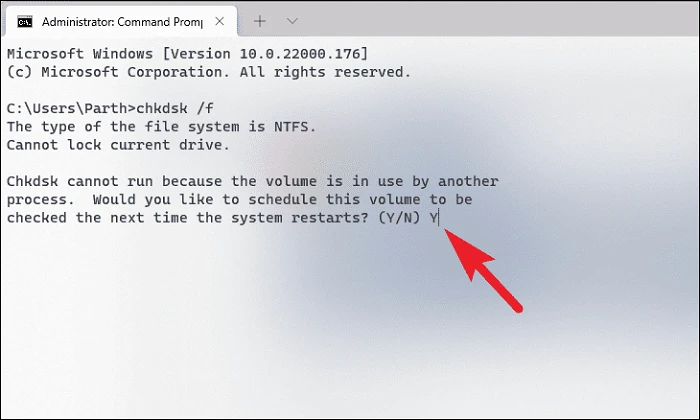
Method 2: Run a CHKDSK Scan
Running a CHKDSK scan can detect and fix disk errors, which might be causing the KERNEL DATA INPAGE ERROR.
Terminal. Right-click on the Terminal app and select Run as administrator.

chkdsk /f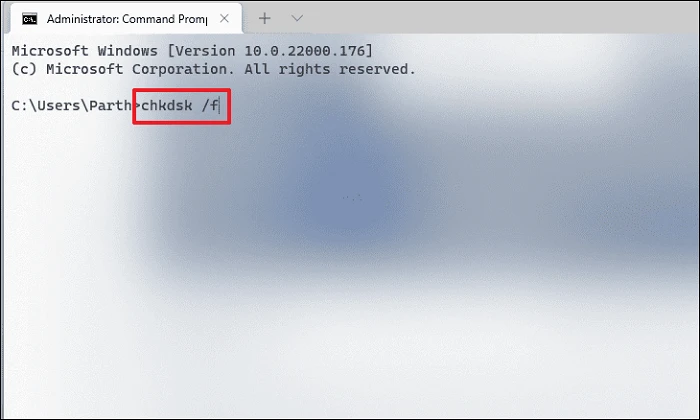
Method 3: Run Windows Memory Diagnostic Tool
The Windows Memory Diagnostic Tool can identify issues with your RAM that might be triggering the error.
Memory Diagnostic. Select the Windows Memory Diagnostic app from the results.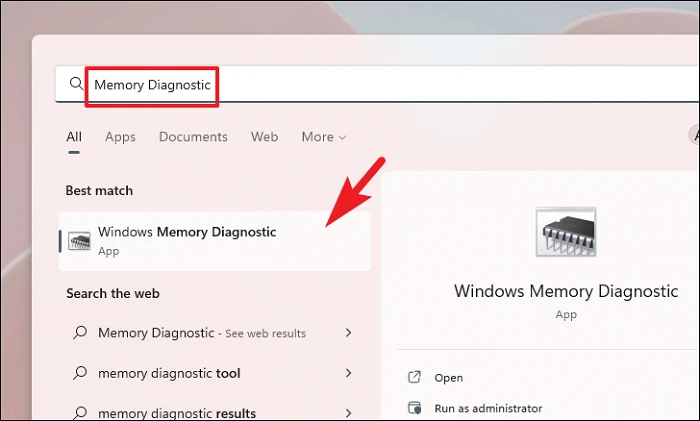
Restart now and check for problems to begin the diagnostic immediately, or Check for problems the next time I start my computer to schedule it for the next reboot.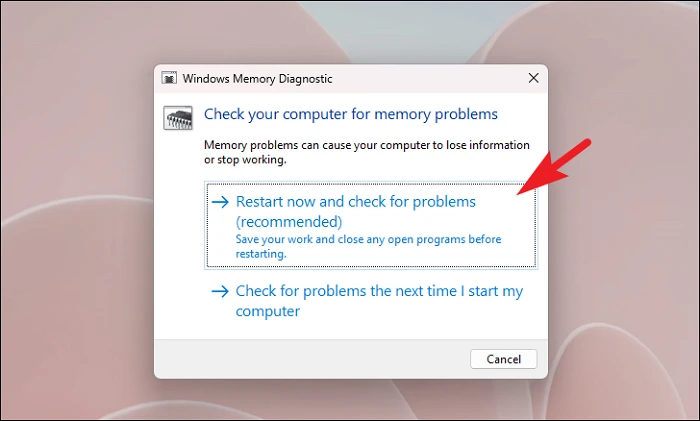
Method 4: Enable Automatic Paging File Size Management
Incorrect paging file settings can lead to system errors. Enabling automatic management can help resolve the KERNEL DATA INPAGE ERROR.
Windows+I on your keyboard.
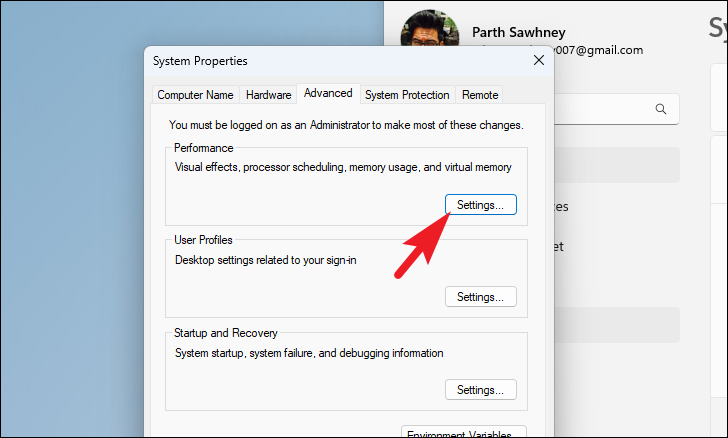
Advanced tab in the Performance Options window and click on Change under Virtual memory.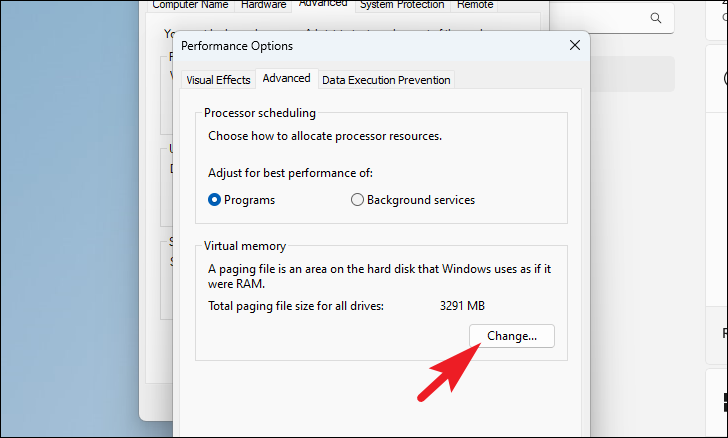
Automatically manage paging file size for all drives and click OK to save the changes.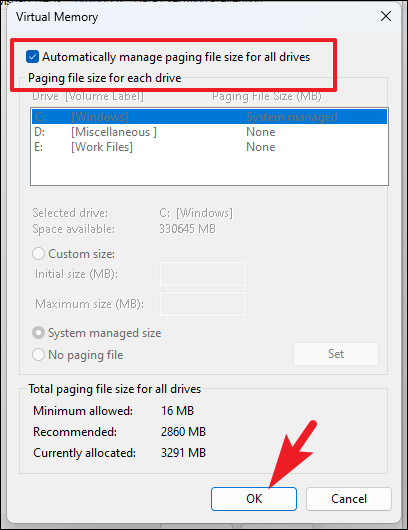
Method 5: Perform a Clean Boot
A clean boot starts Windows with a minimal set of drivers and startup programs, which can help identify if third-party applications are causing the error.
Selective startup under the General tab. Check the box next to Load system services.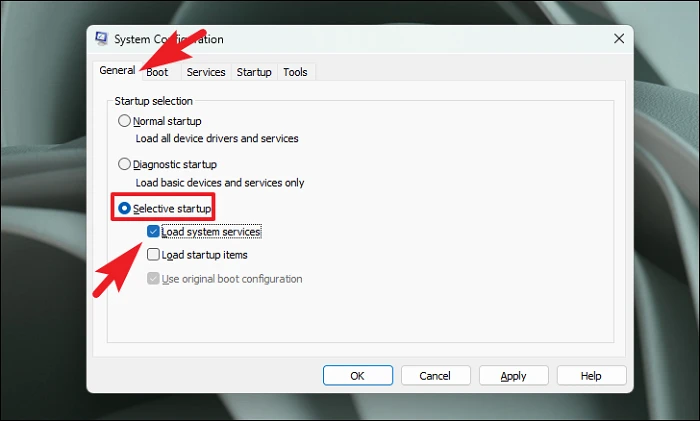
Services tab, check Hide all Microsoft services, and then click Disable all. Click Apply and then OK to confirm.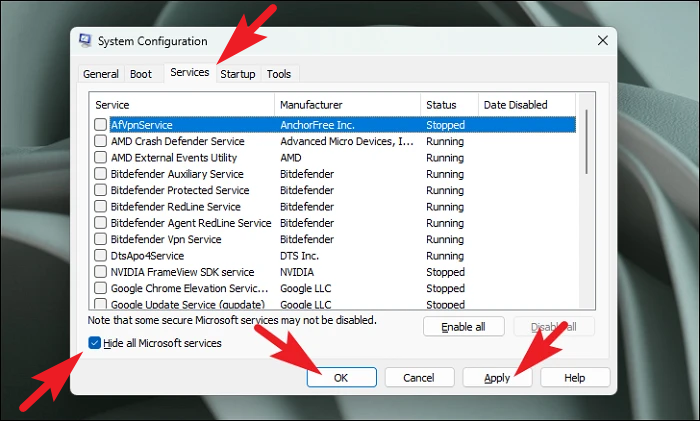
By following these methods, you can troubleshoot and fix the KERNEL DATA INPAGE ERROR on your Windows 11 system. If the issue persists, consider seeking professional help, as it might be a sign of more serious hardware problems.


