How to Fix “Kernel-mode Hardware-enforced Stack Protection is Off” Security Issue in Windows 11
Encountering the "Kernel-mode Hardware-enforced Stack Protection is Off" error on your Windows 11 PC? Don't fret! Learn what causes the issue and follow these simple methods to resolve it.
Encountering the “Kernel-mode Hardware-enforced Stack Protection is Off” error on your Windows 11 PC? Don’t fret! Learn what causes the issue and follow these simple methods to resolve it.
by Parth Sawhney
Encountering the “Kernel-mode Hardware-enforced Stack Protection is Off” notification on your Windows 11 computer can raise security concerns. This feature is essential for protecting your system’s memory stack during code execution. If you’re experiencing this issue, there are several solutions you can try to resolve it and enhance your system’s protection.
1. Uninstall Conflicting Software
Conflicts with certain software, particularly anti-cheat programs associated with specific games, can trigger the “Kernel-mode Hardware-enforced Stack Protection is Off” message. These applications may not be fully compatible with Windows 11’s security features. Uninstalling them might resolve the issue.
Examples of games known to cause this problem include Valorant, Destiny 2, and Phantasy Star Online 2. If you have any of these games installed, consider removing them along with their associated anti-cheat software to see if the issue is resolved.
Click on the three-dot menu next to the application’s name and choose Uninstall. Confirm any prompts to proceed with the uninstallation.
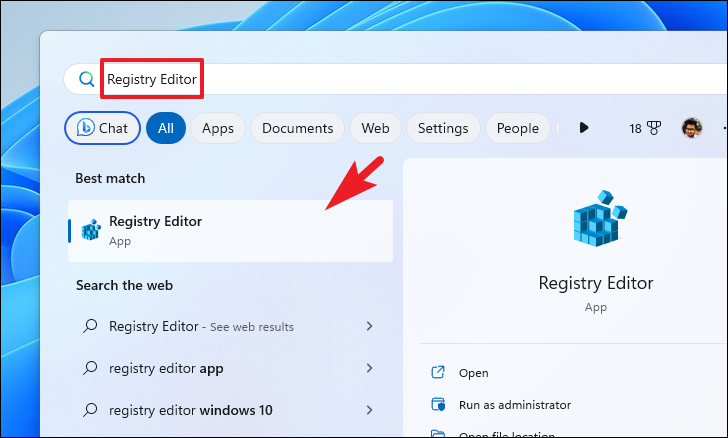
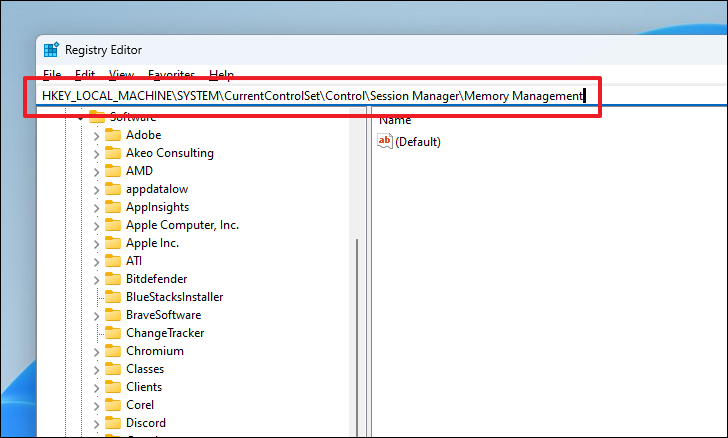
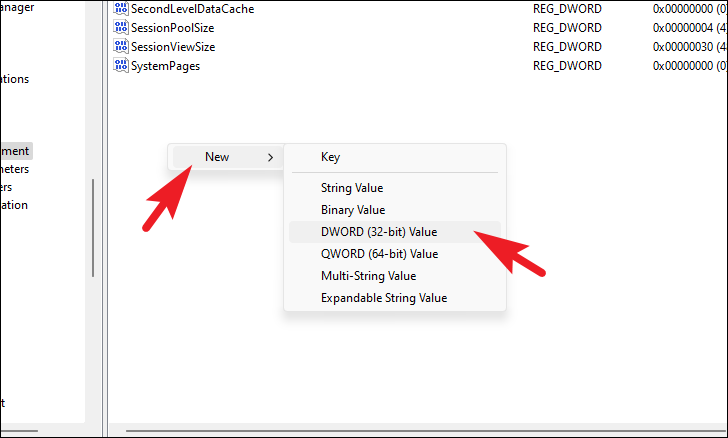
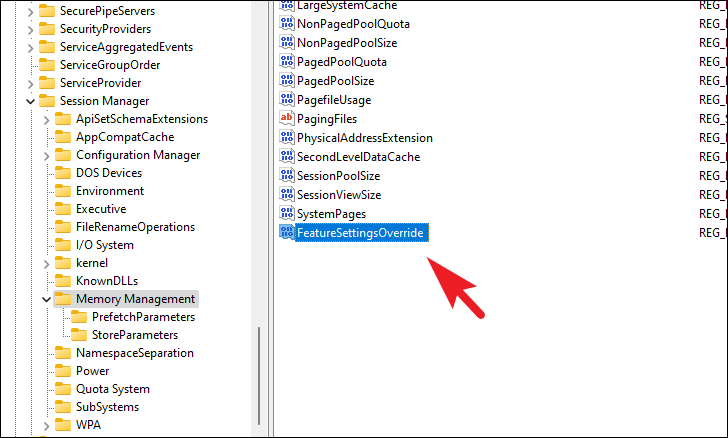
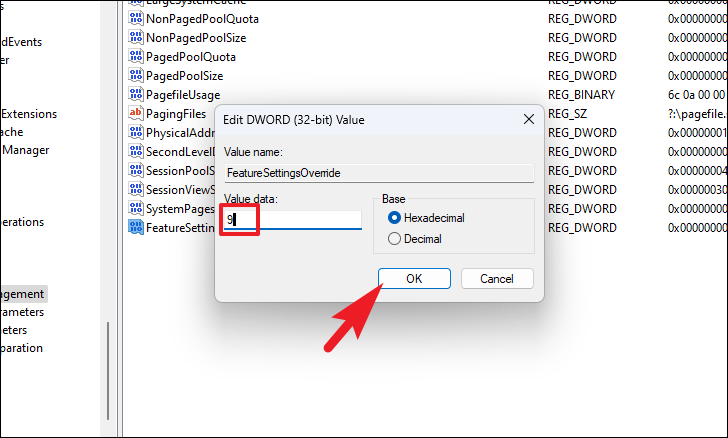
2. Modify the Registry
If uninstalling conflicting software doesn’t fix the issue, adjusting specific registry settings may help re-enable the stack protection feature. Be cautious when modifying the registry, as incorrect changes can affect system stability.
Close the Registry Editor and restart your computer to apply the changes.
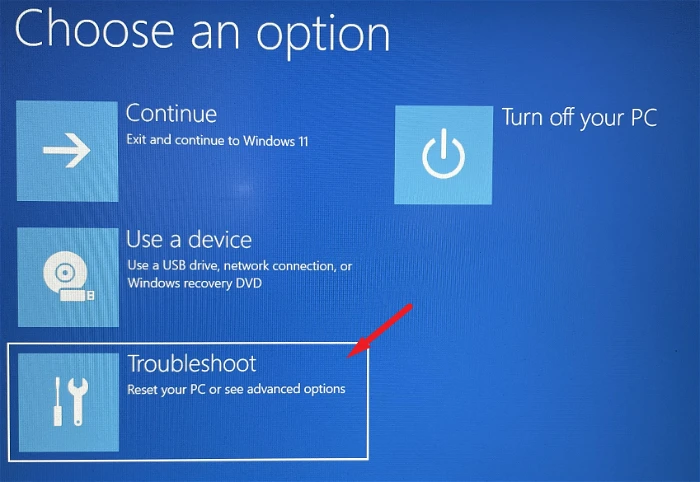
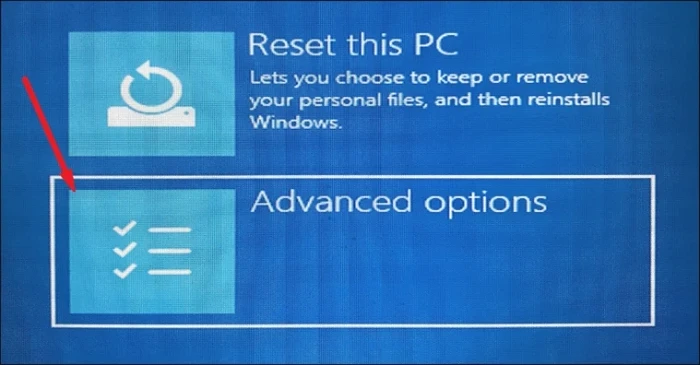
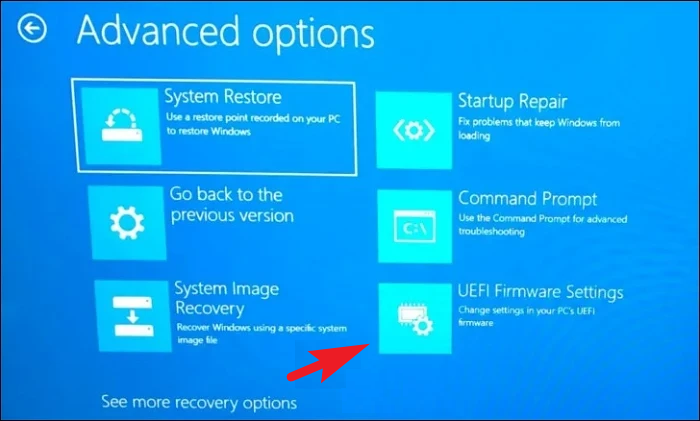
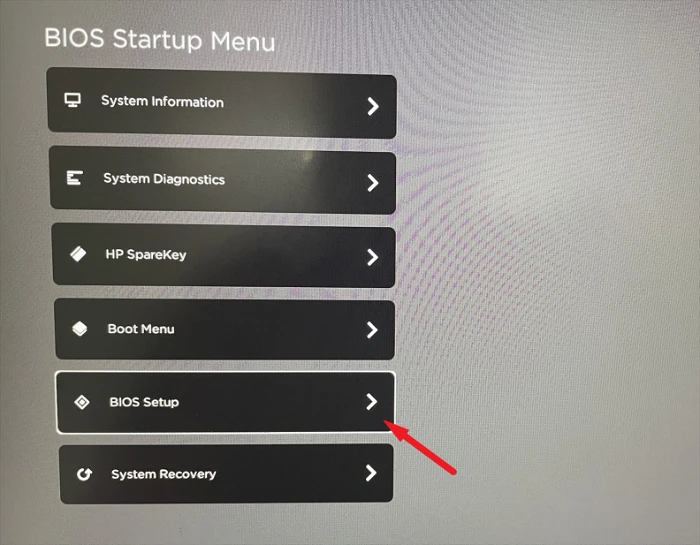
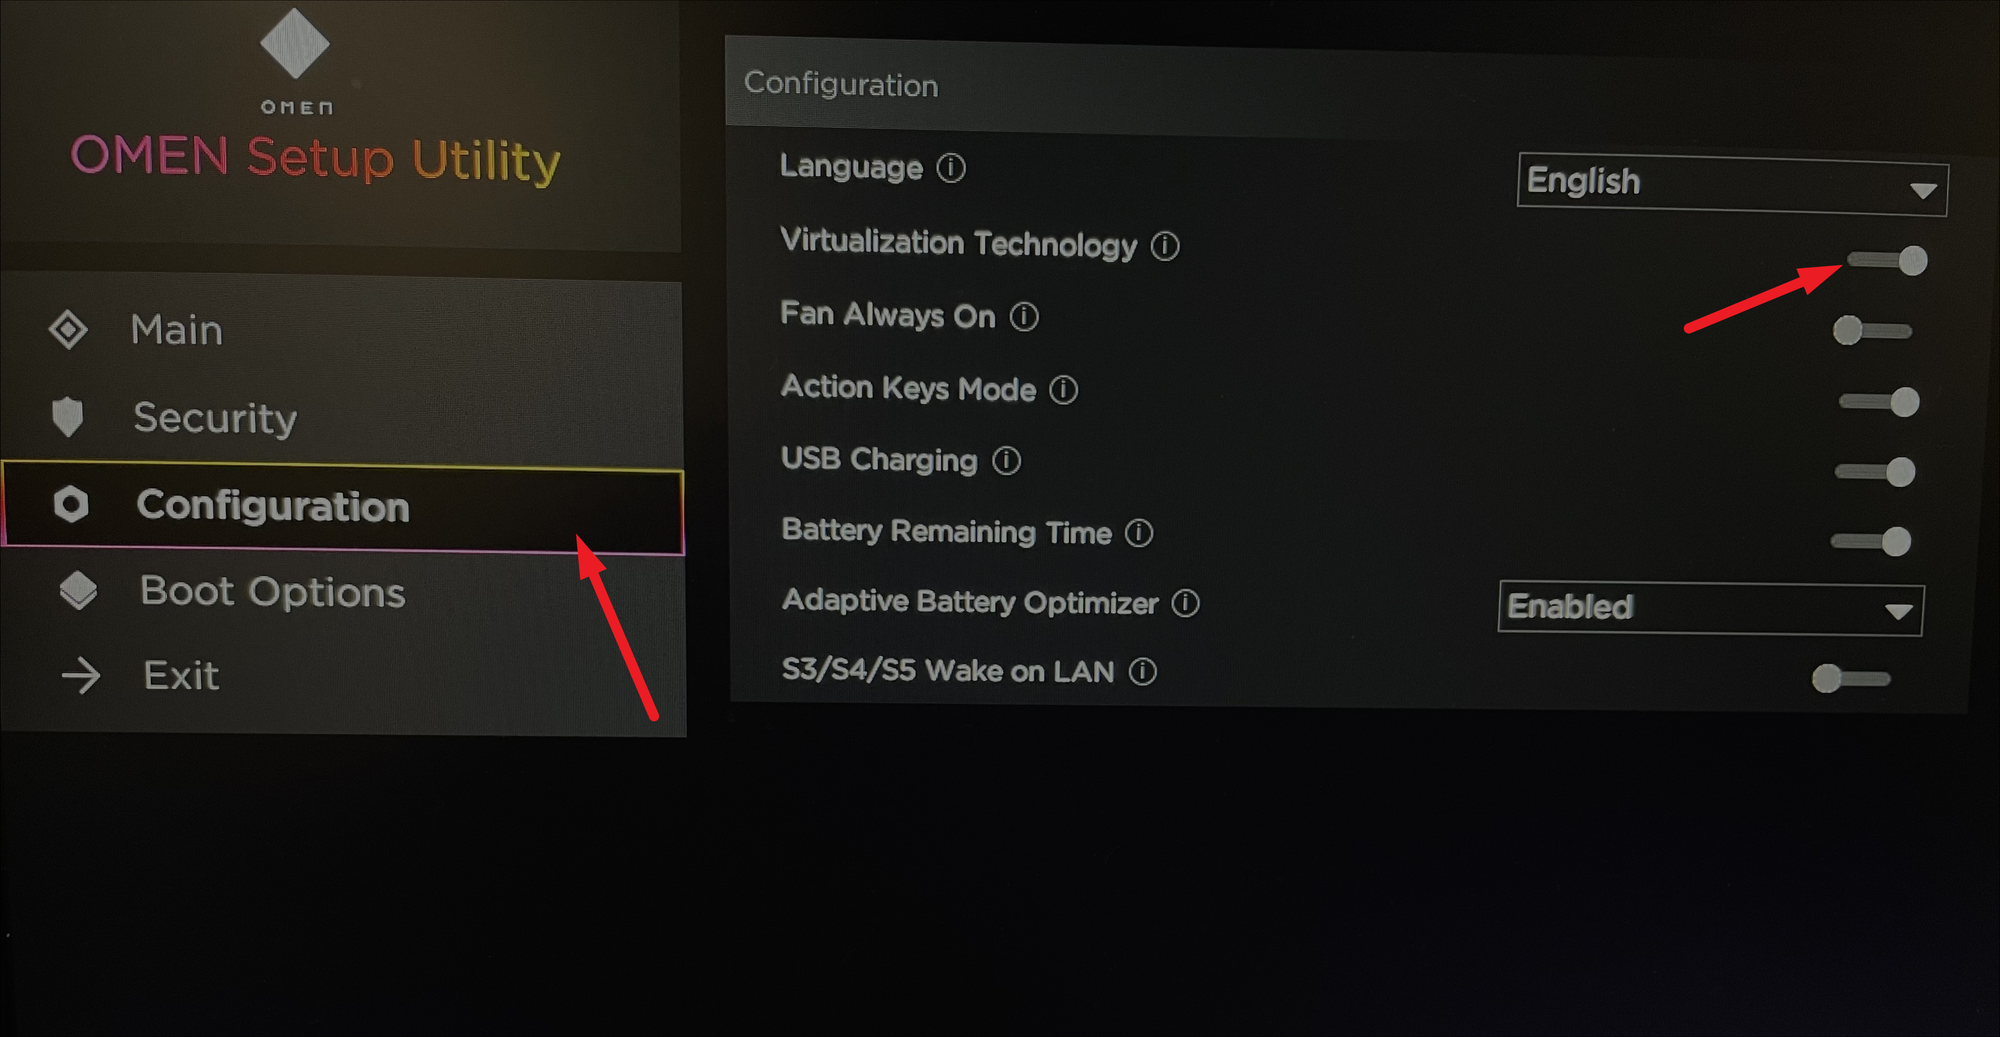
3. Enable Virtualization Using UEFI Settings
Enabling virtualization technology in your system’s UEFI firmware settings can also help resolve the stack protection issue. This feature allows your processor to efficiently handle virtualization tasks required by certain security features in Windows 11.
Your computer will restart. Once it boots up, check if the issue has been resolved.
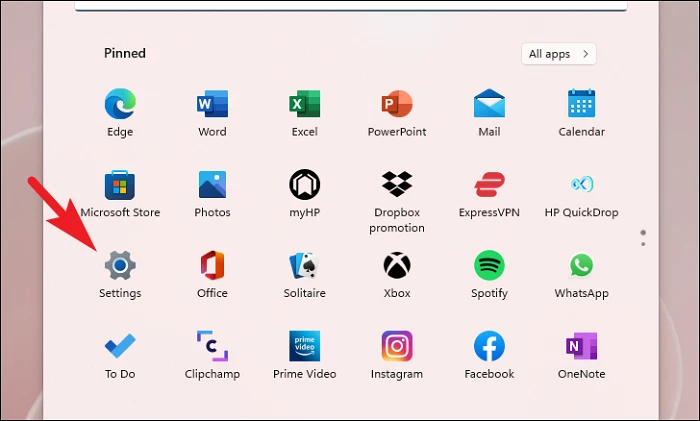
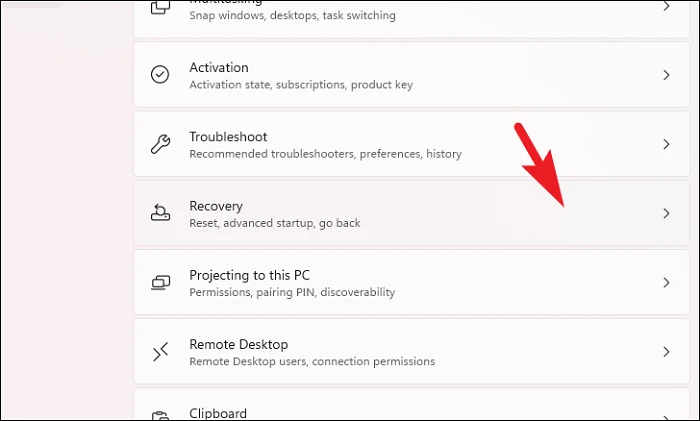
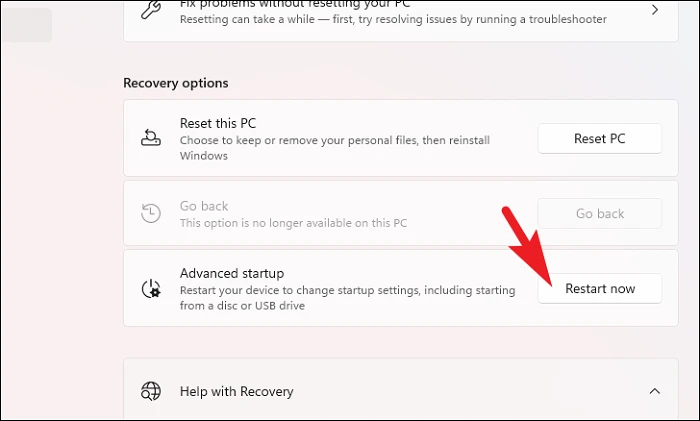
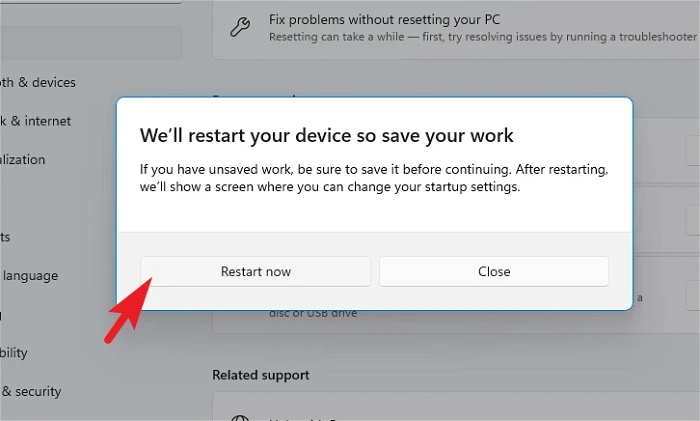
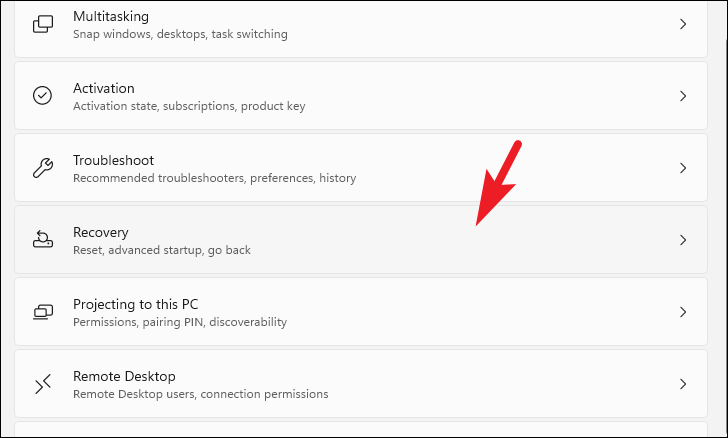
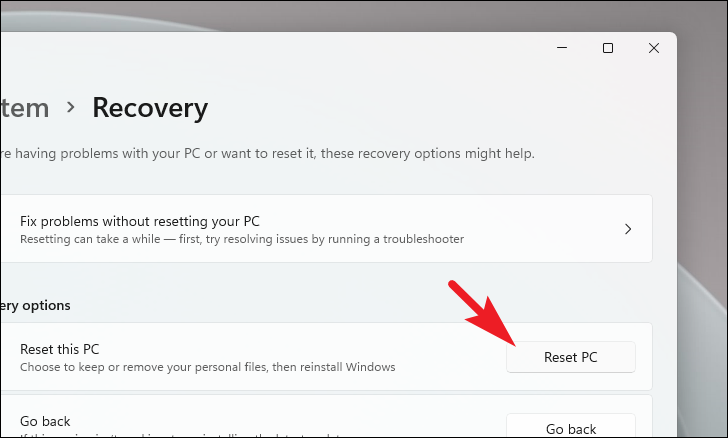
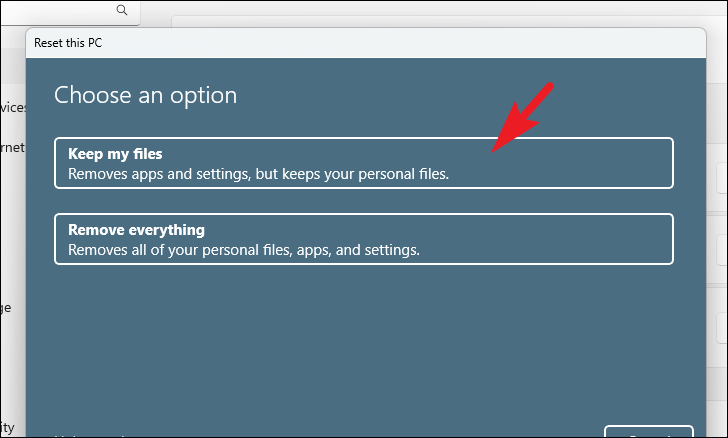
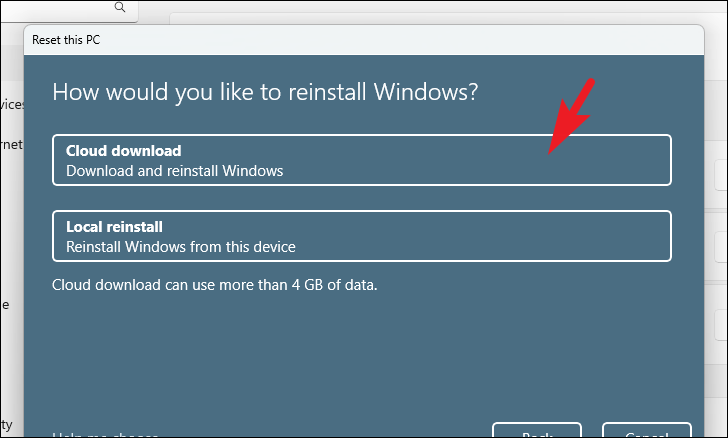
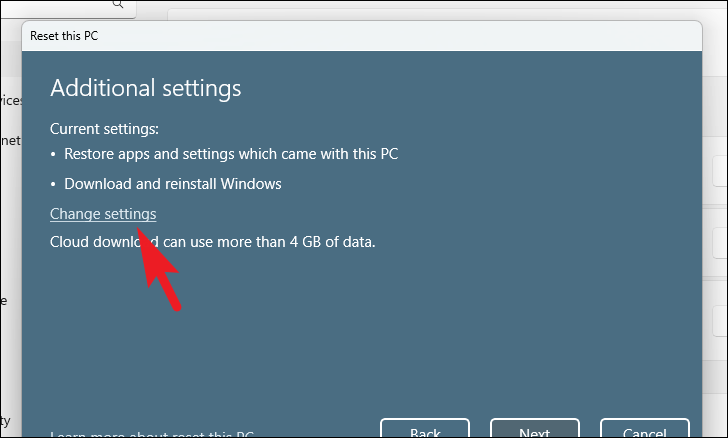
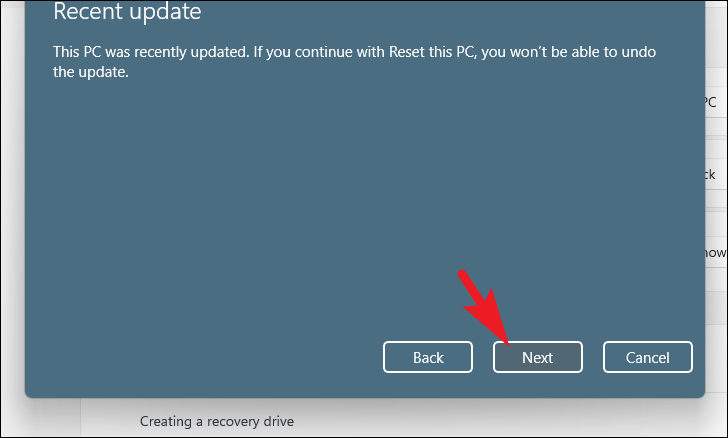
4. Reset Your PC
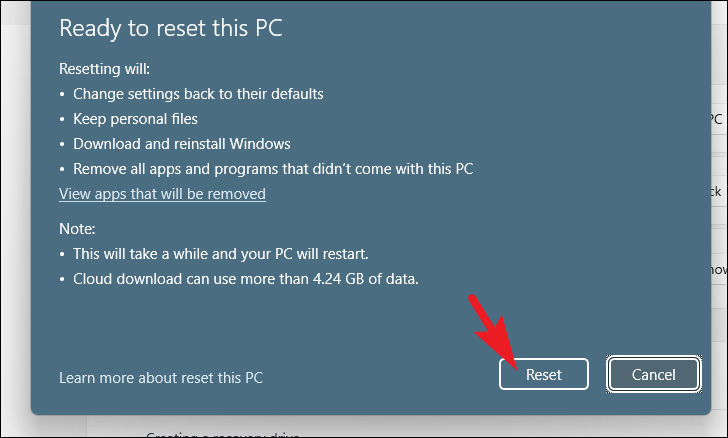
If none of the previous methods work, resetting your PC can help. This will restore your system settings to their defaults and remove installed applications, but you can choose to keep your personal files.
Finally, review the summary of actions and click Reset to begin the process. Your PC will restart and commence resetting.
By following these methods, you can address the “Kernel-mode Hardware-enforced Stack Protection is Off” issue on your Windows 11 computer, ensuring your system is secure and functioning properly.