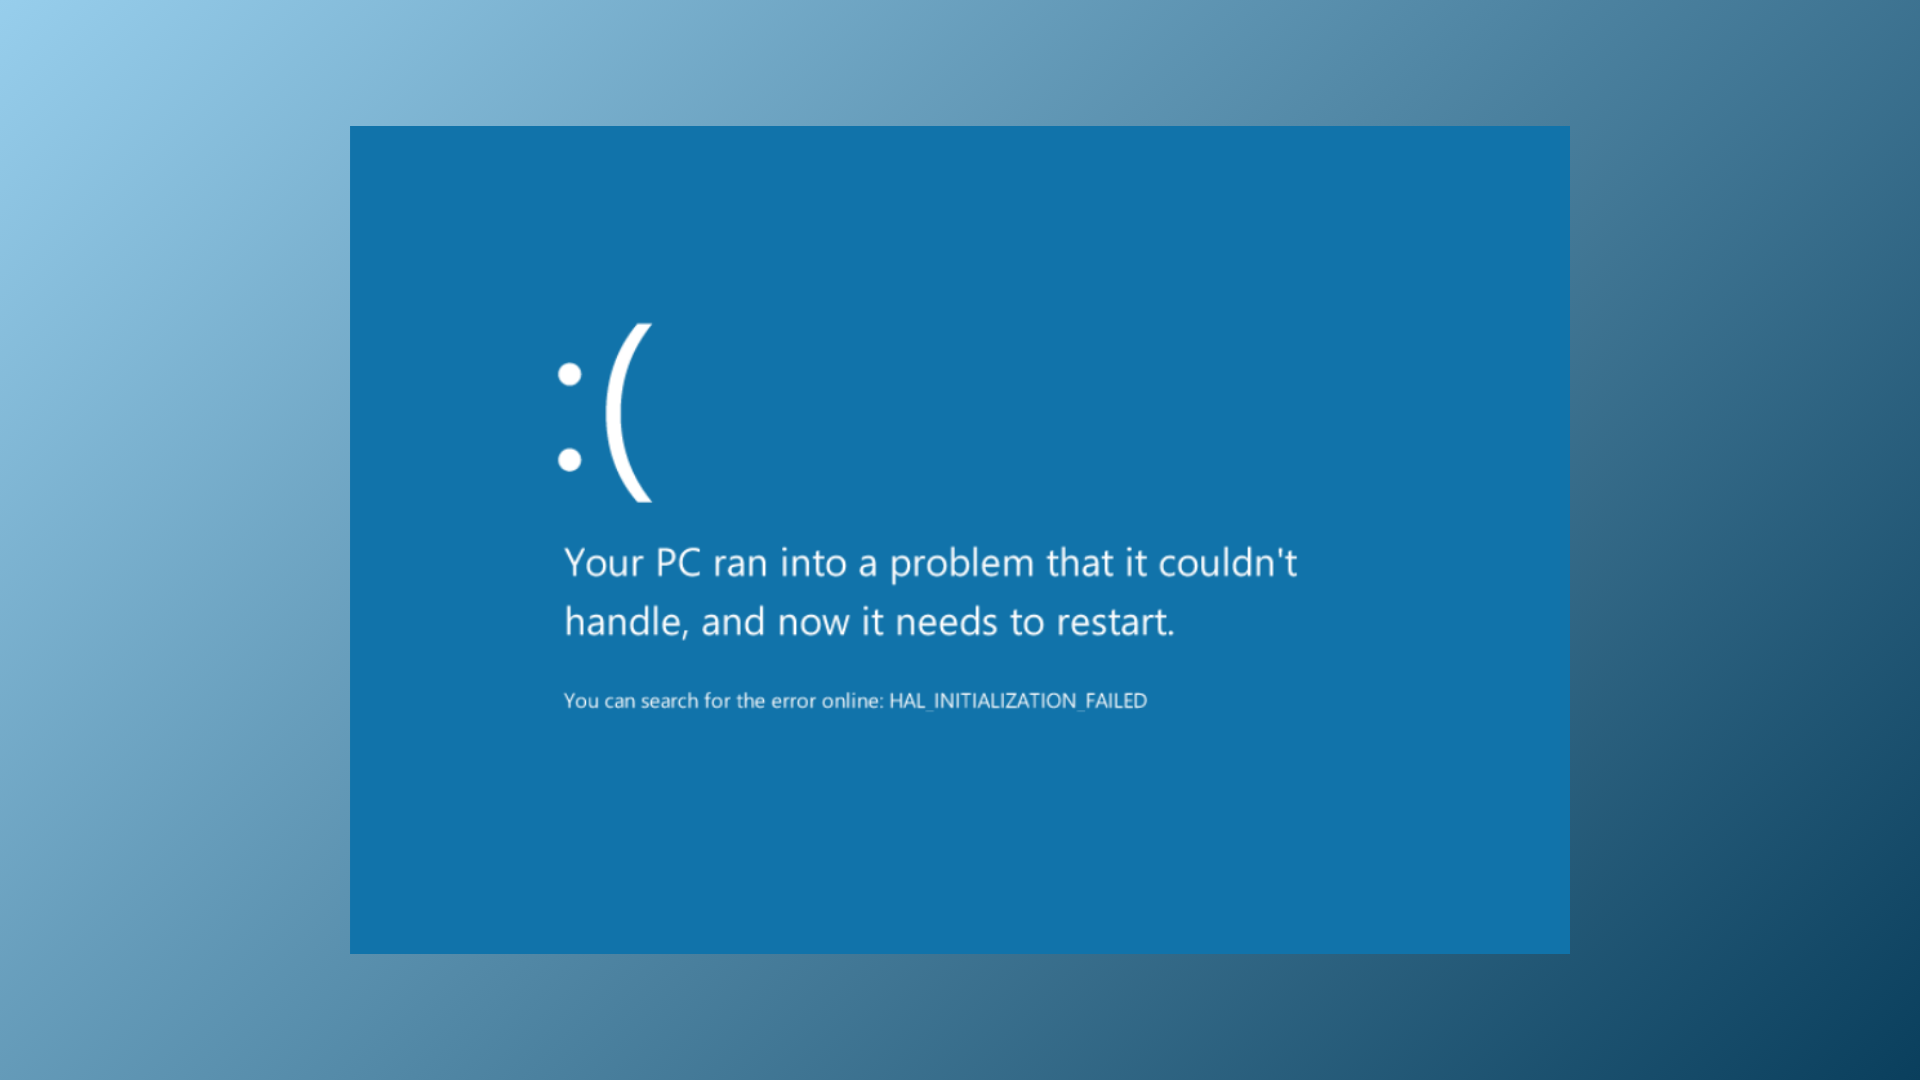
Repeated blue screen errors and slow startups often occur when Memory Integrity, a Windows 11 security feature, fails to enable or conflicts with system drivers and hardware settings. These issues can prevent the system from booting properly, force recovery modes, or display warnings in Windows Security that Memory Integrity is off, leaving your device more vulnerable to threats that target the Windows kernel.
Update or Remove Incompatible Drivers
Device Security > Core Isolation. If you see a warning that Memory Integrity is off, look for a Review Incompatible Drivers option. Click this to see a list of drivers that are blocking the feature.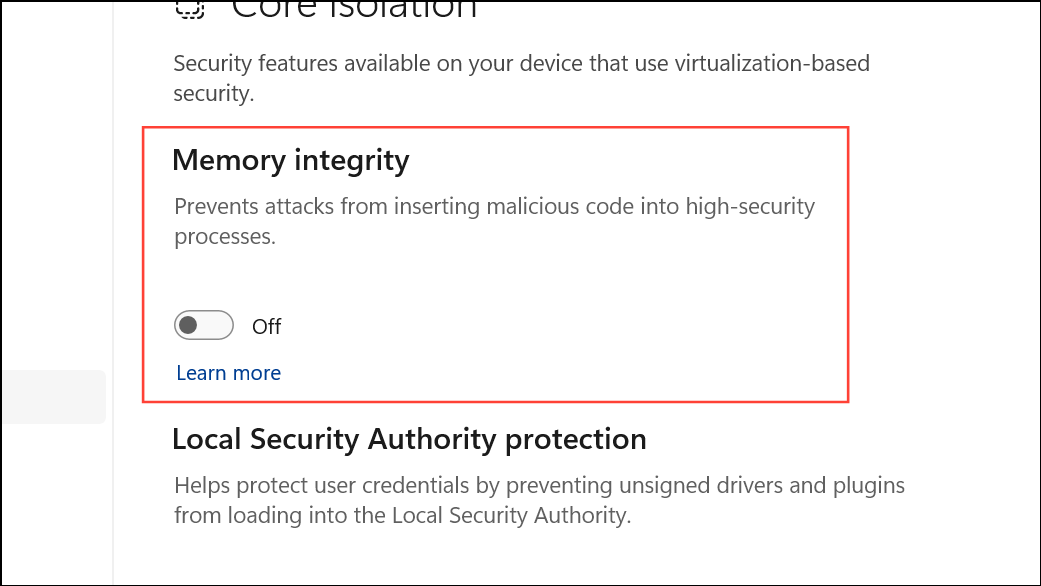
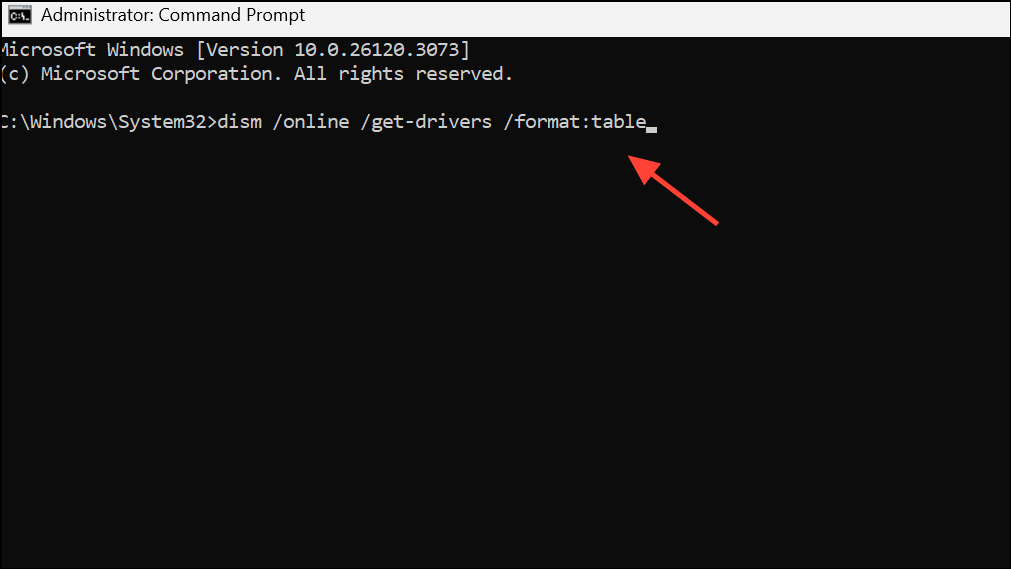
Command Prompt as an administrator and run:dism /online /get-drivers /format:tableThis command shows all installed drivers, helping you identify the problematic one by its Published Name.
View and select Devices by Driver. Find the device using the incompatible driver, right-click it, and choose Update Driver. Select Search Automatically for Drivers to let Windows find the latest version. If no update is found, download the latest driver from the device manufacturer’s website and install it manually.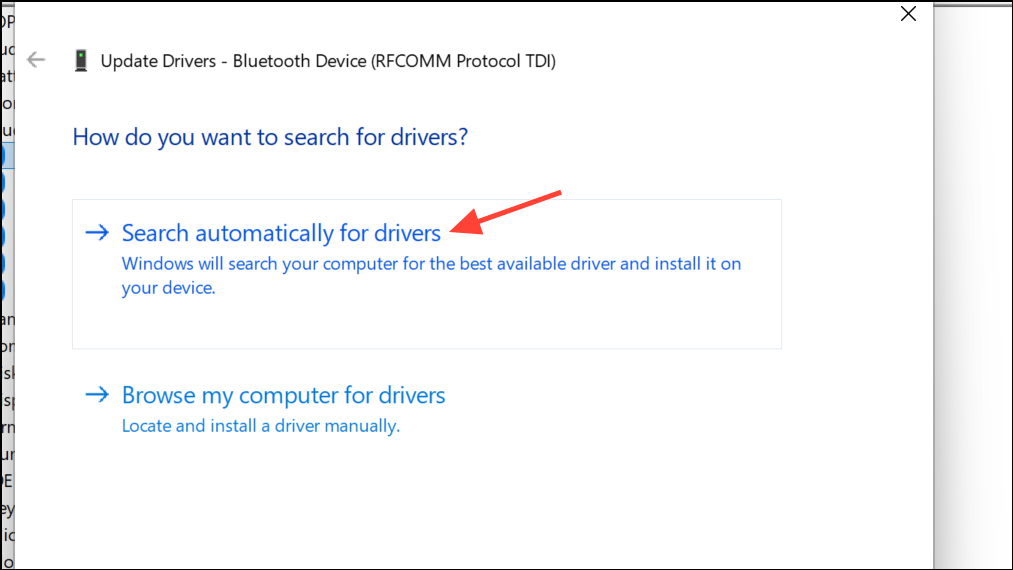
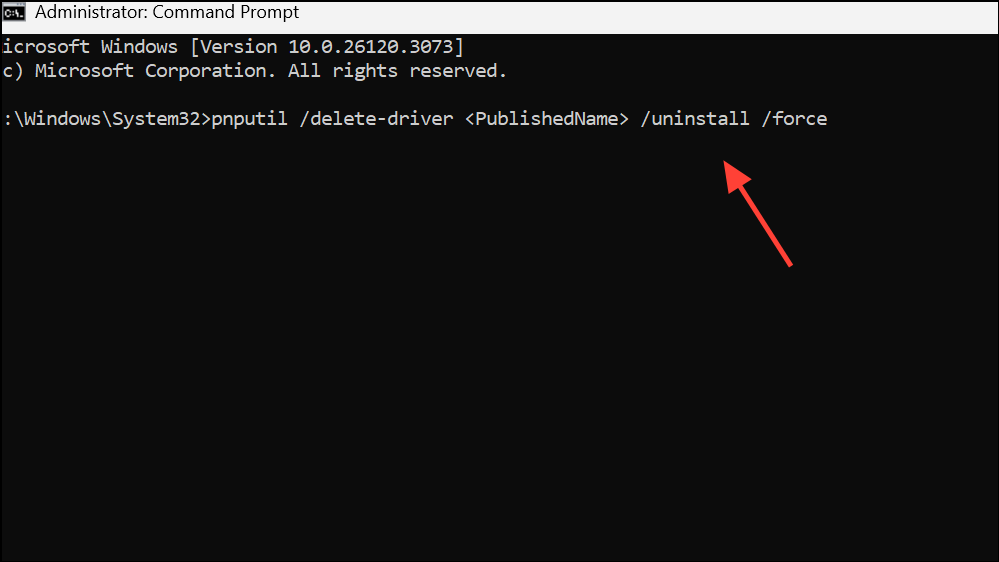
Command Prompt as administrator, run:pnputil /delete-driver <PublishedName> /uninstall /forceReplace <PublishedName> with the driver’s actual published name, such as oem58.inf. Restart your computer to allow Windows to reinstall a compatible driver if the device is needed.
Check for Windows Updates
Settings > Windows Update and click Check for updates. Download and install all available updates, including optional driver or firmware updates.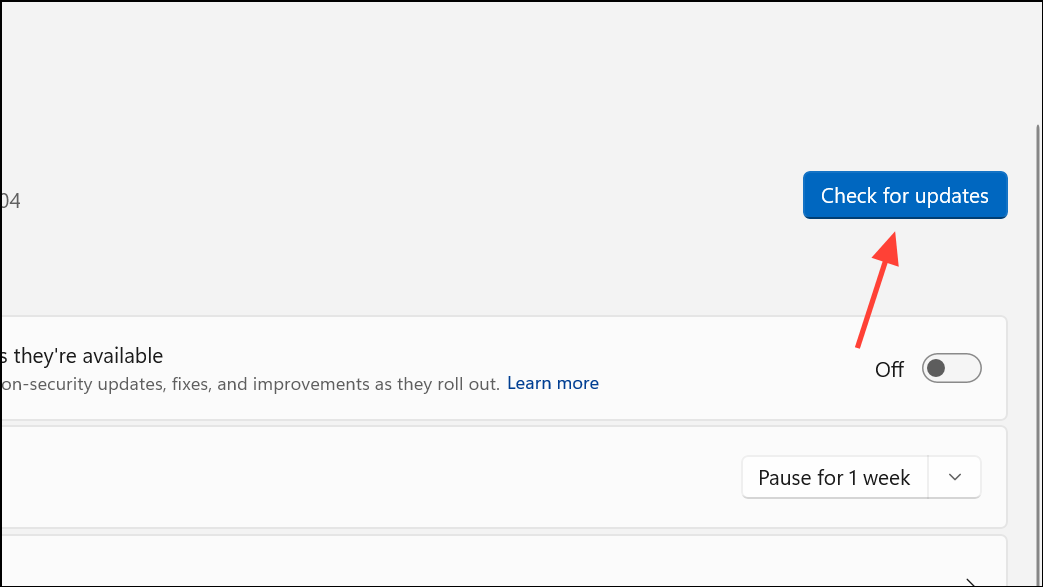
Remove Residual or Hidden Drivers
View > Show hidden devices. Look for any devices with faded icons or yellow warning symbols.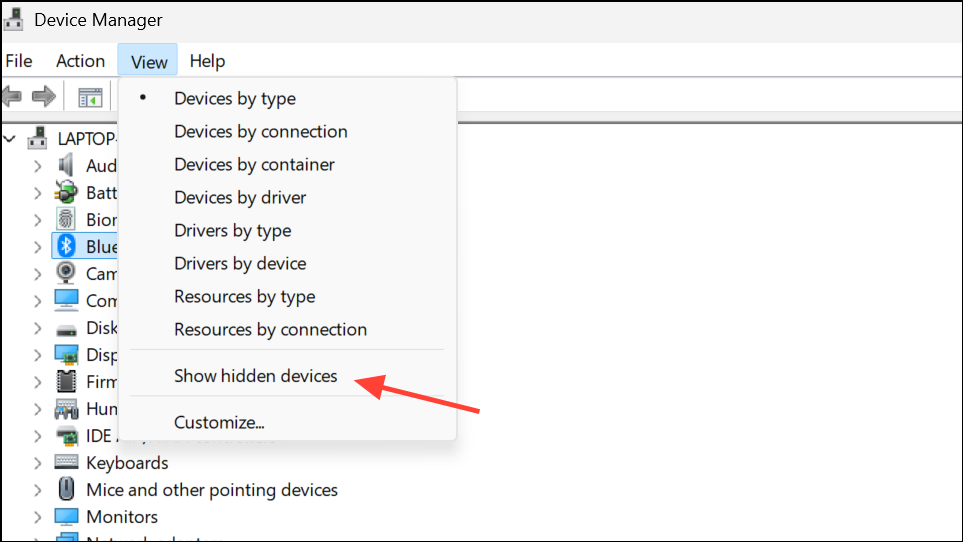
Delete the driver software for this device.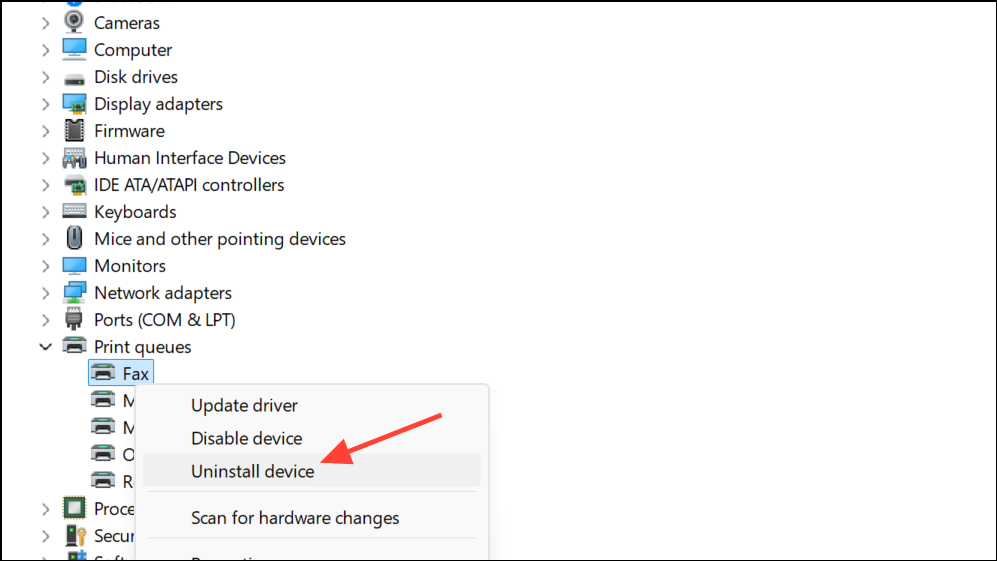
C:\Windows\System32\drivers and ensure any leftover files from uninstalled drivers are removed, taking care not to delete system files.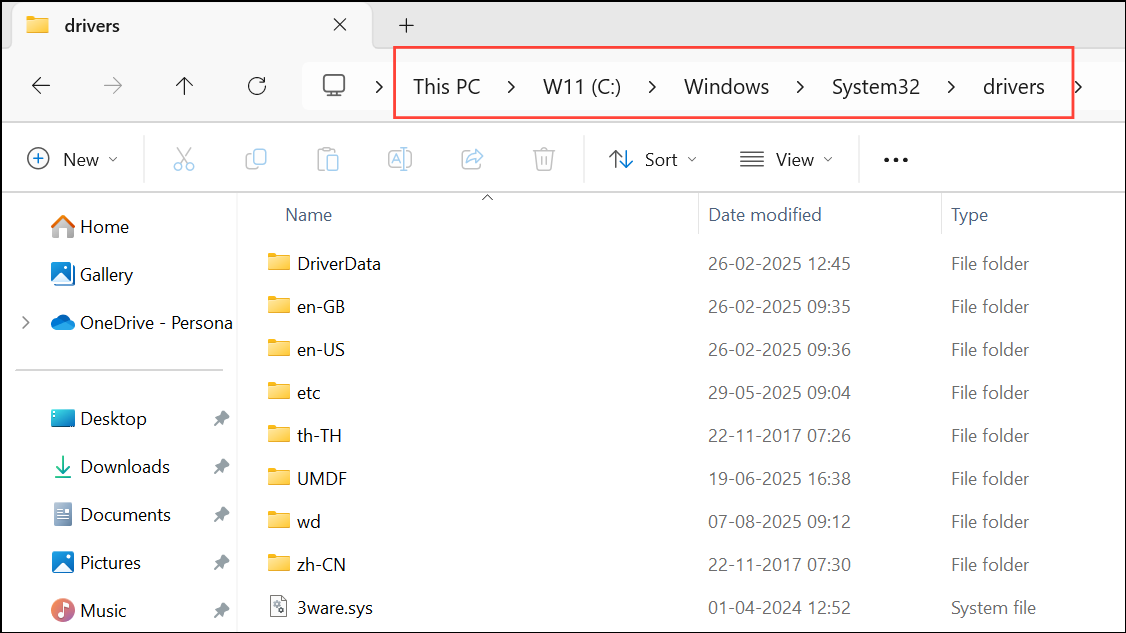
Verify Hardware Virtualization Settings
Del or F2 during boot).Intel VT-x or AMD-V, and ensure they are enabled. Save changes and exit BIOS.Run System File Checker and DISM
sfc /scannow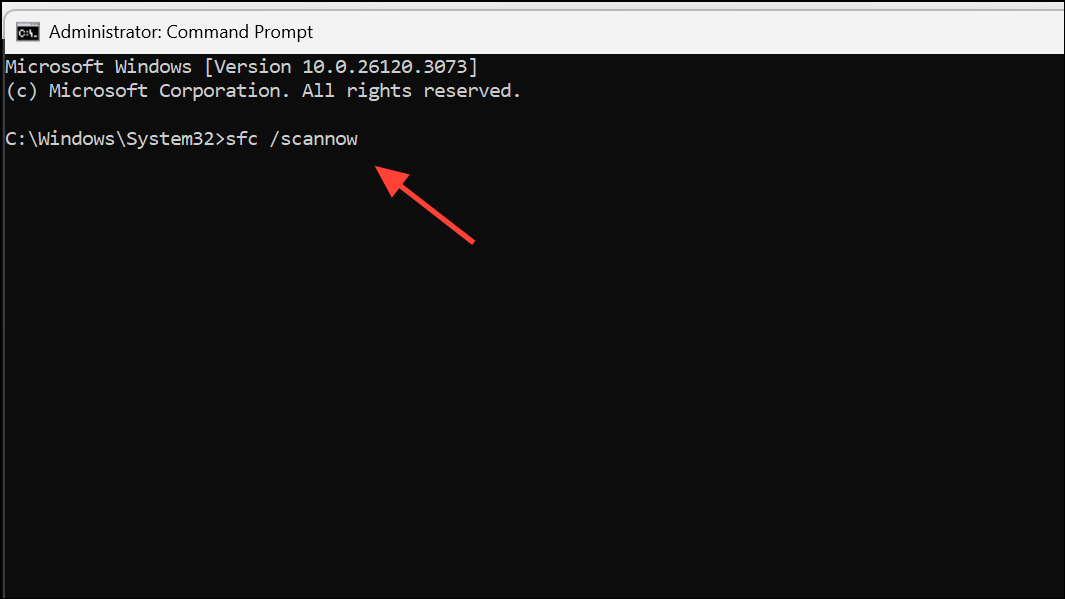
This scans and repairs damaged system files.
DISM /Online /Cleanup-Image /RestoreHealth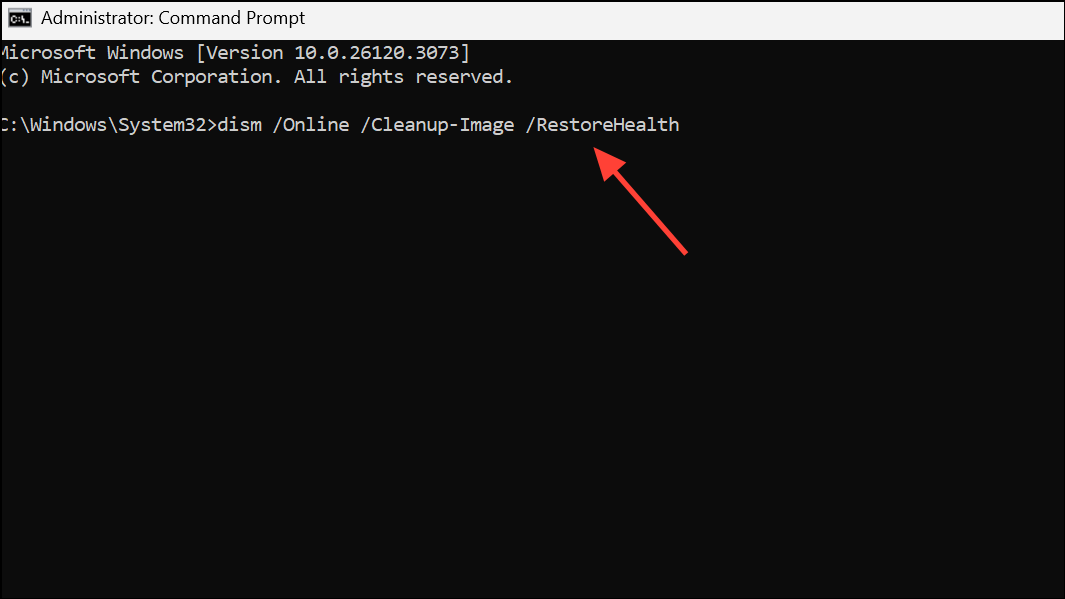
DISM repairs the Windows image, addressing deeper corruption. Restart your PC after both commands finish.
Test RAM Stability and BIOS Settings
Memtest86+ for several passes to rule out faulty memory. If errors appear, use more conservative memory settings or replace the RAM.Enable Memory Integrity via the Registry (Advanced)
HKEY_LOCAL_MACHINE\SYSTEM\CurrentControlSet\Control\DeviceGuard\Scenarios\HypervisorEnforcedCodeIntegrity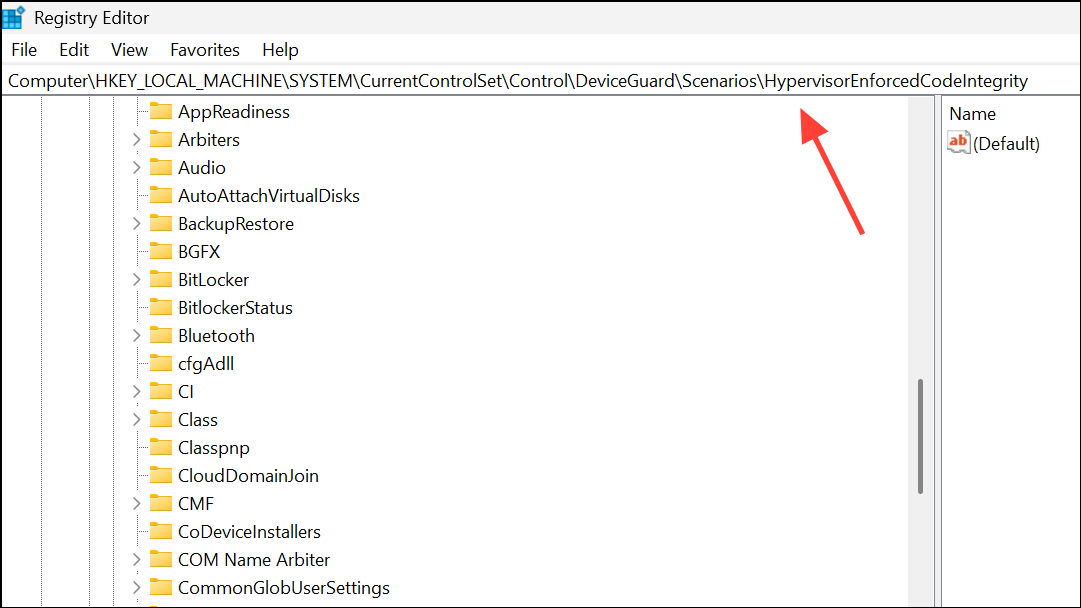
Double-click the Enabled entry, set its value to 1, and click OK.
Additional Troubleshooting and Considerations
If you play games that require Hypervisor-Protected Code Integrity (HVCI), such as Valorant, incompatible anti-cheat drivers (e.g., vgk.sys for Riot Vanguard) may prevent Memory Integrity from enabling. In these cases, you may need to choose between enabling Memory Integrity or running the game, as both may not be compatible simultaneously.
For persistent blue screen issues, examine minidump files in C:\Windows\Minidump using tools like BlueScreenView to identify problematic drivers or hardware. If you continue to experience instability after all troubleshooting steps, consider a repair install of Windows using the Media Creation Tool, which preserves your files and apps while replacing system files.
After resolving the Memory Integrity error, periodically check for new driver and Windows updates, especially after connecting new hardware or installing major software, to prevent future conflicts.
Fixing Memory Integrity blue screen errors on Windows 11 often requires a combination of driver management, hardware setting adjustments, and system repairs. Staying proactive with updates and monitoring new hardware or software changes will help keep your system stable and secure.


