
Outlook’s search function sometimes fails to return expected results, which can disrupt daily workflow and make it hard to locate important emails. Optimizing search reliability in Outlook requires targeted troubleshooting, depending on whether you’re using the New Outlook or Classic Outlook interface on Windows 11. The following methods address core causes such as incomplete indexing, incorrect search settings, and profile corruption, resulting in more consistent and accurate search results.
Update Search Settings in New Outlook
Step 1: Open New Outlook and select Settings from the top right corner. Navigate to General > Search.
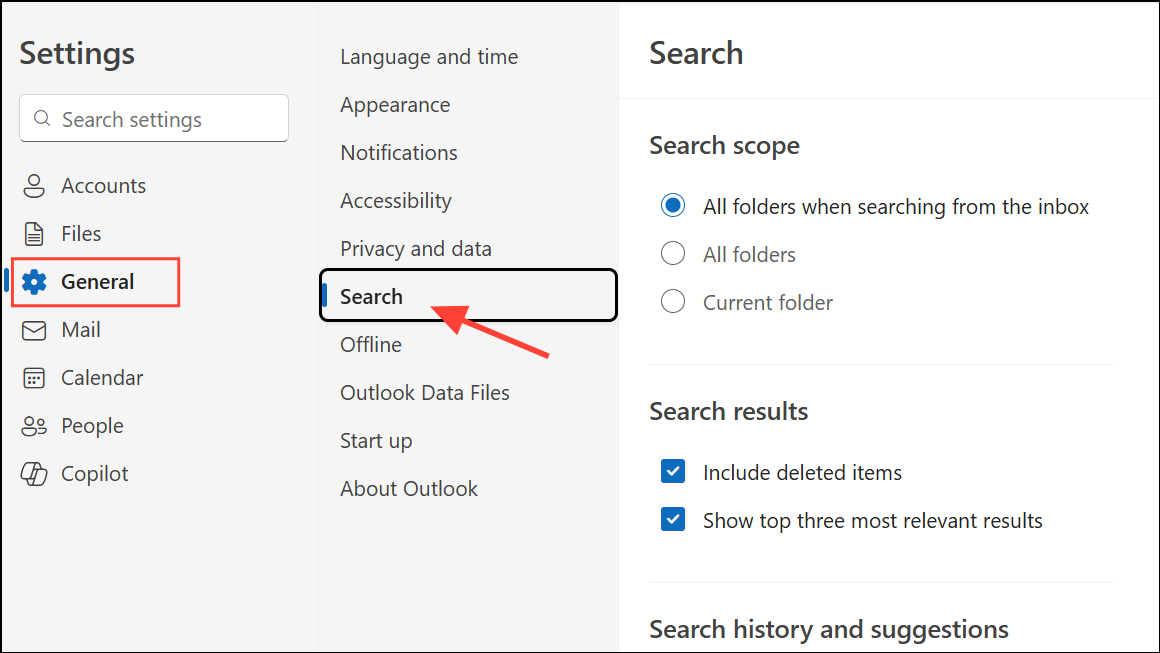
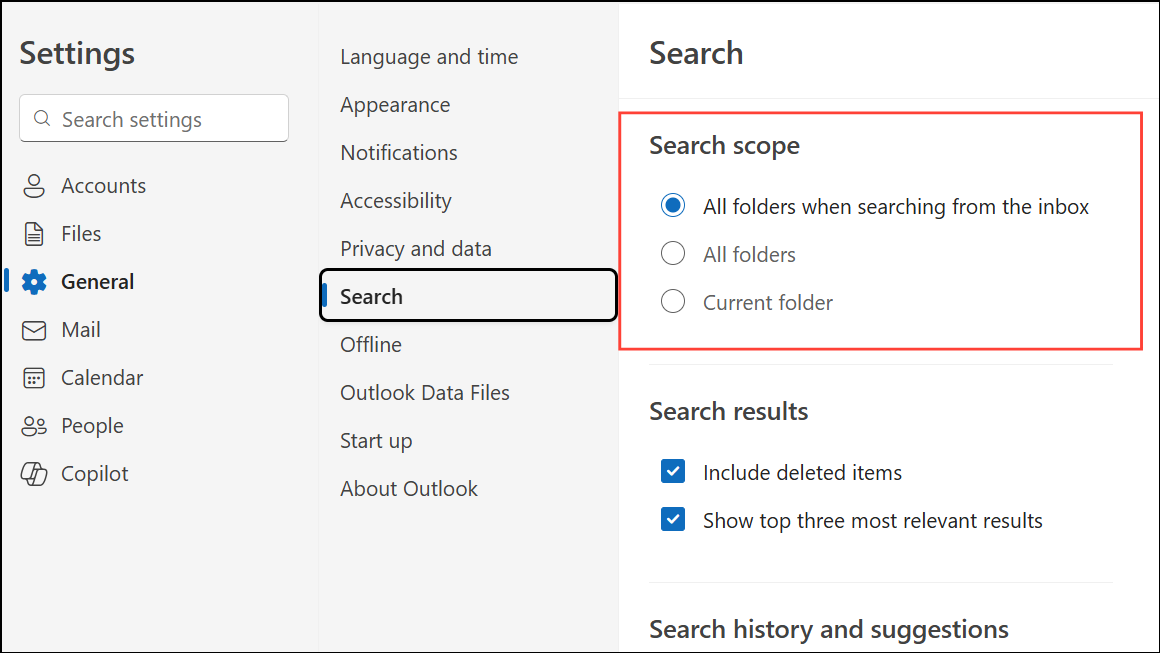
Step 2: Here, adjust the search scope to Current Folder or All Folders to control how broadly Outlook searches your mailboxes. This step can help when older emails or items in specific folders do not appear in results.
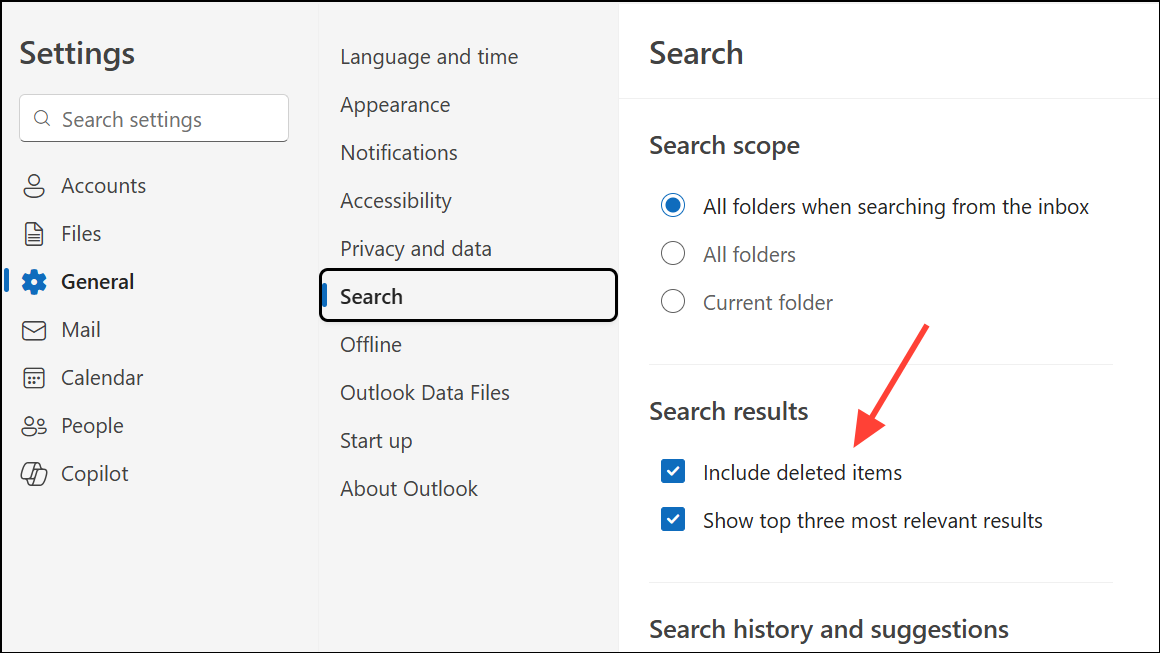
Step 3: If deleted items are missing from search results, ensure the Include deleted items option is checked under Search results in the same menu. Saving this setting expands search coverage to the Deleted Items folder.
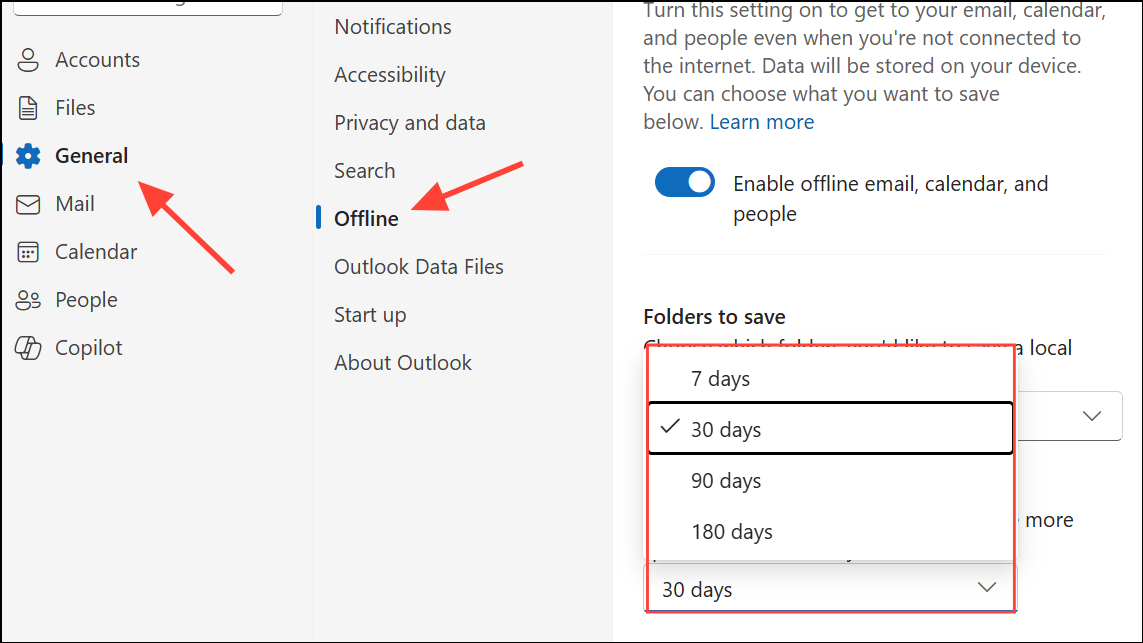
Step 4: To increase the range of emails available for searching, go to Settings > General > Offline and adjust Days of email to save to a longer period. This downloads more historical emails for local indexing, which can resolve issues where searches miss older messages.
Run the Windows Search Troubleshooter (Classic Outlook)
Step 1: On Windows 11, click the Start button, then go to Settings > System > Troubleshoot.
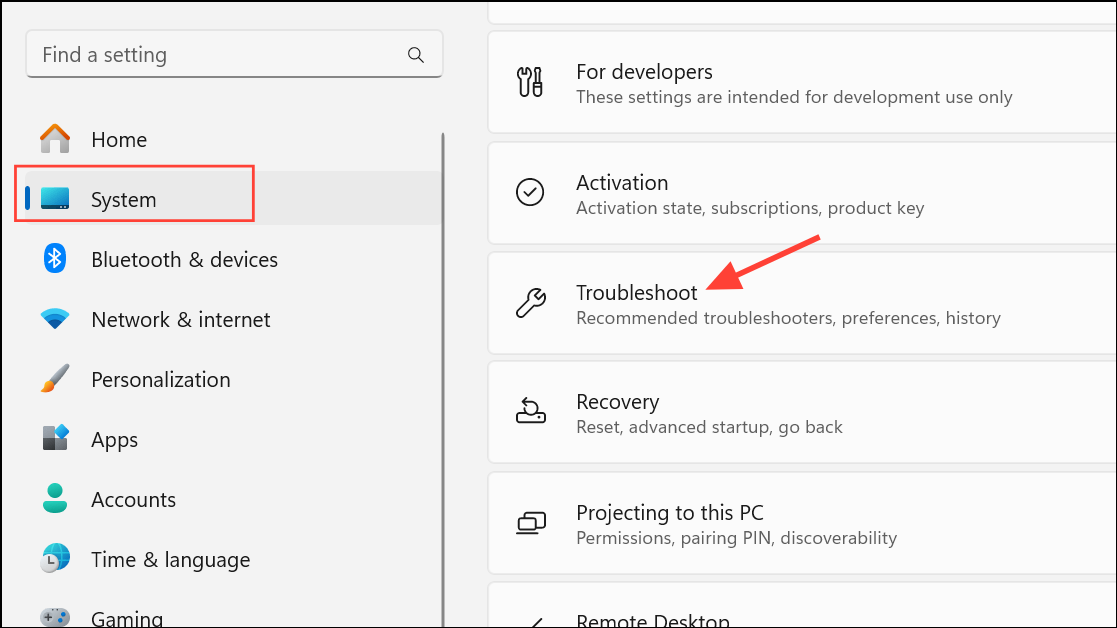
Step 2: Find Searching Windows and select the Indexer troubleshooter. This tool diagnoses and repairs issues with the Windows Search index, which Outlook relies on to deliver results quickly and accurately.
Step 3: Follow the on-screen prompts. The troubleshooter will attempt to resolve any detected problems with search functionality.
Verify Indexing Status and Data File Selection (Classic Outlook)
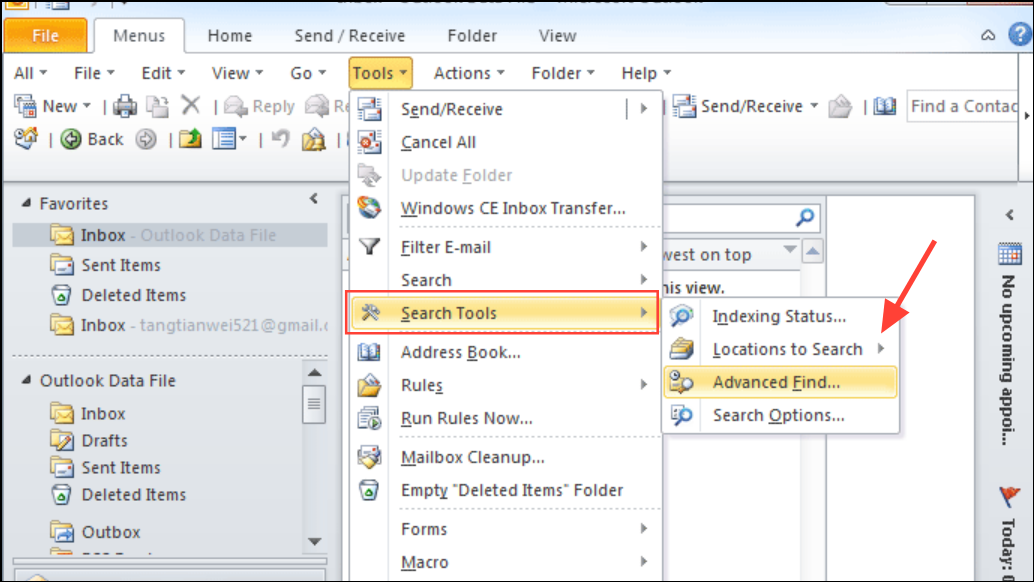
Step 1: In Classic Outlook, click into the search box. From the ribbon, select Search Tools > Indexing Status. The dialog will show how many items remain to be indexed. If indexing is incomplete, leave Outlook open and check again after several minutes to see if the number decreases. Persistent high numbers may indicate a stuck index.

Step 2: Next, select Search Tools > Locations to Search and confirm that all relevant data files are checked. If your main mailbox or archives are not selected, Outlook will not search them.
Restart and Configure the Windows Search Service
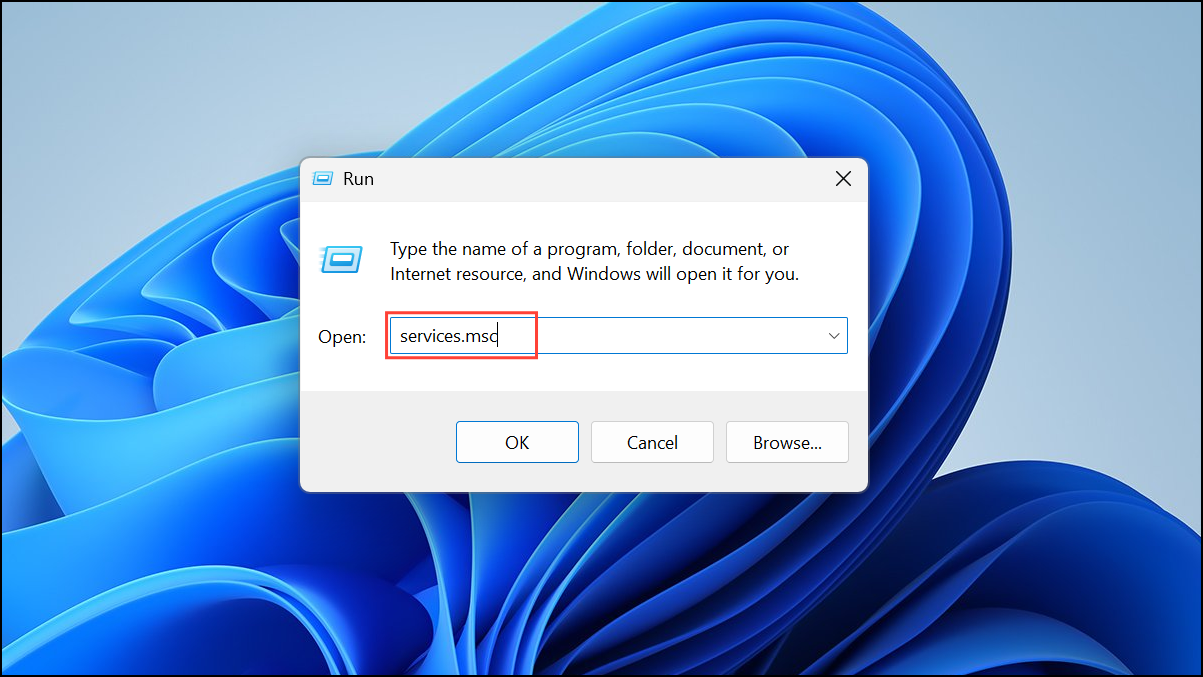
Step 1: Press Windows + R, type services.msc, and press Enter.
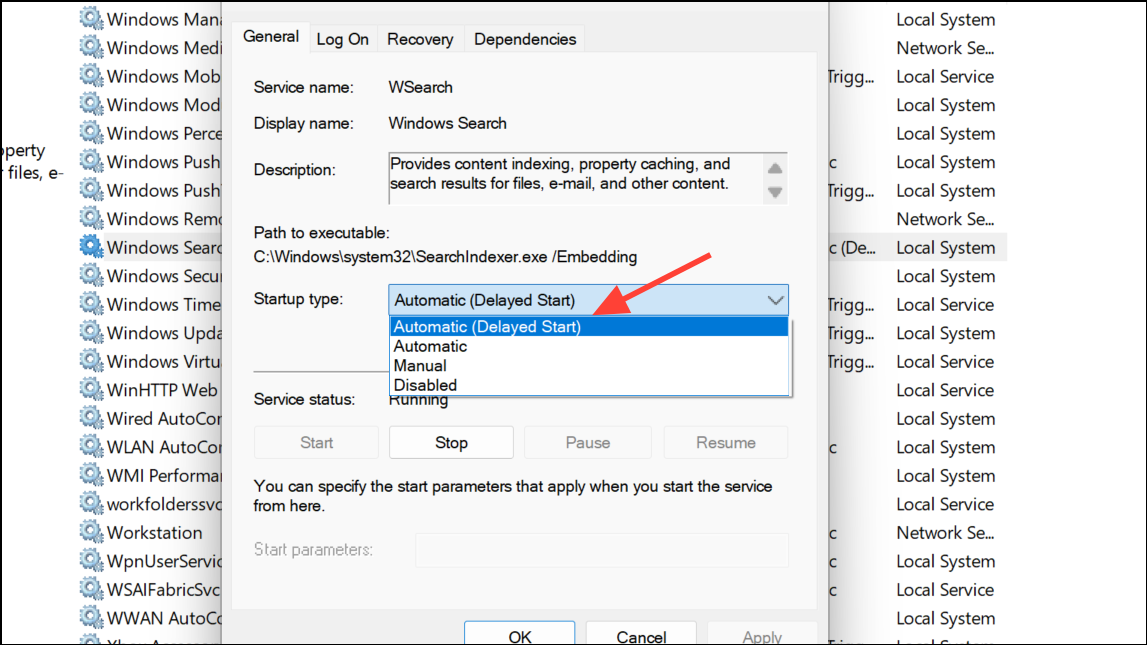
Step 2: In the list, find Windows Search, double-click it, and set Startup type to Automatic (Delayed Start). If the service is not running, click Start to activate it. This ensures the search indexer is always available for Outlook.
Include Outlook Data in Indexing
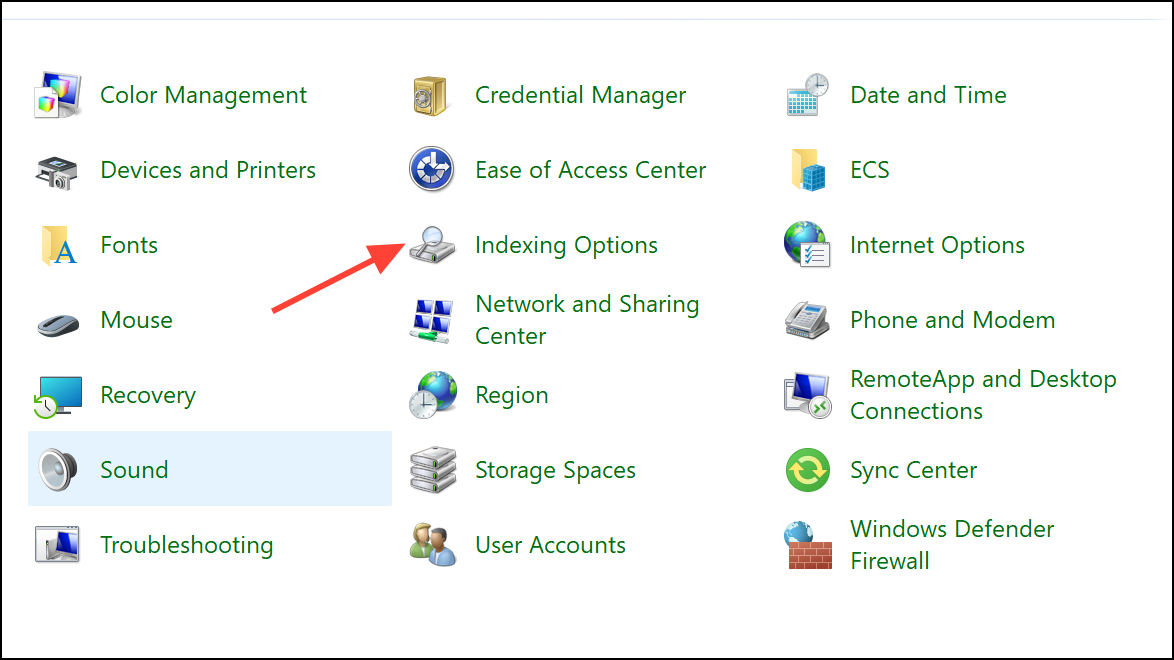
Step 1: Exit Outlook. Open Indexing Options from the Windows Control Panel.
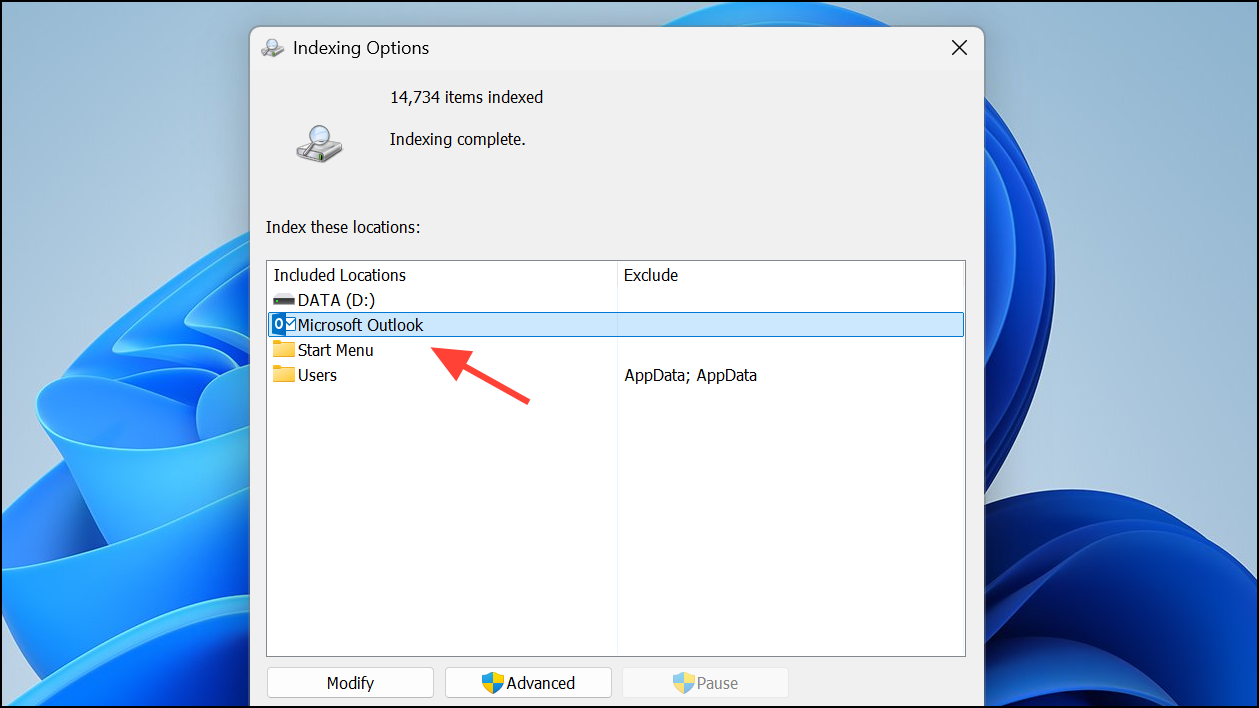
Step 2: Confirm that Microsoft Outlook appears in the Included Locations list. If missing, click Modify and check the box next to Outlook.
Step 3: In Indexing Options, select Advanced, then the File Types tab.

Step 4: Scroll to msg and ensure Index Properties and File Contents is enabled. This setting allows Outlook to search message content, not just headers.
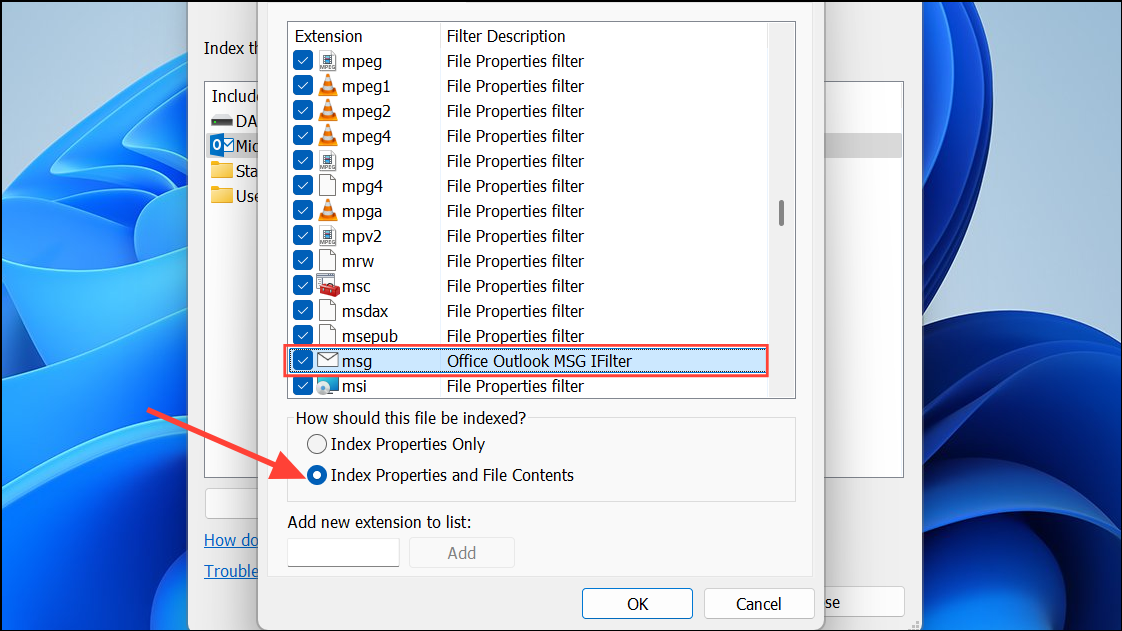
Step 5: Make sure the Filter Description column shows Office Outlook MSG IFilter. If not, the Windows Search service or Outlook installation may be faulty. In this case, consider repairing Office or contacting support.

Rebuild the Search Index
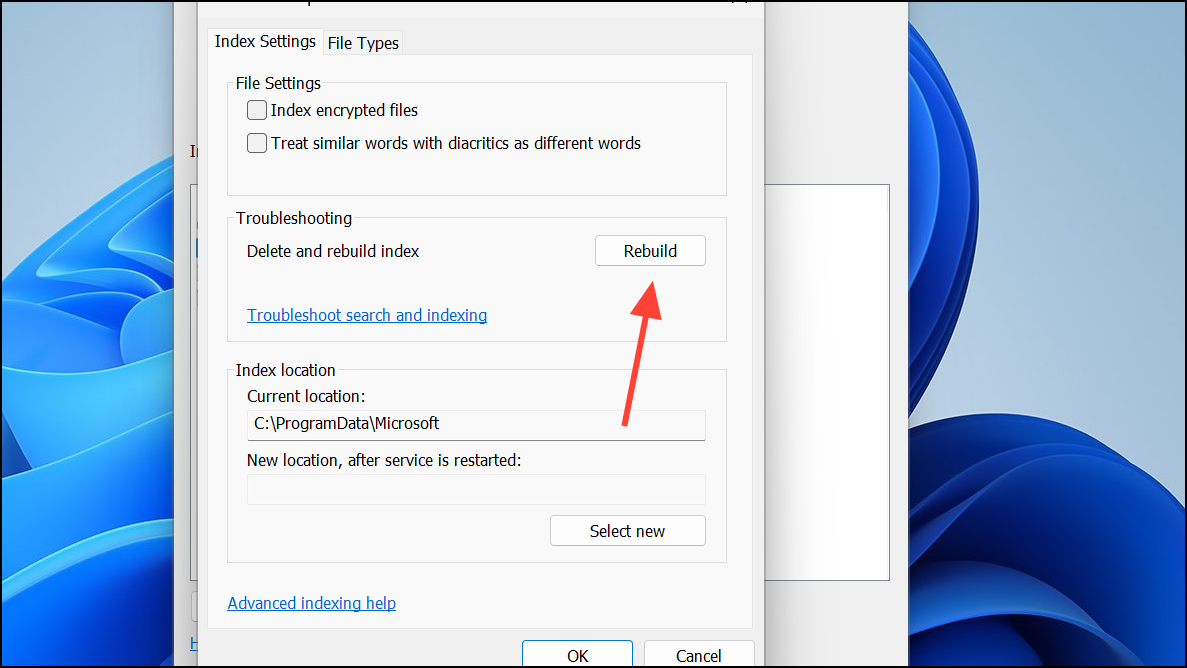
Step 1: Exit Outlook and return to Indexing Options in the Control Panel.
Step 2: Click Advanced and select Rebuild. This process deletes and recreates the search index, which can resolve corruption that leads to missing or incomplete results. Be aware that rebuilding may take several hours, especially with large mailboxes.
Step 3: After rebuilding, leave Outlook open for a while to allow indexing to complete. Monitor Indexing Status to confirm progress.
Create a New Outlook Profile
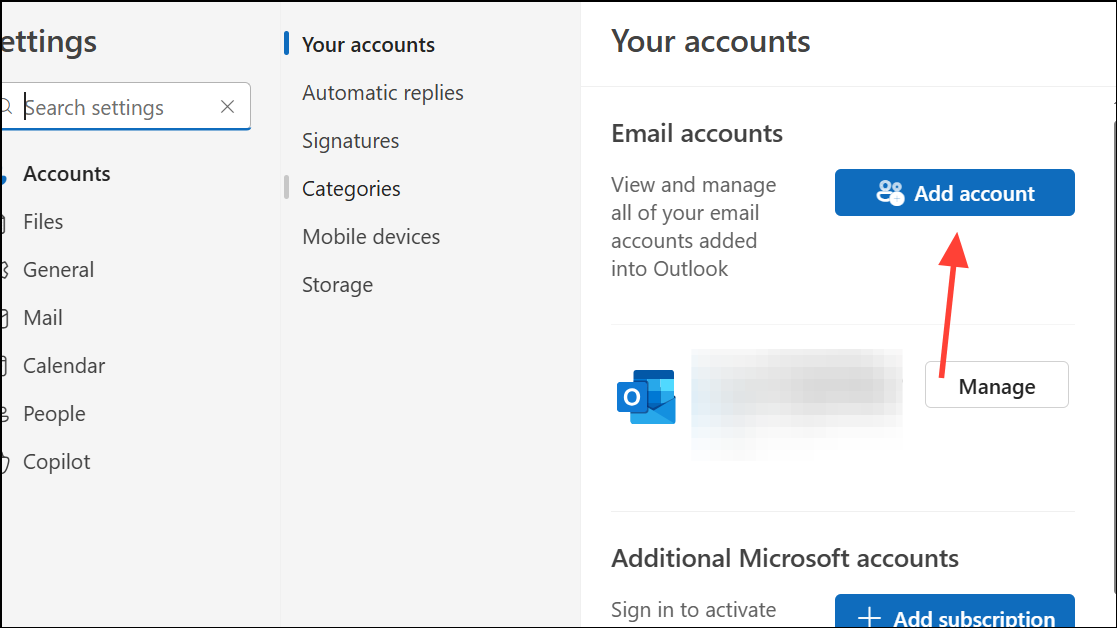
Step 1: In Outlook, go to File > Account Settings > Manage Profiles. Alternatively, exit Outlook and open Mail from the Control Panel. Click Show Profiles and then Add account to create a new profile. Enter a name and set up your account details.
Step 2: Set Outlook to prompt for a profile at startup. Restart Outlook and choose the new profile. Test search functionality. If search works in the new profile, your previous profile may be corrupted and should be replaced.
Expand Search Coverage and Results
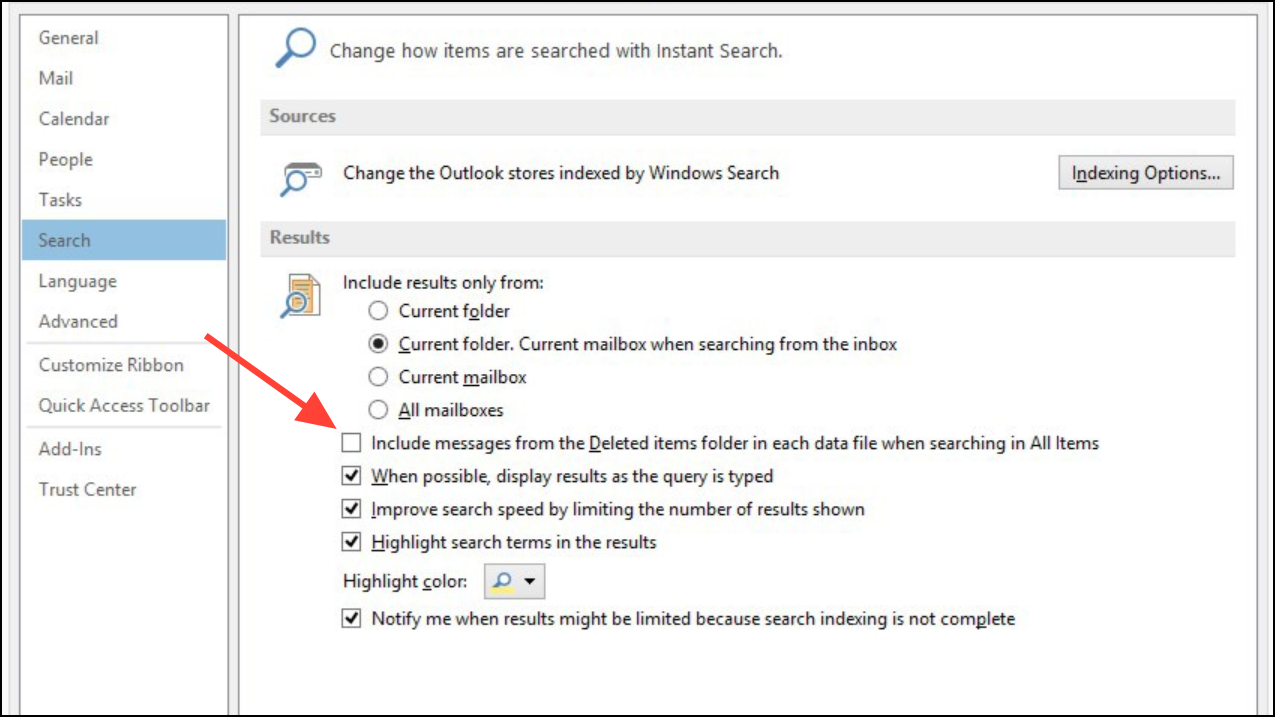
Step 1: In Classic Outlook, go to File > Options > Search. To include deleted items, check Include messages from the Deleted items folder in each data file when searching in All Items and click OK. Restart Outlook.
Step 2: To search more historical emails, adjust the Download email for the past slider in File > Account Settings > Account Settings, then select your account and click Change. Move the slider to a longer period or all mail, then save and restart Outlook.
Step 3: By default, Outlook limits search results to 250 items. To show all results, uncheck Improve search speed by limiting the number of results shown in File > Options > Search. Note that displaying all results may slow down searches.
Repair or Reinstall Microsoft Office
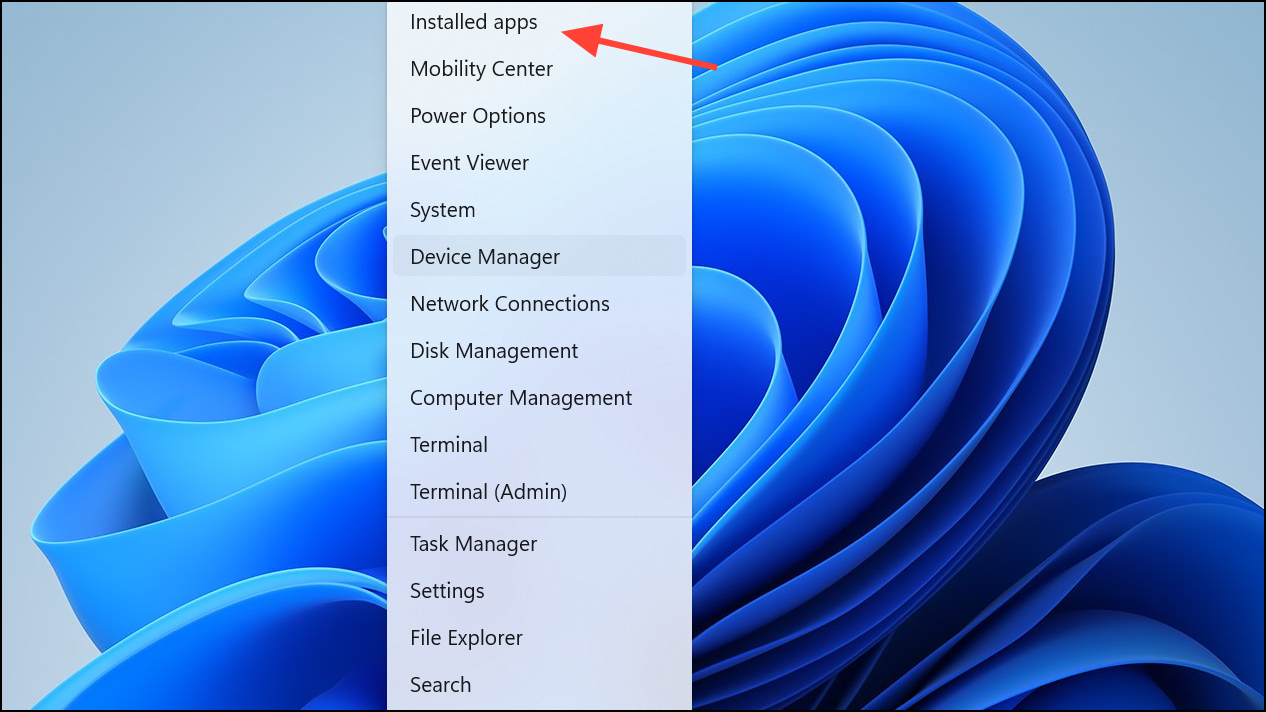
Step 1: Right-click the Start button and select Installed apps (Windows 11) or Apps and Features (Windows 10).
Step 2: Locate Microsoft Office, select Modify, and choose Online Repair for a comprehensive repair. Follow on-screen instructions. This process repairs corrupted program files that may impact Outlook’s search.

Step 3: If repairing Office doesn’t resolve the issue, use Microsoft’s uninstall troubleshooter to remove Office, then reinstall it. This step is more drastic but can fix persistent, unresolvable search problems.
Optimize Search in Shared Mailboxes and Archives
Step 1: When searching in shared mailboxes, use the Current Folder search scope rather than All Mailboxes, as Outlook may not return results from shared or archive mailboxes in broader searches. For auto-expanded archives, search each folder or subfolder individually for best results.
Step 2: If you encounter errors or missing results in shared mailboxes, you can temporarily disable server-assisted search by editing the Windows registry. Only advanced users should attempt this, as incorrect changes can cause system issues. Always back up the registry before proceeding.
    1. Press Windows + R, type regedit, and press Enter.
    2. Navigate to HKEY_CURRENT_USER\Software\Microsoft\Office\16.0\Outlook\Search.
    3. Create a new DWORD value named DisableServerAssistedSearch and set its value to 1.
    4. Close the registry editor and restart Windows.
Disabling server-assisted search can resolve certain search errors in shared mailboxes, especially with perpetual-license versions of Office.
Restoring Outlook’s search functionality on Windows 11 involves a combination of updating search settings, maintaining the Windows Search index, and keeping Outlook profiles healthy. Regularly reviewing these settings and steps helps keep your searches accurate and reliable.