Encountering the “Try Connecting Your Device” error when using Bluetooth on Windows 11 can be frustrating, especially when you rely on wireless peripherals for your daily tasks. Fortunately, there are several solutions you can try to resolve this issue and get your Bluetooth devices working again.
1. Reinstall Bluetooth Drivers
Corrupted or outdated Bluetooth drivers can often cause connection problems. Reinstalling these drivers can help resolve the error.
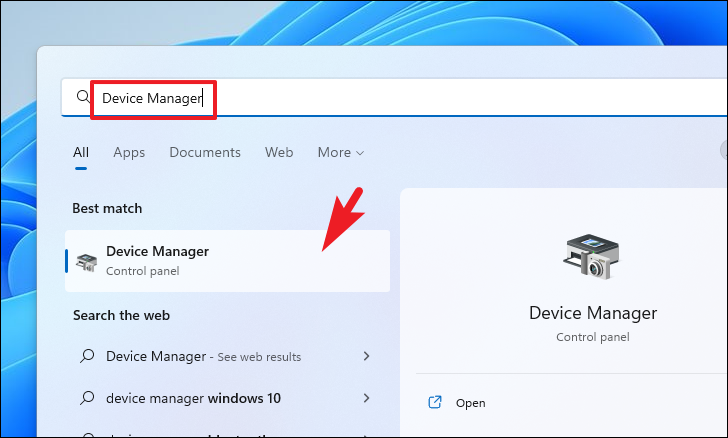
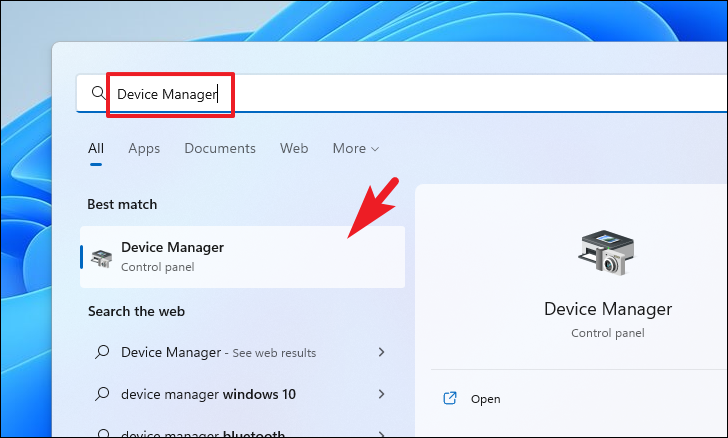
1 Press the Start button and type Device Manager in the search bar. Click on the ‘Device Manager’ app from the search results.
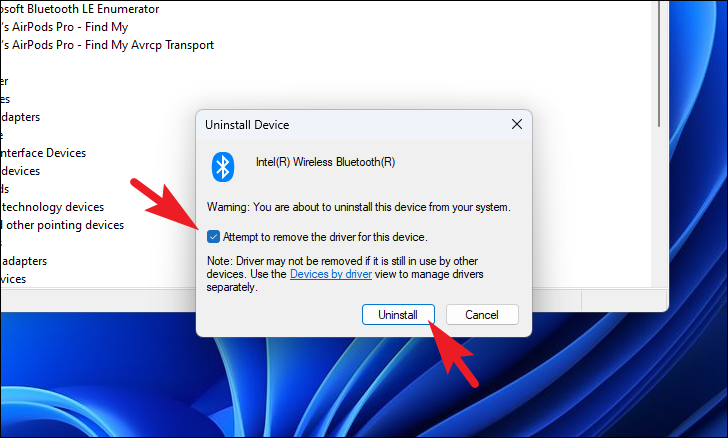
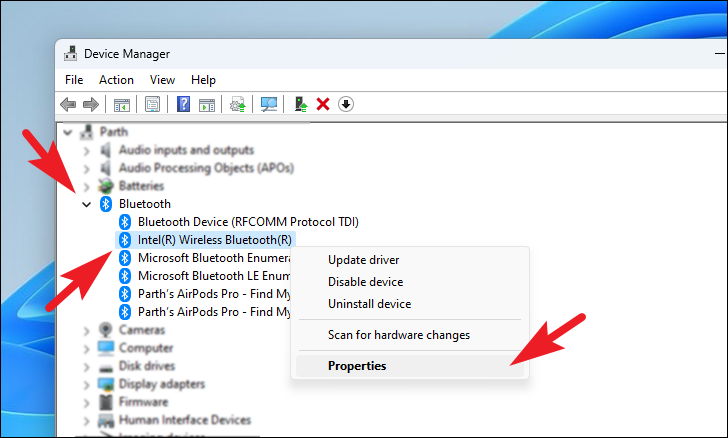
2 In the Device Manager window, expand the ‘Bluetooth’ section by clicking the arrow next to it. Right-click on your Bluetooth adapter (e.g., ‘Bluetooth Wireless’) and select ‘Uninstall device’ from the context menu.
3 In the confirmation window, check the box that says ‘Attempt to remove the driver for this device’ and click ‘Uninstall’.
4 Restart your computer to allow Windows to reinstall the default Bluetooth drivers automatically.
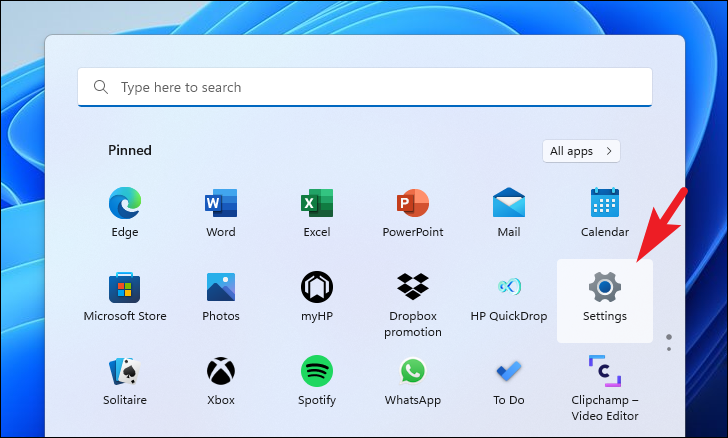
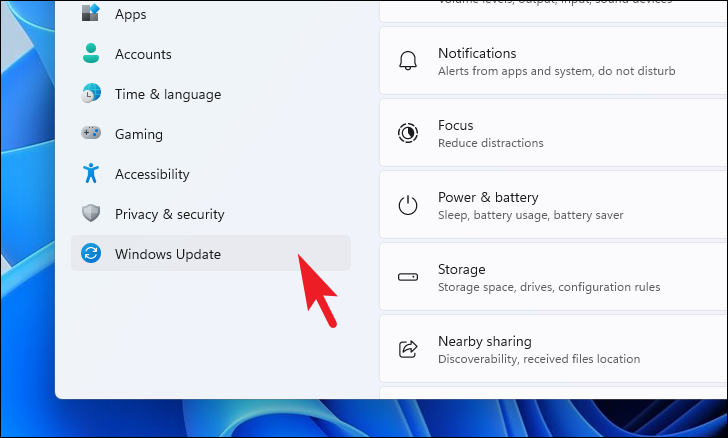
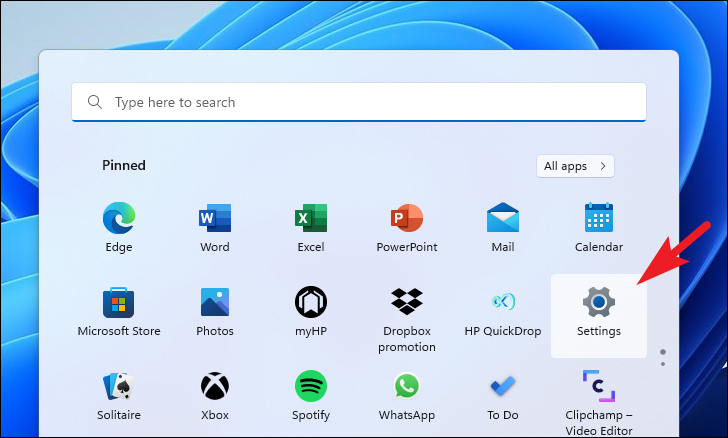
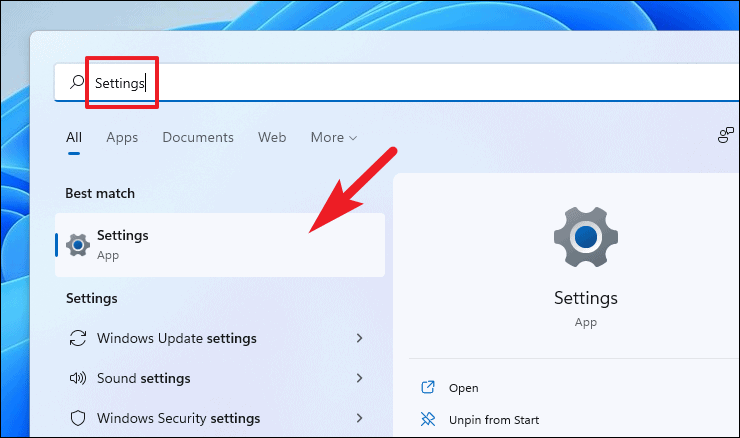
5 After rebooting, open the Settings app by clicking the Start button and selecting the ‘Settings’ icon.
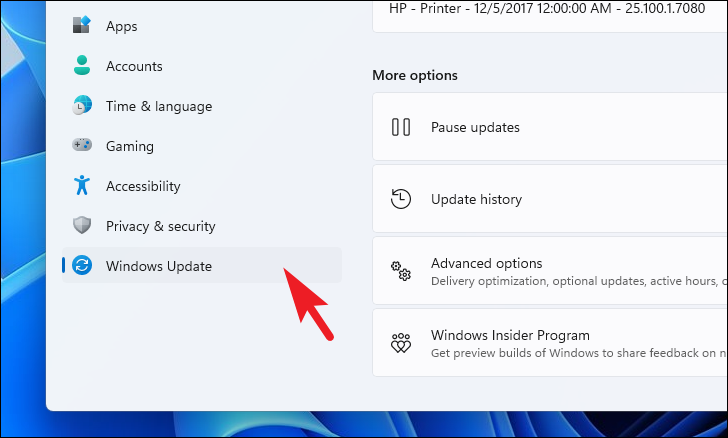
6 Navigate to the ‘Windows Update’ section from the left sidebar.
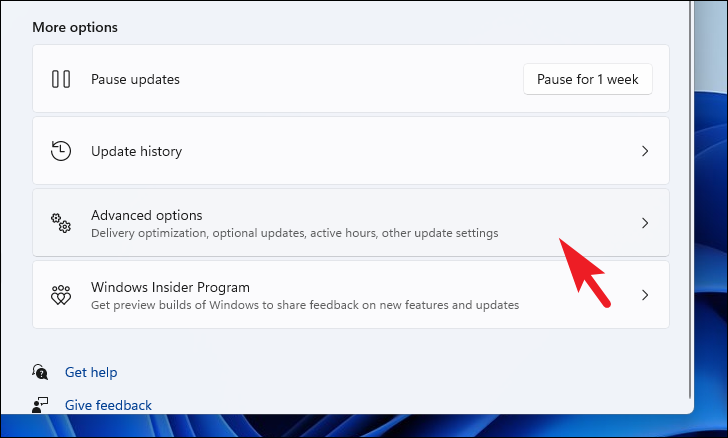
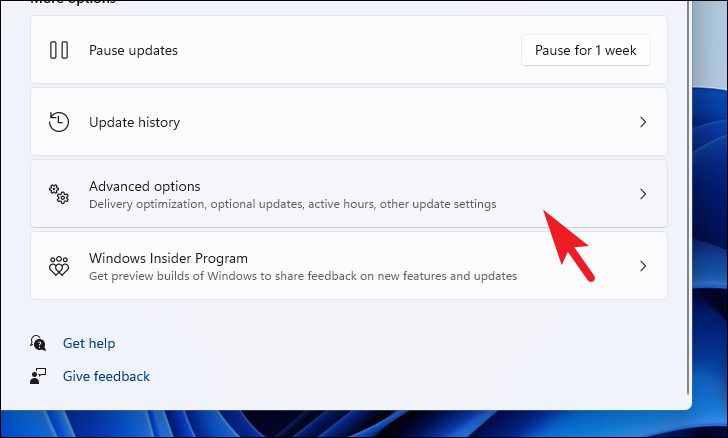
7 Click on ‘Advanced options’ in the right pane.
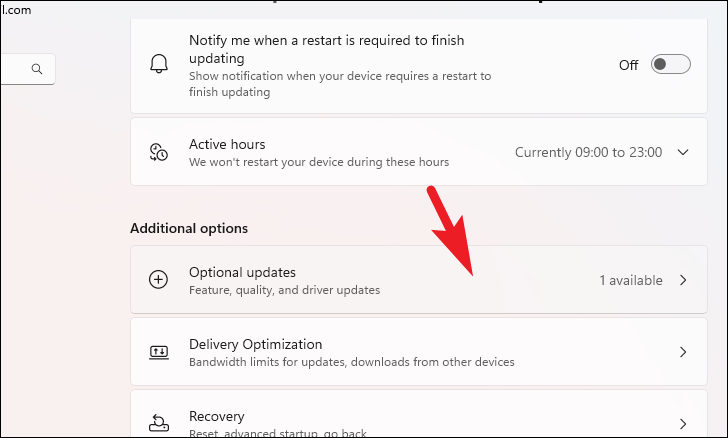
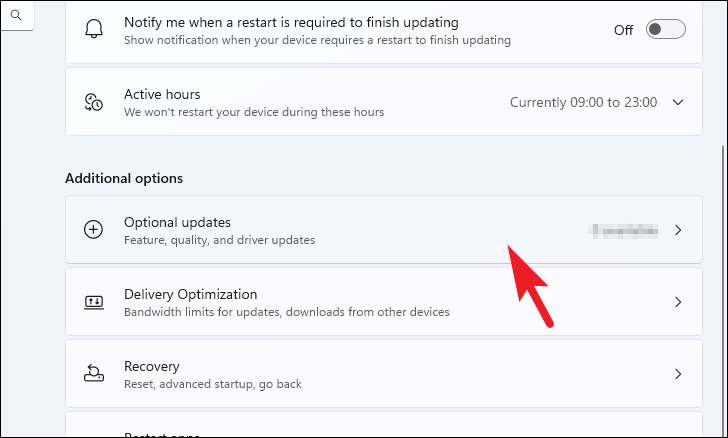
8 Select ‘Optional updates’ under the ‘Additional options’ section.
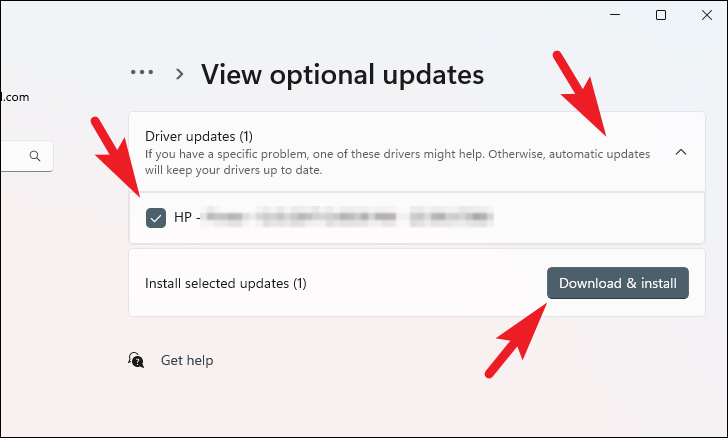
9 Expand the ‘Driver updates’ section, check the box next to the Bluetooth driver, and click ‘Download & install’ to reinstall the driver.
2. Update or Roll Back Bluetooth Drivers
Sometimes, updating to the latest driver or rolling back to a previous version can fix Bluetooth connectivity issues.
Updating Drivers via Settings:
1 Open the Settings app by clicking the Start button and selecting ‘Settings’.
2 Go to the ‘Windows Update’ section on the left.
3 Click on ‘Advanced options’ in the right pane.
4 Select ‘Optional updates’.
5 Expand the ‘Driver updates’ section, check the Bluetooth driver, and click ‘Download & install’.
Updating Drivers via Device Manager:
1 Press the Start button, type Device Manager, and open it from the results.
2 Expand the ‘Bluetooth’ section, right-click your Bluetooth adapter, and select ‘Update driver’.
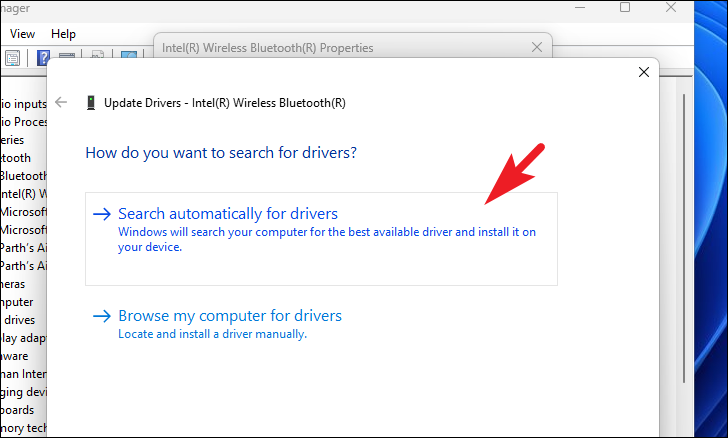
3 Choose ‘Search automatically for drivers’ to let Windows find the latest driver.
Manual Driver Installation:
If automatic updates don’t work, you can manually download the latest driver from the manufacturer’s website and install it.
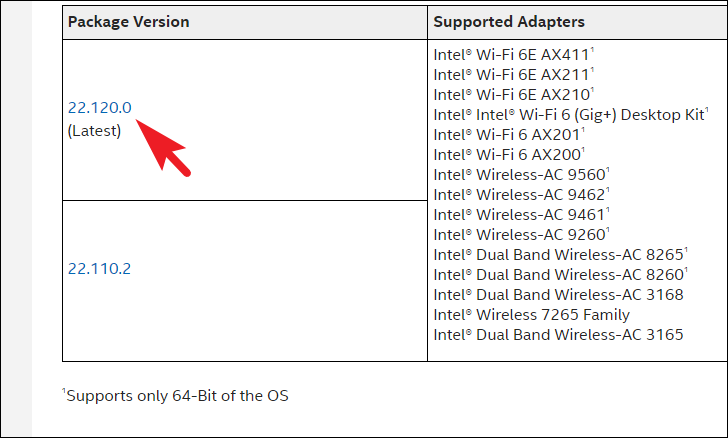
2 Scroll down and select ‘Windows 10 and Windows 11’ from the dropdown menu to find compatible drivers.
3 Click on the ‘Latest’ driver package to download it.
4 On the next page, click ‘Download’ under ‘Available Downloads’, then accept the license agreement to start the download.
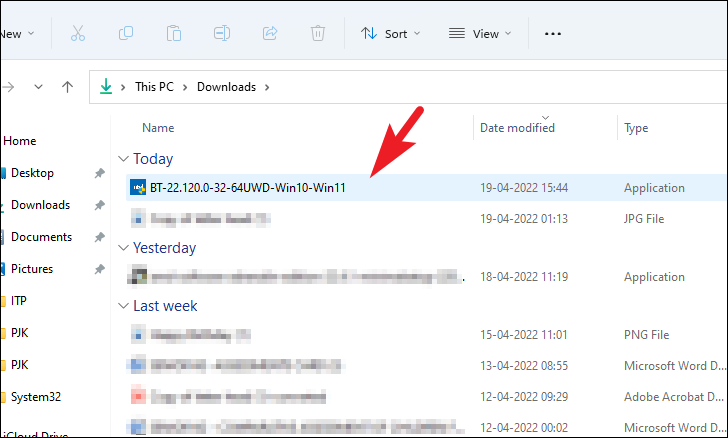
5 Once downloaded, navigate to your downloads folder and double-click the installer file.
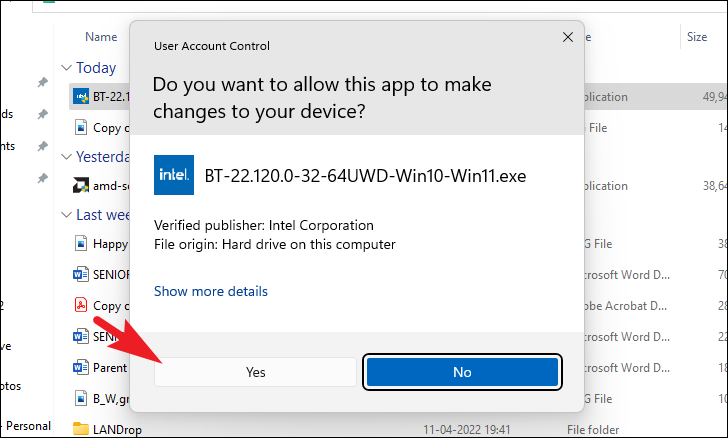
6 If prompted by User Account Control, click ‘Yes’ to allow the installation.
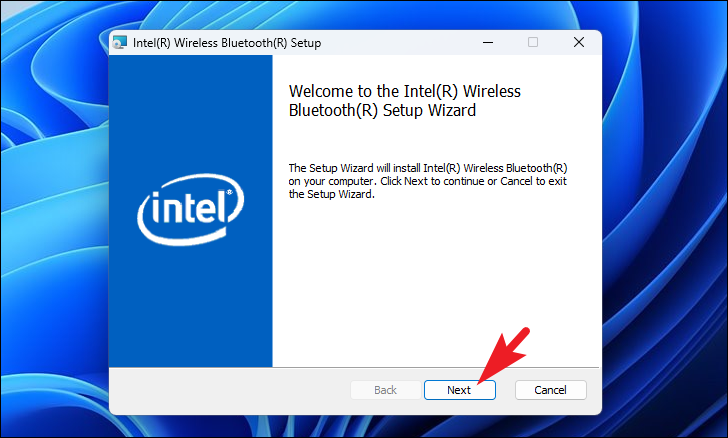
7 Follow the on-screen instructions in the installation wizard to complete the setup.
8 After installation, restart your computer to apply the changes.
3. Run the Bluetooth Troubleshooter
Windows includes a built-in troubleshooter that can automatically detect and fix common Bluetooth issues.
1 Open the Settings app by clicking the Start button and selecting ‘Settings’.
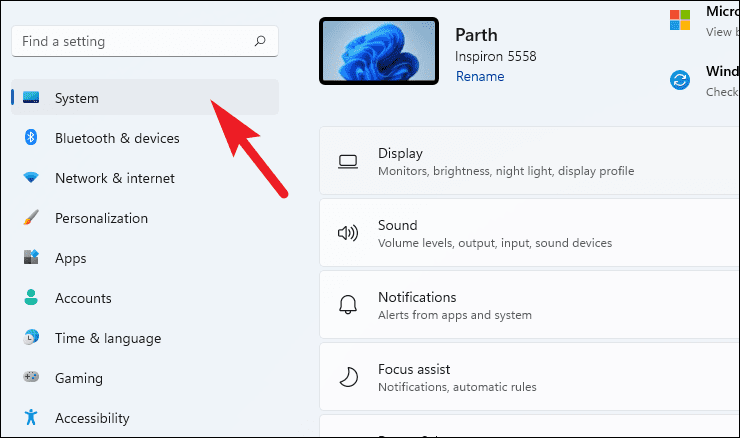
2 Go to the ‘System’ section in the left sidebar.
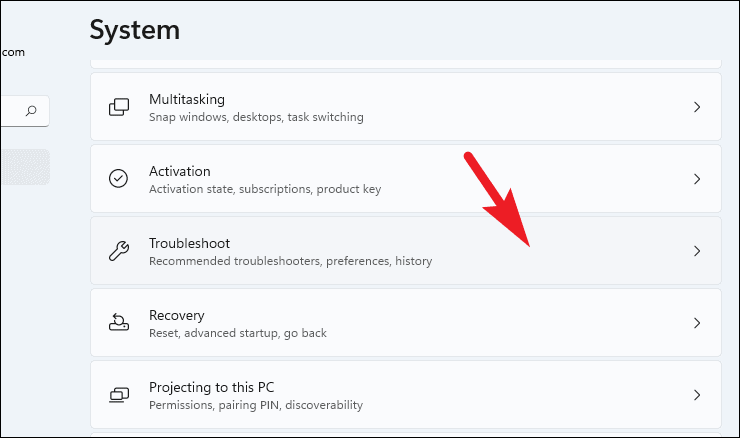
3 Scroll down and click on ‘Troubleshoot’ in the right pane.
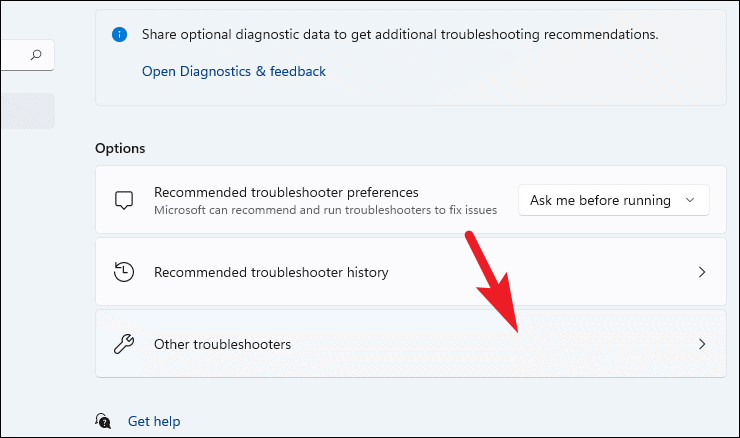
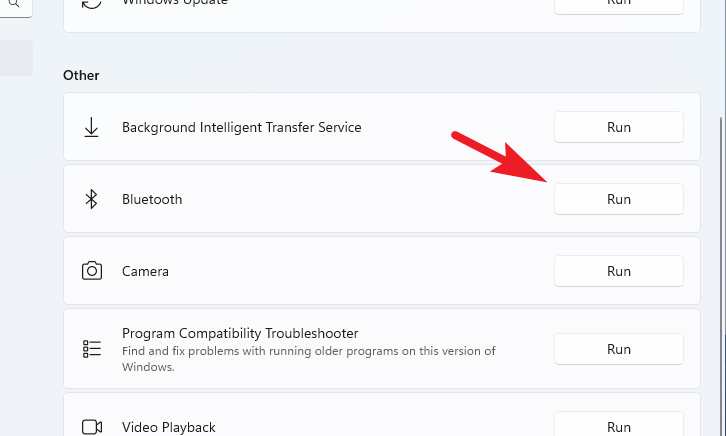
4 Select ‘Other troubleshooters’.
5 Find ‘Bluetooth’ in the list and click ‘Run’ next to it.
6 The troubleshooter will scan for issues and apply fixes automatically. Follow any on-screen instructions if prompts appear.
4. Set Bluetooth Service to Automatic
Ensuring that the Bluetooth service starts automatically can help maintain a stable connection.
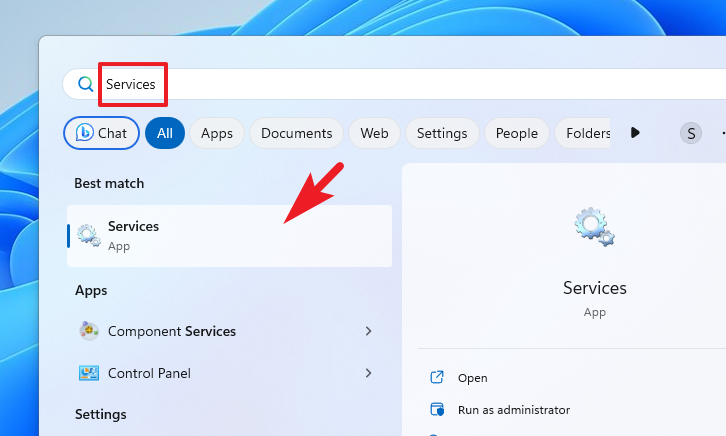
1 Press the Start button, type Services, and open the ‘Services’ app from the results.
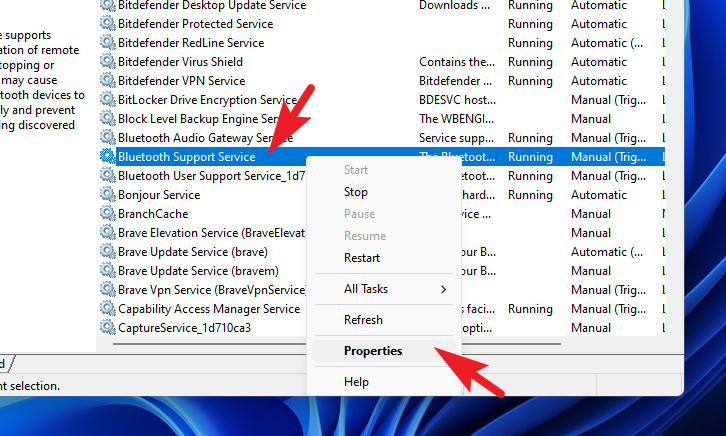
2 In the Services window, scroll down to find ‘Bluetooth Support Service’. Right-click on it and select ‘Properties’.
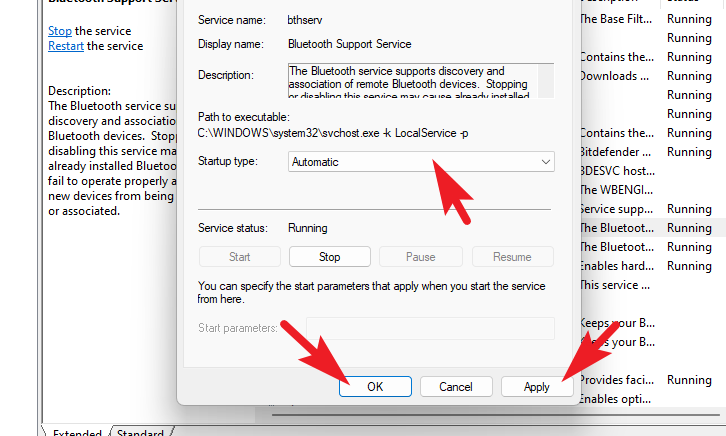
3 In the Properties window, set the ‘Startup type’ to ‘Automatic’ from the dropdown menu.
4 Click ‘Apply’ and then ‘OK’ to save the changes.
5 Restart your computer to ensure the changes take effect.
Adjusting the logon settings for Bluetooth services can help resolve connectivity issues.
1 Open the ‘Services’ app by searching for it in the Start Menu.
2 Find ‘Bluetooth Support Service’, right-click on it, and select ‘Properties’.
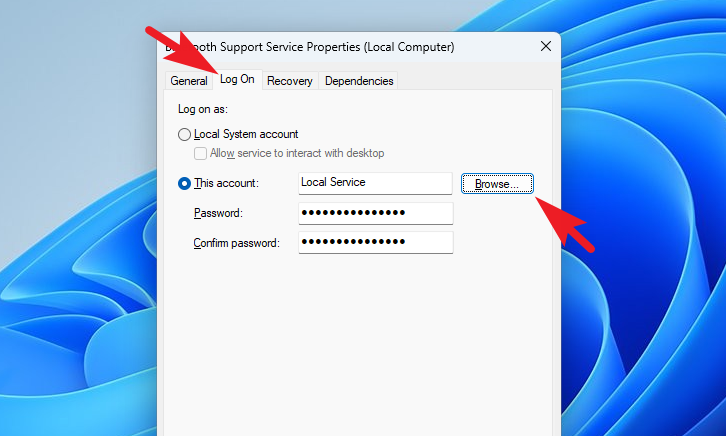
3 Go to the ‘Log On’ tab and click ‘Browse’.
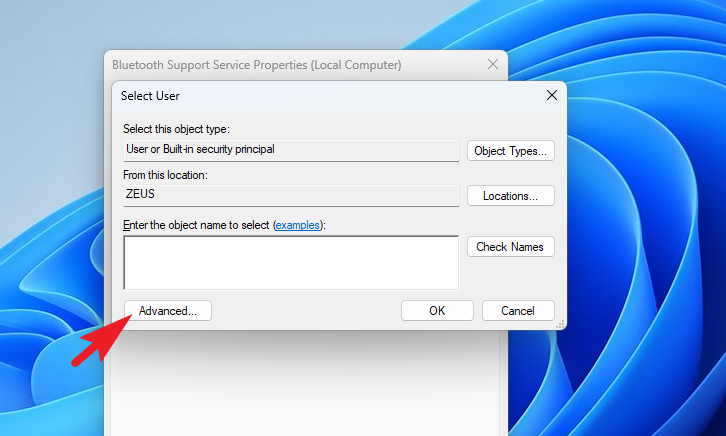
4 In the new window, click ‘Advanced’, then ‘Find Now’.
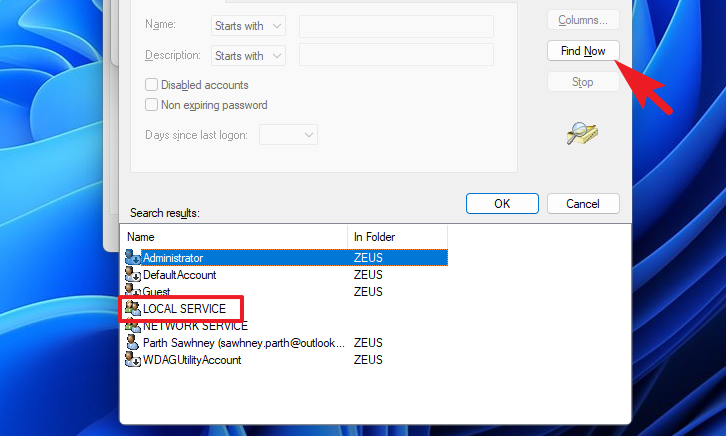
5 Select ‘Local Service’ from the list and click ‘OK’.
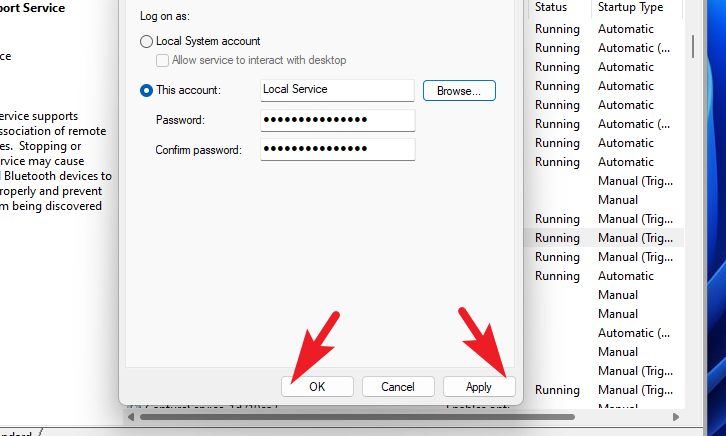
6 Back in the Properties window, click ‘Apply’ and then ‘OK’.
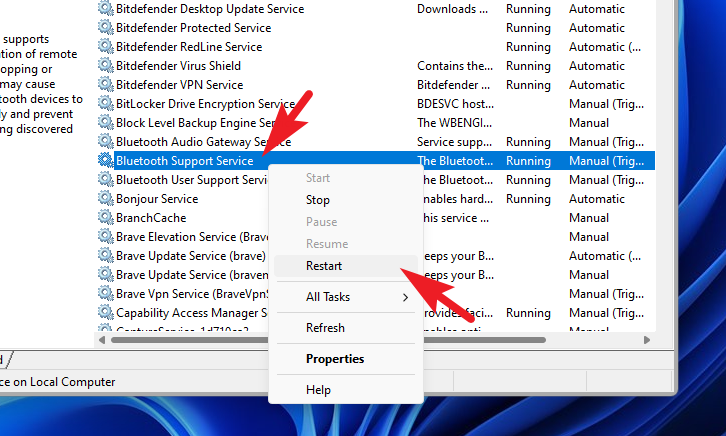
7 In the Services window, right-click ‘Bluetooth Support Service’ and select ‘Restart’.
8 Try reconnecting your Bluetooth device. If it still doesn’t work, restart your computer and attempt to connect again.
6. Update Windows
Keeping Windows up to date can fix underlying software issues and improve system stability.
1 Open the Settings app by selecting it from the Start menu.
2 Click on ‘Windows Update’ in the left sidebar.
3 Click ‘Check for updates’ and then ‘Download & install’ if updates are available.
7. Restart Windows
Sometimes, a simple restart can resolve temporary glitches and conflicts.
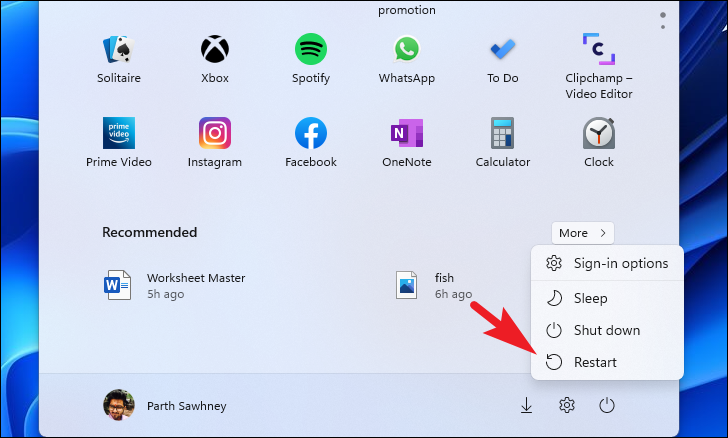
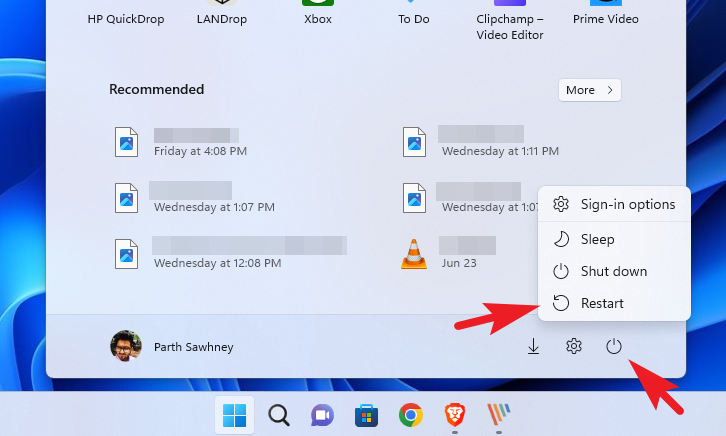
1 Click the Start button, then click the ‘Power’ icon and select ‘Restart’.
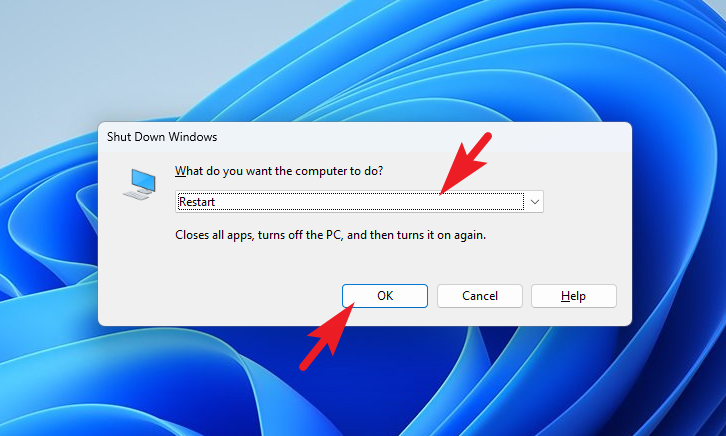
Alternative Method: Press Alt + F4 from the desktop to open the ‘Shut Down Windows’ dialog. Select ‘Restart’ from the dropdown and click ‘OK’ or press Enter.
8. Connect External Antennas
Some Bluetooth adapters require external antennas for optimal performance, especially in desktop setups.
1 Check if your Bluetooth adapter model is among those that need external antennas, such as:
Intel Wireless-AC 9260 Intel Dual Band Wireless-AC 8265 Intel Dual Band Wireless-AC 8265 Desktop Kit 2 Locate the antennas that came with your adapter or computer. There should be two—one for Wi-Fi and one that serves both Wi-Fi and Bluetooth.
3 Attach both antennas to the appropriate ports on your adapter to ensure optimal connectivity.
9. Roll Back to a System Restore Point
If the issue started recently, rolling back your system to a previous state might help.
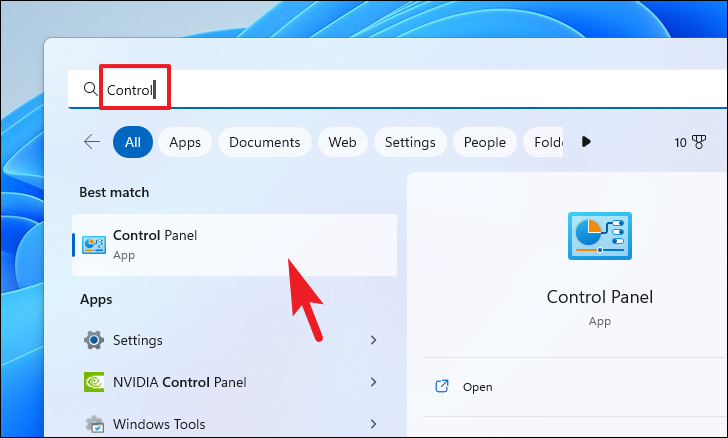
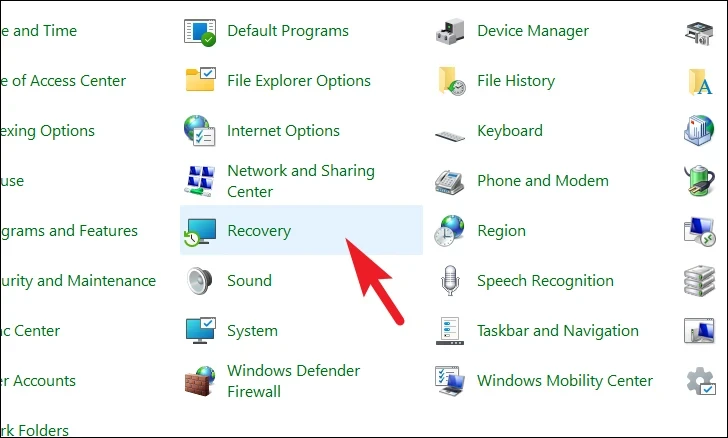
1 Click the Start button, type Control Panel, and open it from the results.
2 In the Control Panel, click on ‘Recovery’.
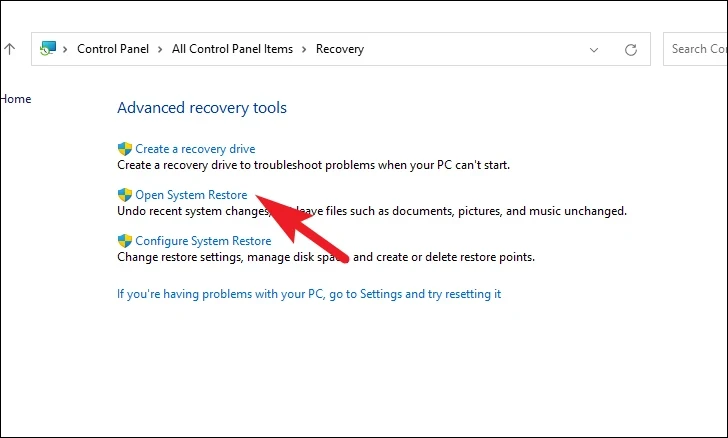
3 Click ‘Open System Restore’.
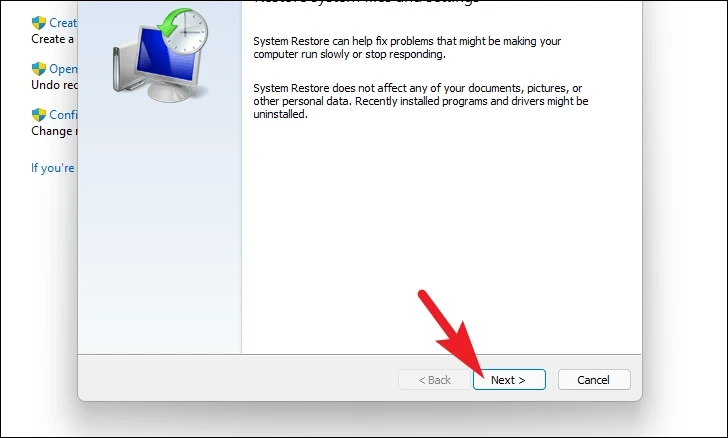
4 Click ‘Next’ in the System Restore window.
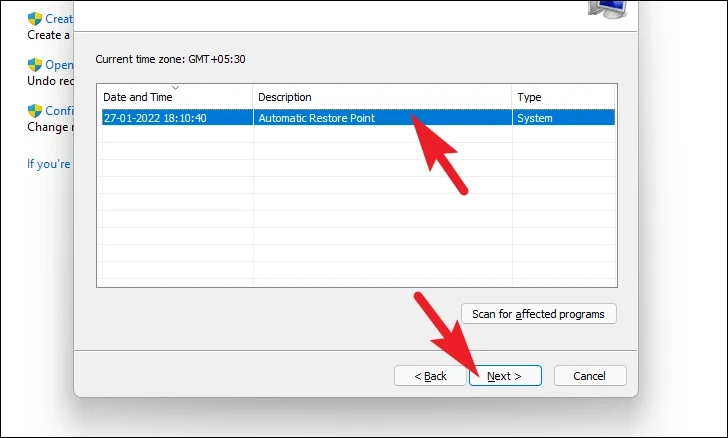
5 Select a restore point from before the issue began and click ‘Next’.
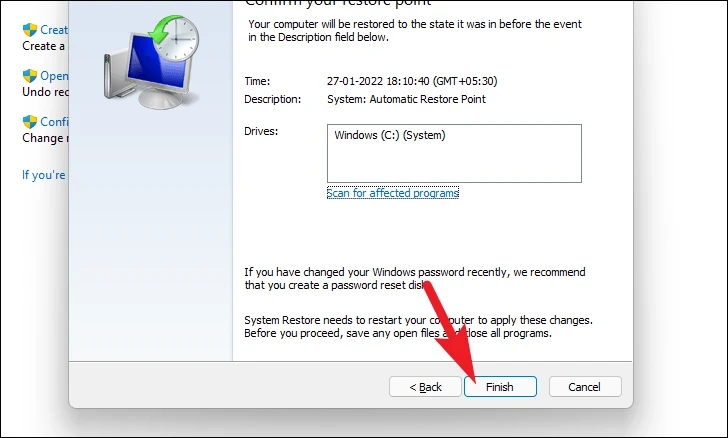
6 Review the details and click ‘Finish’ to start the restoration process.
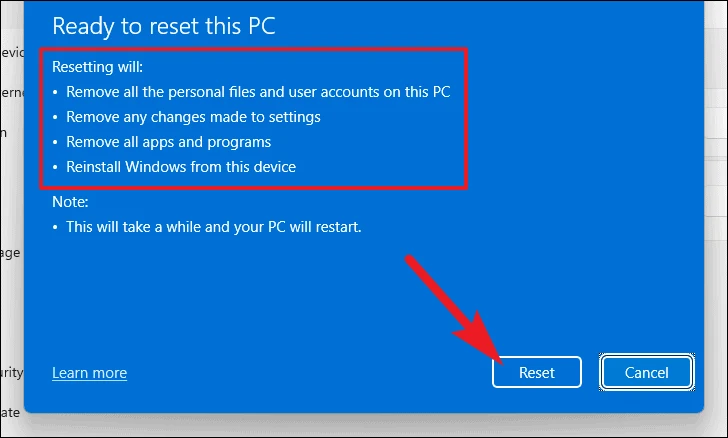
10. Reset Windows to Factory Settings
If all else fails, resetting Windows can resolve deep-seated issues by reinstalling the operating system while keeping your personal files.
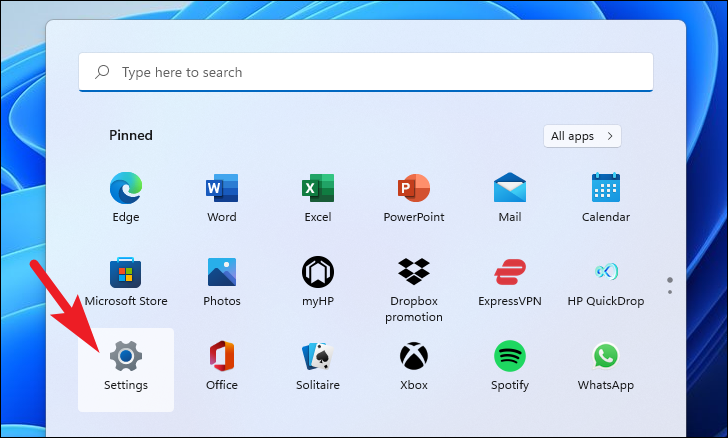
1 Open the Settings app from the Start menu.
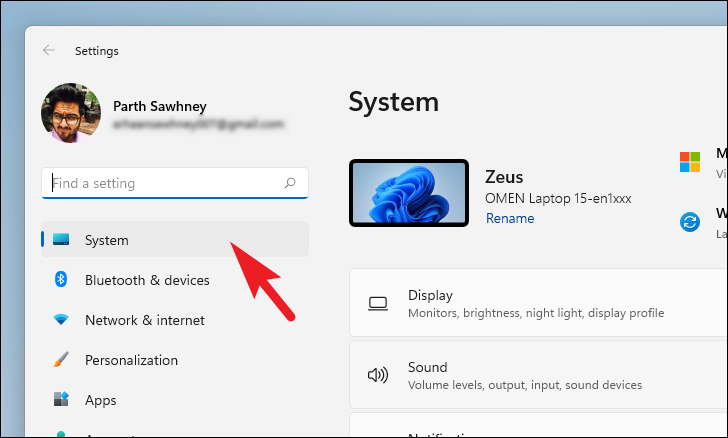
2 In the left sidebar, ensure ‘System’ is selected.
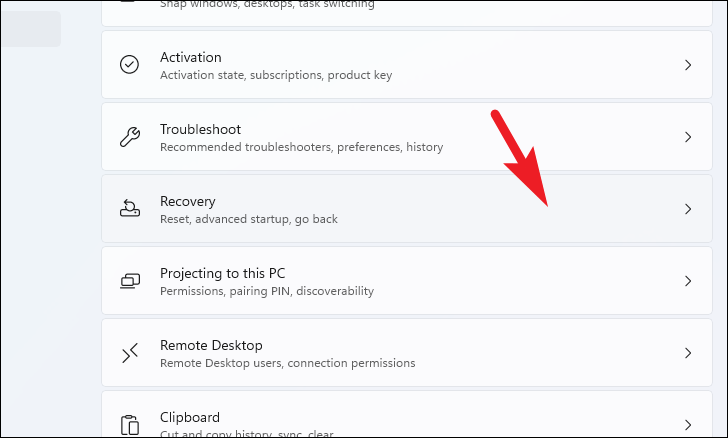
3 Scroll down and click on ‘Recovery’ in the right pane.
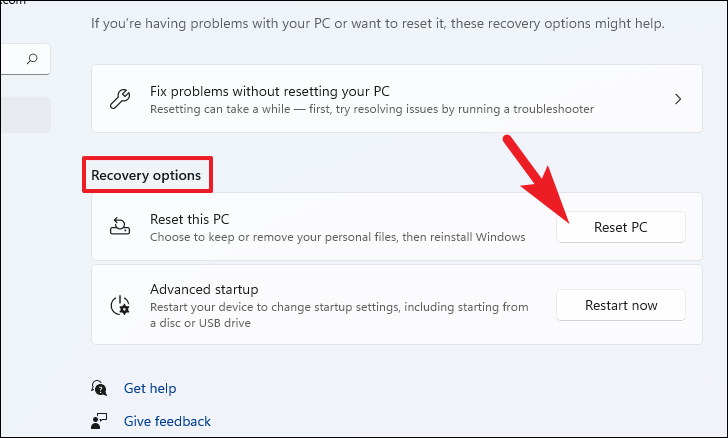
4 Under ‘Recovery options’, click ‘Reset PC’ next to ‘Reset this PC’.
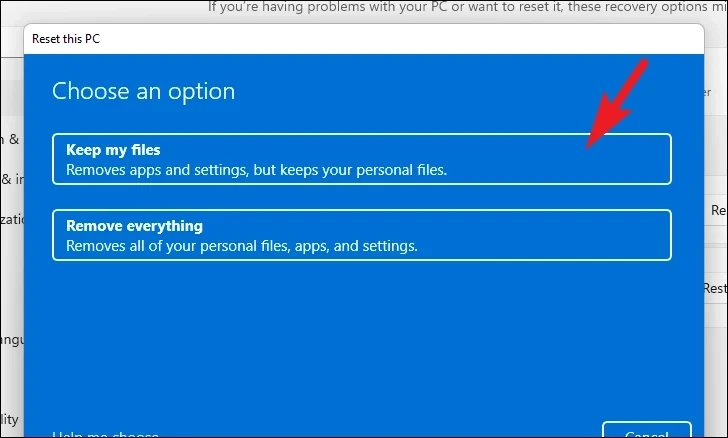
5 Choose ‘Keep my files’ to retain your personal data while resetting system settings and apps.
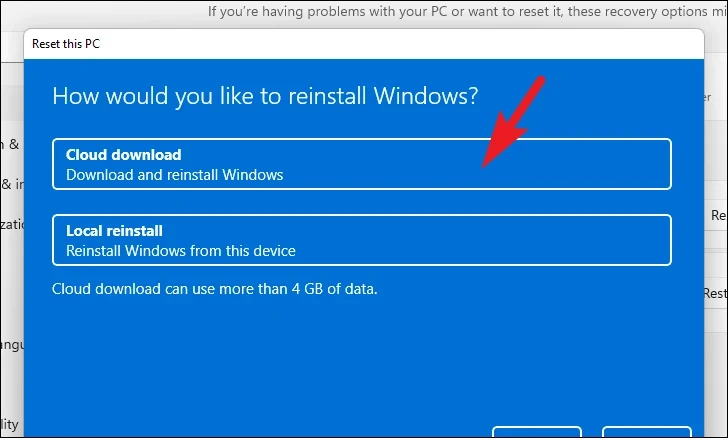
6 Select ‘Cloud download’ for the latest version of Windows. Note that this requires an internet connection and may use over 4 GB of data.
Note: ‘Cloud download’ will require an active internet connection and will consume upwards of 4 GB of data.
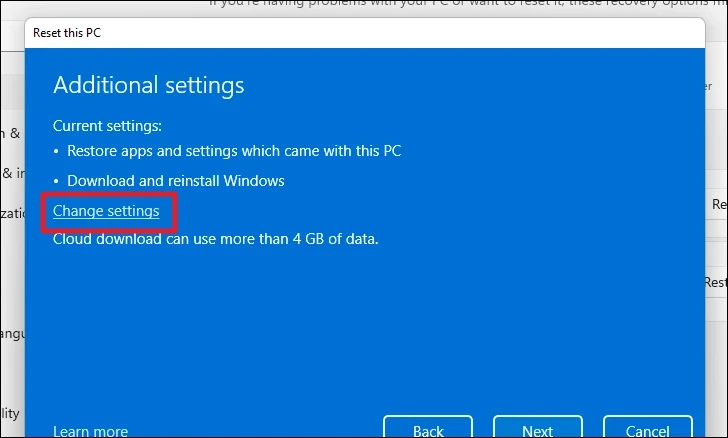
7 Review your reset settings and click ‘Next’.
8 Click ‘Reset’ to begin the process. Your computer will restart multiple times during the reset.
By following these steps, you should be able to resolve the Bluetooth error and reconnect your devices without further issues.