
Many users reported that Windows 10 installation is getting failed without any error code. The error code helps you understand what kind of error your device is facing so you can take appropriate steps to resolve it. But when there is no error code, you’re flying blind and it makes troubleshooting the situation somewhat difficult.
Still, it’s not impossible and we have compiled a list of solutions that will help you quickly resolve this problem and enable you to install Windows 10 on your device.
General Fixes
Before going on to try the fixes listed below, here are some general easy fixes you should try to resolve the installation error:
- Remove any peripherals: If you have any non-essential external hardware peripherals plugged in, like headphones, USB devices, external hard drives, printers, scanners, etc., unplug them. They can interfere with the installation. If your laptop is connected to a docking station, also undock it.
- Update Drivers: Make sure all the important drivers are updated before installing Windows.
- Uninstall third-party anti-virus: If you’re using any third-party anti-virus software, uninstall it and use only Microsoft Defender, at least while you’re trying to upgrade the Windows. Third-party anti-virus software can often cause problems with Windows updates. Once the installation completes, you can reinstall the software. But make sure you have the required activation information before uninstalling so you can reactivate it.
- Free Up Disk Space: You should have enough space on your hard drive so that the Windows installation can take place. If it doesn’t get the required space, the installation will fail. Check the disk space from File Explorer (or, Windows Explorer in Windows 7) and free up space if required.
Try updating Windows after performing these fixes. If you still see an error code, then proceed with the more technical fixes listed below.
Method 1: Deploy DISM and SFC Command
Deployment Image Servicing and Management scans will check and repair the existing operating system files installed on your device along with other system files.
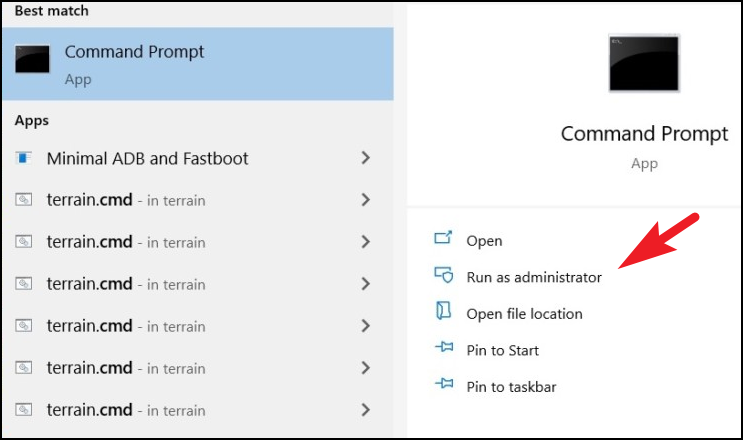
Head to the Start Menu and type ‘Command Prompt’ to search for it. Then, click on the ‘Run as administrator’ option from the right section of the menu to continue.
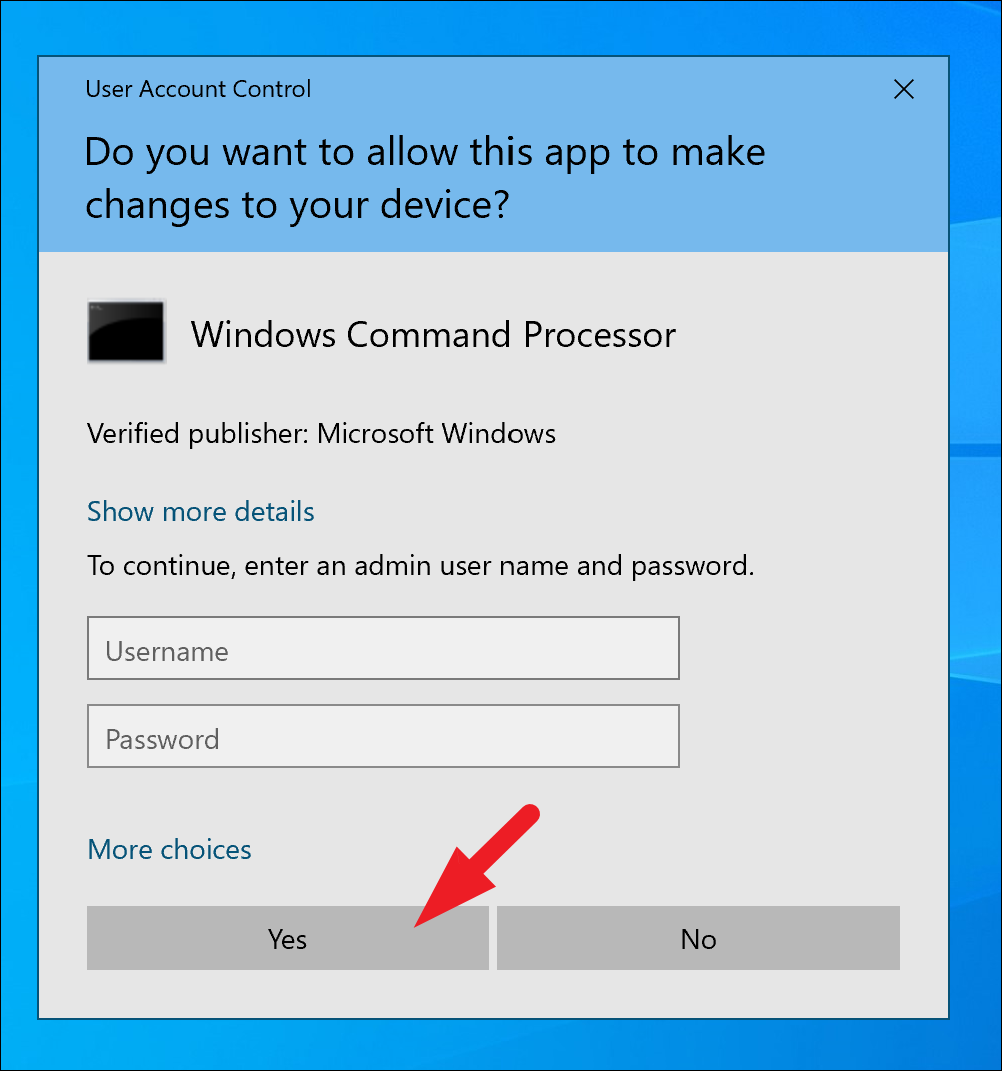
Next, if you are not logged in with an admin account, enter the credentials for one. Otherwise, click on the ‘Yes’ button to proceed.
Then, type or copy+paste the below-mentioned command and hit Enter on your keyboard. This will restore the currently installed OS image on your device.
DISM/ Online/Cleanup-Image/RestoreHealth 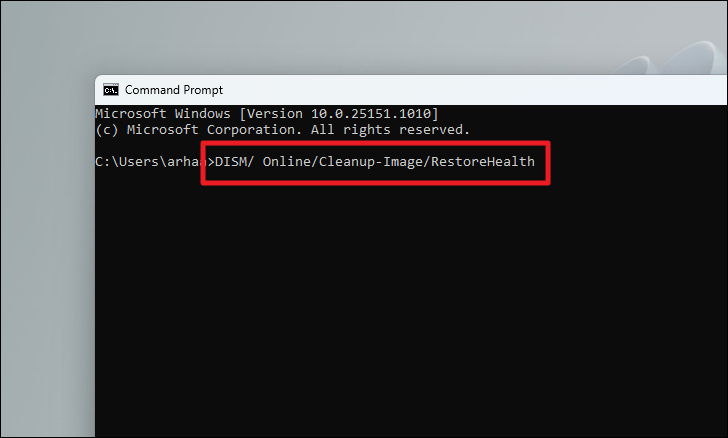
Once completed, type or copy+paste the following command and hit Enter to check and repair the System files on your PC.
SFC /scannow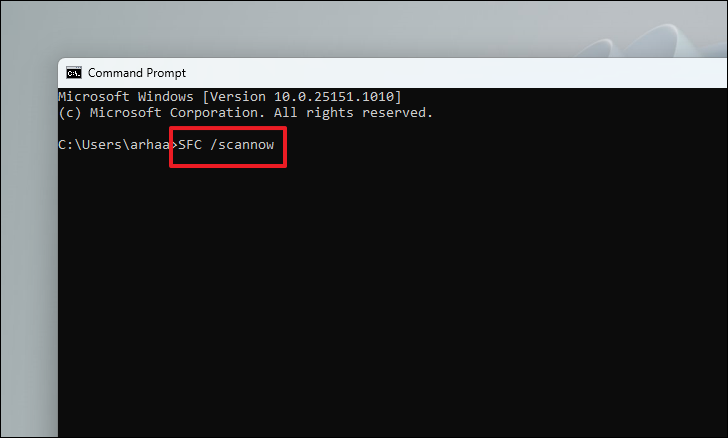
If after the scan, you get the message that the scan was successful, try updating your Windows again or move on to the next fix. But if it finds corrupted files in the scan, remove those files and then try updating your PC.
Method 2: Rebuild Boot Configuration Data (BCD)
Typically responsible for a proper boot of your computer, many users have reported that rebuilding their BCD data helped fix their Windows 10 installation problem.
To rebuild your PC, you will need to access the Advanced Startup Repair tool on your system. To do so, turn on your PC, and at the first sign of boot, press and hold the ‘Power’ button for 10 seconds to force shut down. You can also unplug your PC if you are on a desktop system.
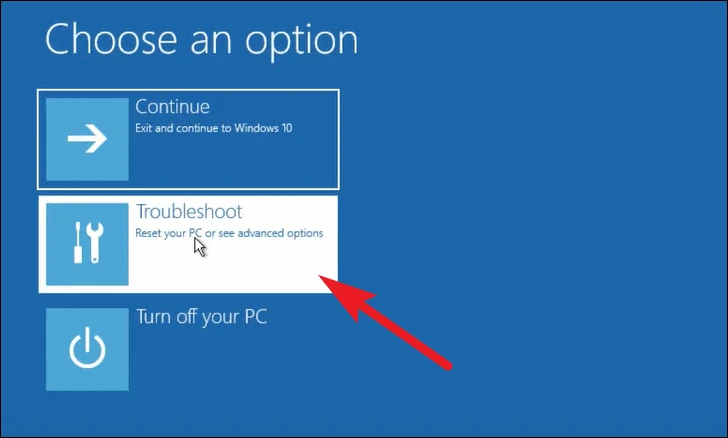
Repeat this process three times and on the fourth time, let your PC restart as usual. The Advanced Startup Repair will automatically kick in and you will be greeted by a blue screen. Click on the ‘Troubleshoot’ tile to proceed.
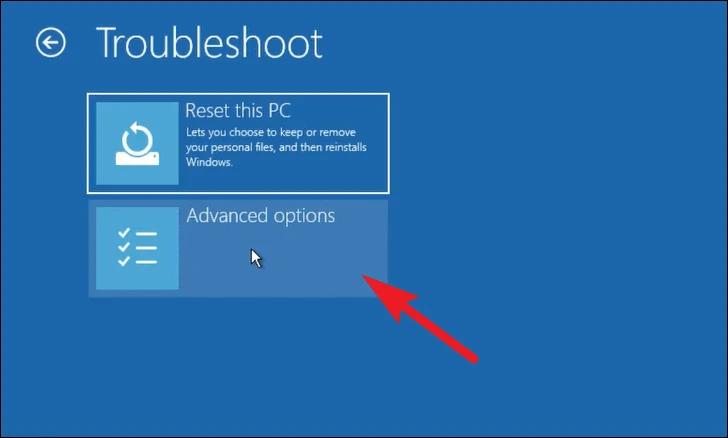
After that, click on the ‘Advanced Options’ tile to continue.
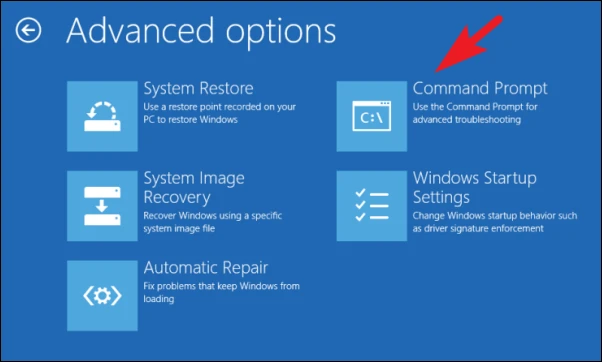
Next, click on the ‘Command Prompt’ tile.
After that, type or copy+paste the below-mentioned commands, one at a time, and hit Enter after entering each one of them to execute them.
bootrec /FixMbrbootrec /RebuildBcd bootrec /ScanOs
bootrec /FixBoot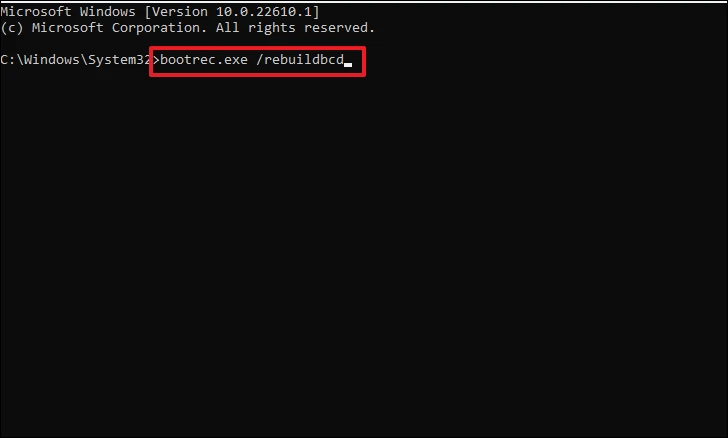
Once you have executed all the commands, reboot your PC again and check if the problem persists.
Method 3: Uninstall Conflicting Language Packs
Many users have verified that removing additional language packs from their system enabled them to fix the problem on their PC.
First, open the Settings app from the Start Menu. Alternatively, press the Windows+I keys on your keyboard to open the app.
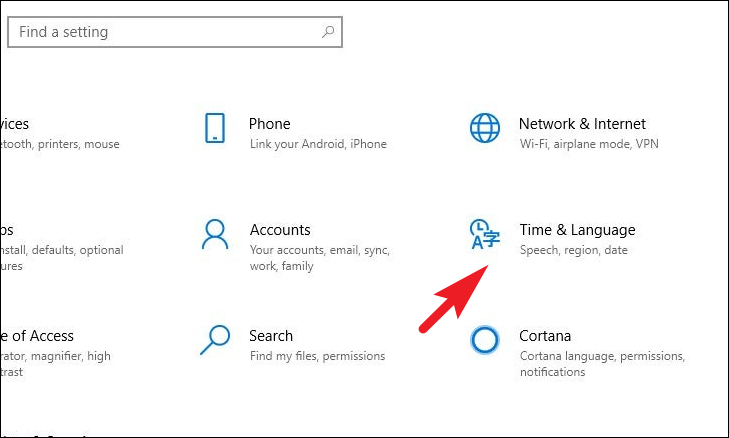
After that, select the ‘Time & Language’ tile to proceed.
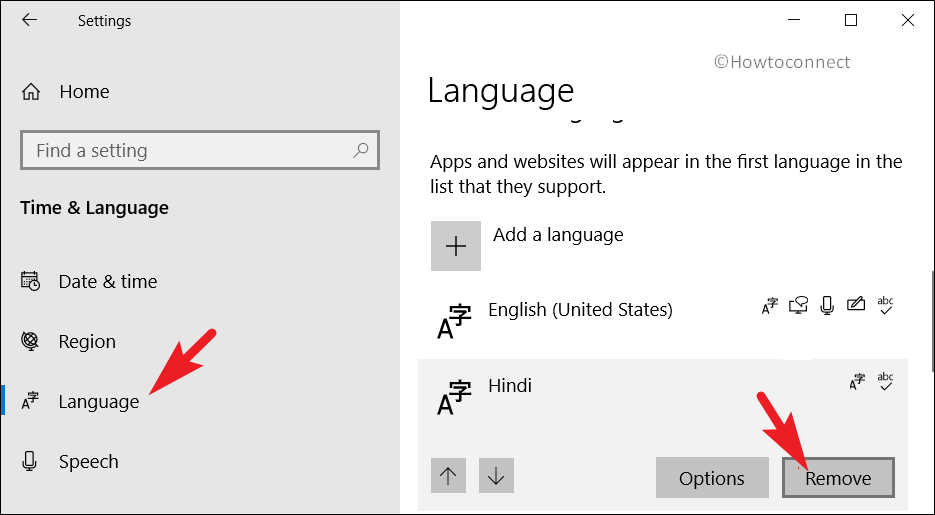
Next, click on the ‘Language’ tab from the left sidebar. Then, click on the language pack you wish to remove to expand the tile. Next, click on the ‘Remove’ button from the expanded view to uninstall the language from your system.
Repeat the above-mentioned process if you have multiple languages installed on your system. Once done, restart your system and check if the issue is resolved.
Method 4: Run Installation in Clean Boot
Many a time a third-party service or software might interfere in the installation process of Windows. You can eliminate this issue by running the installation in a clean boot where only essential Microsoft services are running.
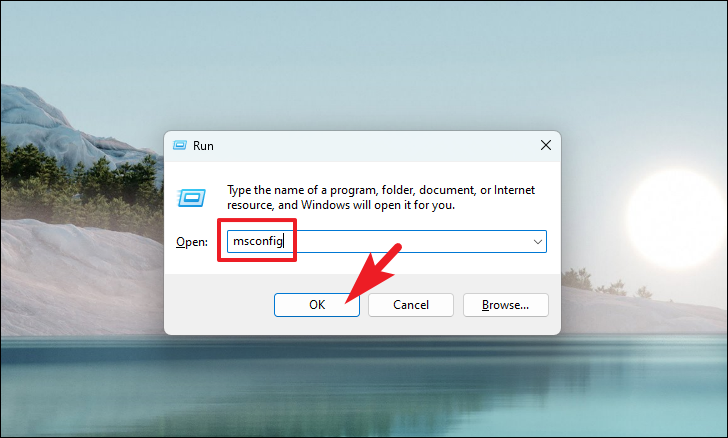
First, press the Windows+R keys together on your keyboard to bring up the Run command utility. Then, type msconfig and hit Enter on your keyboard to proceed.
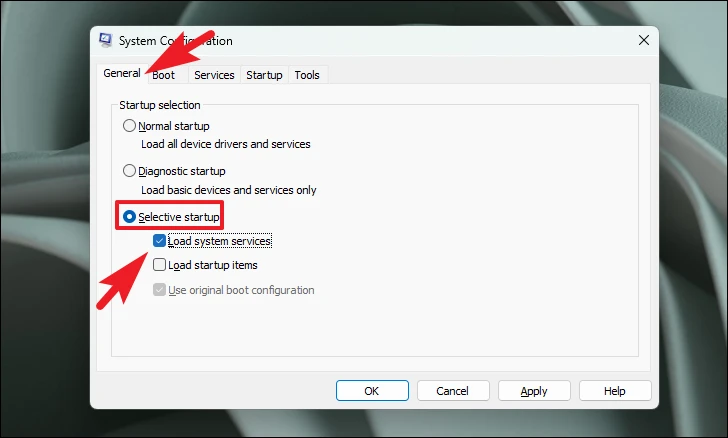
After that, click on the ‘Selective startup’ option and then click to select the ‘Load system services’ option.
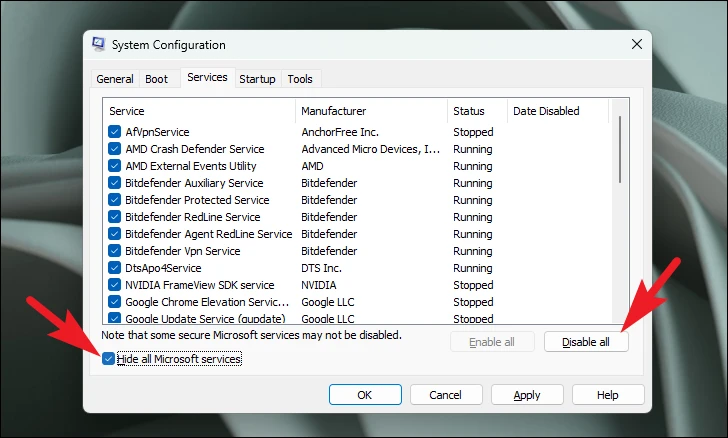
Then, click on the ‘Services’ tab and click on the checkbox preceding the ‘Hide all Microsoft services’ option. Then, click on the ‘Disable all’ button to disable all but Microsoft services.
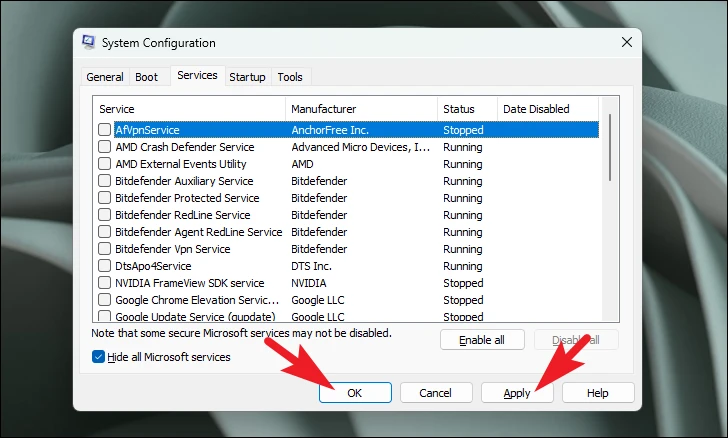
Then, click on the ‘Apply’ button to apply the changes and click on the ‘OK’ button to close the window
Now, restart your PC from the Start Menu. The PC will start in clean boot mode and run the installation again.
There you go, folks. Using the methods stated in this guide, you can easily and quickly resolve the installation error for Windows 10 on your PC.


