How to Fix Windows 11 Auto Shutdown After Inactivity When Idle
Stop Windows 11 from automatically shutting down when your PC is idle.
Stop Windows 11 from automatically shutting down when your PC is idle.
by Pallav Pathak
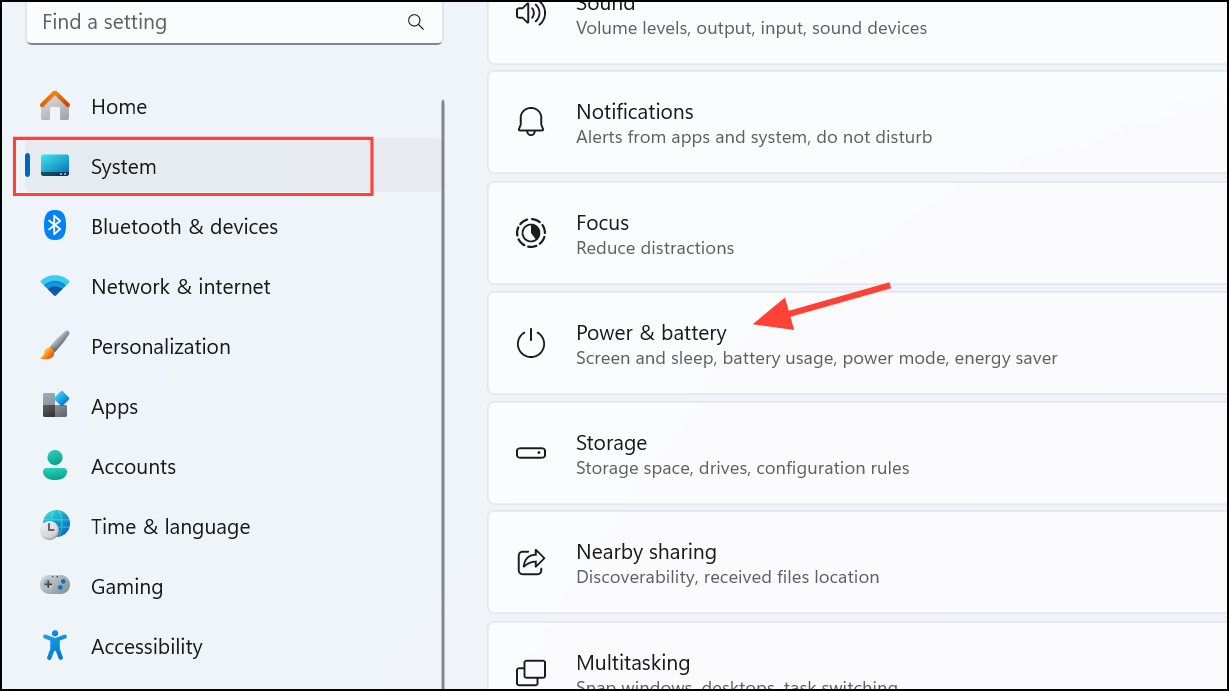
Windows 11 may automatically shut down after a period of inactivity, interrupting your workflow or causing unsaved data loss. This behavior typically occurs due to specific power settings or scheduled tasks configured within your operating system. Adjusting these settings can effectively resolve this issue, allowing your PC to remain active even when idle.
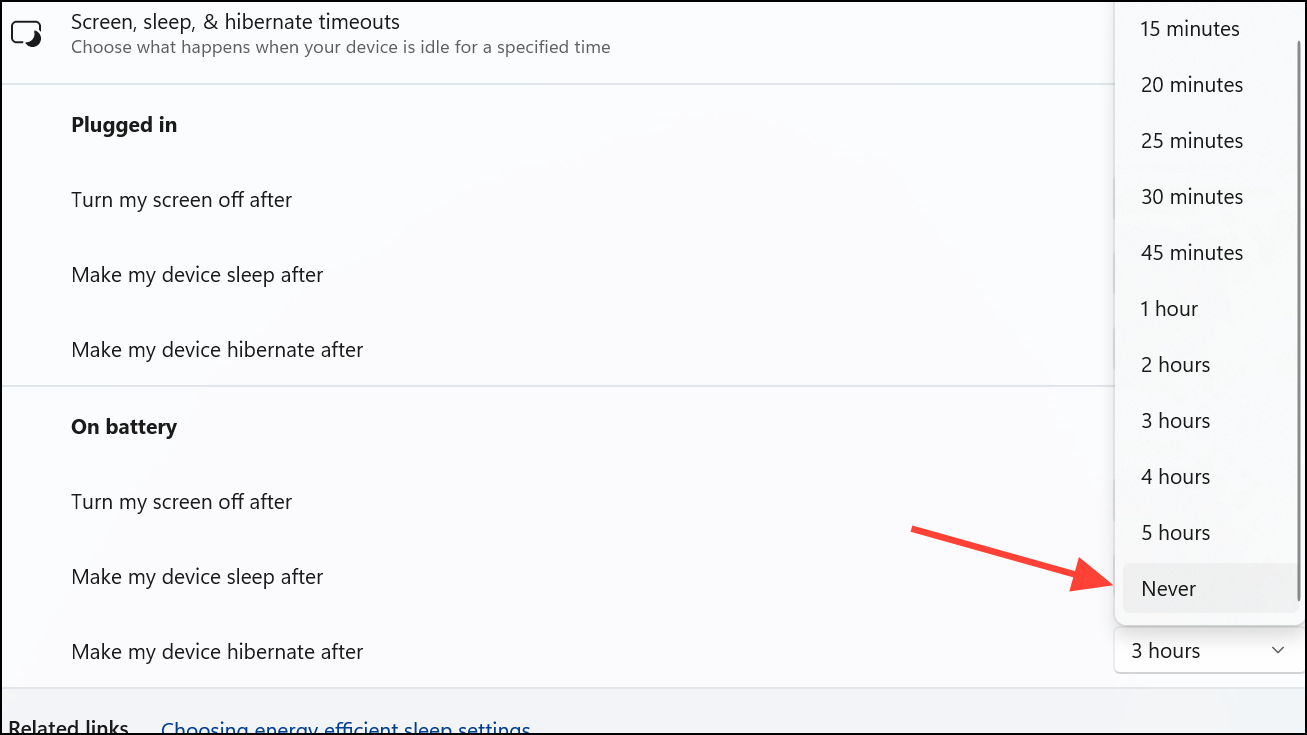
Under the Screen and sleep section, you’ll find several drop-down menus. Set each dropdown option (e.g., “On battery power, put my device to sleep after” and “When plugged in, put my device to sleep after”) to Never. This prevents your system from automatically sleeping or shutting down due to inactivity.
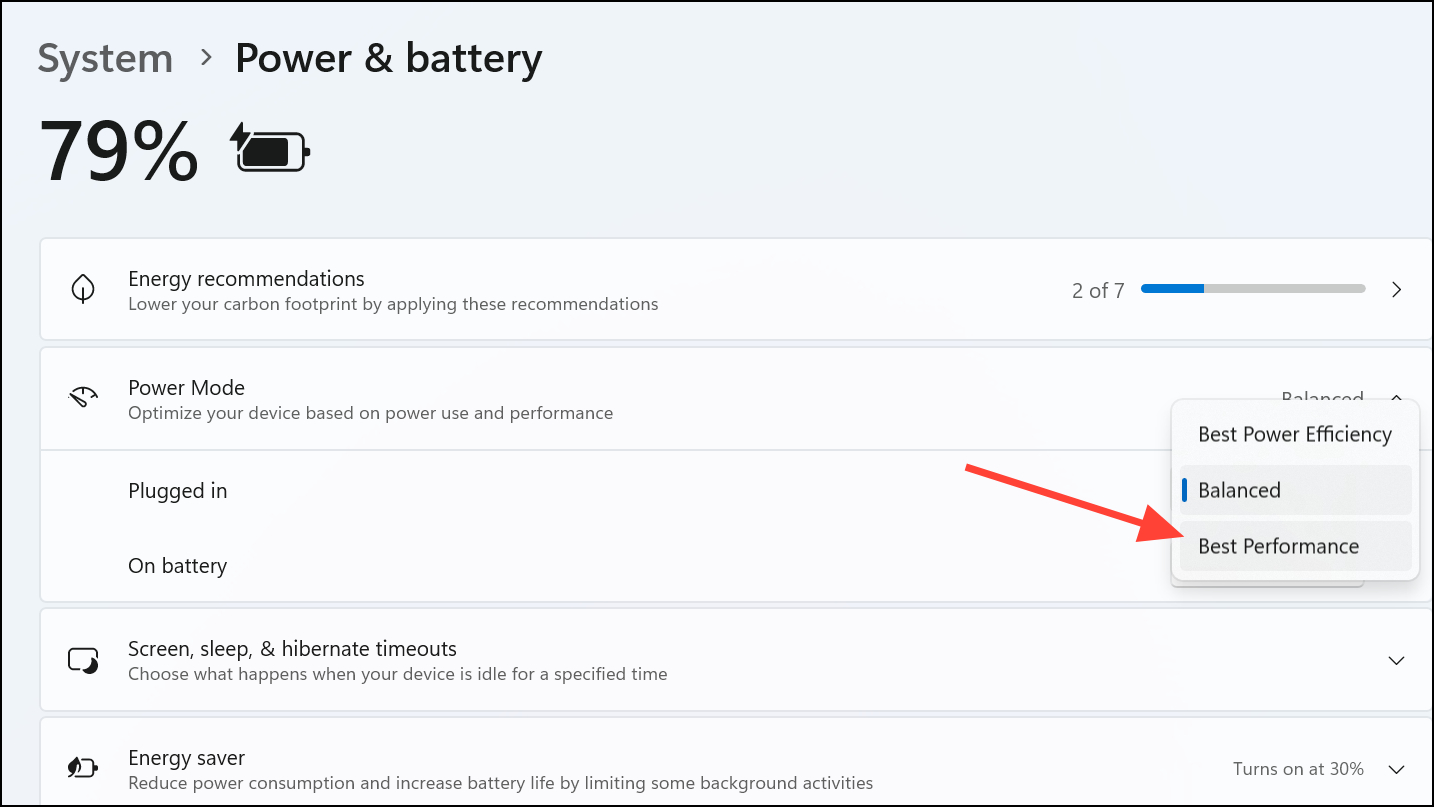
Scroll down to the Power mode section and select Best performance to ensure your system prioritizes performance over power-saving measures that might trigger auto shutdown.
After changing these settings, close the Settings app and restart your computer to apply the changes.
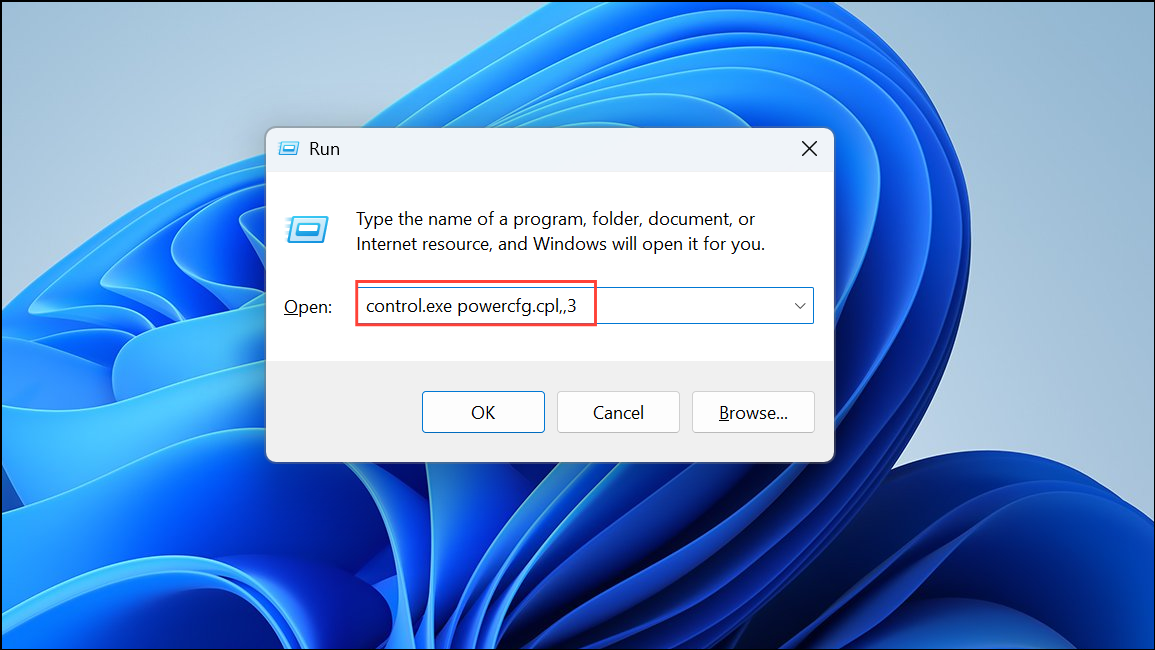
Press Windows key + R to open the Run dialog box. Type control.exe powercfg.cpl,,3 and press Enter. This will open the “Advanced Power Options” window directly.
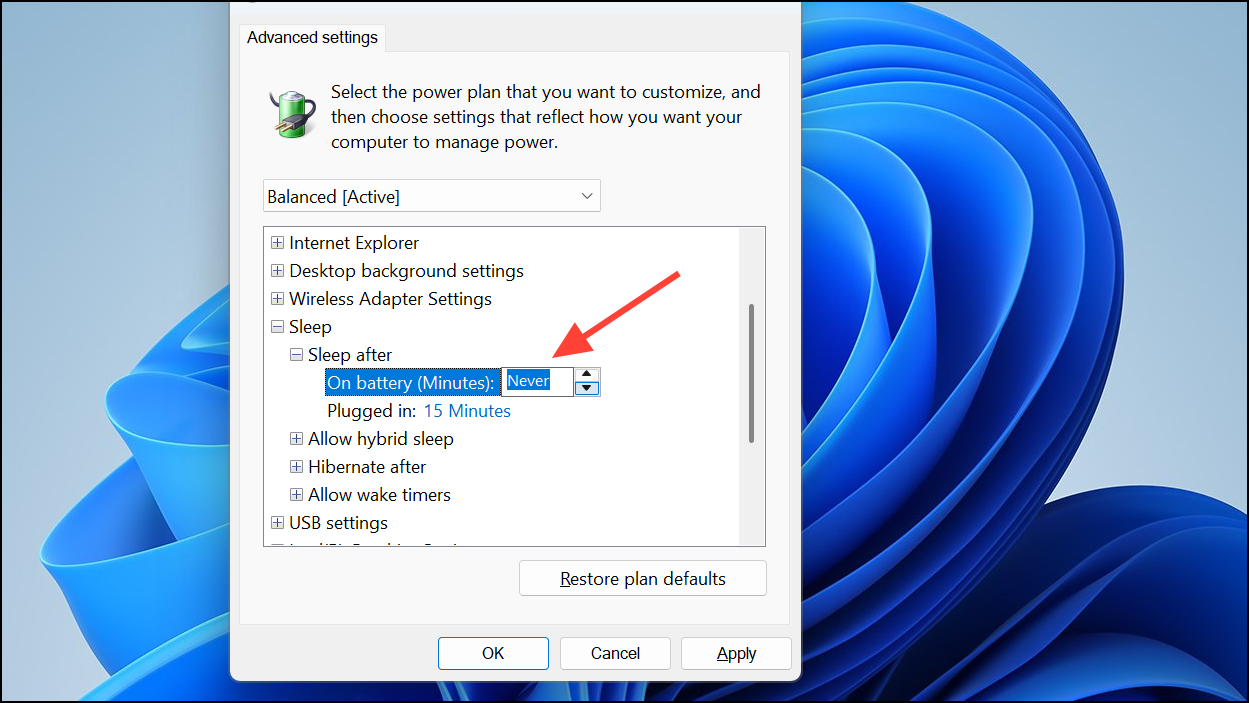
In the Advanced Power Options window, expand the Sleep option by clicking the plus (+) icon. Under this, expand Sleep after and set both “On battery” and “Plugged in” settings to Never.
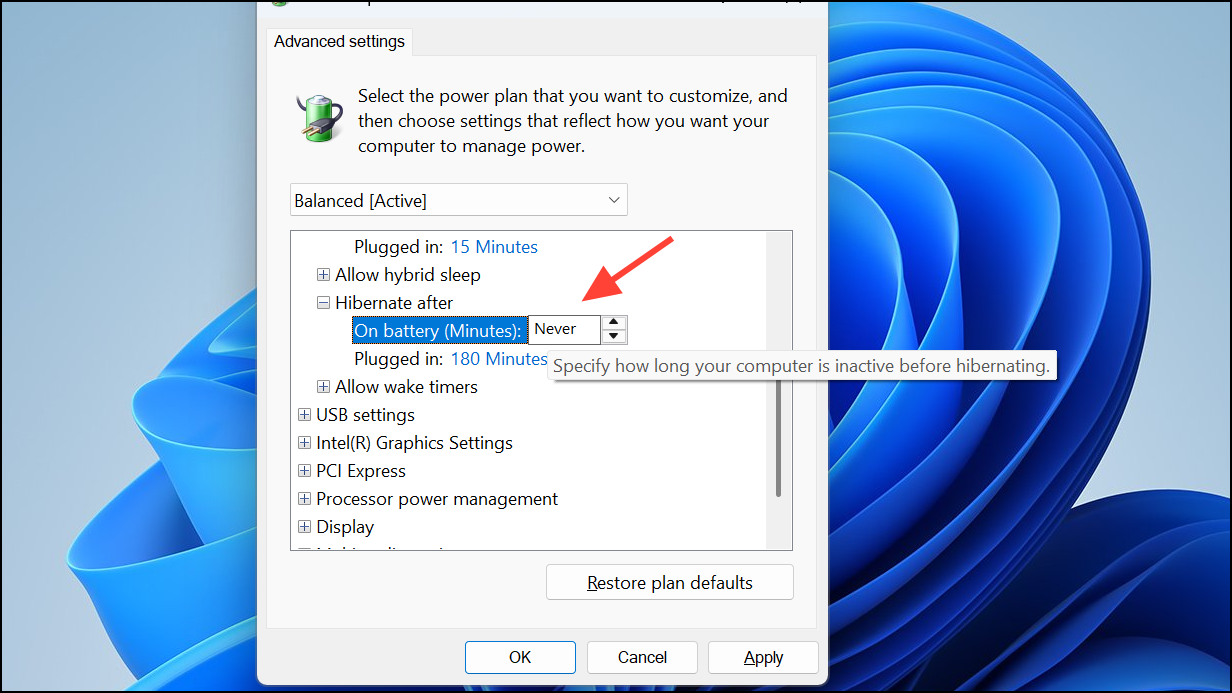
Next, expand the Hibernate after option and set both “On battery” and “Plugged in” settings to Never as well. This prevents Windows from entering hibernation mode automatically.
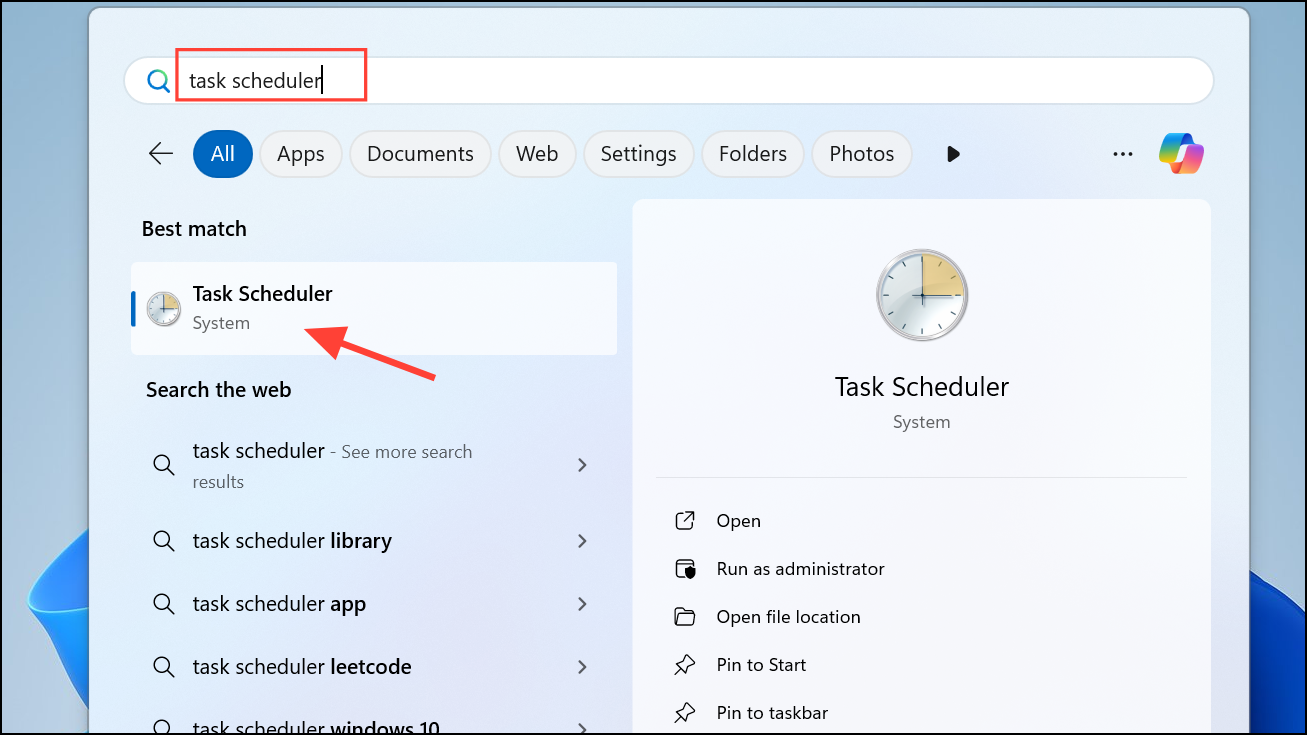
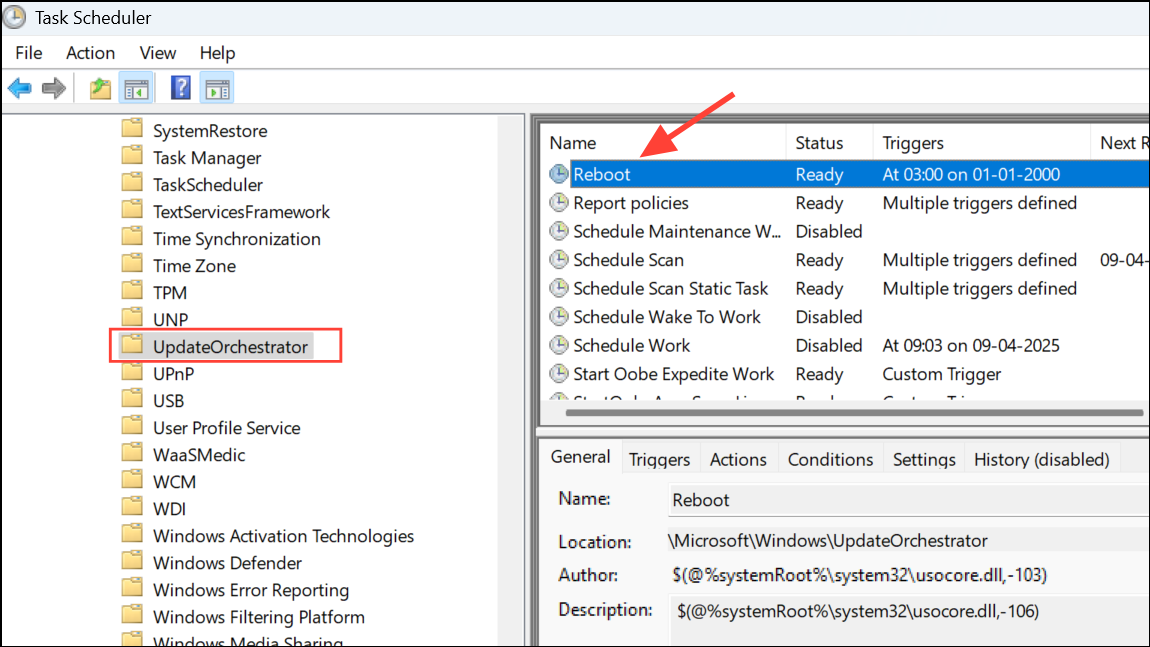
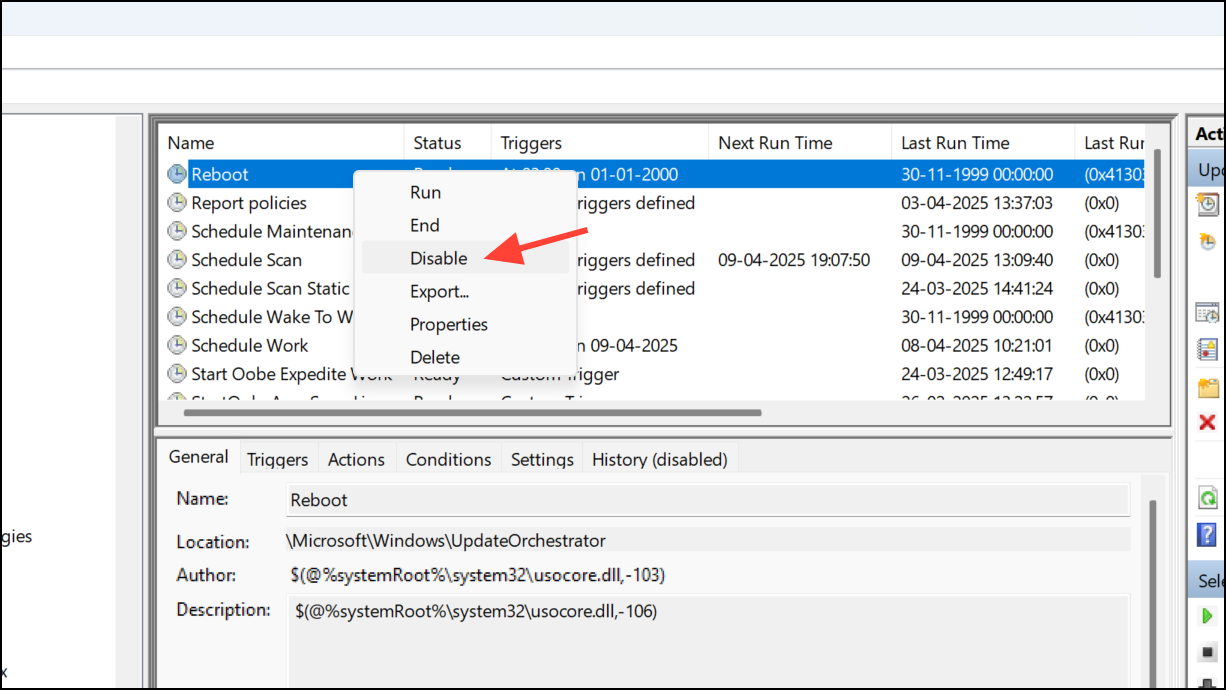
In Task Scheduler, navigate to Task Scheduler Library > Microsoft > Windows > UpdateOrchestrator. Here, look for tasks named “Reboot,” “Shutdown,” or similar.
Next, navigate to Task Scheduler Library > Microsoft > Windows > WindowsUpdate. Check for similar tasks that may trigger automatic shutdowns, right-click, and disable them as needed.
Once done, close Task Scheduler and restart your computer to apply the changes.
Method 4: Use Command Prompt to Disable Auto Shutdown
If the above methods don’t resolve the issue, you can manually disable any scheduled shutdown commands using Command Prompt.
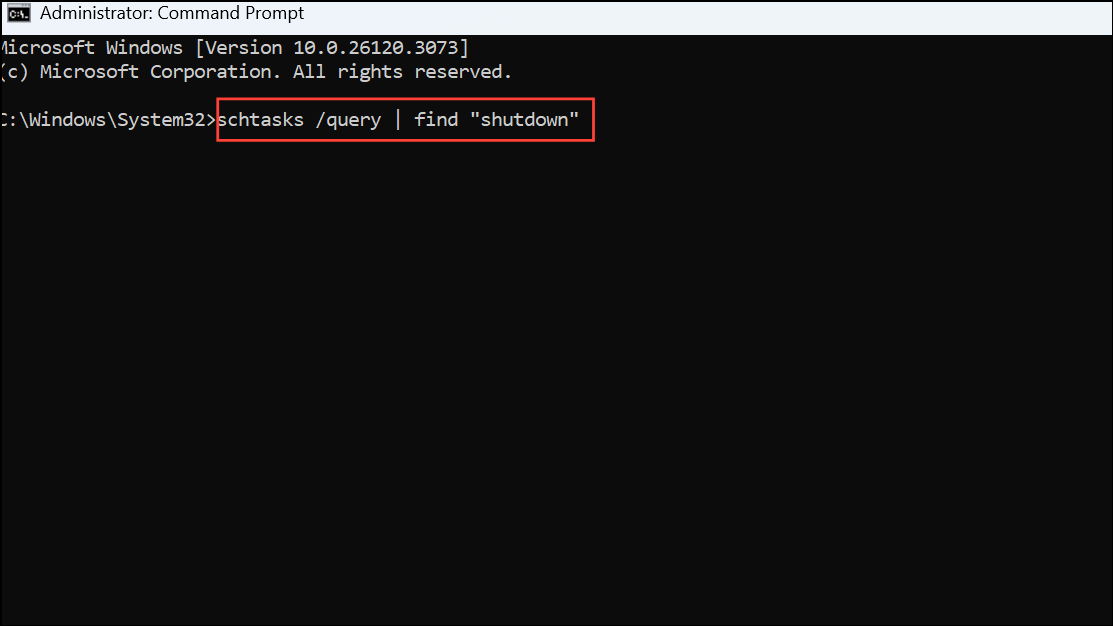
Next, enter the following command to check if any shutdown tasks are scheduled:
schtasks /query | find "shutdown"
If any shutdown tasks appear, you can disable them individually using Task Scheduler as described in Method 3 above.
Close the Command Prompt window and restart your PC to confirm the changes.
After implementing these methods, your Windows 11 PC should no longer shut down automatically when idle. Regularly checking your power settings and scheduled tasks ensures your system stays active and responsive as needed.