Experiencing issues with your Ethernet connection on Windows 11 can be frustrating, especially when you rely on a wired network for stability and speed. Fortunately, most Ethernet problems stem from driver issues, which are often easy to resolve. In this guide, we’ll walk you through several methods to fix Ethernet driver issues on your Windows 11 PC.
1. Update the Ethernet Driver
An outdated driver can cause compatibility issues and disrupt your network connection. Updating the Ethernet driver is a straightforward process that can quickly resolve such problems.
To update the driver, you have three options:
Method 1: Update via Device Manager
In this method, you’ll use the Device Manager to update the driver.
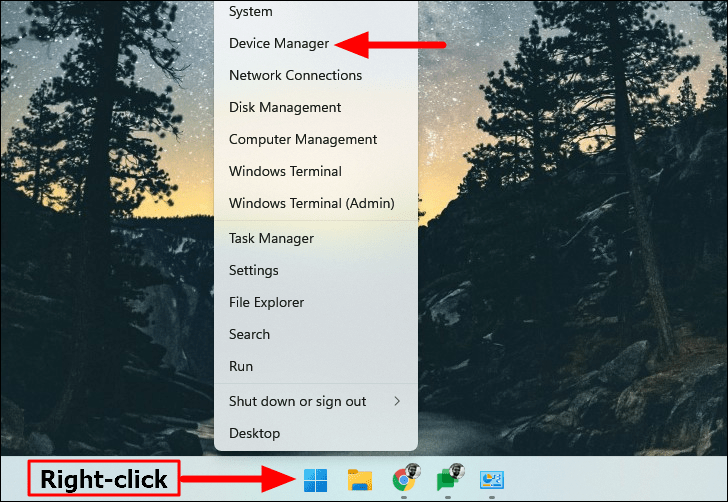
- Right-click the
Starticon on the taskbar or pressWINDOWS+Xand select Device Manager.
- Expand the Network adapters section by double-clicking it.
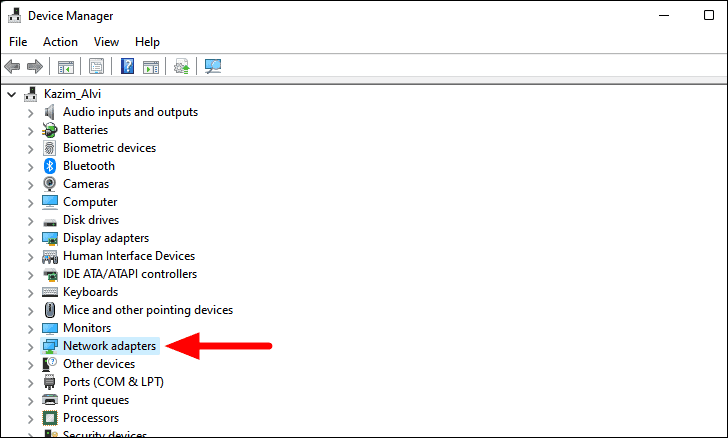
- Right-click on your Ethernet adapter and choose Update driver.

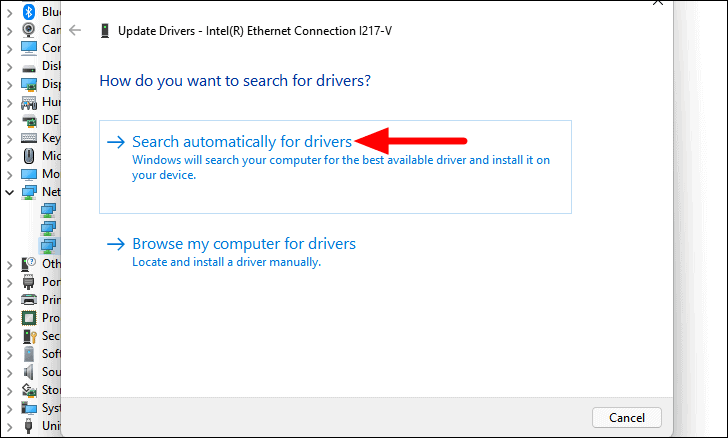
- Select Search automatically for drivers. Windows will search your computer for the best available driver and install it.
Method 2: Update via Windows Update
Windows Update can also provide driver updates. Here’s how to check:
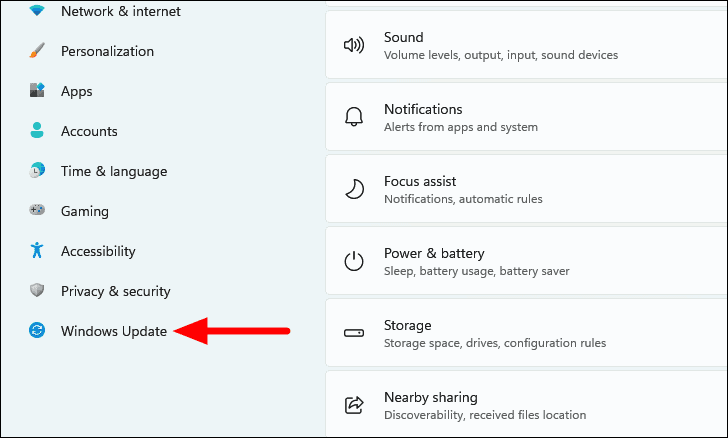
- Open Settings by pressing
WINDOWS+Ior right-clicking theStarticon and selecting Settings.

- Go to the Windows Update tab on the left.
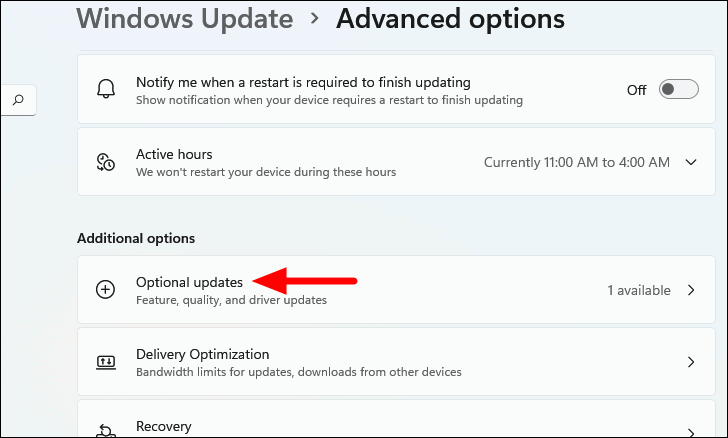
- Click on Advanced options.
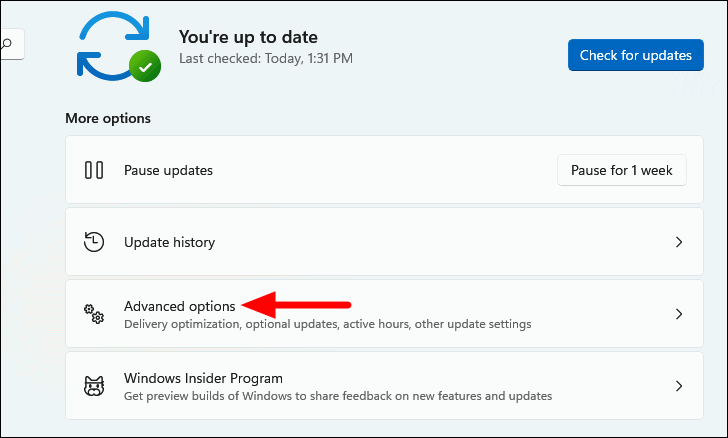
- Select Optional updates under Additional options.
- Expand the Driver updates section.
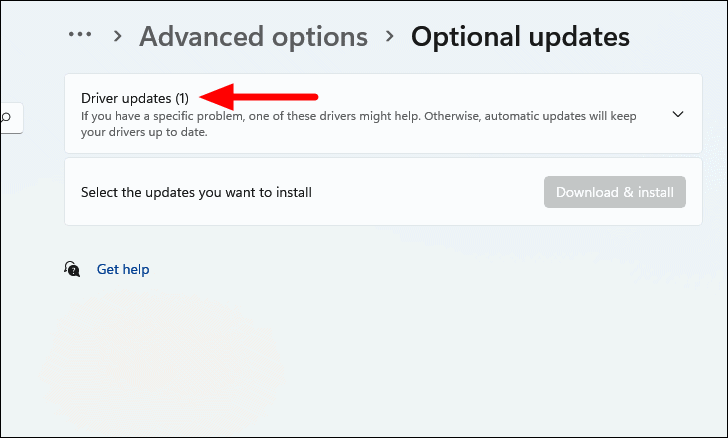
- If an update for your Ethernet adapter is available, check the box next to it and click Download & install.

Method 3: Update via Manufacturer’s Website
If no updates are found using the above methods, you can manually download the latest driver from the manufacturer’s website.
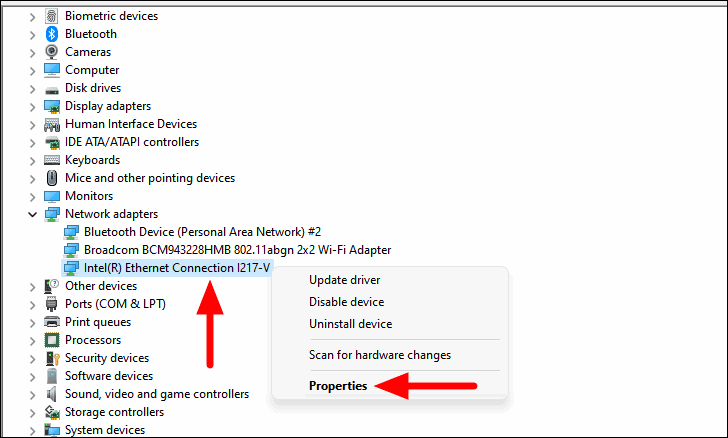
- Open Device Manager and expand Network adapters.
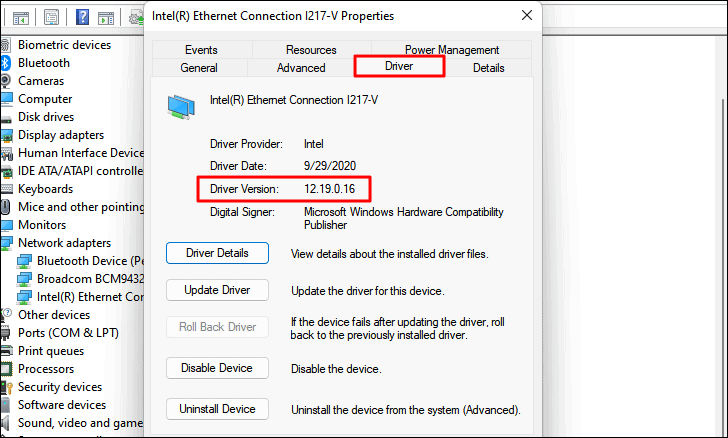
- Right-click your Ethernet adapter and select Properties.
- Go to the Driver tab and note the driver version.
- Visit the manufacturer’s official website.
- Search for the latest driver for your Ethernet adapter model compatible with Windows 11.
- Download and install the driver by following the on-screen instructions.
- Restart your PC to apply the changes.
2. Reinstall the Ethernet Driver
If updating the driver doesn’t help, reinstalling it can fix corruption issues.
- Open Device Manager as before.
- Expand Network adapters and right-click your Ethernet adapter.
- Select Uninstall device.
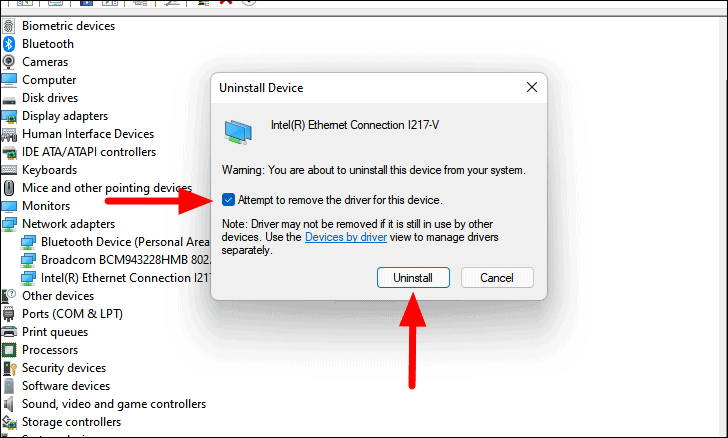
- In the confirmation window, check Attempt to remove the driver for this device and click Uninstall.
- Restart your computer. Windows will automatically reinstall the driver.
3. Reset the Network Adapter
Resetting the network adapter restores it to default settings, which can resolve various connectivity issues.
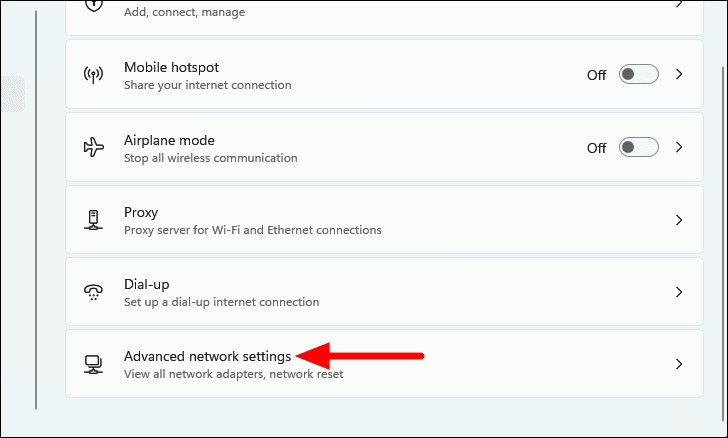
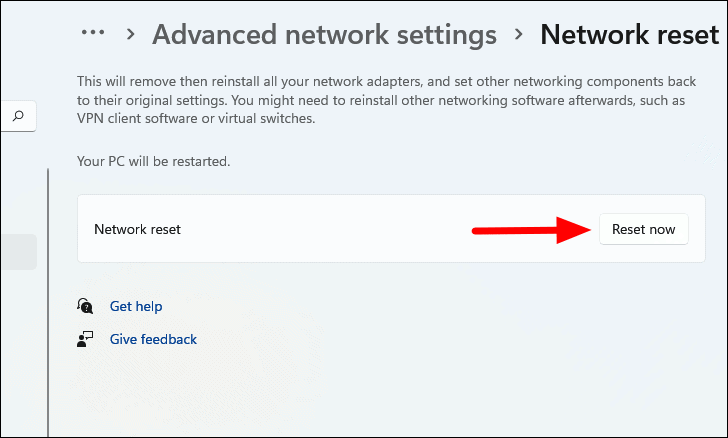
- Open Settings and select Network & internet from the left pane.

- Click on Advanced network settings on the right.
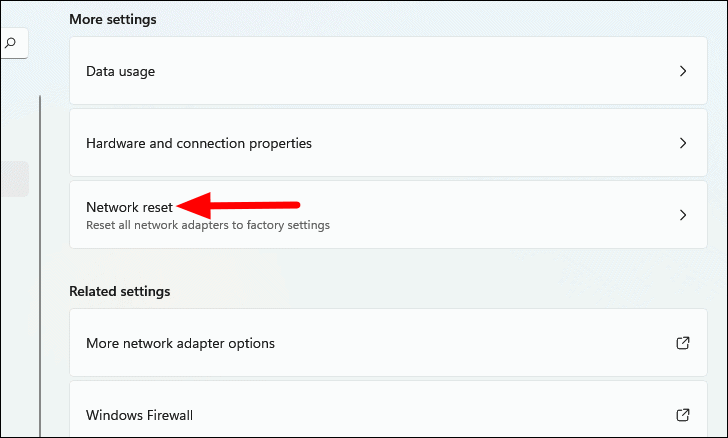
- Under More settings, click on Network reset.
- Click Reset now next to Network reset.
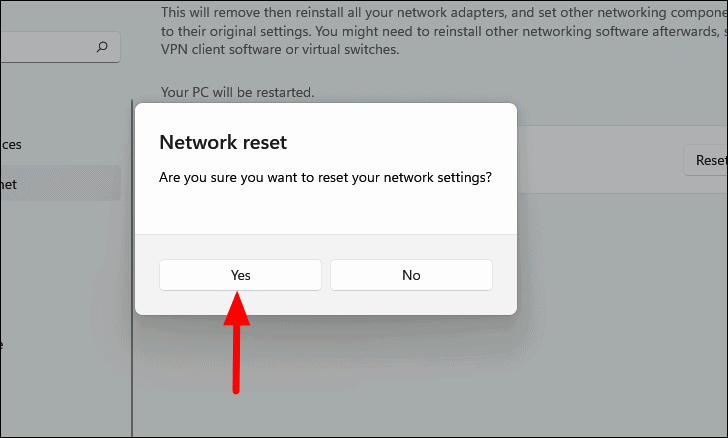
- Confirm by clicking Yes. Your PC will restart to complete the reset.
4. Check if the Ethernet Adapter is Disabled
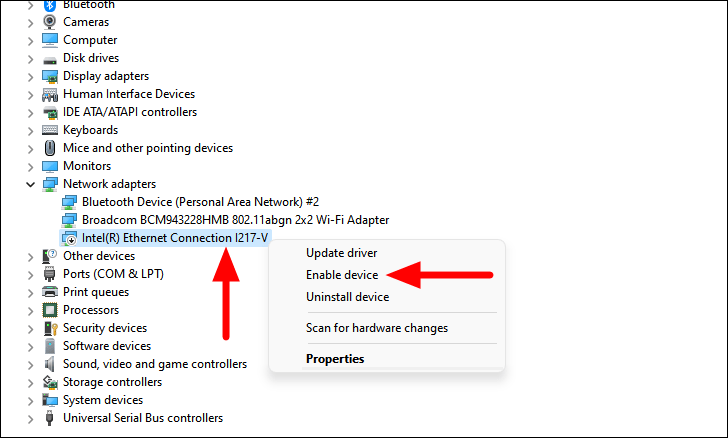
An accidentally disabled adapter can prevent network access. Here’s how to check and enable it:
- Right-click the
Starticon or pressWINDOWS+Xand choose Device Manager. - Expand Network adapters.
- Right-click your Ethernet adapter. If you see Enable device, click it to enable the adapter.
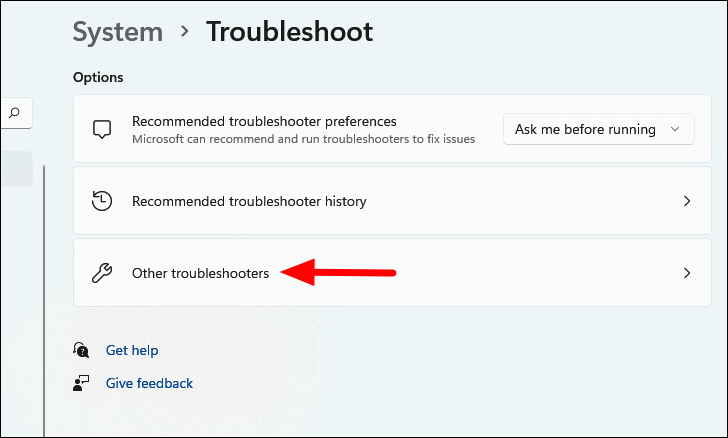
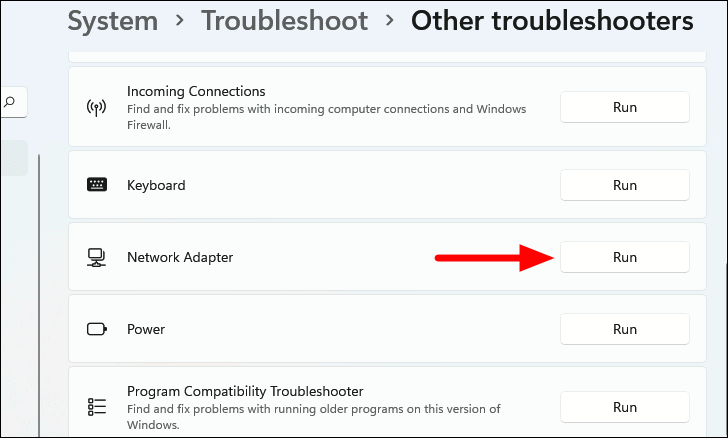
5. Run the Network Adapter Troubleshooter
Windows has a built-in troubleshooter that can automatically detect and fix network issues.
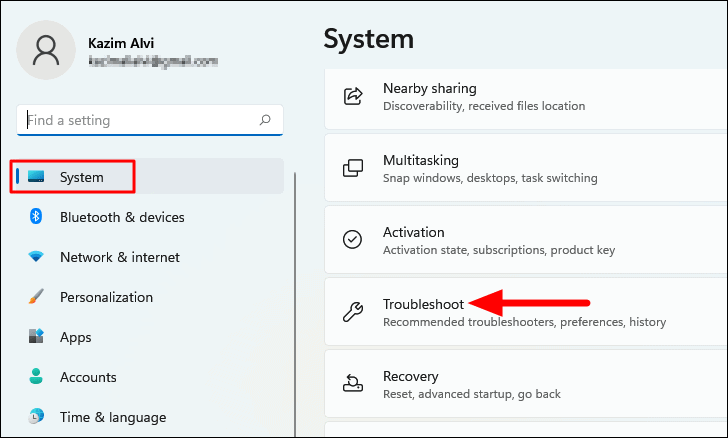
- Open Settings and navigate to System > Troubleshoot.
- Click on Other troubleshooters.
- Find Network Adapter and click Run next to it.
- Select Ethernet and click Next.
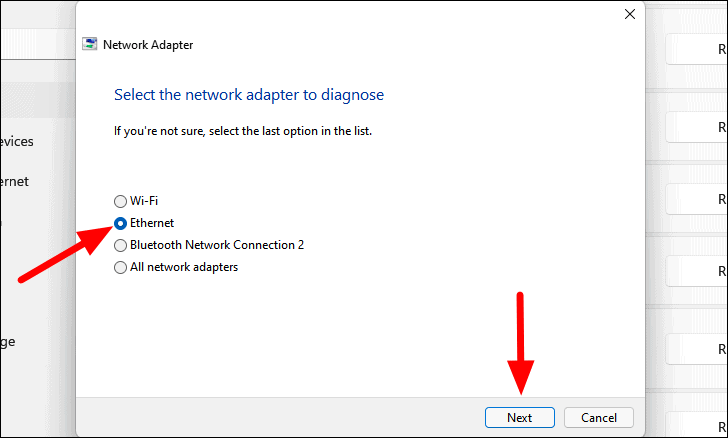
- Follow any on-screen instructions to complete the troubleshooting process.
6. Restart Your PC
Sometimes, a simple restart can resolve temporary glitches affecting your network connection.
- Click on the
Startmenu. - Select the power icon and choose Restart.
7. Perform Basic Hardware Checks
Ensure that all physical connections are secure and functioning properly.
- Verify that the Ethernet cable is firmly connected to both your PC and the modem/router.
- Inspect the cable for any visible damage.
- Restart your modem/router by unplugging it, waiting a minute, and plugging it back in.
By following these methods, you should be able to resolve Ethernet driver issues on your Windows 11 PC and restore your wired network connection.


