
Experiencing high CPU usage on your Windows 11 PC can lead to sluggish performance, unresponsive applications, and even system crashes. It may also cause your computer to overheat, potentially damaging hardware components. Fortunately, there are several effective solutions to address high CPU usage and improve your system’s performance.
Update Drivers
Outdated or faulty drivers can cause your CPU to work harder than necessary. Updating your drivers ensures that your hardware communicates efficiently with Windows 11.
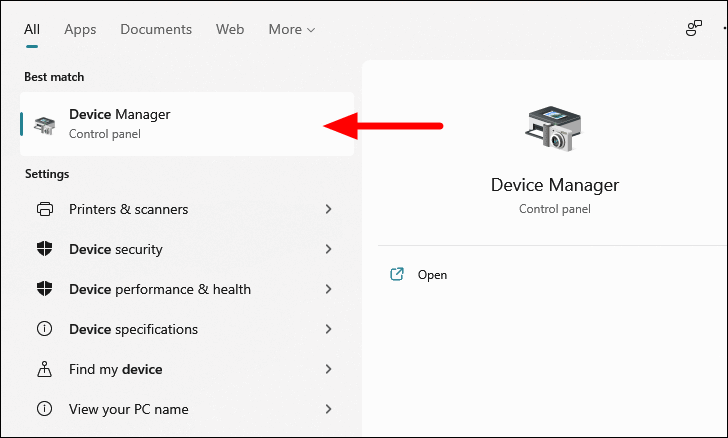
- Press WINDOWS + S to open the search bar, type Device Manager, and select it from the results.
- In the Device Manager window, expand categories like Display adapters or Network adapters to find devices that may need updating.
- Right-click on a device and select Update driver from the context menu.
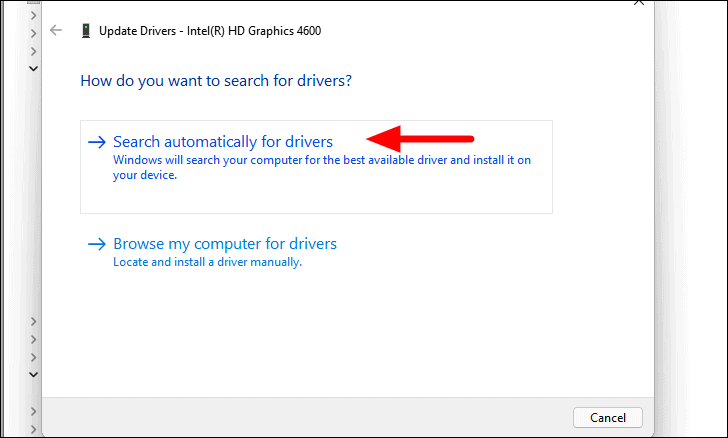
- Choose Search automatically for drivers. Windows will search for and install the latest driver if available.
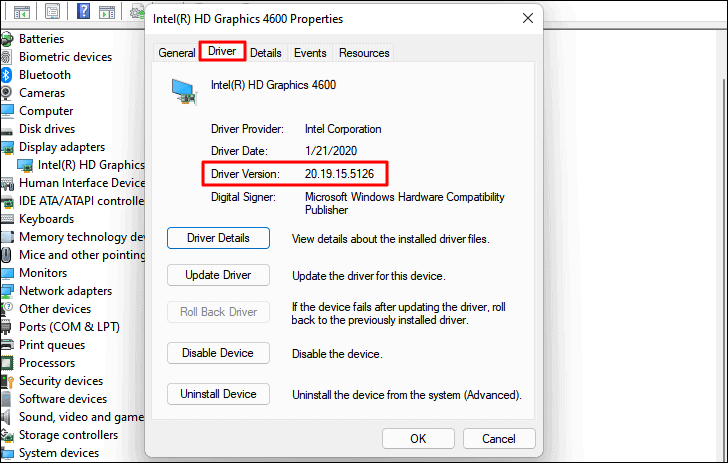
If Windows doesn’t find a new driver, you can visit the manufacturer’s website to download and install the latest driver manually. Be sure to verify the current driver version by accessing the device’s properties:
- Right-click the device in Device Manager and select Properties.
- Go to the Driver tab and note the Driver Version.
Run a Full Malware Scan
Malware or viruses can consume significant CPU resources. Running a full system scan can detect and remove malicious programs.
- Press WINDOWS + S, type Windows Security, and select it.
- Click on Virus & threat protection.
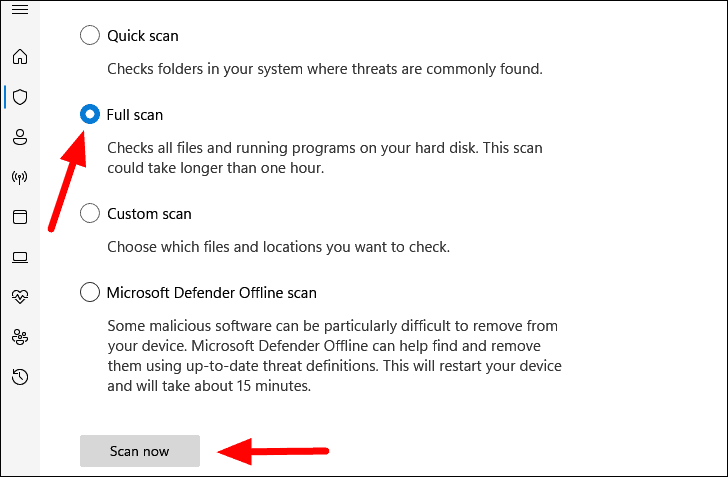
- Select Scan options beneath the Quick scan button.
- Choose Full scan and click Scan now.
The scan may take some time, but you can continue using your PC while it runs in the background. If threats are found, follow the on-screen instructions to remove them.
Update Windows
Keeping Windows 11 up to date can resolve underlying issues that cause high CPU usage.
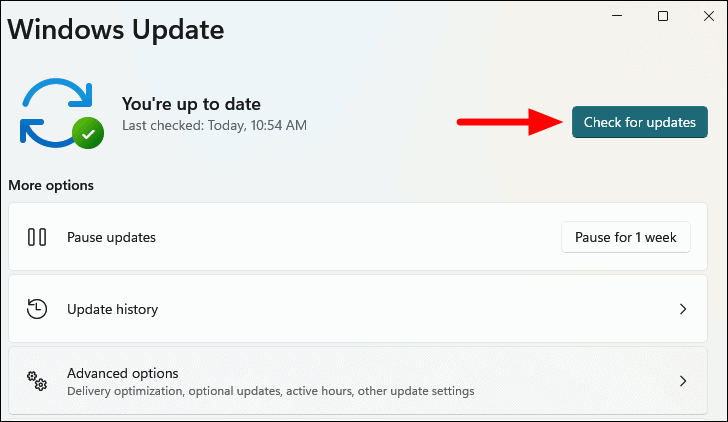
- Press WINDOWS + I to open Settings.
- Click on Windows Update in the left sidebar.
- Select Check for updates. Windows will search for and install any available updates.
Disable Background Apps
Background apps can consume CPU resources even when you’re not using them. Disabling unnecessary background apps can help reduce CPU usage.
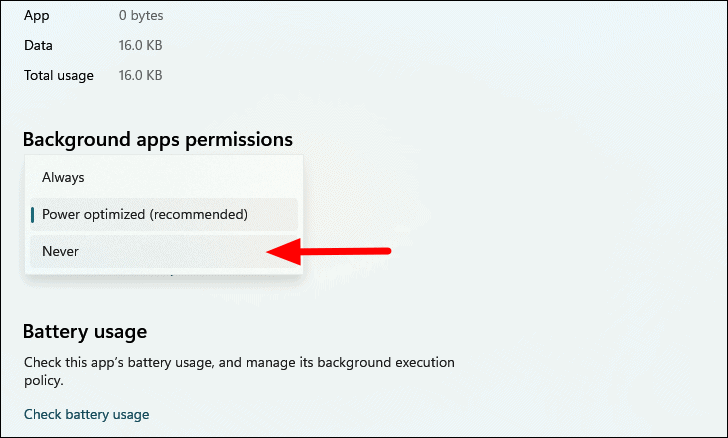
- Press WINDOWS + I to open Settings.
- Click on Apps and select Apps & features.
- Scroll through the list to find apps you don’t need running in the background.
- Click the three dots next to the app and select Advanced options.
- Under Background apps permissions, choose Never from the drop-down menu.
Disable Third-party Antivirus and VPN Software
Third-party antivirus and VPN software can sometimes overload the CPU. Temporarily disabling or uninstalling these programs may alleviate the issue.
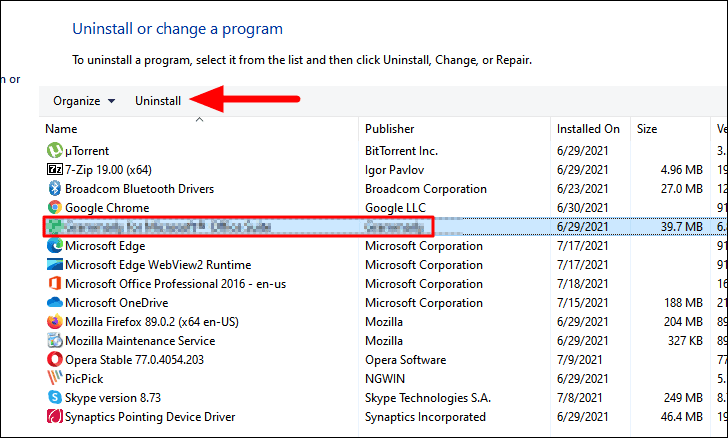
- Press WINDOWS + R to open the Run dialog.
- Type
appwiz.cpland press ENTER to open Programs and Features. - Select the antivirus or VPN software you want to remove and click Uninstall at the top.
- Follow the on-screen prompts to complete the uninstallation.
If uninstalling these programs resolves the high CPU usage, consider using alternative software or rely on built-in Windows security features.
Change Power Settings
Adjusting your power plan can optimize your CPU’s performance.
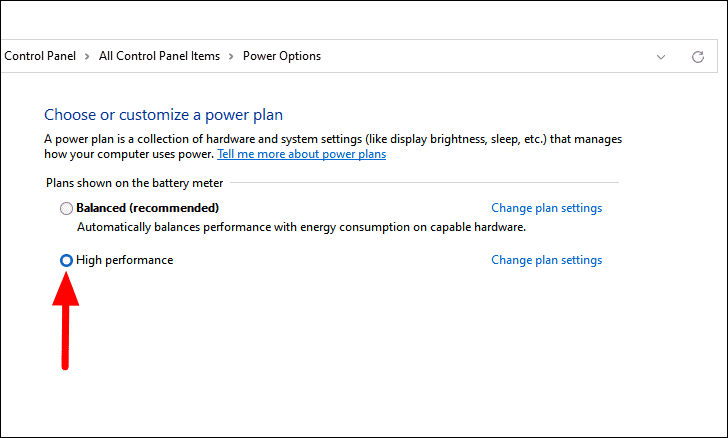
- Press WINDOWS + S, type Edit power plan, and select it.
- Click on Restore default settings for this plan to revert any custom settings.
- To change the power plan, click on Power Options in the address bar.
- Select the High performance power plan from the list.
Disable Unnecessary Services
Certain Windows services can consume CPU resources. Disabling these services may help reduce high CPU usage.
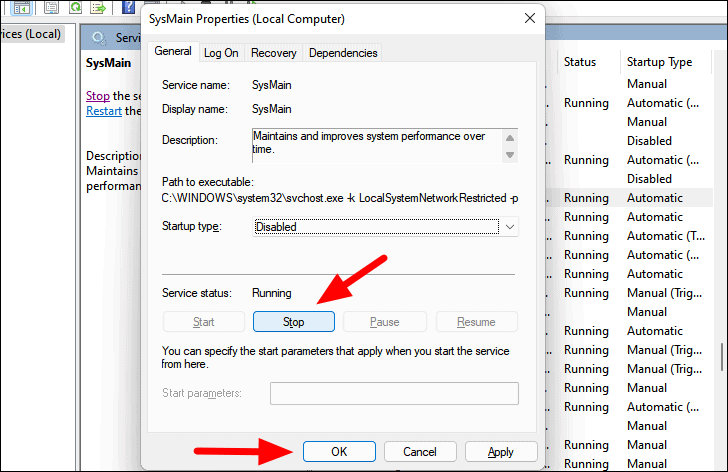
Disable SysMain (Superfetch)
- Press WINDOWS + R, type
services.msc, and press ENTER to open the Services window. - Scroll down and double-click on SysMain.
- In the properties window, set the Startup type to Disabled.
- Click Stop to halt the service, then click OK.
Disable Windows Search
- In the Services window, double-click on Windows Search.
- Set the Startup type to Disabled.
- Click Stop, then select OK.

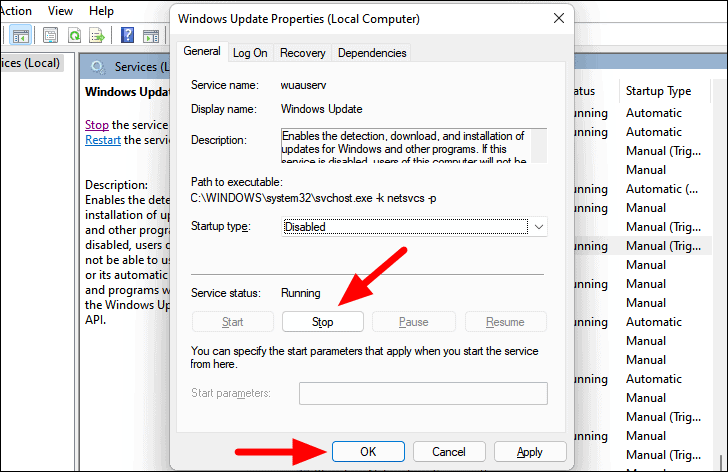
Disable Windows Update
- Still in the Services window, double-click on Windows Update.
- Change the Startup type to Disabled.
- Click Stop to halt the service and then click OK.
Disabling these services may affect system functionality. If you don’t notice an improvement in CPU usage, it’s advisable to re-enable them.
Restart the Computer
Sometimes, a simple restart can clear temporary glitches causing high CPU usage.
- Click on the Start icon or press the WINDOWS key.
- Click the Power button and select Restart.
After restarting, monitor your CPU usage to see if the issue persists.
Check Power Supply
A faulty power supply can limit the CPU’s performance, causing it to work harder and consume more resources. If you suspect a hardware issue:
- Ensure your power supply unit (PSU) meets the recommended specifications for your system.
- Consult a professional technician to test and replace the PSU if necessary.
High CPU usage in Windows 11 can stem from various causes, but by following these methods, you can identify and resolve the issues impacting your system’s performance.


