
The taskbar is an essential component of Windows 11, providing quick access to the Start menu, pinned apps, and system tray icons. When the taskbar suddenly disappears, it can significantly disrupt your workflow and computer usage. Thankfully, this issue is commonly software-related and can be fixed using several methods outlined below.
Restart Windows Explorer
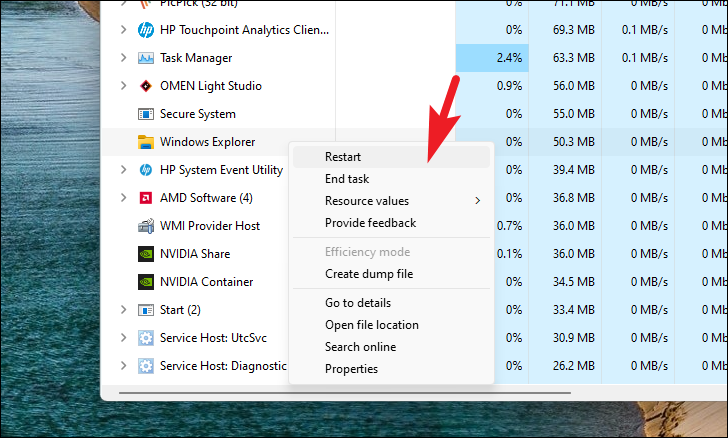
Restarting the Windows Explorer process can quickly restore a missing taskbar caused by temporary glitches.
- Press
Ctrl+Shift+Escto open the Task Manager. - In the Task Manager window, ensure the Processes tab is selected.
- Scroll down and locate Windows Explorer under the Apps or Windows Processes section.
- Right-click on Windows Explorer and select Restart from the context menu.
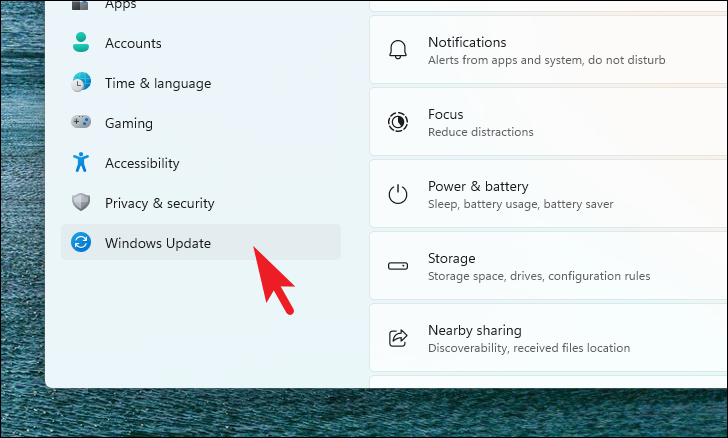
Check for Windows Updates
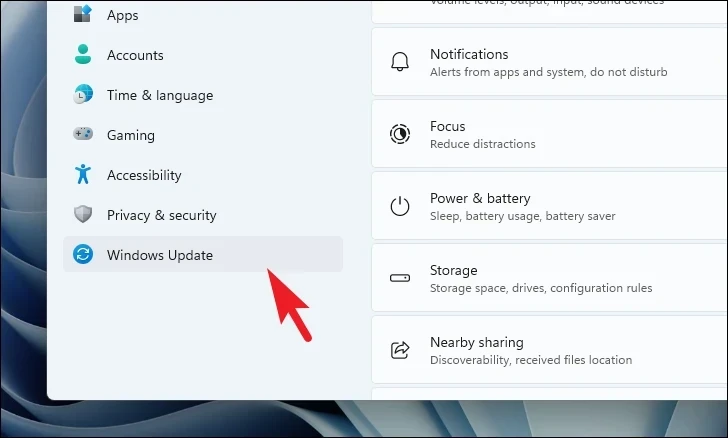
Updating your system can resolve underlying issues that might be causing the taskbar to disappear.
- Press
Windows+Ito open the Settings app. - Click on Windows Update in the left sidebar.
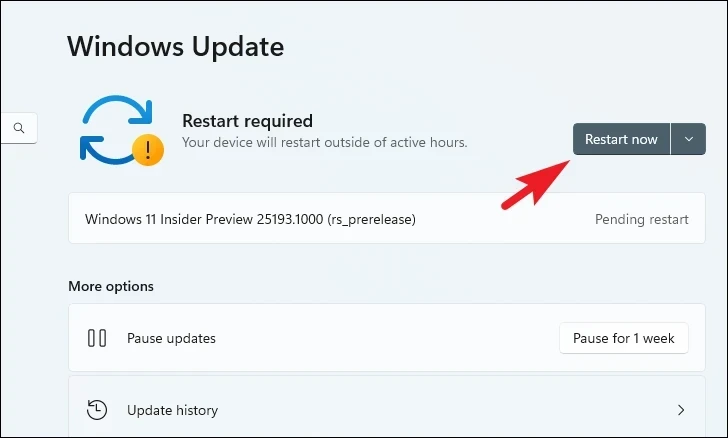
- Click Check for updates. If updates are available, click Download & install.
- Once the updates are installed, restart your computer if prompted.
Disable Taskbar Auto-Hide
Sometimes, the taskbar is set to hide automatically when not in use. Adjusting this setting can bring back your taskbar.
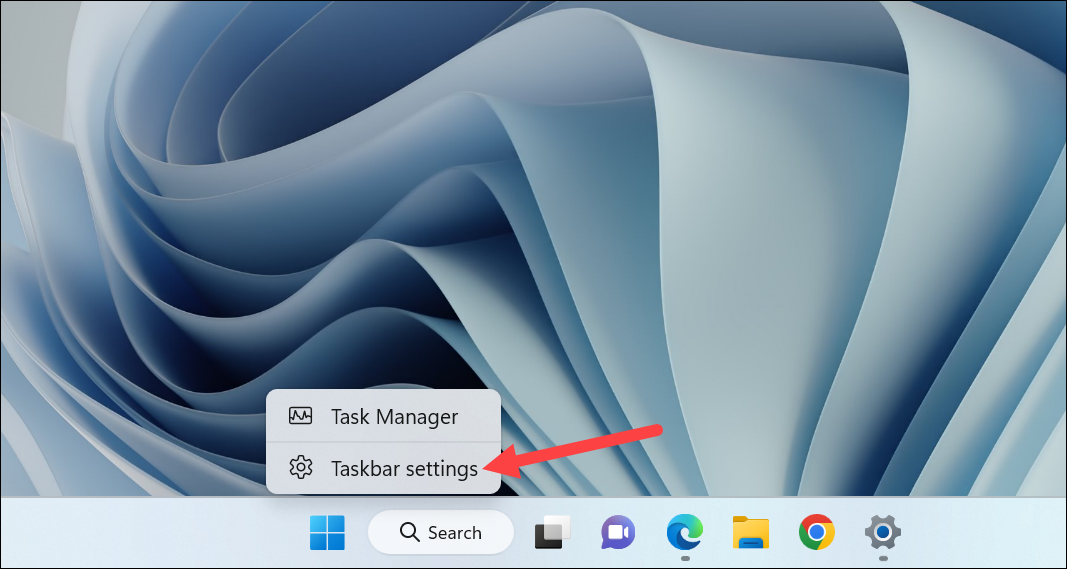
- Move your mouse to the bottom of the screen to see if the taskbar appears.
- If it does, right-click on the taskbar and select Taskbar settings. Alternatively, press
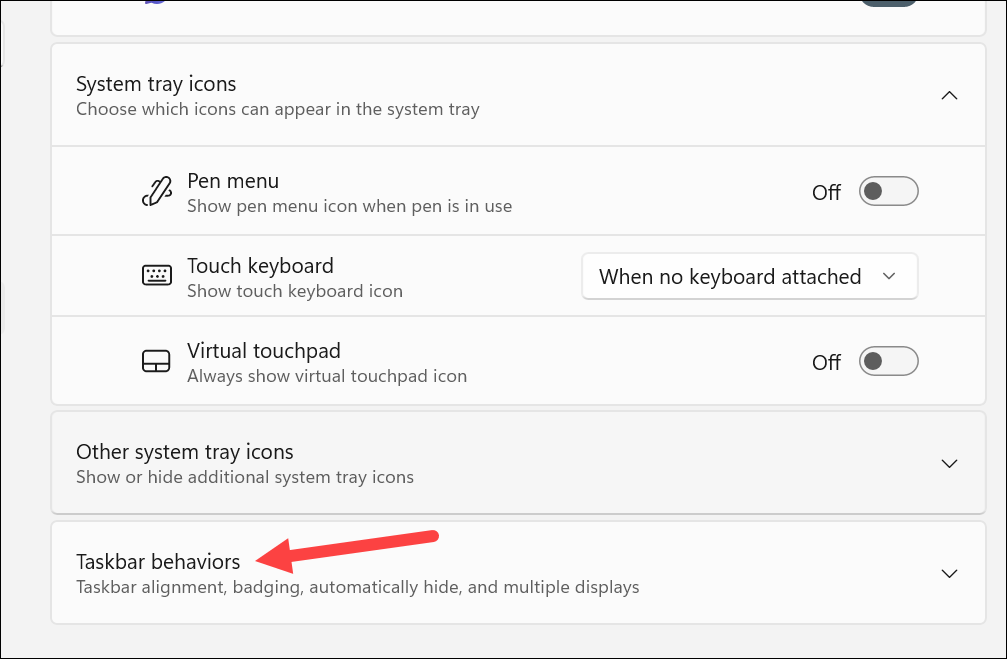
Windows+Iand navigate to Personalization > Taskbar.
- Expand the Taskbar behaviors section.
- Uncheck the box next to Automatically hide the taskbar.
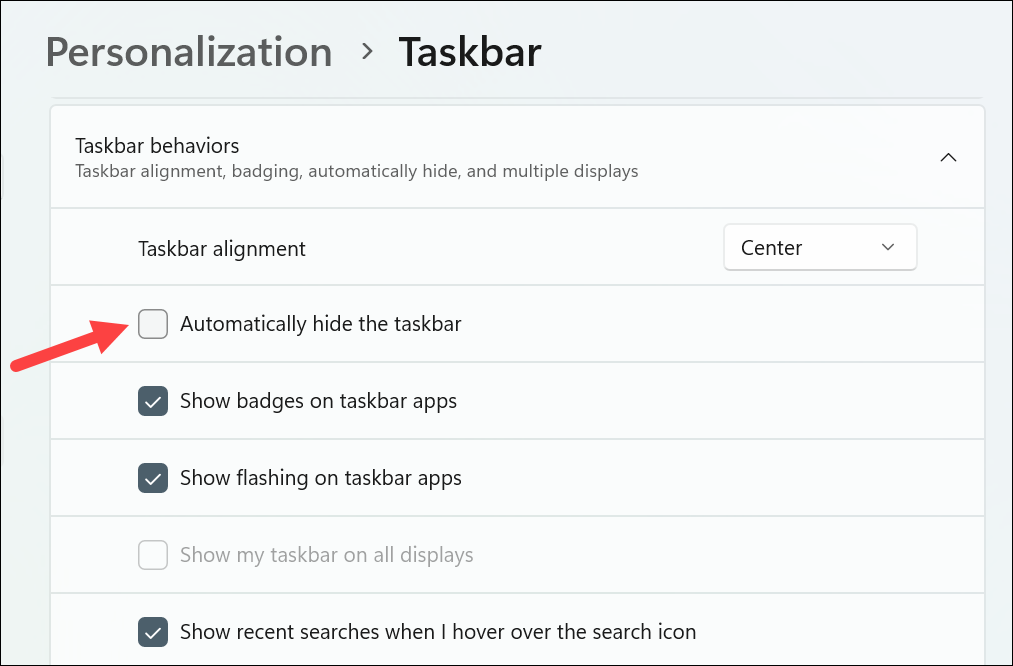
If the taskbar doesn’t appear when you hover at the bottom, try the next method.
Update or Roll Back Graphics Drivers
Outdated or incompatible graphics drivers can cause display issues, including a missing taskbar.
Update Graphics Drivers
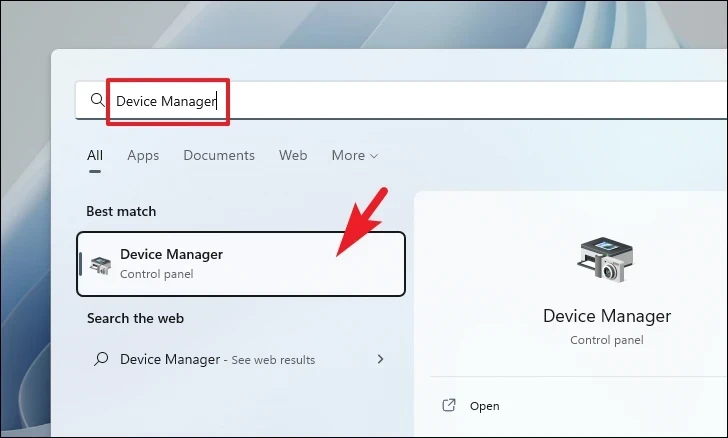
- Press
Windows+Xand select Device Manager. Alternatively, head to the Start Menu and type Device Manager. Then, click on the ‘Device Manager’ f.
- Expand the Display adapters section.
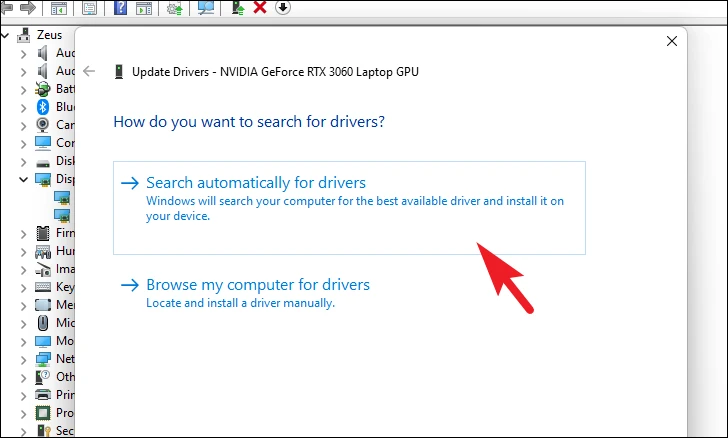
- Right-click on your graphics card and select Update driver.
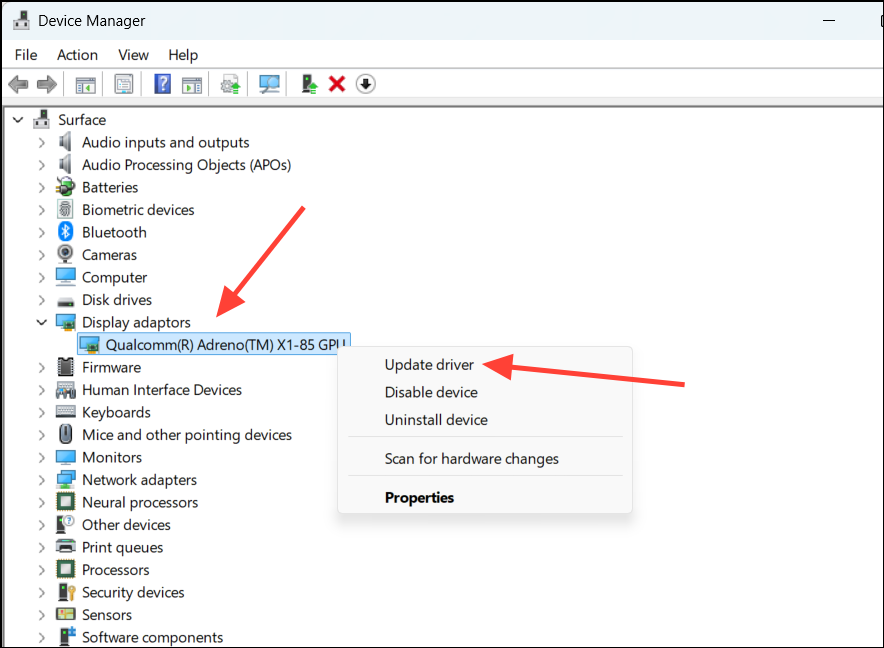
- Choose Search automatically for drivers. Windows will look for and install the latest drivers.
Roll Back Graphics Drivers
If the issue started after a recent driver update, rolling back to a previous version might help.
- In Device Manager, expand Display adapters.
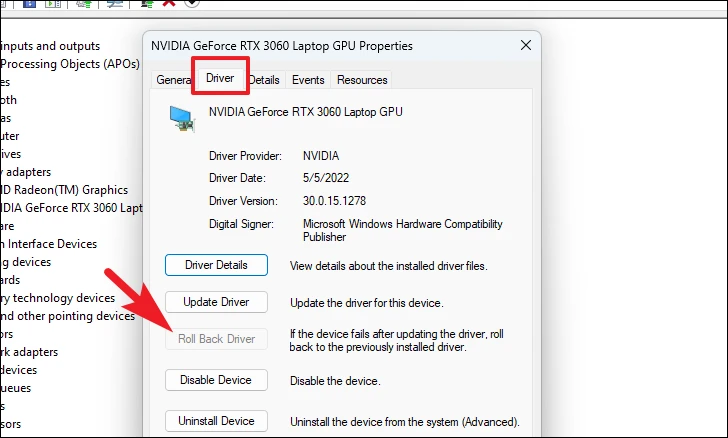
- Right-click on your graphics card and select Properties.

- Navigate to the Driver tab.
- Click Roll Back Driver. If it’s greyed out, you might need to manually install a previous driver version. Refer to this guide for detailed instructions.
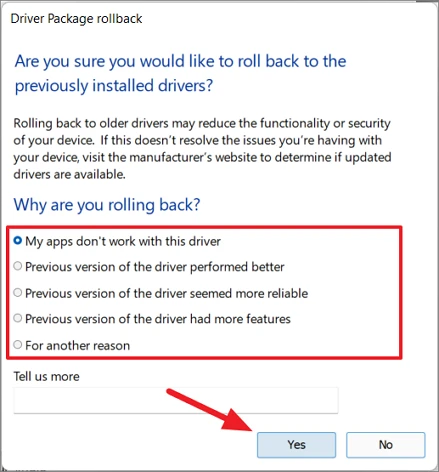
- Select a reason for rolling back and click Yes to proceed.
After rolling back, restart your computer and check if the taskbar is restored.
Run SFC and DISM Scans
Corrupted system files can lead to missing taskbar issues. Running these scans can repair those files.
- Press
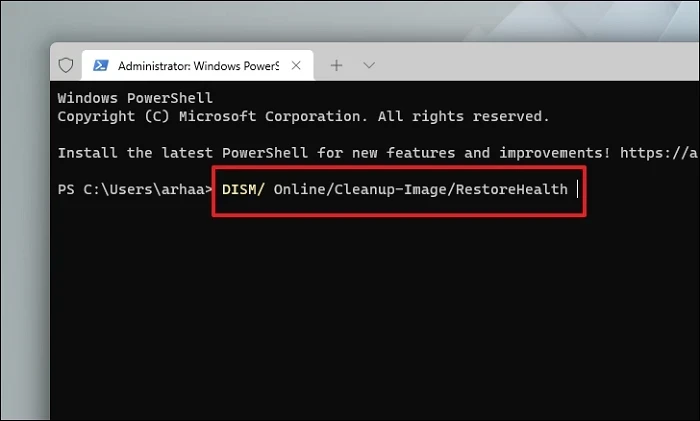
Windows+R, typecmd, and pressEnterto open Command Prompt. - Type
DISM /Online /Cleanup-Image /RestoreHealthand pressEnterto run the DISM scan.
- After the DISM scan completes, type
SFC /scannowand pressEnterto run the System File Checker.
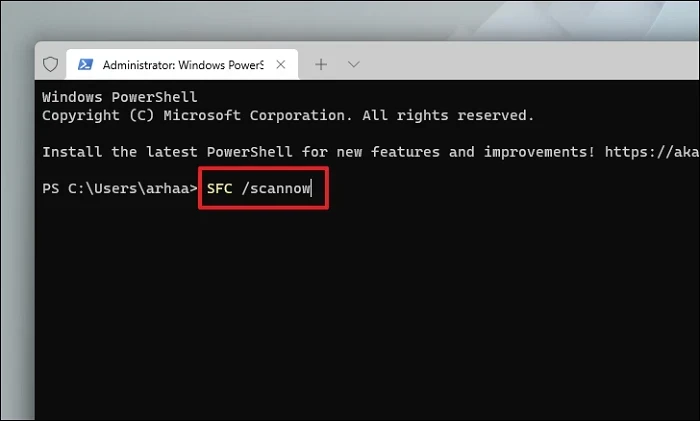
Once the scans are complete, restart your computer and see if the taskbar reappears.
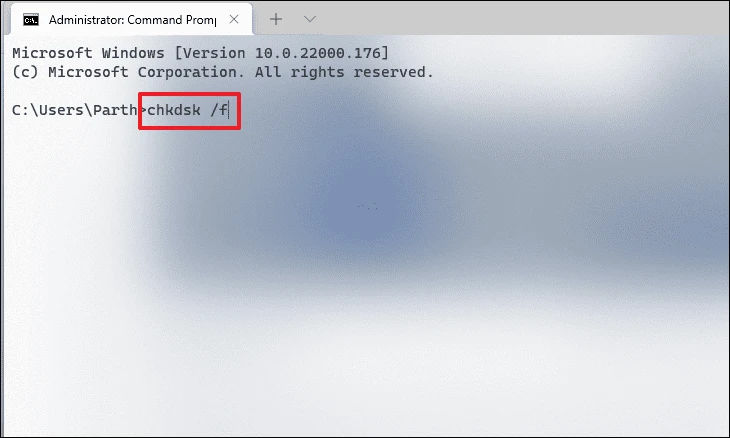
Perform a CHKDSK Scan
Disk errors can cause system issues, including problems with the taskbar. Running a CHKDSK scan can fix these errors.
- Open Command Prompt by pressing
Windows+R, typingcmd, and pressingEnter. - Type
chkdsk /fand pressEnter.
- Press
Yto schedule the scan for the next restart.
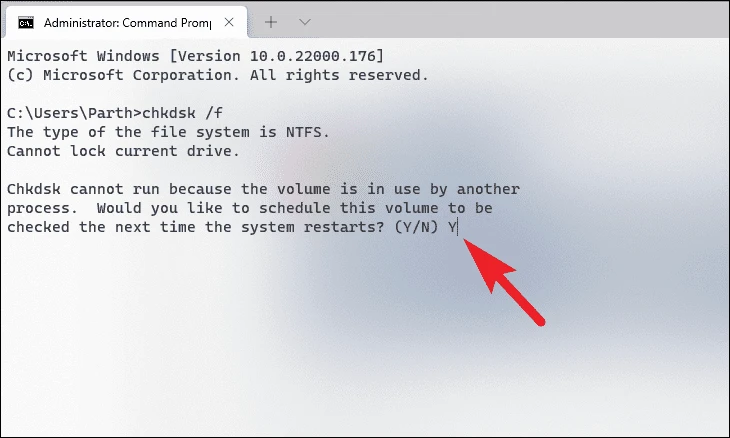
Restart your computer to allow CHKDSK to run. After it completes, check if the taskbar is visible.
Uninstall Recent Updates
If the issue started after a recent Windows update, uninstalling it might resolve the problem.
- Press
Windows+Ito open Settings. - Navigate to Windows Update from the left sidebar.
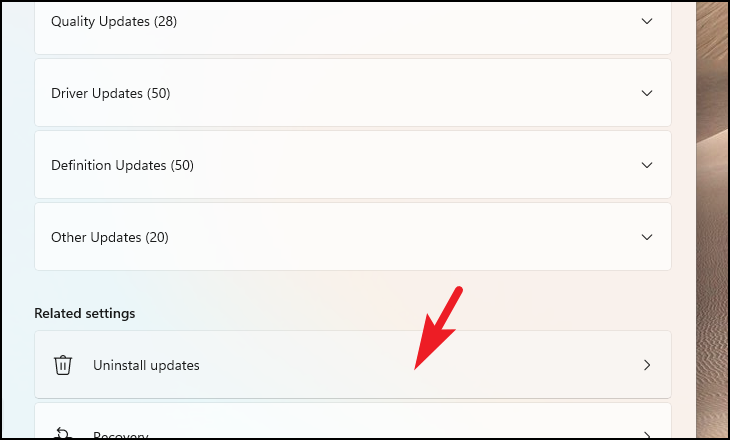
- Click on Update history.
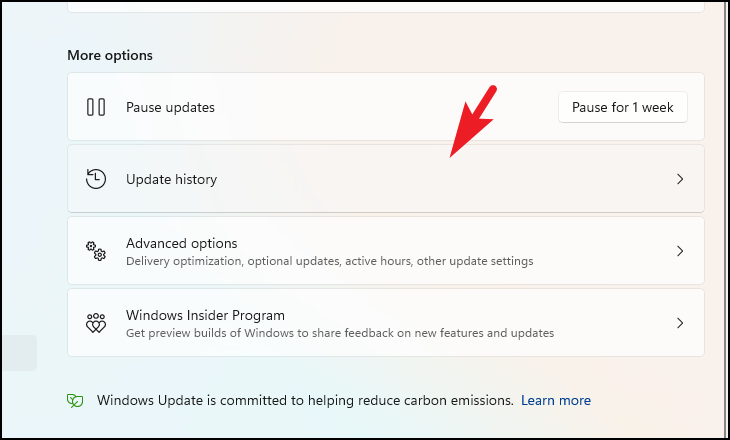
- Select Uninstall updates.
- Choose the most recent update and click Uninstall. Confirm any prompts to proceed.
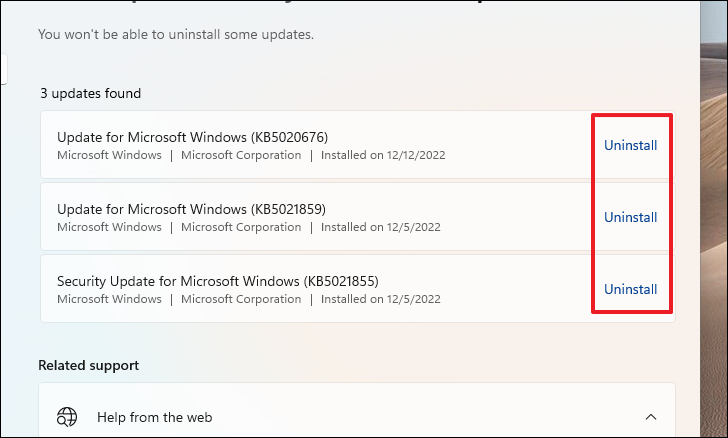
Restart your computer and check if the taskbar issue is resolved.
Delete Corrupted Registry Key
A corrupted registry key might be causing the taskbar to disappear. Deleting it can fix the issue.
- Press
Windows+R, typecmd, and pressEnterto open Command Prompt.
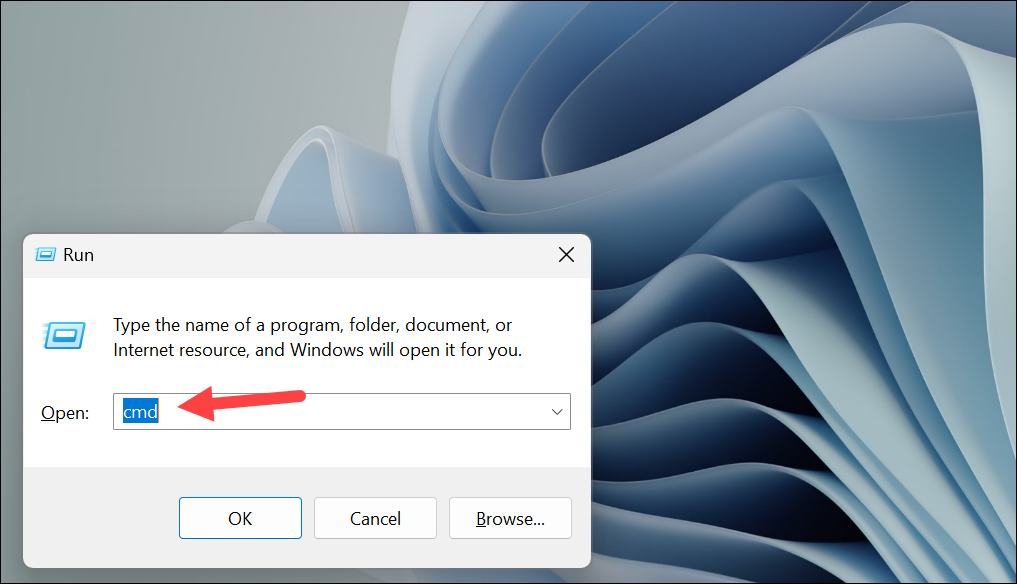
- Enter the following command and press
Enter:
reg delete HKCU\SOFTWARE\Microsoft\Windows\CurrentVersion\IrisService /f && shutdown -r -t 0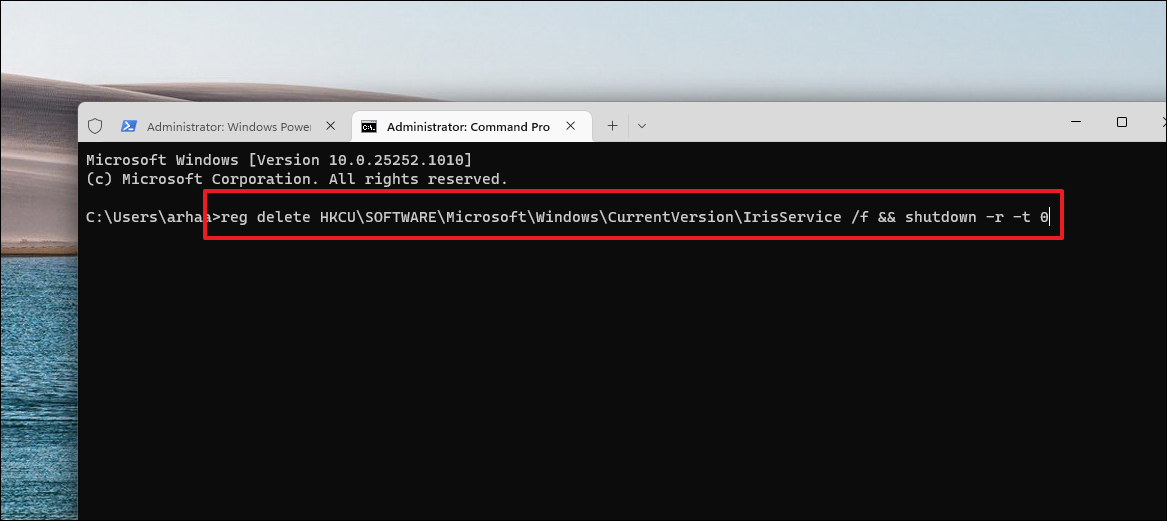
Re-register the Taskbar Components
Re-registering system components can fix issues caused by registration errors.
- Press
Windows+Xand select Windows Terminal (Admin).
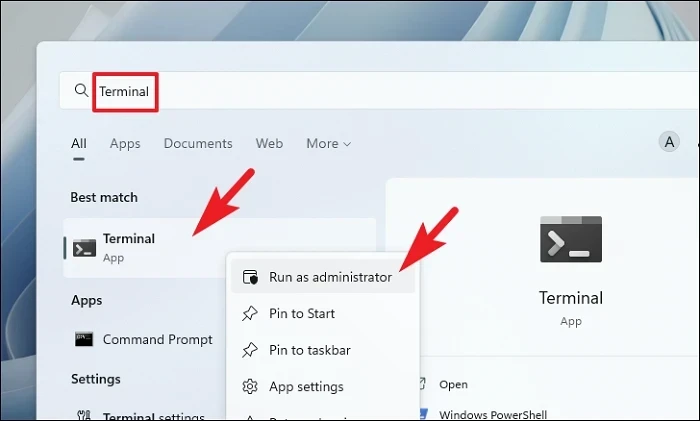
- Click Yes if prompted by User Account Control.

- In the terminal window, type the following command and press
Enter:
Get-AppXPackage -AllUsers | Foreach {Add-AppxPackage -DisableDevelopmentMode -Register "$($_.InstallLocation)AppXManifest.xml"}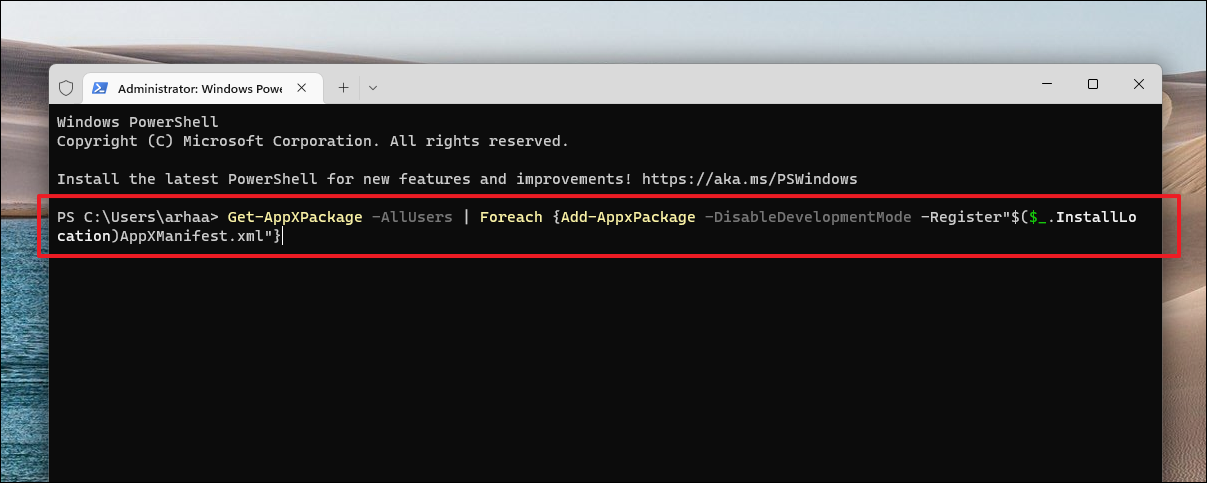
Wait for the command to complete, then restart your computer to apply the changes.
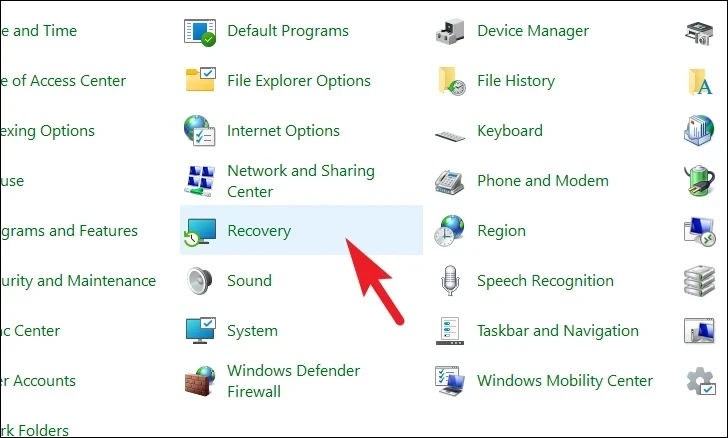
Use System Restore
If the taskbar issue started recently, restoring your system to an earlier point might help.
- Press
Windows+R, typecontrol, and pressEnterto open the Control Panel.
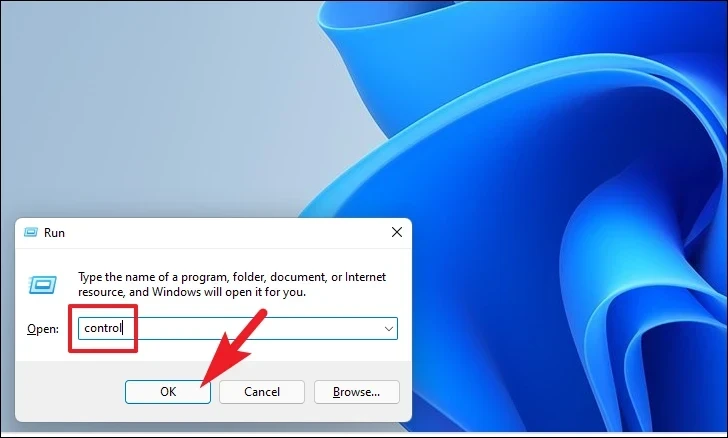
- Click on Recovery.
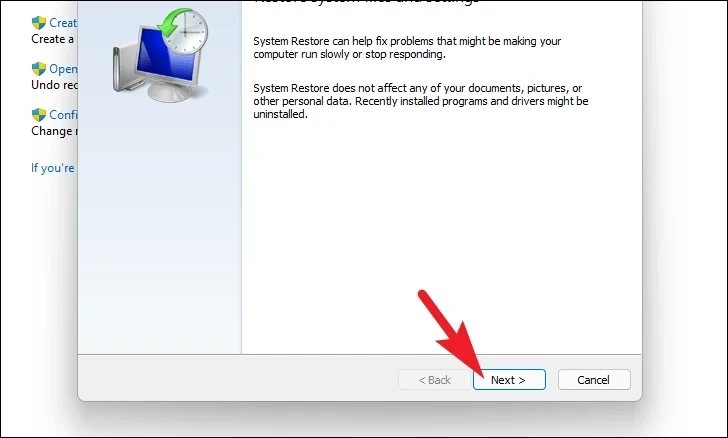
- Select Open System Restore and click Next.
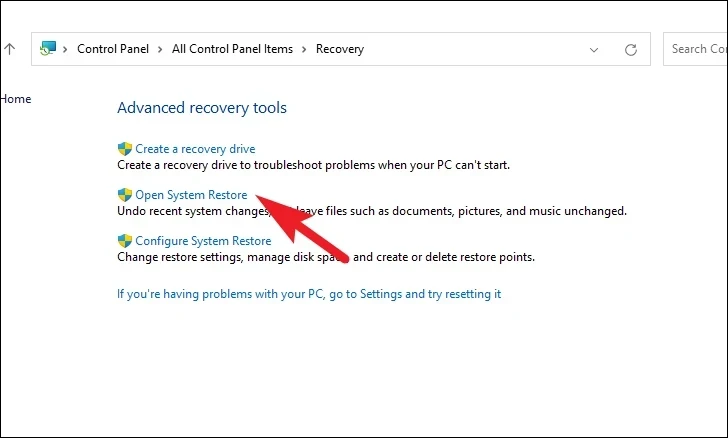
- Choose a restore point from before the issue occurred and follow the prompts to restore your system.
Reset Your PC
If none of the above methods work, resetting your PC can resolve deeper issues. You can choose to keep your personal files during the reset.
- Press
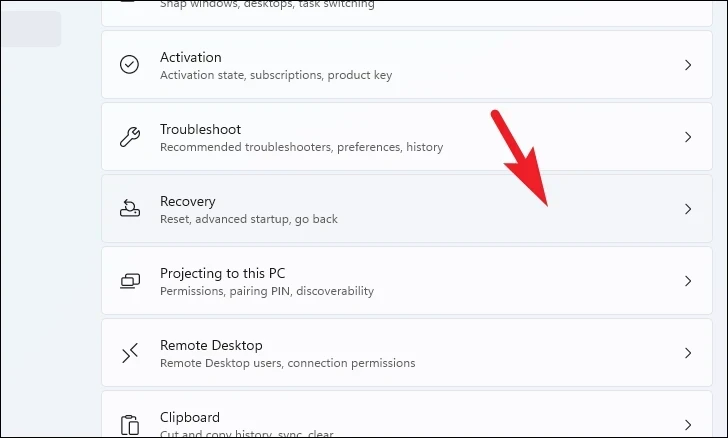
Windows+Ito open Settings. - Select System from the left sidebar.
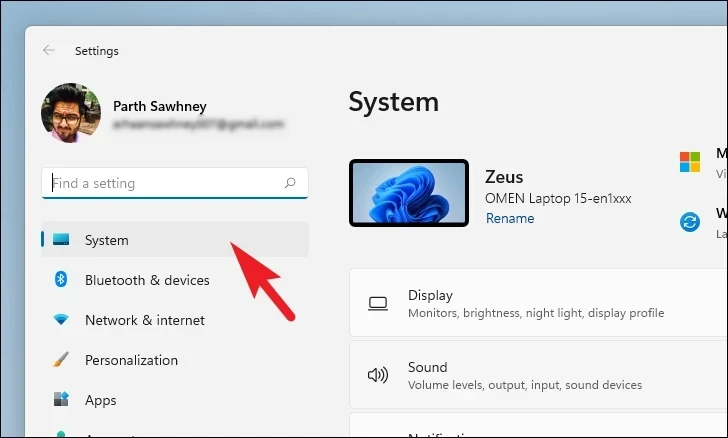
- Click on Recovery on the right.
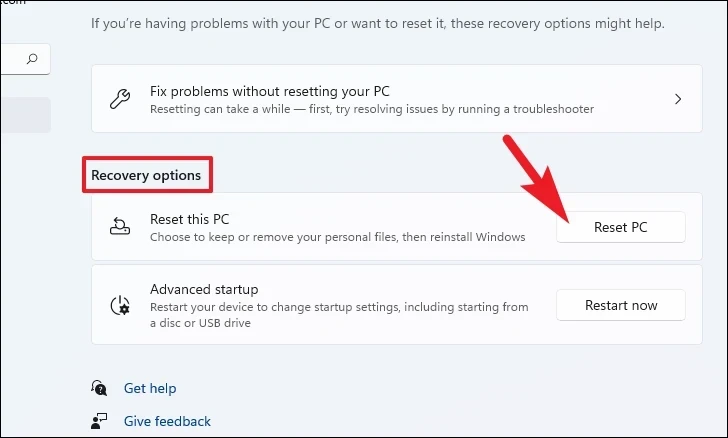
- Under Reset this PC, click Reset PC.
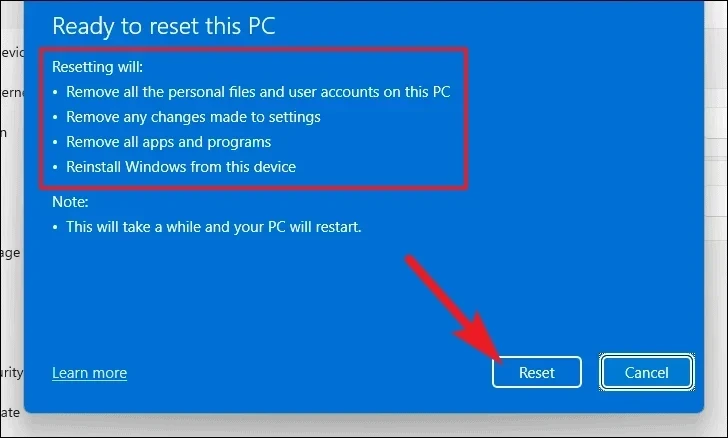
- Choose Keep my files to retain personal data or Remove everything to start fresh.

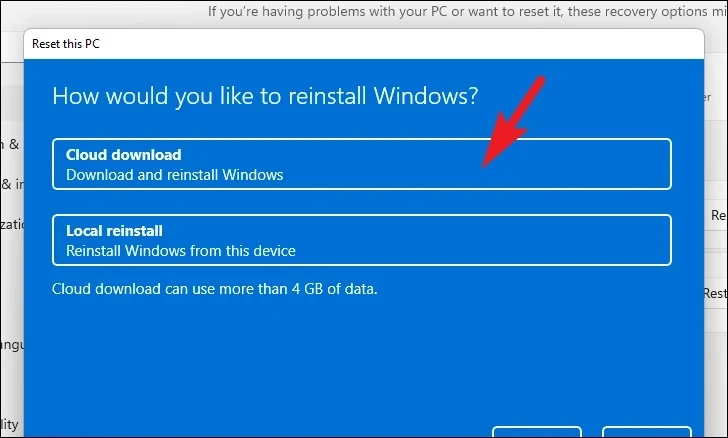
- Select Cloud download or Local reinstall for the reset method.
- Review the reset settings and click Next, then click Reset to begin the process.
By following these methods, you should be able to restore your missing taskbar and regain full functionality of your Windows 11 system.


