The taskbar in Windows 11 offers quick access to your favorite apps and system settings. But if you prefer a minimalistic desktop or need more screen space, you might want to hide it when it's not in use. This guide will show you how to automatically hide the taskbar using different methods.
Hide the taskbar using Windows Settings
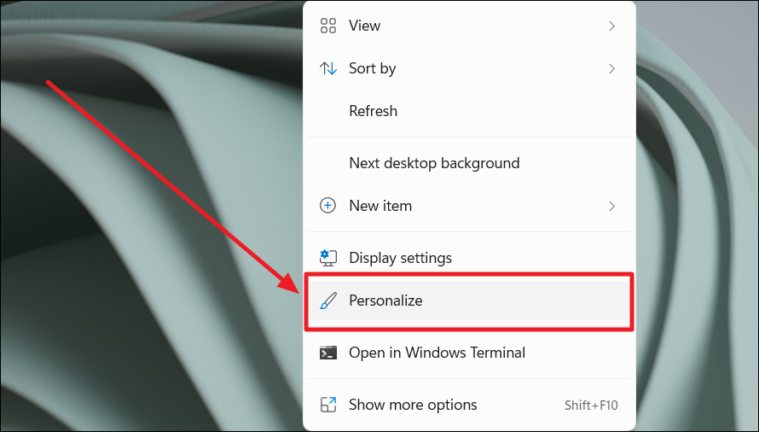
- Right-click on a blank area of your desktop and select 'Personalize' from the context menu.
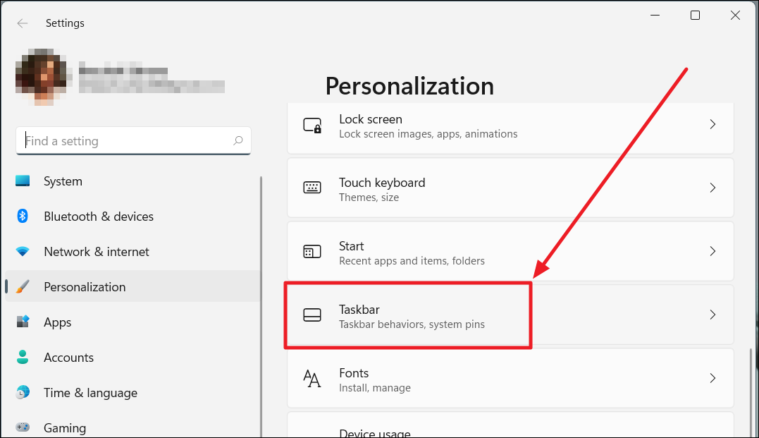
- In the 'Personalization' window, scroll down and click on 'Taskbar'.
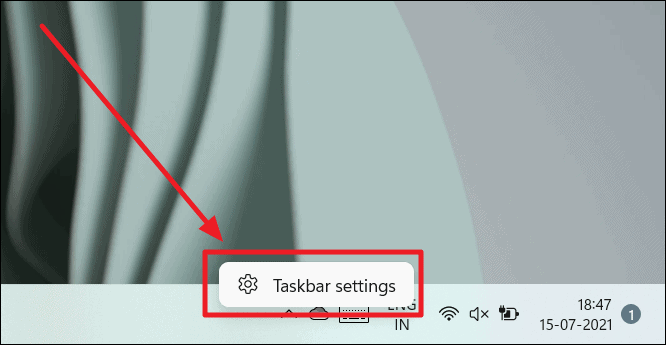
Alternatively, you can right-click directly on the taskbar and choose 'Taskbar settings' to open the taskbar settings immediately.
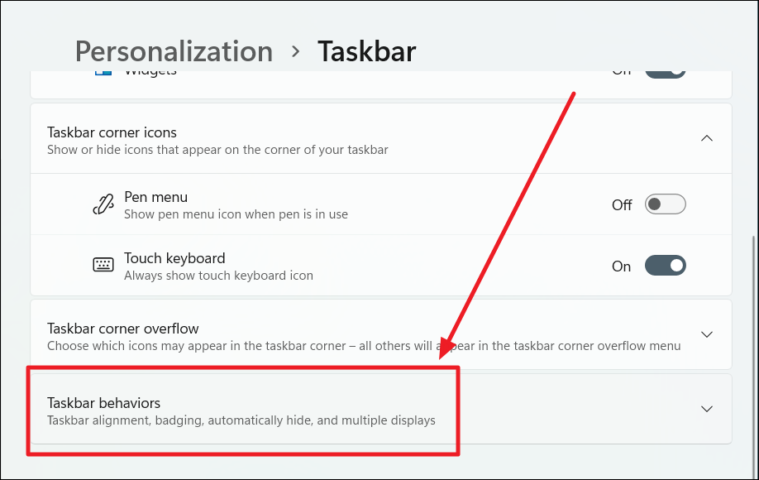
- In the Taskbar settings, expand the 'Taskbar behaviors' section by clicking on it.
- Check the box next to 'Automatically hide the taskbar' under 'Taskbar behaviors'.
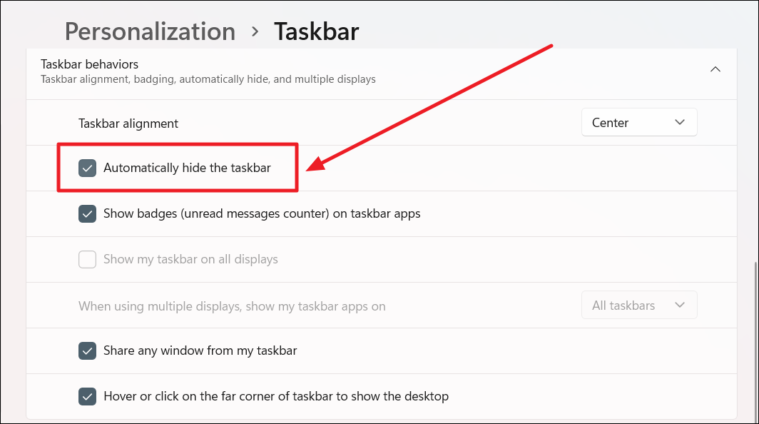
The taskbar will now automatically hide when it's not in use. To make it reappear, simply move your cursor to the bottom of the screen.
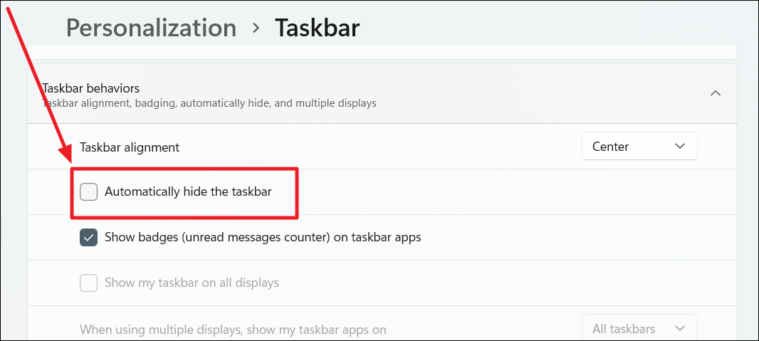
To unhide the taskbar permanently, follow the same steps and uncheck the 'Automatically hide the taskbar' option.
Hide the taskbar using Command Prompt
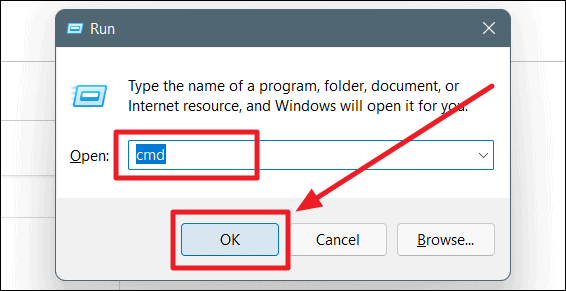
- Press Windows + R to open the Run dialog box. Type cmd and click 'OK' or press Enter to open Command Prompt.
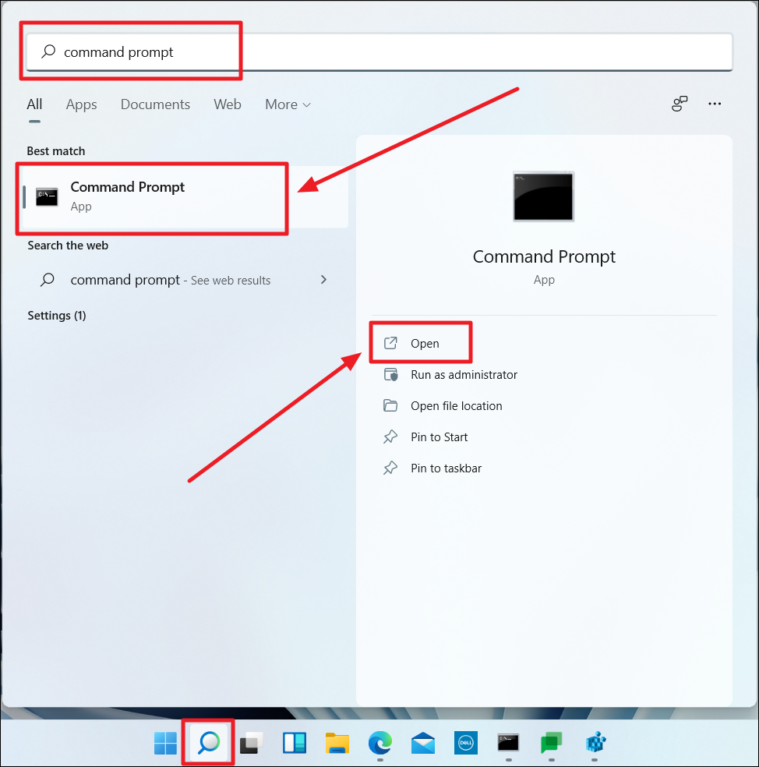
Alternatively, click the 'Search' icon on the taskbar, type 'Command Prompt' in the search field, and select the app from the results to open it.
- In the Command Prompt window, copy and paste the following command, then press Enter:
powershell -command "&{$p='HKCU:SOFTWARE\Microsoft\Windows\CurrentVersion\Explorer\StuckRects3';$v=(Get-ItemProperty -Path $p).Settings;$v[8]=3;&Set-ItemProperty -Path $p -Name Settings -Value $v;&Stop-Process -f -ProcessName explorer}"Your taskbar will now automatically hide when not in use.
To disable the automatic hiding of the taskbar, run the following command in Command Prompt and press Enter:
powershell -command "&{$p= 'HKCU:SOFTWARE\Microsoft\Windows\CurrentVersion\Explorer\StuckRects3' ;$v=(Get-ItemProperty -Path $p).Settings;$v[8]=2;&Set-ItemProperty -Path $p -Name Settings -Value $v;&Stop-Process -f -ProcessName explorer}"Changing the taskbar alignment in Windows 11
Windows 11 positions taskbar icons in the center by default, but you can align them to the left if you prefer the traditional look.
- Right-click on the taskbar and select 'Taskbar settings' from the menu.

- In the Taskbar settings window, click on 'Taskbar behaviors' to expand the section.

- Find the 'Taskbar alignment' option, and click on the drop-down menu next to it.
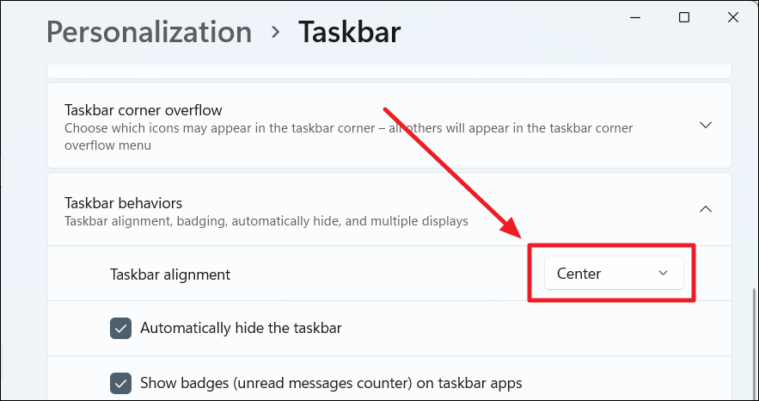
- Select 'Left' from the list to align taskbar icons to the left.
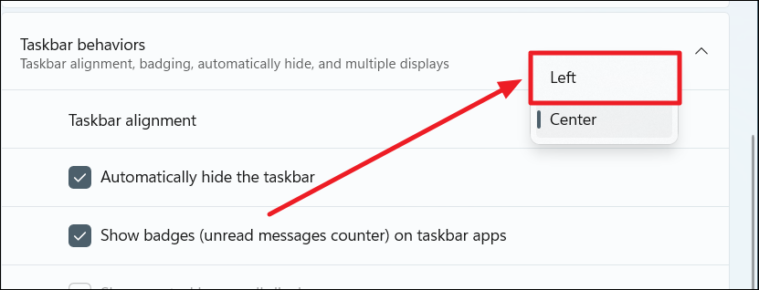
Your taskbar icons will now align to the left side of the screen.
Having trouble hiding the taskbar?
If your taskbar doesn't automatically hide after you've enabled the setting, it might be due to an app requiring your attention or a notification that needs to be addressed.
Here are some steps to troubleshoot:
- Check for any running applications on the taskbar that are highlighted or flashing. They might have notifications or prompts waiting for your action. Open the app and address any notifications.
- Look at the system tray icons for any apps with notification badges (a red or orange dot). Click on these icons to review the notifications.
- Dismiss any system notifications that appear in the lower-right corner of the screen, as they can keep the taskbar visible.
If the taskbar still doesn't hide, try closing background applications that might be causing issues. As a last resort, restart your computer to see if that resolves the problem.
Hiding the taskbar in Windows 11 is a simple process that can help you maximize your screen space and achieve a cleaner desktop look. Whether you use the Settings app or Command Prompt, you can easily control when the taskbar appears on your screen.

