
If you need to perform graphics diagnostics or monitor Direct3D application usage on your Windows 11 system, installing the DirectX Graphics Tools is essential. While it’s not included by default, you can easily add it through Windows’ optional features. This tool not only helps in tracing Direct3D applications but is also valuable for developing DirectX games and applications, providing real-time GPU usage tracking.
How to Install DirectX Graphics Tools on Windows 11
Adding the Graphics Tools to your Windows 11 PC is straightforward. Follow these steps to get it installed:
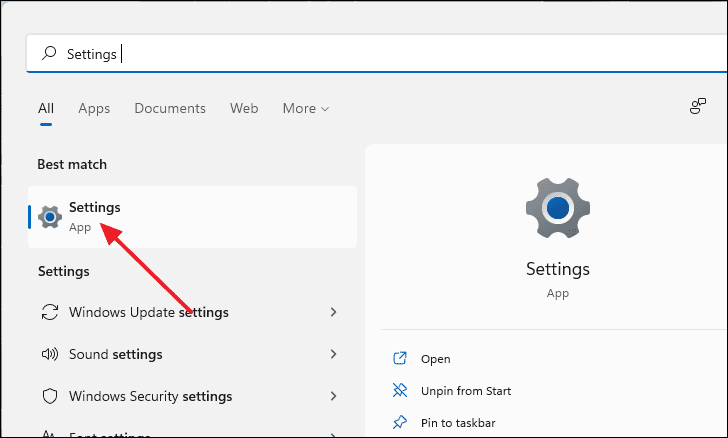
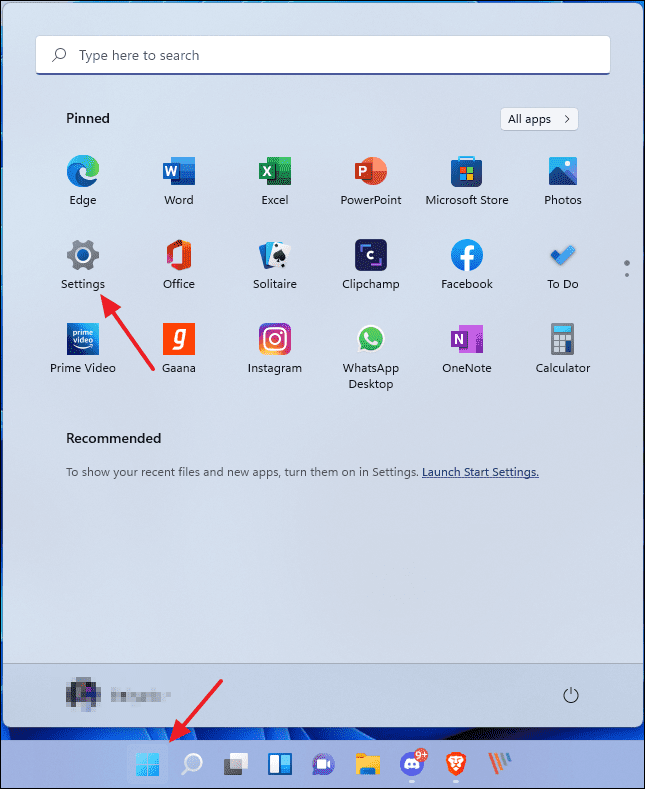
- Open the
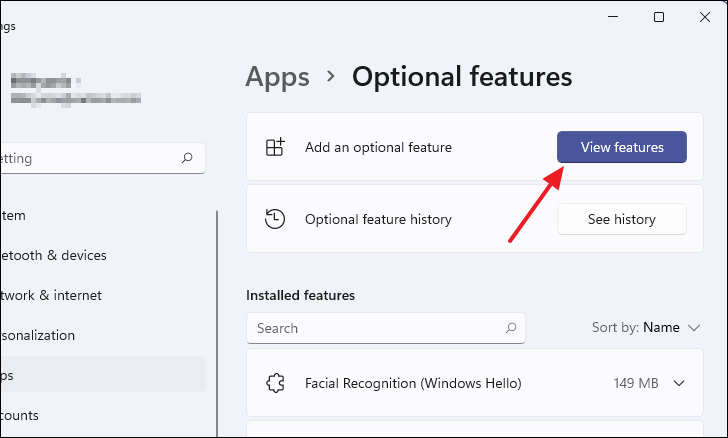
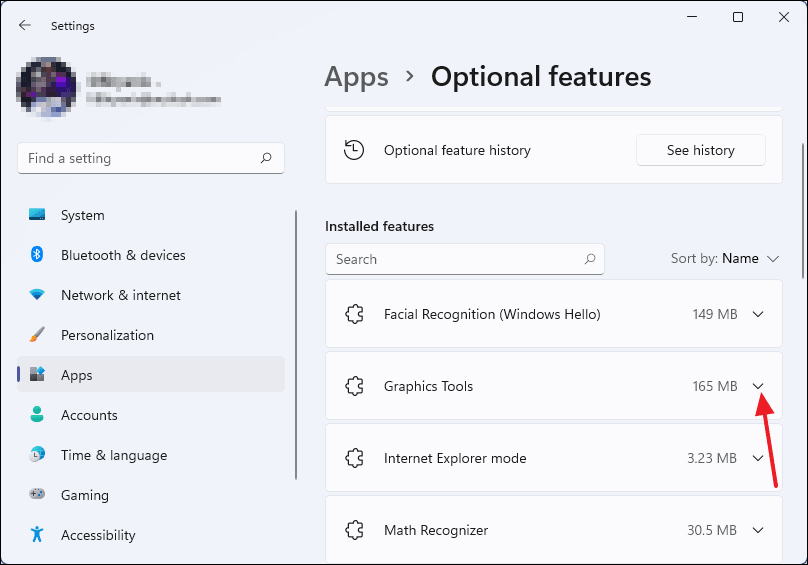
Settingsapp by pressingWindows+Ior by searching for it in the Start menu. - In Settings, select Apps from the left-hand menu, then click on Optional features on the right.
- On the Optional features page, click the View features button next to “Add an optional feature”.
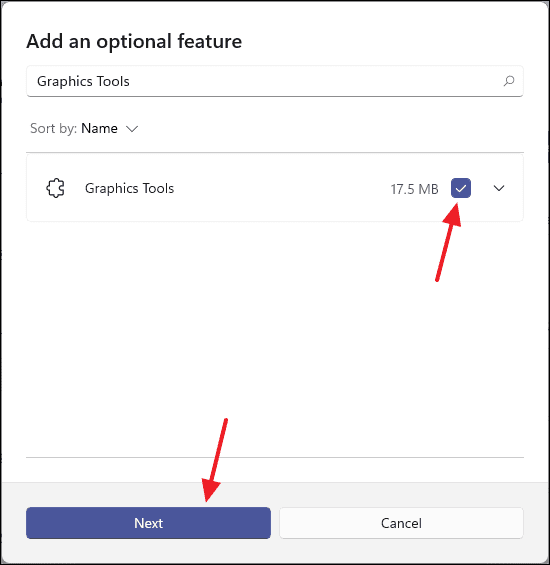
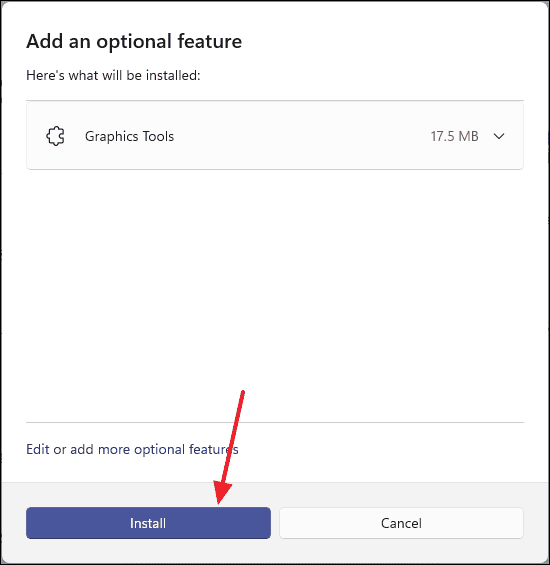
- In the search bar of the “Add an optional feature” window, type Graphics Tools.
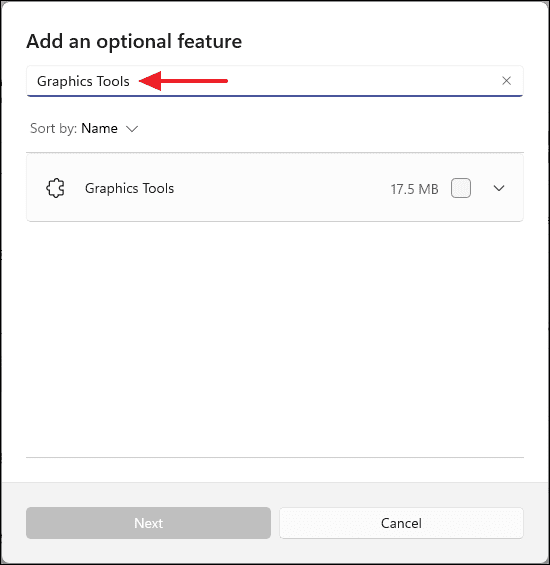
- When Graphics Tools appears in the search results, check the box beside it and click Next.
- Click Install to begin the installation.
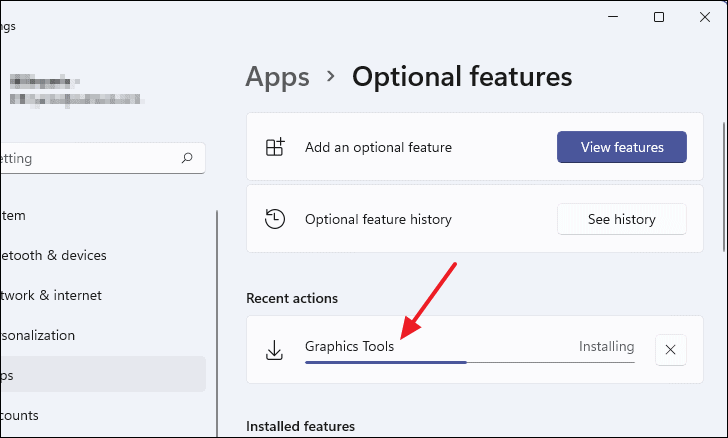
The installation process will start, and you can monitor its progress under the “Recent actions” section. The time it takes may vary based on your system’s performance and internet connection speed.
Once completed, you’ll see “Installed” next to Graphics Tools in the Recent actions list.
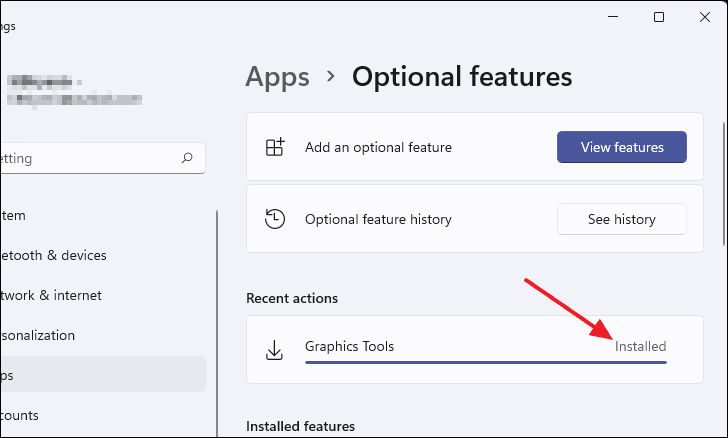
Congratulations! You’ve successfully installed the DirectX Graphics Tools on your Windows 11 computer.
How to Use DirectX Graphics Tools
With the Graphics Tools now installed, you can run DirectX diagnostics to gather information about your system’s graphics components. Here’s how to use the DirectX Diagnostic Tool:
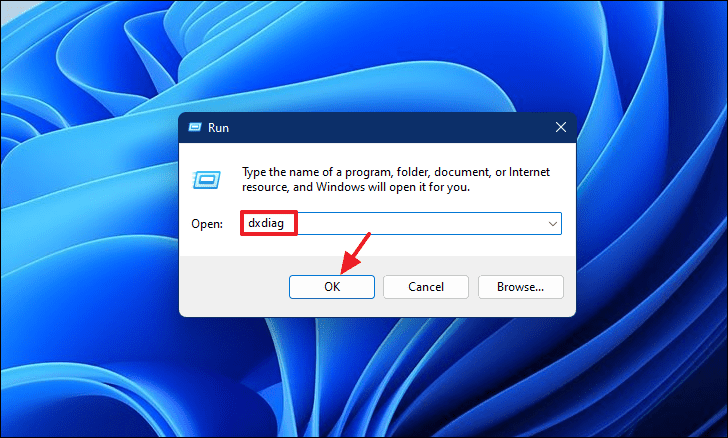
- Press
Windows+Rto open the Run dialog box. - Type
dxdiagand click OK to launch the tool.
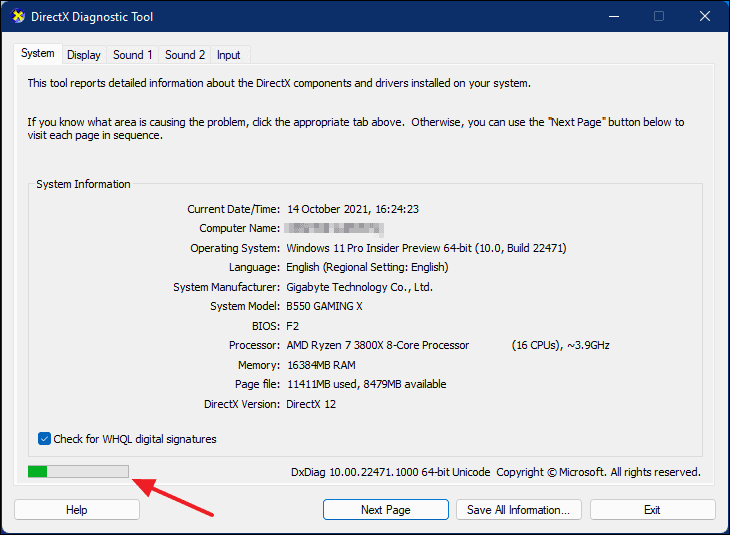
The DirectX Diagnostic Tool will start gathering information about your system. You’ll see a green progress bar at the bottom-left corner indicating that the diagnosis is in progress. Wait for it to complete.
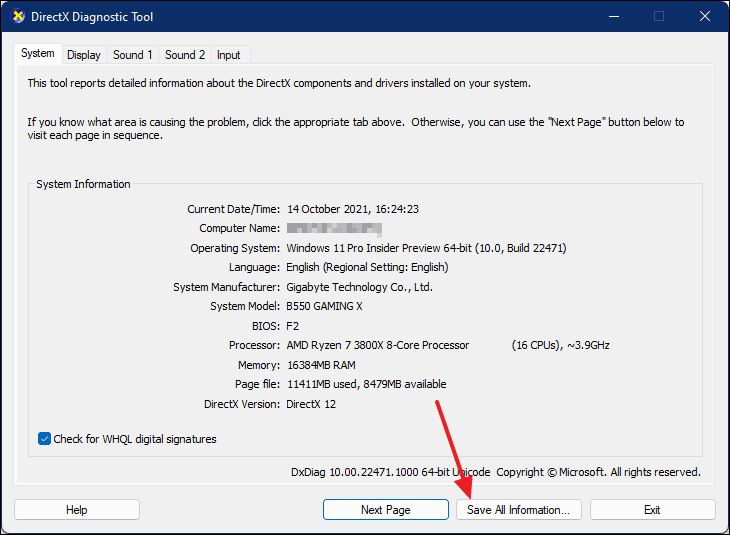
After the diagnosis is finished, the progress bar will disappear. You can save the detailed report by clicking on the Save All Information… button.
How to Uninstall DirectX Graphics Tools
If you decide you no longer need the Graphics Tools, you can uninstall them easily. Here’s how:
- Open the
Settingsapp by pressingWindows+Ior searching for it in the Start menu. - Go to Apps and then click on Optional features.
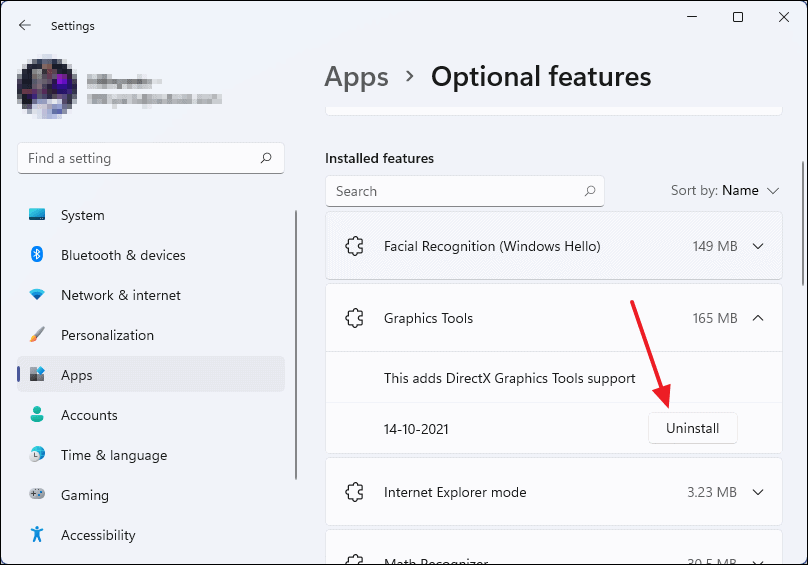
- In the list of installed features, locate Graphics Tools and click the dropdown arrow next to it.
- Click the Uninstall button to remove the Graphics Tools from your system.
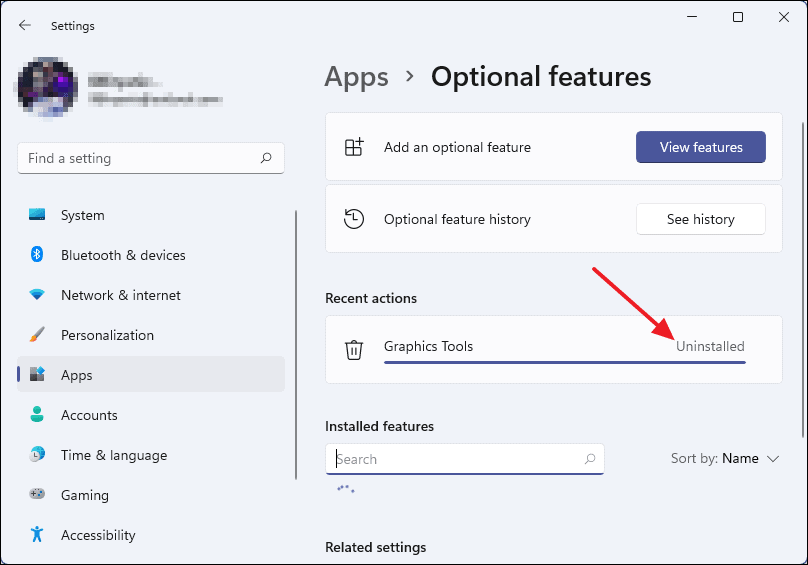
Windows will begin the uninstallation process. Once it’s complete, you’ll see “Uninstalled” under the Recent actions section.
By following these instructions, you can manage the DirectX Graphics Tools on your Windows 11 PC with ease, installing them when needed for diagnostics or development, and removing them when they’re no longer required.


