The latest version of macOS, the Big Sur is indeed a Big upgrade. Before we dive into the installation process, let’s brief up on what to expect from this update.
The Big Sur is an even defined space where everything is not only compact but also easy to access. The macOS Big Sur user interface is much more visually appealing. This update gives images and icons that extra lift to make them look more lively. The Big Sur home screen is the first thing you’d see after the update, and there are quite a few additions and improvisations in there too! For now, how to install the macOS Big Sur.
First, download the ‘macOS Big Sur Beta profile’ on your Mac from the link below.
The Beta profile would then open in your ‘Downloads’. Click on it.
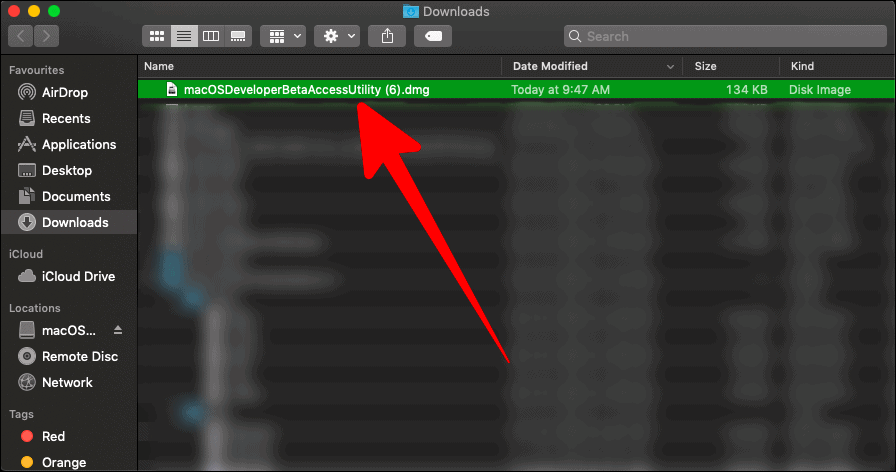
The ‘Downloads’ screen would lead you to the next window containing the macOS beta package option. Double click on it.
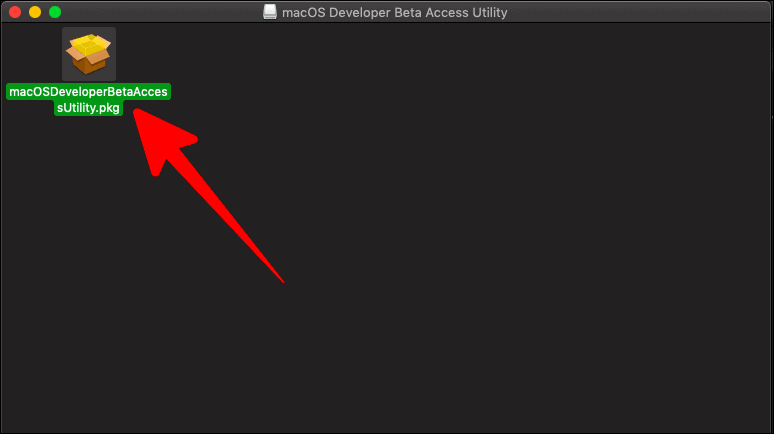
You would now be looking at the ‘Beta Access Utility Installer’ window. This is essentially your guide through the entire initial installation process. Click on ‘Continue’ on the ‘Introduction’ page of the window to proceed.
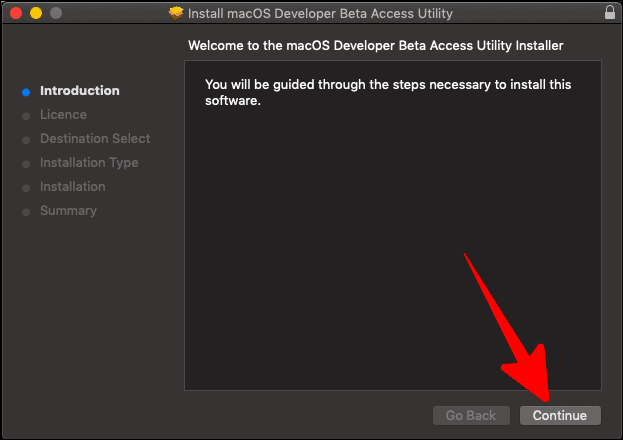
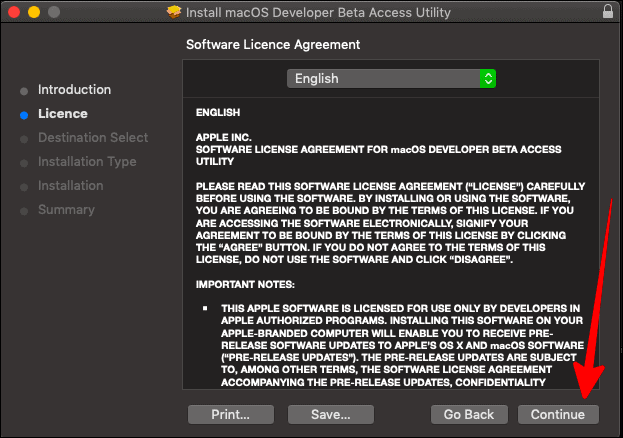
Next is the ‘License’ page, where you ought to read the agreement. Click on ‘Print’ or ‘Save’ if you want to save this agreement. Once you’ve read it, click on ‘Continue’.
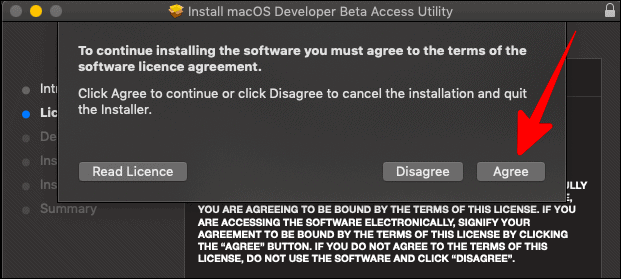
There would be another confirmatory prompt just to make sure you are completely up for the installation. Click on ‘Agree’ if you are.
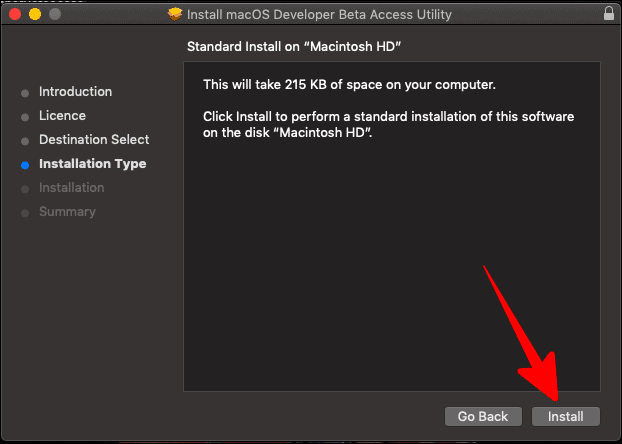
Next is the ‘Installation Type’ window which would inform you about the amount of space the software would use up on your system and the disk which would accommodate the installed OS. Select ‘Install’.
Now, you would be asked to approve the installation by adding your password. Enter your password and click on ‘Install Software’.
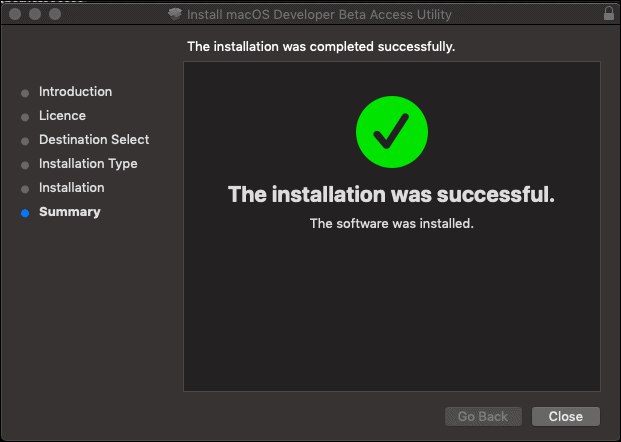
After that, there would be a few seconds of installing, and then you would get a completion prompt, which marks the ‘Summary’ stage of the installation.
After installing the macOS Big Sur beta profile, a small ‘Software Update’ window would pop up. Click on ‘Upgrade Now’.
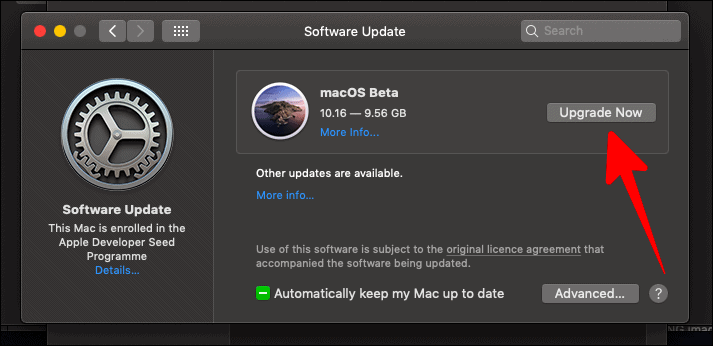
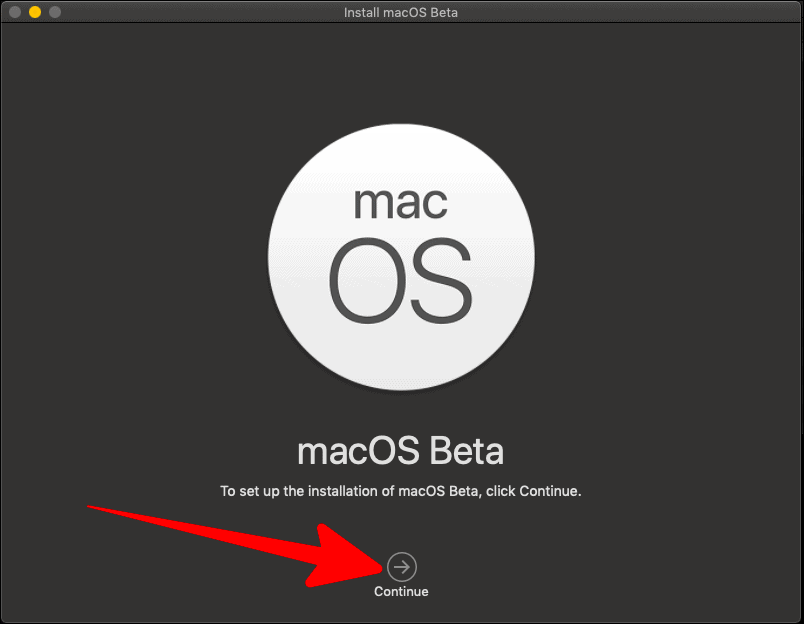
You would now see an ‘Install macOS Beta’ window. Click on ‘Continue’ to set up the installation.
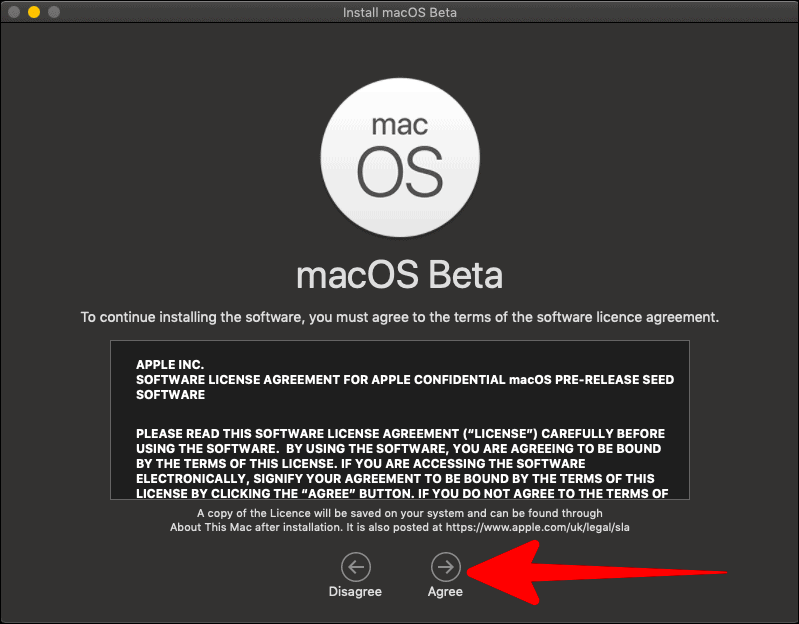
The next bit is the ‘Software License Agreement’ window, which contains all the crucial information about the software. Ensure to read it completely and only then click on ‘Agree’.
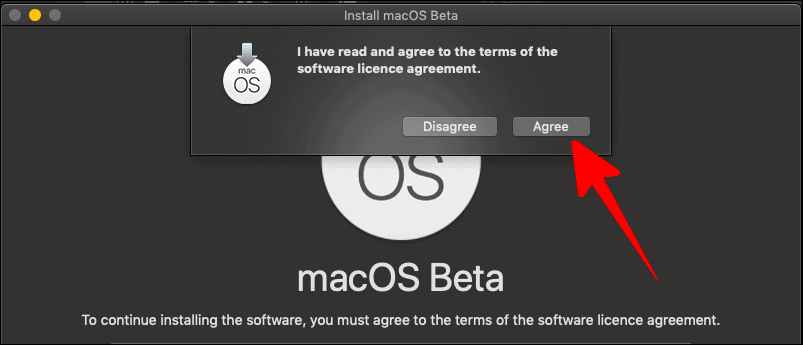
There would be another confirmation pop-up, select ‘Agree’ again.
The next window would inform you about the end source of the installation. Basically, where this installed file would fill in. If your disk is full, you would get constant alerts to free up space, until it is enough for macOS Beta to fit into your disk. Once you have enough space and there is a free disk, click on ‘Install’.
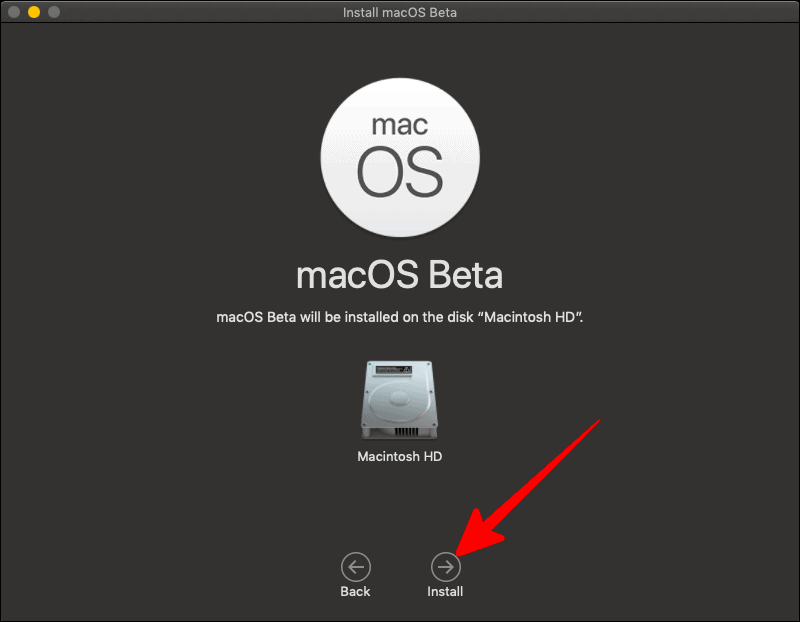
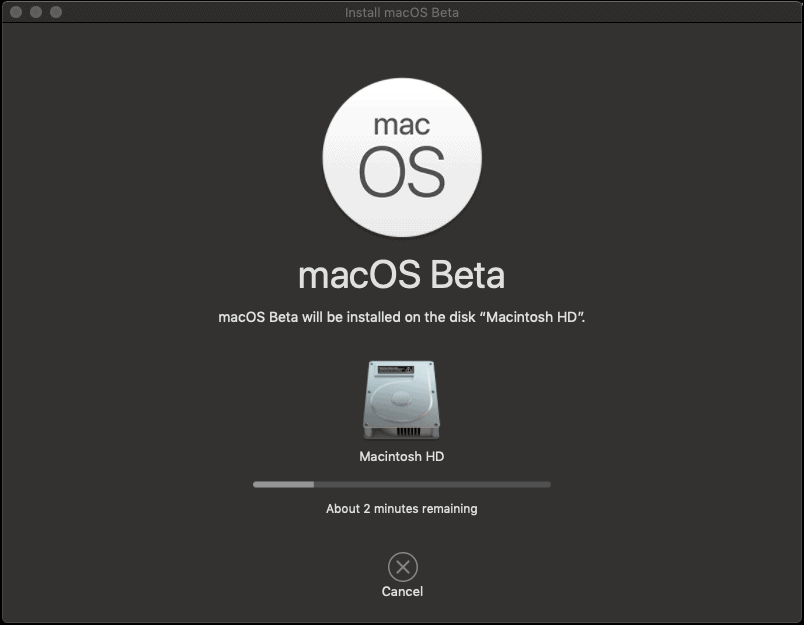
The installation process would begin immediately. It would take a maximum of 5 to 7 minutes depending on your internet speed.
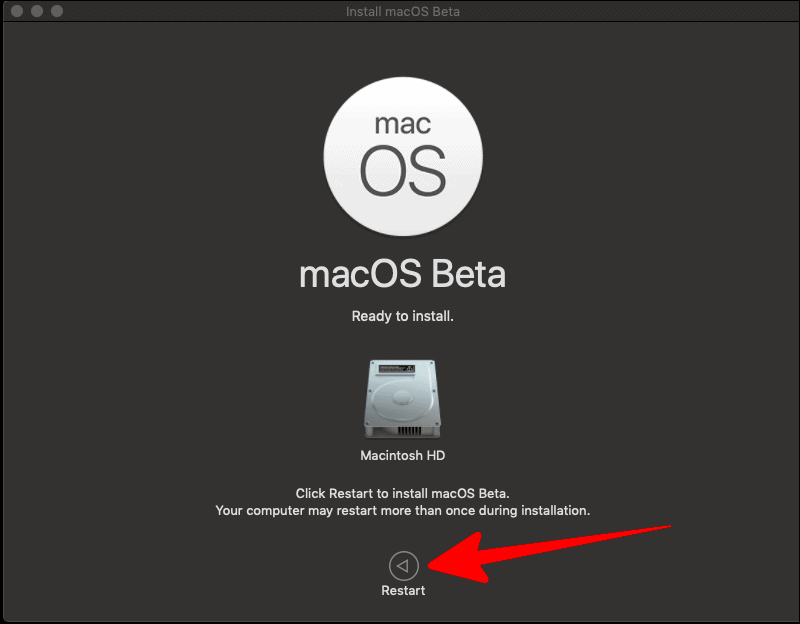
After macOS Beta has been installed on your Macintosh disk, and the software is ‘Ready to Install’, you would have to restart your system for the new upgrade to take the lead. Click on ‘Restart’.
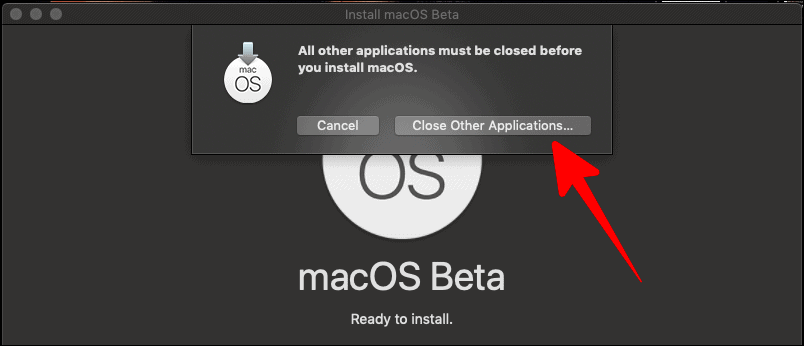
If you have any applications running on your Mac before the restarting process, you would get a prompt to close all those applications. Select ‘Close Other Applications’.
It’s recommended to have a backup of anything that you were previously working on or any important stuff that was open on any of the apps before you click ‘Restart’.
Now, your Mac would reinstall. Plugin your charger before restarting. The entire restarting process would take about 30 to 45 minutes. Keep the charger plugged in the whole time.
The next thing you see on your Mac would be a flowy and colorful screen. Congratulations! You have successfully installed the Big Sur.

The Big Sur has tons of upgrades for all across your macOS. Installing this incredible upgrade onto your laptop is the first step to a smoother Mac life!

