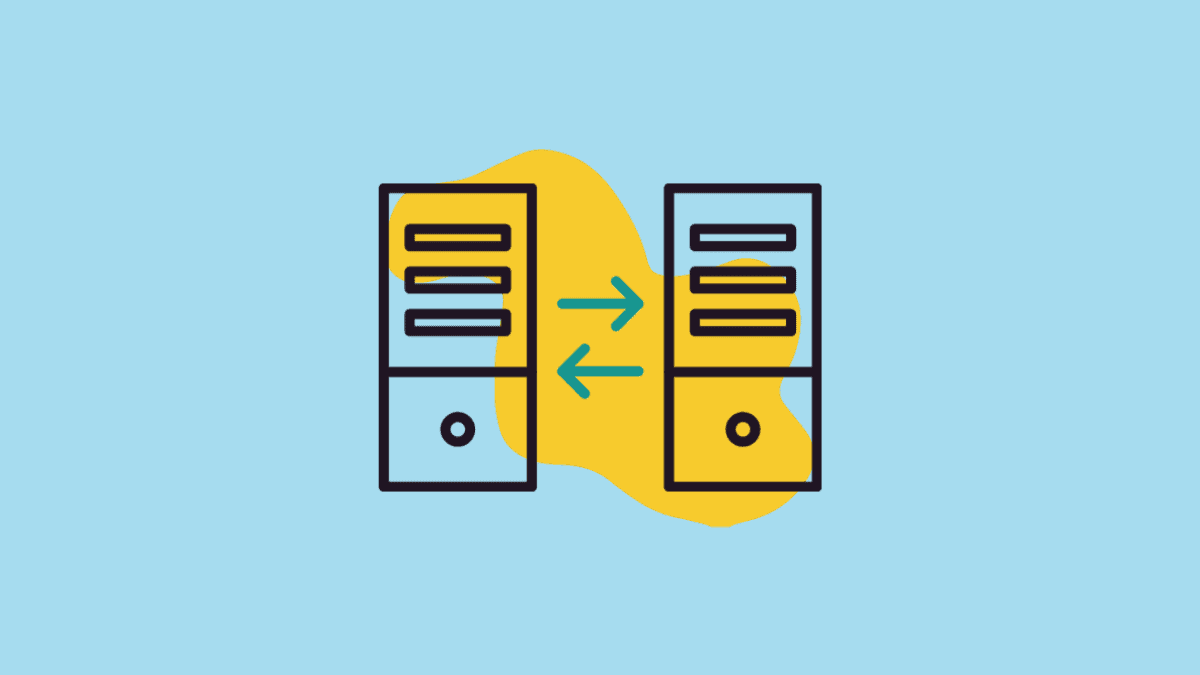
Accessing shared files and folders on a network can greatly enhance productivity, but constantly typing network addresses can be cumbersome. By mapping a network drive in Windows 11, you can quickly access these resources directly from File Explorer. This guide will show you how to enable network discovery, set up file sharing, and map a network drive on your PC.
Turn on Network Discovery on Your Windows 11 PC
To allow your PC to find other devices on the network, you need to enable network discovery:
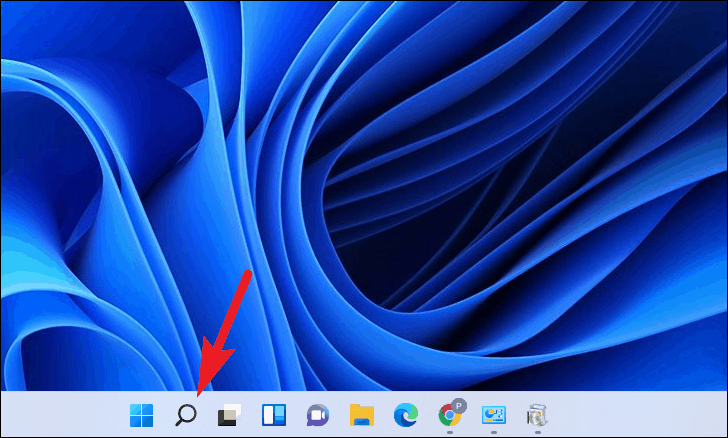
- Click the Search icon on the taskbar and type
Controlin the search bar.
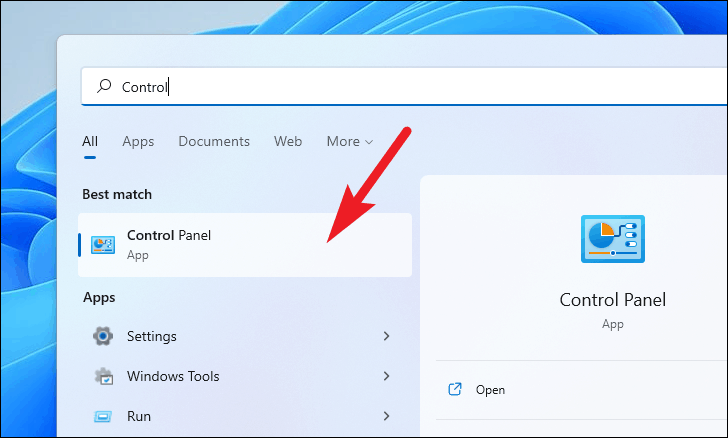
- Select the Control Panel app from the search results.
Alternatively, press Windows + R to open the Run dialog, type control, and click OK to open the Control Panel directly.

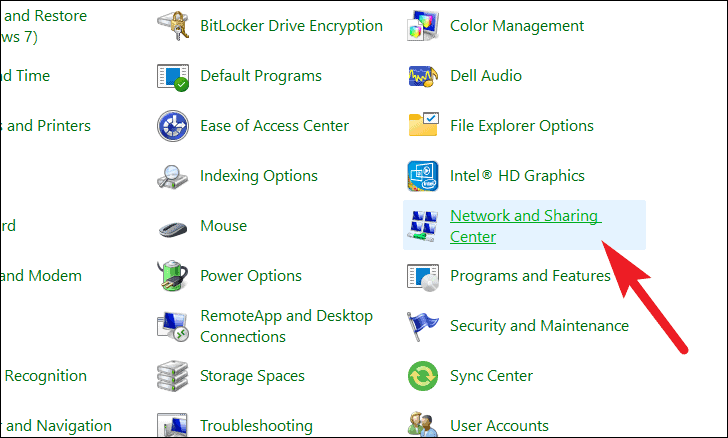
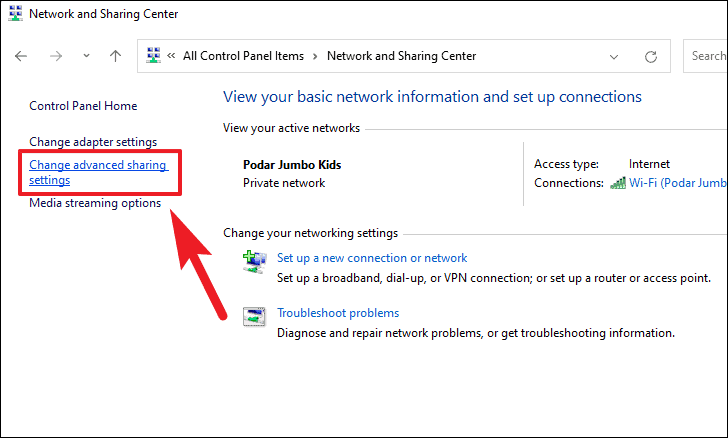
- In the Control Panel, click on Network and Sharing Center.

- On the left side, click Change advanced sharing settings.

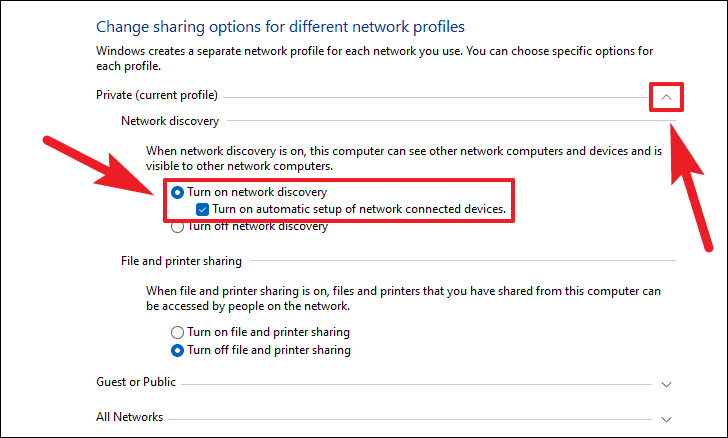
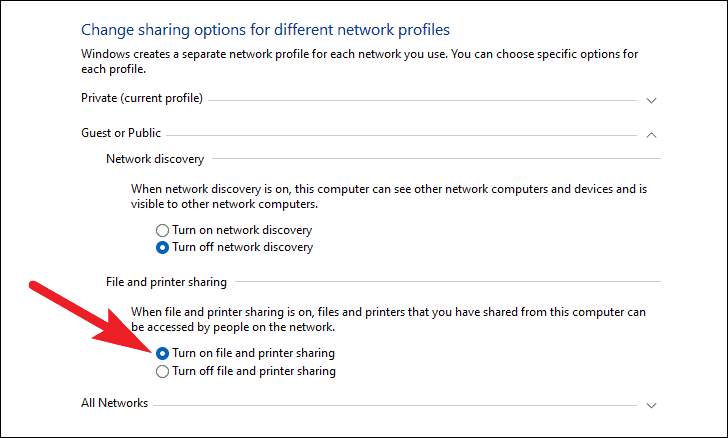
- Expand your current network profile (Private or Public) by clicking the arrow.
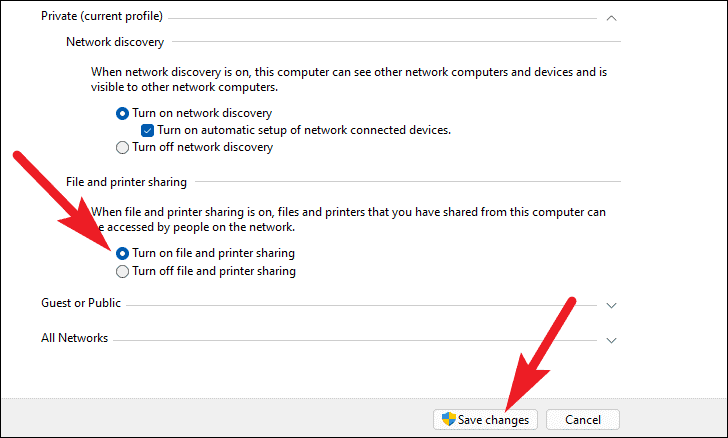
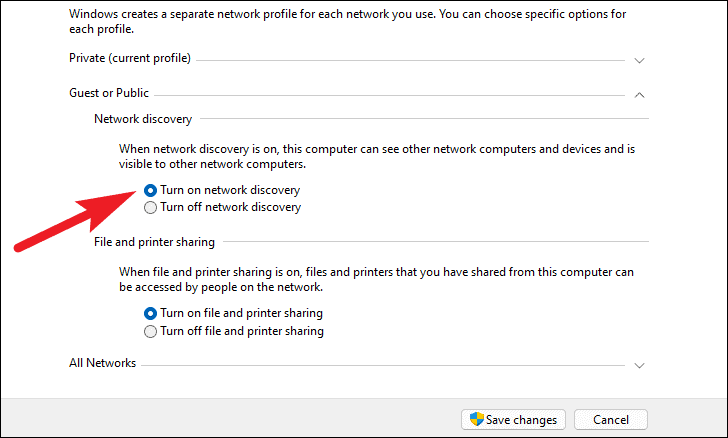
- Under Network discovery, select the option Turn on network discovery.
- Ensure that Turn on automatic setup of network connected devices is also checked.
- If you want to share files and printers, under File and printer sharing, select Turn on file and printer sharing.
- Click Save changes at the bottom to apply the settings.
Your computer can now discover other devices on the network and be discovered by others.
Enable File Sharing on the Resource Computer
To access files on another computer, file sharing must be enabled on that device:
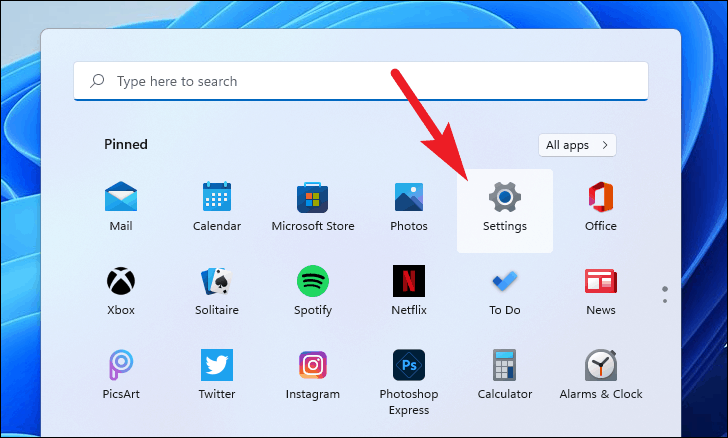
- On the resource computer, open the Settings app. Press
Windows + Ito open it quickly.
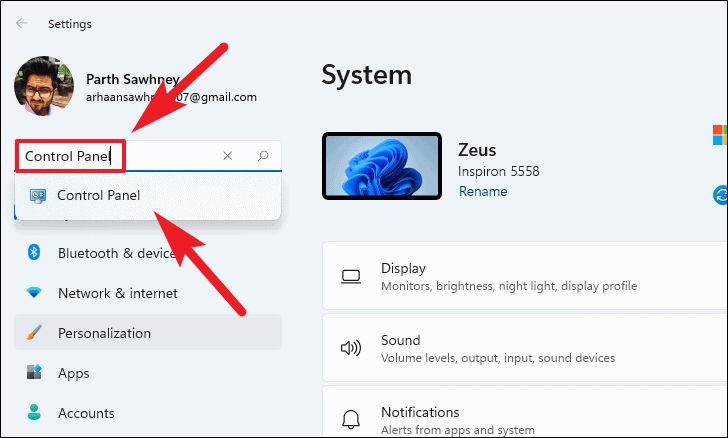
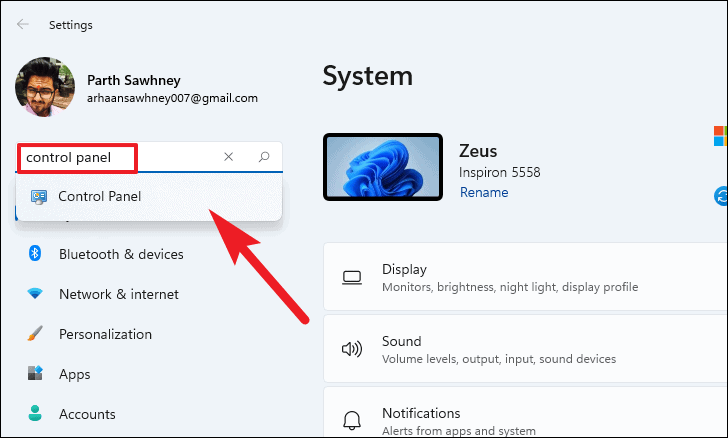
- In Settings, use the search bar at the top and type
control panel. Select the Control Panel from the results.
- In the Control Panel, click on Network and Sharing Center.
- On the left side, select Change advanced sharing settings.
- Under your current network profile, find the File and printer sharing section and select Turn on file and printer sharing.
- Ensure that Turn on network discovery is also selected under the Network discovery section.
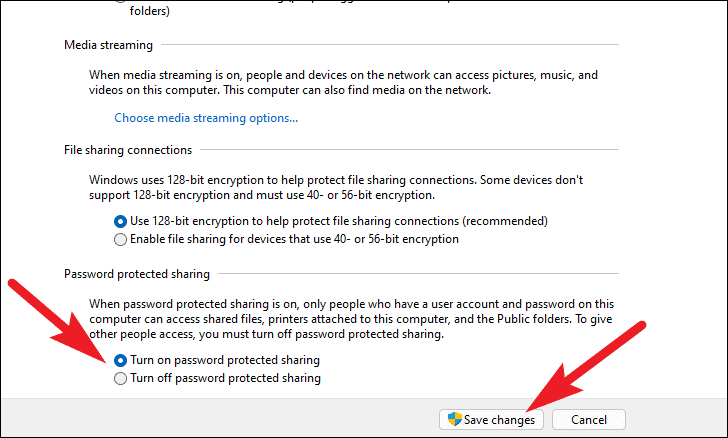
If the network is private and only trusted devices are connected, you can disable password-protected sharing:
- Scroll down to the All Networks section and expand it.
- Under Password protected sharing, select Turn off password protected sharing.
- Click Save changes to apply the settings.
Map a Network Drive on Your Windows 11 PC
With network discovery and file sharing enabled, you can now map the network drive:
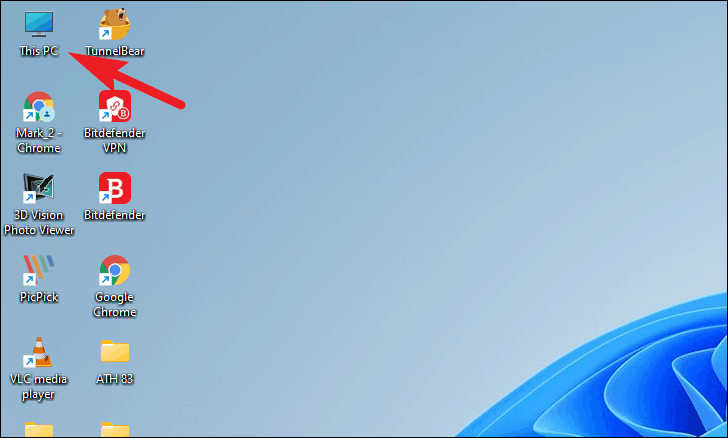
- Open This PC from your desktop or press
Windows + Eto open File Explorer.
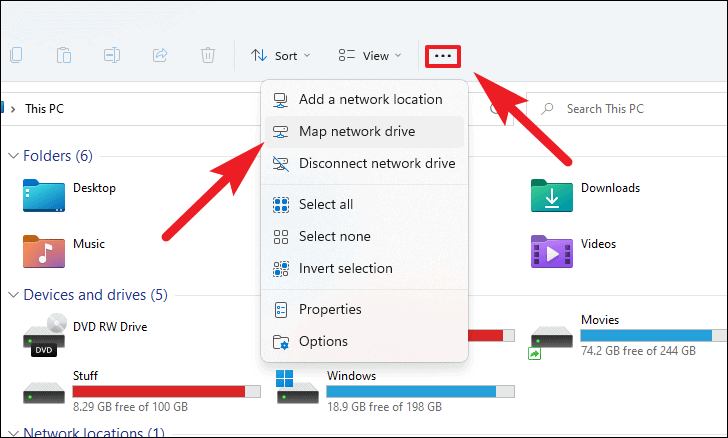
- Click the ellipsis icon (three dots) on the toolbar and select Map network drive.
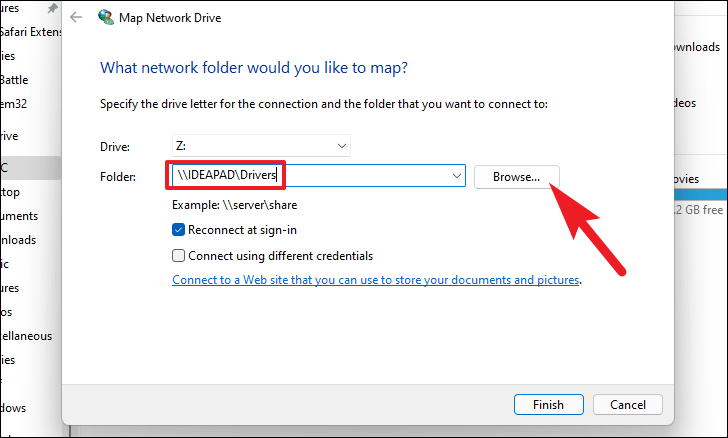
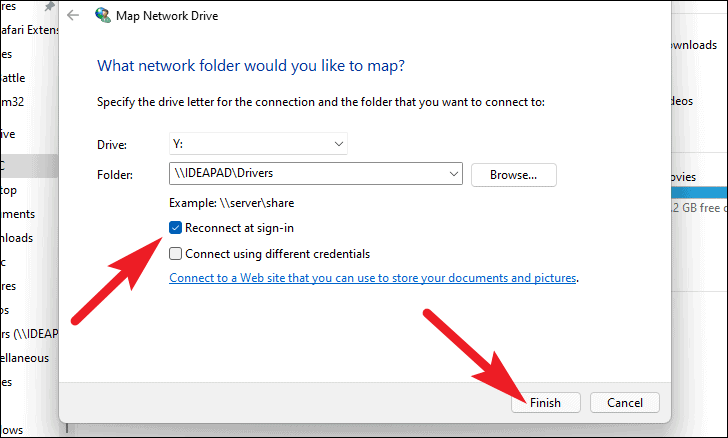
- In the Map Network Drive window, enter the shared folder’s network address or click Browse to find it.
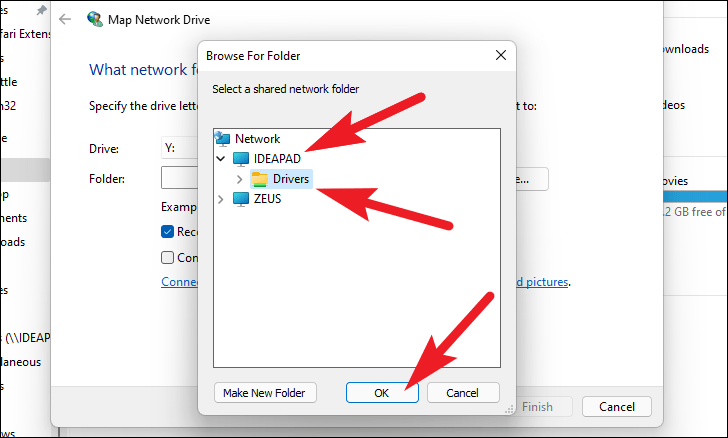
When browsing:
- Expand the network device to see shared folders.
- Select the folder you want to map and click OK.
- Check the box for Reconnect at sign-in if you want the drive to reconnect automatically.
- Click Finish to map the network drive.
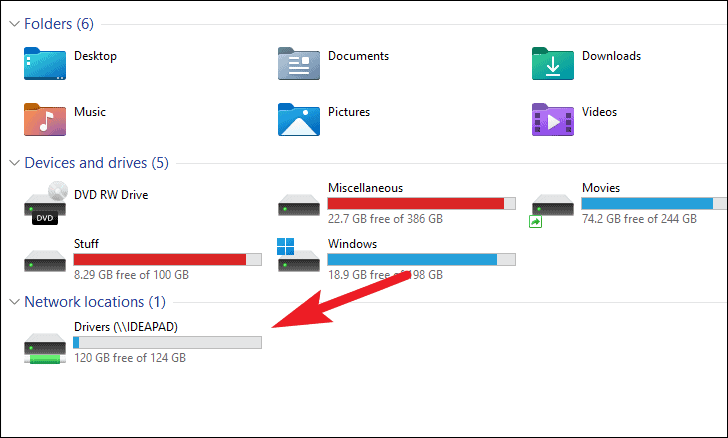
If prompted, enter the username and password for the resource computer. The network drive will now appear in This PC alongside your other drives.
Fix: Windows Can’t Access Network Location
If you’re unable to access the network location even after mapping, you may need to enable the SMB protocol:
- Open the Settings app from the Start menu.
- Use the search bar on the left sidebar to type
control paneland select the Control Panel.
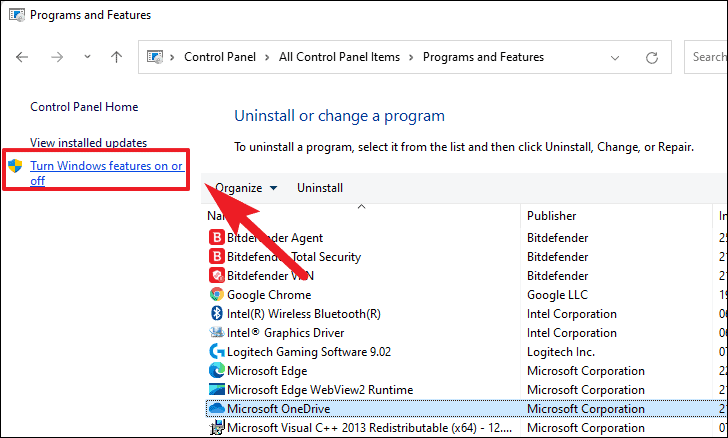
- In Control Panel, click on Programs and Features.
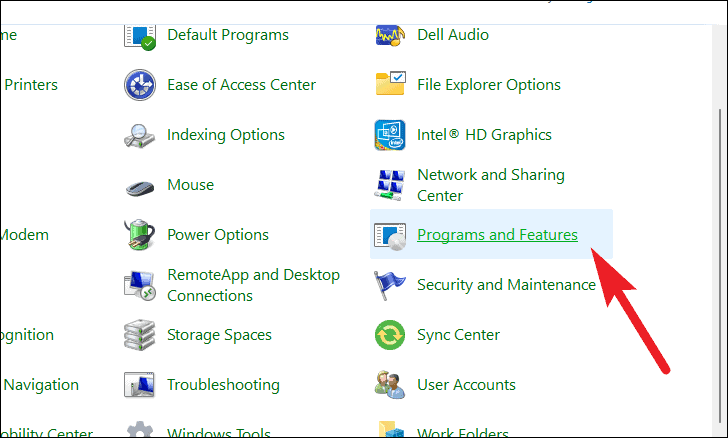
- On the left, select Turn Windows features on or off.
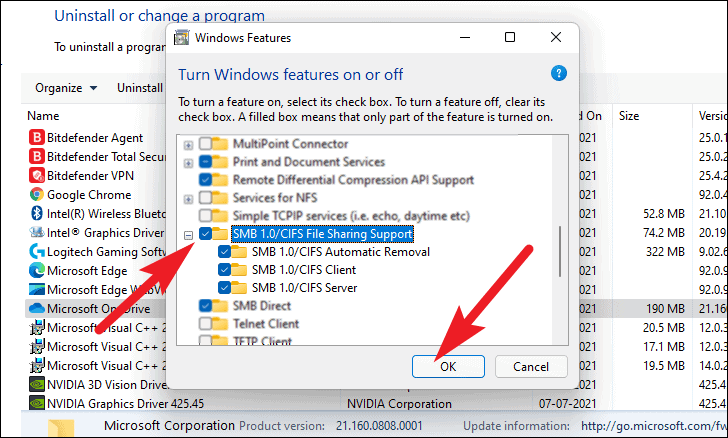
- Scroll down and check the box next to SMB 1.0/CIFS File Sharing Support, then click OK.
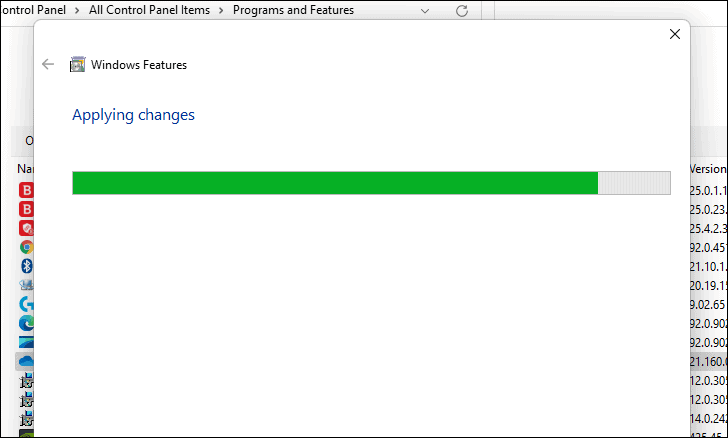
Windows will apply the changes, which may take a few minutes.
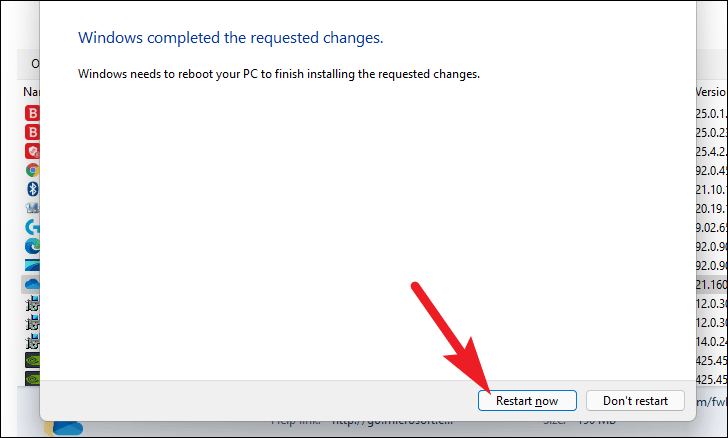
After the feature is enabled:
- Restart your computer when prompted by clicking Restart now, or choose Don’t restart to restart later.
Once your PC restarts, you should be able to access the network location without issues.
By following these steps, you can easily map a network drive in Windows 11, allowing quick and convenient access to shared resources on your network.


