Cisco WebEx is increasingly becoming the video conferencing app of choice for many businesses and institutes. The free plan of the service has all the tools you’d need to conduct a video meeting.
If you’re looking for a Zoom alternative, but don’t want to miss out on any of the Zoom features, there can’t be a better replacement than WebEx as it comes with the same feature set as Zoom.
You can record a meeting on WebEx on the free plan. WebEx recording works two ways, you can either record locally on your computer using the WebEx desktop app, or you can have cloud recording feature on the paid plans of the service.
Unlike Zoom, you don’t have to manually enable recording features on your account. WebEx recording is enabled by default on all accounts. However, not everyone in the meeting can record.
Who can record a WebEx Meeting?
Recording a WebEx meeting is only possible when you’re the host of a meeting. Participants in a WebEx meeting can never record a meeting.
If need be, organizers and hosts can however change role of a participant to ‘Host’ status and hand over the meeting controls to let them record a meeting.
WebEx doesn’t support host and co-host features, so only one member in a meeting can record a meeting at a time. There’s no workaround to that.
How to Record a WebEx Meeting as a Host
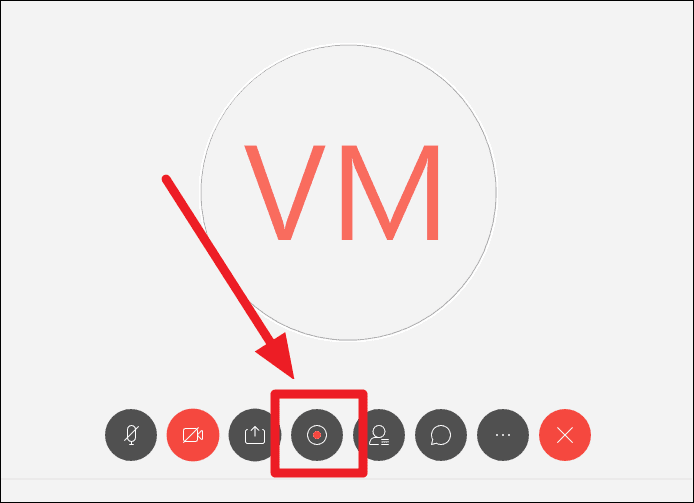
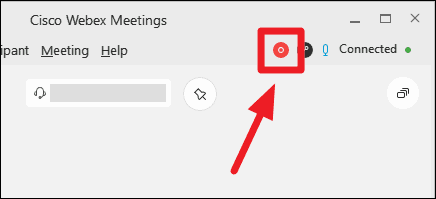
WebEx has the simplest of recording options if you compare to other video conferencing services. After you join a meeting in WebEx as a host, simply click on the ‘Recorder’ button on the meeting controls bar at the bottom of the meeting window.
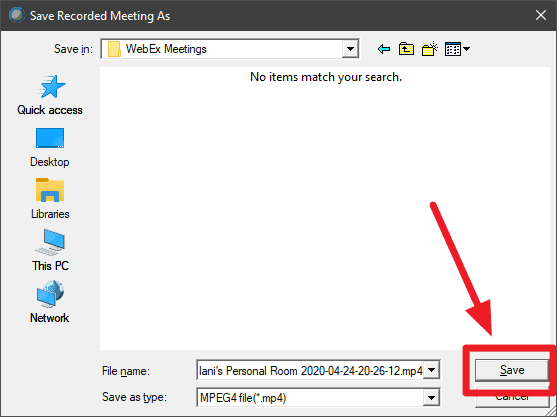
WebEx will ask you to select a location to save the recording file, be sure to create a separate folder to save your WebEx recording files for easier access.
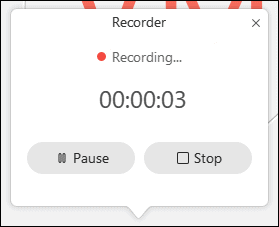
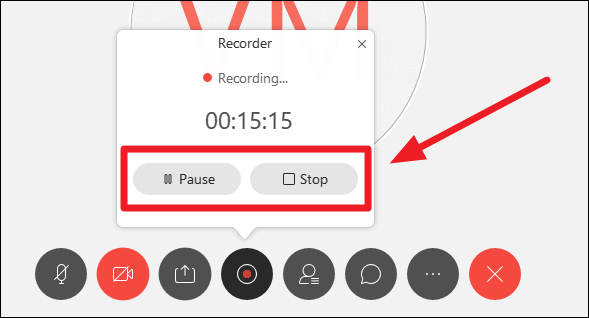
Once the recording begins, a ‘Recorder’ control menu will show over the recording icon with controls to pause or stop recording.
A recording icon will also display on the meeting window for all participants to know that the meeting is being recorded.
To pause or stop the recording anytime during the meeting, click on the ‘Recorder’ icon at the bottom of the meeting window. Then, select either the ‘Pause’ or ‘Stop’ buttons.
How to configure WebEx Recording views
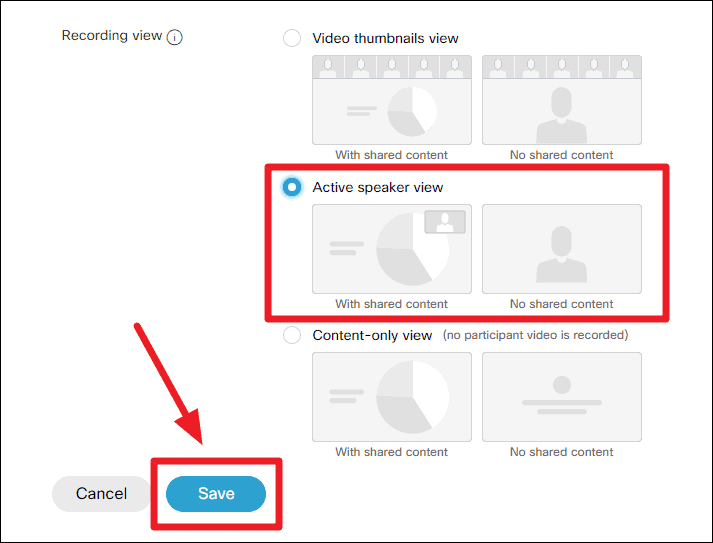
You can configure the Webex recorder to record in the following pre-defined views:
- Video thumbnails view to record everyone in the meeting with a thumbnail preview of each participant.
- Active speaker view to record only the active speaker in the meeting.
- Content-only view to not record anyone’s video but only the content shared in the meeting.
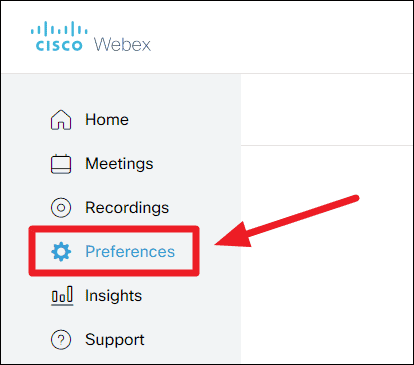
To configure recording view in WebEx, open meetingsapac.webex.com website in a browser and sign-in with your account. Then, click on the ‘Preferences’ option on the left to open your account settings menu.
Select the ‘Recording’ tab on the preferences screen.
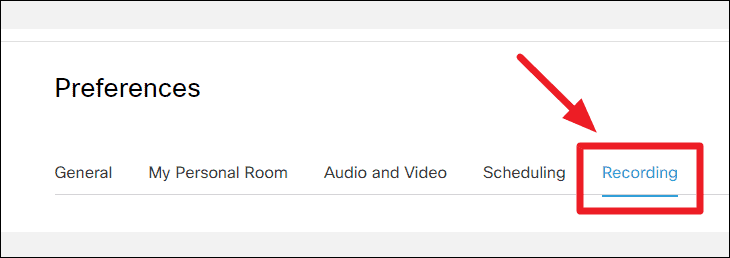
Then, select a ‘Recording view’ from the available options and click on the ‘Save’ button.
WebEx recordings are saved in .MP4 video formats. You can view WebEx recordings from the folder you selected to save the meeting when starting the recorder.
Can I Record a Webex meeting as an attendee (not the host)?
Webex only allows the host or the alternate host of a meeting to record the meeting. This applies to both local recording from the Desktop app and cloud recording feature on the paid plans of Webex.
However, there are plenty of unofficial ways to record a Webex meeting on your computer. You can use third-party software like ApowerREC, or Screencastify Chrome Extension to record meetings on any video conferencing platform like Webex, Zoom, Google Meet, Microsoft Teams, and others.


