Recording Google Meet sessions can be extremely beneficial when you need to revisit discussions or share them with team members who couldn’t attend. Screencastify is a popular Chrome extension that allows you to effortlessly record, edit, and share your screen activity directly from your browser. This guide will walk you through downloading, setting up, and using Screencastify to capture your Google Meet sessions.
How to download and set up Screencastify extension
Screencastify offers two methods to record your Google Meet sessions: using the browser extension or the desktop application. Both methods are simple and effective. This guide will focus on using the browser extension to record your meetings.
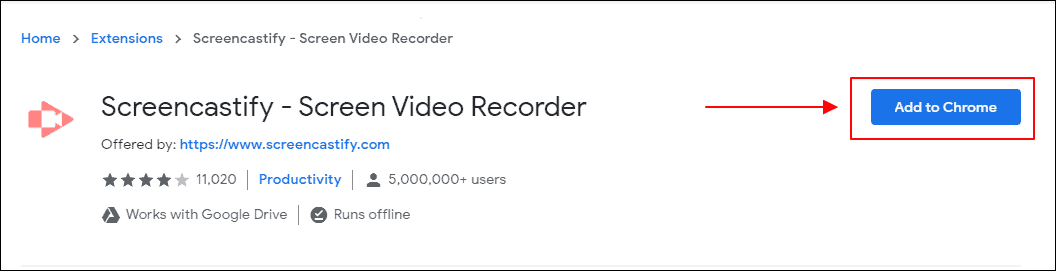
First, install the Screencastify Chrome extension, which is free on the Chrome Web Store. You can search for ‘Screencastify’ in the store or click the button below to go directly to the extension’s page and install it.
Click the ‘Add to Chrome‘ button on the Screencastify extension page to install it on your browser.
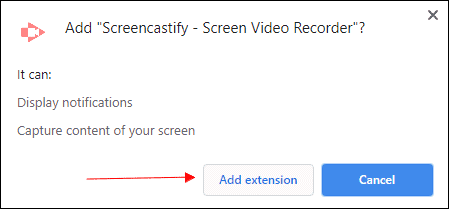
A confirmation window will appear, asking for permission to add the extension. Click ‘Add extension‘ to confirm.
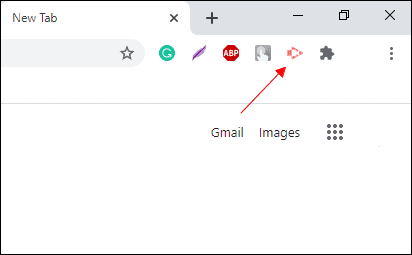
After installation, the Screencastify icon will appear in the extensions section next to the address bar in Chrome.
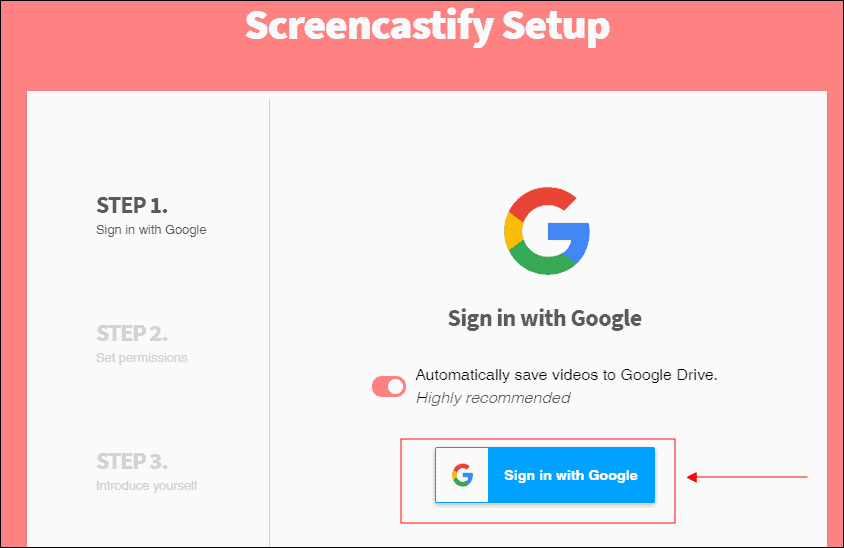
Click the Screencastify icon to open the setup screen in a new Chrome tab. Start the setup process by signing in with your Google account; click on ‘Sign in with Google‘ to proceed.
💡 Tip
While signing in with your Google account, ensure the ‘Automatically save videos to Google Drive‘ option is enabled. If it’s not, make sure to turn it on.
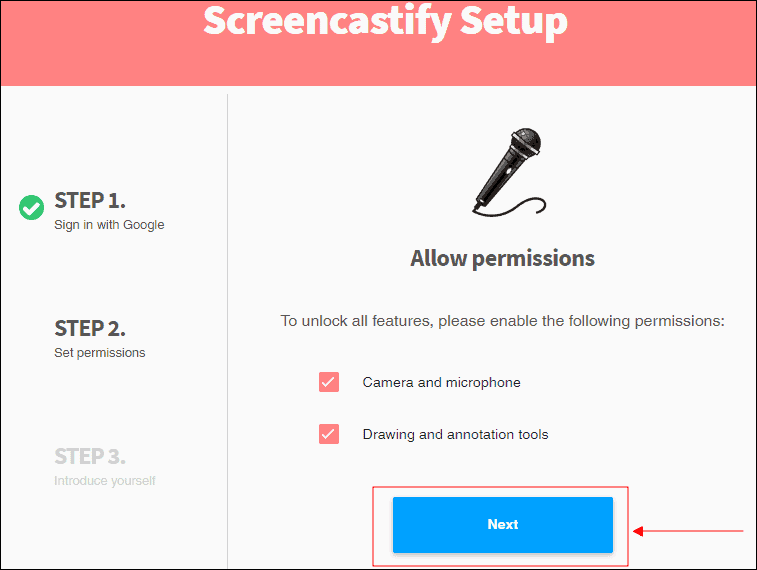
Next, grant Screencastify permission to use your camera, microphone, and ‘Drawing and Annotation Tools’. Ensure all checkboxes are selected, then click ‘Next‘.
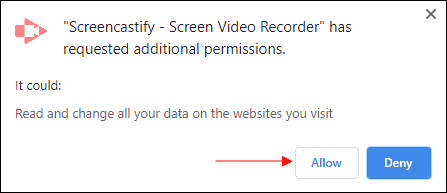
The extension will prompt you to allow it to “Read and change all your data on the websites you visit“. Click ‘Allow‘ to confirm.
Once the setup is complete, you’re ready to start recording your Google Meet sessions with Screencastify.
How to use Screencastify to record a Google Meet
During your Google Meet session, click on the Screencastify icon in the Chrome toolbar.
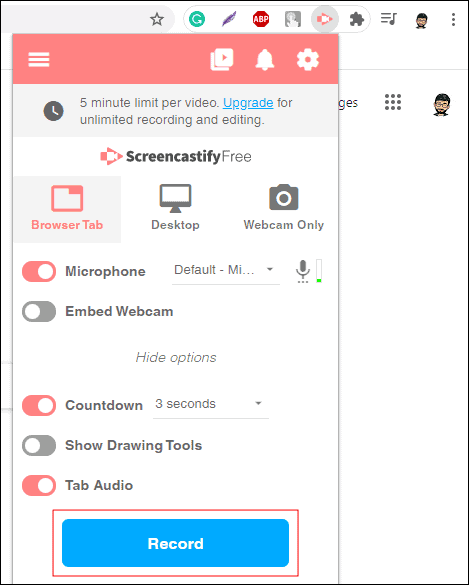
A pop-up window will appear with recording options. Select the ‘Browser Tab‘ option to set up the recording for your Google Meet tab.
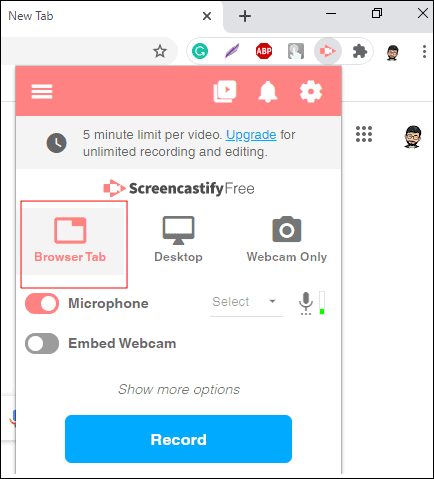
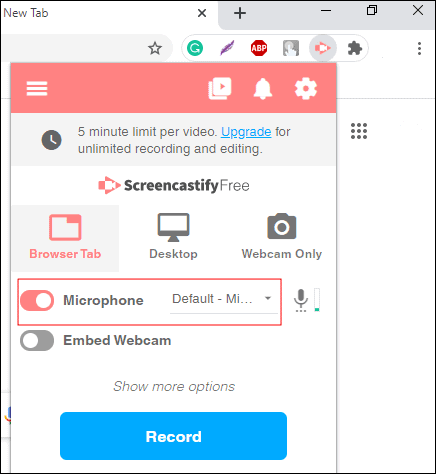
Ensure the ‘Microphone‘ option is enabled and the correct device is selected from the dropdown menu.
💡 Tip
If you’re not using an external microphone, select the ‘Default‘ option from the microphone dropdown menu.
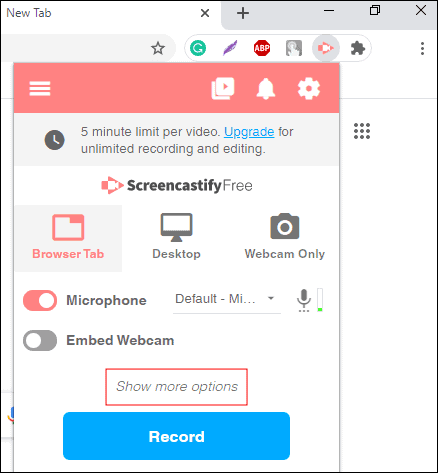
Next, click on ‘Show More Options‘ to access additional settings.
In the advanced options, make sure the ‘Tab Audio‘ toggle is enabled. This ensures that the audio from other participants is recorded.
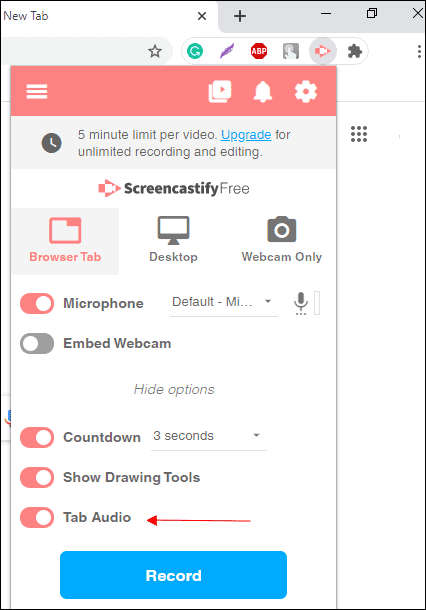
When you’re ready, click the ‘Record‘ button to start recording.
A countdown timer will appear, and Screencastify will begin recording your active Google Meet tab.
By default, an overlay with recording controls appears at the bottom left corner. You can also access these controls by clicking on the Screencastify icon while recording.
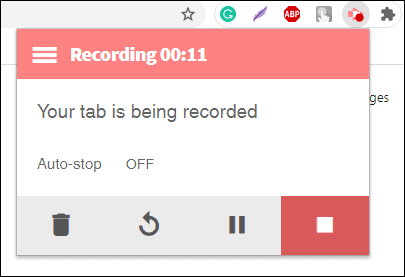
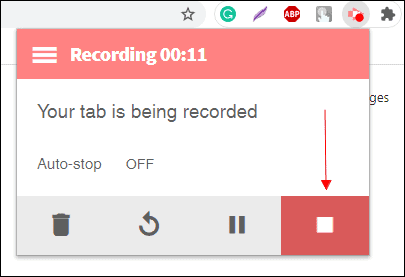
To stop recording, click the ‘Stop‘ button (the square icon) on the recording controls bar.
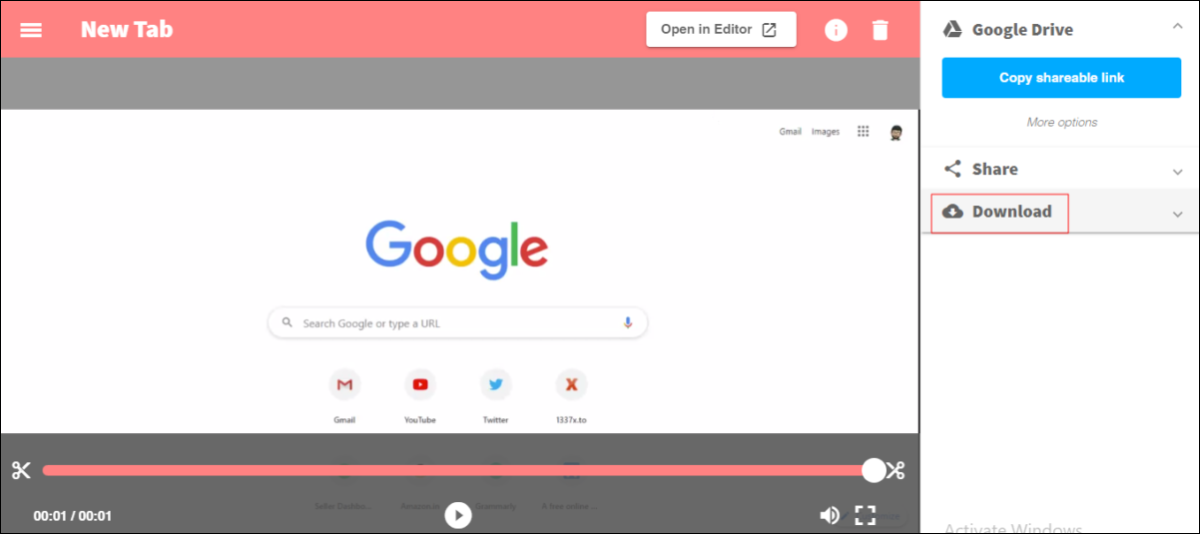
After stopping the recording, Screencastify opens the video in a new tab where you can preview and trim it before sharing or downloading.
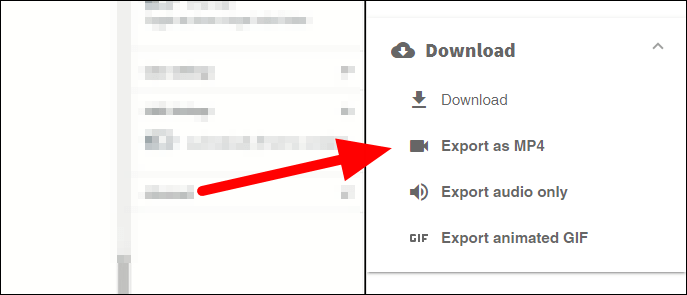
To download the recording, click on the ‘Download‘ option in the left panel of the preview screen.
Screencastify saves recordings in the webm format by default, which may not be compatible with all media players. To ensure broader compatibility, click on ‘Export as MP4‘ below the download button.
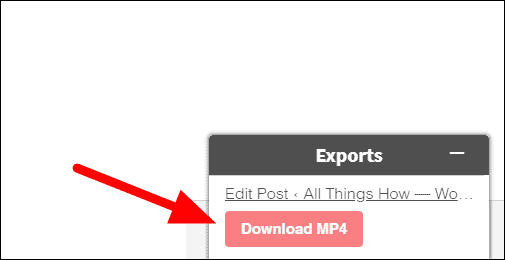
Allow the extension to convert the recording to an MP4 file. Once the conversion is complete, click ‘Download MP4‘ at the bottom right corner to save the recording.
Screencastify also automatically saves your recordings to Google Drive. To share a recording, go to My Drive » Screencastify folder in your Google Drive and share the video as needed.
By using Screencastify, you can easily record and share your Google Meet sessions, ensuring you never miss important details from your meetings.